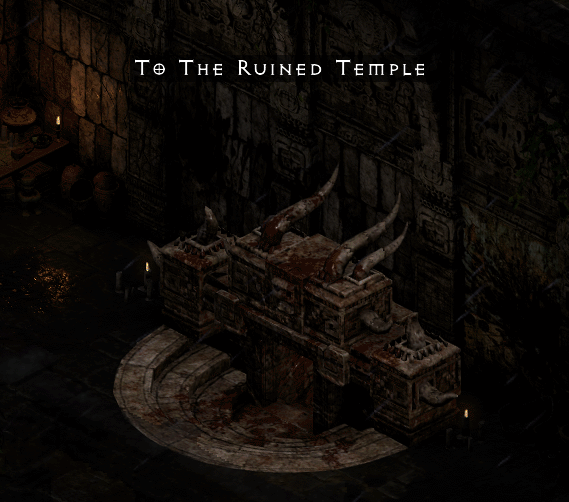
Temple Farming Guide
Last Updated:May 24, 2023|Changelog
Farming in the same few areas all the time can feel monotonous. This guide provides you with an alternative route that includes all Temples and the Sewers from Act 3! The temples are very small areas with a number of Elite Groups, all of which can drop every single item in the game. Next to them there are 2 Superuniques and a number of Super Chests on this route. Jumping from one max Level area to the next with little travel and no town time make this route decently efficient, especially in Single Player. You can even add the Travincal and Lower Kurast Super Chests to do more in a single game!
Why farm this Route?
The Temples and Sewers are Area Level (alvl) 85 zone in Diablo 2 Resurrected. Elite Packs in this area can drop every Set and Unique item in the game, making them incredibly valuable to farm. In addition to them, you come across 2 Superuniques, many Super Chests and Armor Stands which can net you extra loot.
| Hell | ||
| Caster Builds | Arachnid Mesh Harlequin Crest Nightwing's Veil Griffon's Eye Death's Fathom Tal Rasha's Guardianship Eschuta's Temper | |
| Attack Builds | Andariel's Visage Dracul's Grasp Verdungo's Hearty Cord | |
| Other | Stormshield Crown of ages War Traveler | |
How do I find the Temples?
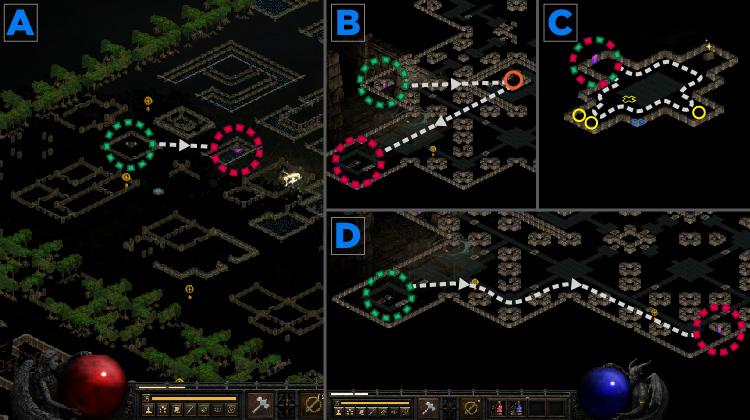
Apart from the Sewers entrances, any location of the Temple runs are located in random locations. Check out the images below for an example layout for Single Player using an already explored map.
In Kurast Bazaar you find the entrances to the Disused Fane (1), Ruined Temple with Battlemaid Sarina (2), and the Sewers Level 1. Inside the Sewers are a Golden Chest and the Icehawk Riftwing in Level 1, and 3 Super-Chests in Level 2. Leaving the Sewers towards Upper Kurast, and you'll find the Forgotten Reliquary (3) and Forgotten Temple (4). You can also find a number of Super-Chests in Upper Kurast. Located in static locations on either side of the Kurast Causeway are the Disused Reliquary (5) and Ruined Fane (6).
Tips & Tricks
Immunities
Depending on your Character's damage types, you can choose to skip Temples to avoid immunities completely. Some of them can be broken with your typical Infinity Mercenaries.
| Physical | Magic | Fire | Lightning | Cold | Poison | ||
| Ruined Temple | - | Immune | Immune | - | Immune | - | |
| Disused Fane | - | Immune | Immune | - | Immune | - | |
| Sewers Level 1 | - | Immune | - | Immune | Immune | Immune | |
| Sewers Level 2 | - | Immune | - | Immune | - | Immune | |
| Forgotten Reliquary | - | Immune | Immune | - | Immune | - | |
| Forgotten Temple | - | - | Immune | Immune | Immune | - | |
| Ruined Fane | - | - | Immune | Immune | Immune | - | |
| Disused Reliquary | - | - | Immune | Immune | Immune | - | |
Rerolling Maps
In Single Player, you can reroll your maps by changing the difficulty to Nightmare then back to Hell. This allows you to find a very efficient layout with as little travel distance and as many Super Chests along the route.
Maximize Magic Find
Super high level Unique and Set Items are the main reason to farm any max level area. Optimizing the "Better Chance of Getting Magic Items" (MF) Stat increases your chance of finding them. Since monsters in this area have very low average Life, you can get away with reducing your damage significantly to increase your MF.
High Player Count
A high player count increases the amount of items dropping at 3/5/7 players which increases your likelihood of dropping good Base Items, Runes, Flawless Gems, Charms, and Jewels, especially on the numerous Super Chests on this route. Play at the highest count you feel comfortable on, but change it to /players 7 before opening Super Chests.
Build Recommendations
- Amazon - Lightning Fury
- Amazons generally suffer from their low mobility. No active mobility Skills
- Immune to Lightning are a problem until she has access to Infinity. Don't farm this route without it!
- Assassin - Lightning Sentry
- The Trapsin can kill everything in the areas of this route, even without Infinity. Utilize Fire Blast against Immune to Lightning monsters and Lightning Sentry + Death Sentry against the rest.
- Barbarian - War Cry
- The War Cry Barbarian deals Physical Damage and never has to worry about any immunities.
- With Increased Speed and a Staff of Teleportation the Barbarian has decent mobility early on.
- Druid - Hurricane Tornado
- With a large Life pool through Oak Sage and Summons to tank melee attack damage, the Druid has little to fear.
- With Physical and Cold Damage, this build is capable of killing every monster in the area. A lot of the low Life monsters just explode from a couple of ticks from Hurricane.
- Necromancer - Summoner
- Corpse Explosion is a very powerful ability to clear out density very quickly. As it is a native Skill of the Necromancer, all their builds are powerful in the Temples.
- Due to the low Life of monsters, your Summons and Mercenary are especially efficient to create the first corpse for your chain reaction with Corpse Explosion.
- Bone Armor helps to minimize half of the damage in these Areas.
- Paladin - Zeal
- The Physical Damage Zealer faces no immunity in any area of this route. Even on a low budget build, he can easily cut through all enemies inside.
- Sorceress - Fire Ball-Nova / Frozen Orb - Meteor
- Hybrid builds excel at farming all areas in this guide. She can kill every monster in them, even without infinity.
Summary
- Quickly run to the Waypoint in Act 3 and enter the Kurast Bazaar through the Waypoint. Don't forget to pick it up if you are planning to farming the temples.
- All Temples and the Sewers are max level, capable of dropping every Unique and Set item in the game.
- Focus your efforts on Elite Groups, they are the reason why you are here.
- When your Area of Effect clear becomes stronger, start experimenting with a higher player count to increase your chance for Runes, Bases and Charms.
- Always open the Golden Chests and Super Chests! Make sure to increase the Player Count before doing so in Single Player.
Credits
Written by Teo1904
Reviewed by MacroBioBoi