Diablo 3 Complete Set Dungeon Guide
Last Updated:August 28, 2024|Changelog
Introduction
Set Dungeons are unique areas with multiple objectives that must be completed in a certain amount of time to achieve "Basic" and "Mastery" levels of completion. Every class has 4 Set Dungeons based on their original 4 Class Sets that are fun to complete and difficult to master. Unfortunately the new Class Sets don't have Set Dungeons: Horde of the Ninety Savages, Aegis of Valor, Gears of Dreadlands, Patterns of Justice, Masquerade of the Burning Carnival, Mundunugu's Regalia and The Typhon's Veil . To find the entrance to each Set Dungeon you must put on a full Class Set and visit the Tome of Set Dungeons for a clue (or just read our guide :D). This is found in the Royal Quarters which is in Leoric's Manor up the staircase to the right.
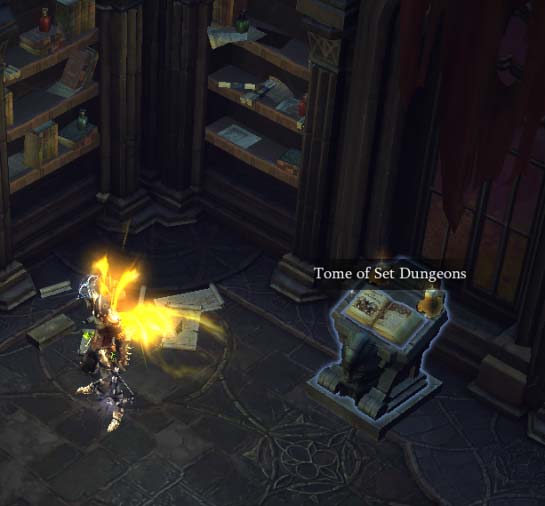

After using your clue to reach the proper destination a green Portal will appear if you're wearing the full associated Class Set. Mastery of one dungeon is required to complete the Seasonal Journey, so plan on doing at least one each Season if you want to get that extra Stash Tab! Game difficulty doesn't impact Set Dungeons in any way and if you take fatal damage you fail and will have to try again (meaning you won't lose your character on Hardcore). Some of these builds are a bit low on Toughness, so putting it on Normal just for the walk to the Set Dungeon is recommended, especially on Hardcore. You can do these in groups, only the leader has to wear the set, and only they will get the completion. You can have teammates wait around as you get your objectives done, then give them the signal to help clean up the rest of the Set Dungeon while you eat some snacks!
Rewards
Completing Set Dungeons won't lead to Unique item drops or crafting possibilities, but there are Banner Sigil's, Pennant's and Wings to earn for your troubles. Completion of any Set Dungeon will reward you with a Banner Sigil for that Dungeon, 28 total that you can acquire. Completing all 4 Set Dungeons within a Class will also reward you with a Pennant and another even fancier Pennant is available when you Master all 4 on that Class. Basic and Mastery completion of 24 of the 28 Set Dungeons (Excluding Necromancer entirely) will also reward the player with arguably the coolest cosmetic wings in the game: The Wings of the Dedicated and The Wings of Mastery!
Core Setup
For 99% of Set Dungeons you want max Cooldown Reduction, Attack Speed and Resource Cost Reduction to cast your abilities faster and more frequently. None of them require amazing gear and can be completed with non-ancient Legendary Items, level 25 Legendary Gems, and zero Augments. Some can be easily failed if you have too much damage, Area Damage or even skills that kill things passively such as Mystic Ally or Gargantuan. Every Set Dungeon requires you to kill every enemy present so focus on completing the objectives early on while making sure not to leave enemies behind. The last thing you want is to have to backtrack through the whole dungeon at the end to kill a few enemies you left behind. Being patient will help you complete many of the objectives so just take a relaxed approach, gather up the enemies for the objectives and you'll sail through. There are also specific Legendary items that are used frequently that can be reused as you move to other classes shown below. In Season 25 we will avoid using Soul Shards in Set Dungeons as they are generally very powerful and can complicate some of the needed objectives.
Items
- Captain Crimson's Trimmings provide Cooldown Reduction, Resource Cost Reduction, Damage and Toughness. The pieces are crafted at the Blacksmith and are used in nearly every Set Dungeon build.
- The Ring of Royal Grandeur is the star of the show being used in all 28 builds. It enables you to wear one less piece of your required 6-piece Set, allowing you to bring Captain Crimson's Trimmings.
- Leoric's Crown provides insane Cooldown Reduction with a Flawless Royal Diamond in the Socket. You or your follower should always be wearing this item during these! This can also be cubed instead of Illusory Boots if you don't need to move through monsters.
- Obsidian Ring of the Zodiac, In-geom & Messerschmidt's Reaver all provide massive Cooldown Reduction. Wear and Cube as many of these as possible.
- Illusory Boots allow you to move unhindered through enemies, making some of the objectives much easier to handle.
- Gogok of Swiftness is the only Legendary Gem that gives Cooldown Reduction, so you'll take it on every build.
- Adding Molten Wildebeest's Gizzard to any build will grant you a massive shield that makes survival trivial.
Barbarian
The Barbarian has some of the more difficult Set Dungeons, however with the right strategies they can be taken down in a few attempts. It's not the completion, but the Mastery that can take practice and test your patience. Luckily these aren't heavily gear dependent and you can get through them with underwhelming gear.
| Immortal King's Call | The Legacy of Raekor | Might of the Earth | Wrath of the Wastes |
| Easy | Medium | Hard | Hard |
| Whirlwind Call of the Ancients Wrath of the Berserker | Furious Charge Ancient Spear Ground Stomp | Leap Ground Stomp Earthquake | Whirlwind Rend Ground Stomp |

Location
Act 3 - The Ruins of Sescheron. Travel down the path until things open up then go to the right into the corner and the portal will appear.
Objectives
- Kill every Elite while having a 4,000% damage bonus.
- Kill 150 enemies while having Wrath of the Berserker active.
Basic - Complete one objective and kill 168 enemies within the time limit.
Mastery - Complete both objectives and kill all enemies within the time limit.
Setup
- Pick up Cooldown Reduction everywhere you can. Use Messerschmidt's Reaver, Obsidian Ring of the Zodiac, Gogok of Swiftness as well as In-geom. This will help keep Call of the Ancients and Wrath of the Berserker up all the time to complete the objective.
- Use Mortick's Brace to gain all runes on Wrath of the Berserker and Mantle of Channeling to buff Damage and Toughness further. Echoing Fury and Chilanik's Chain are also great to keep you moving fast!
Gameplay
- Activate Call of the Ancients at the beginning and spam War Cry, Ignore Pain, Threatening Shout and Wrath of the Berserker. The 4,000% damage bonus is from having Call of the Ancients and Wrath of the Berserker up at the same time so keep them active at all times.
- Spin around with Whirlwind and kill everything with ease. Call of the Ancients will last forever so don't cast them again unless they somehow die as having this on cooldown will hinder Wrath of the Berserker uptime because it eats your Obsidian Ring of the Zodiac procs.
- This one will be very fast and easy but don't get too excited because they only get harder from here!
- Here we use Whirlwind to do damage, but you can check out the Furious Charge Barbarian Guide to combine The Legacy of Raekor and Immortal King's Call to really destroy.

Location
Act 5 - Overgrown Ruins. Head out of the Survivor's Enclave and look for the set of ruined columns a little ways down and to the left.
Objectives
- Hit 15 different enemies with a single Furious Charge 6 times.
- Hit an enemy with a 27,500% damage bonus Spender 15 times.
Basic - Complete one objective and kill 325 enemies within the time limit.
Mastery - Complete both objectives and kill all enemies within the time limit.
Setup
- Ground Stomp Wrenching Smash is great to pull enemies from a distance for the Furious Charge objective.
- Leap is optional for extra movement but can be replaced with any other skill such as Sprint for extra speed.
- Pick up Cooldown Reduction rolls everywhere you can. Use Messerschmidt's Reaver, Obsidian Ring of the Zodiac, Gogok of Swiftness as well as In-geom.
- Like many Set Dungeons you want to bring your damage down significantly so you can easily gather up enemies before smashing them with Furious Charge. Take out Gems, Paragon or entire items to get your damage to a tolerable level.
Gameplay
- Cast War Cry and Threatening Shout early on and keep them up throughout the Dungeon.
- Use Furious Charge to build up the stacks from the The Legacy of Raekor (6) Bonus. You get a lot of these stacks and only lose 5 every time you spend Fury, so build them up and everything you hit with Ancient Spear will count for the objective.
- Avoid killing enemies until you have 15 or more gathered near you. Ground Stomp to pull them all together, Furious Charge then cast Ancient Spear Boulder Toss to finish them off. Be patient and let the enemies gather up before blasting them with Furious Charge. Once you get that Objective the other ones is super simple, just pick off any remaining enemies using Boulder Toss.
- Check out the Raekor Boulder Toss Barbarian Guide to see how you can domniate with this fan favorite build!
Location
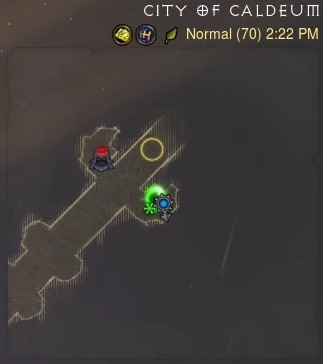
Act 2 - City of Caldeum. Take the waypoint and head all the way to Belial. Just before his entrance go to the right and the portal will appear.
Objectives
- Use Leap, Ground Stomp and then Earthquake in under 6 seconds on every Elite.
- Freeze and kill at least 1 enemy every 10 seconds for 1 minute straight.
Basic - Complete one objective and kill 182 enemies within the time limit
Mastery - Complete both objectives and kill all enemies within the time limit.
Setup
- Pick up Cooldown Reduction rolls everywhere you can. Use Messerschmidt's Reaver, Obsidian Ring of the Zodiac, Gogok of Swiftness as well as In-geom. This will help you stay mobile and allow you to freeze very often.
- Ancient Spear Boulder Toss is a great way to spend Fury to reset your cooldowns from the Might of the Earth (2) Bonus. Leap and Ground Stomp are required for the objective and Earthquake Chilling Earth is needed to keep freezing enemies as you go along.
Gameplay
- The hard part of this dungeon is using 3 different skills on every Elite you encounter. To accomplish this you need to tone down your damage to get all 3 skills off before they die. Aim for around 250k sheet damage to make this easy on yourself.
- When no Elite is around use Leap to kill everything. Earthquake Chilling Earth will be cast when you Leap, helping you get the freezing objective.
- Once you find an Elite, attack them with: Leap, then Ground Stomp and finally Earthquake (in that exact order) to complete the first objective. Lower your Paragon and damage to get the 3 skills off and you'll be fine.
- Keep moving and be aggressive to get this one done on time.
- To see a stronger version of this Class Set check out the Might of the Earth Leapquake Build Guide.
Disclaimer
This is considered by most players to be the hardest Set Dungeon in the game and it may take many tries to clear it. You only have to Master it once to get the Wings of Mastery, but if you're just doing a Set Dungeons for your Seasonal Journey, this is one to avoid.

Location
Act V - Pandemonium Fortress Level 1. Take the Waypoint and travel backwards down the narrow walkway until you reach a staircase. The portal will appear at the top.
Objectives
- Rend 10 enemies at once 5 different times.
- Do not take any Physical damage for the duration of the dungeon.
Basic - Complete one objective and kill 111 enemies within the time limit.
Mastery - Kill all enemies and complete both objectives in under 5 minutes.
Setup
- The main focus is maintaining Fury so you can Whirlwind at will. You also prioritize Movement Speed to help evade enemy attacks.
- You literally can't get hit by anything in this one and Shields like Molten Wildebeests Gizzard won't save you. Illusory Boots are great for not getting stuck when you need to use Rend to kill enemies for your objective.
- You can play around with this setup to incorporate skills like Leap for more mobility to evade attacks if desired. If you feel too slow, change Strongarm Bracers for Warzechian Armguards or Lamentation for Chilanik's Chain.
- Make sure to use War Cry Veteran's Warning and Wrath of the Berserker Striding Giant for the chance to Dodge, don't rely on this but it can save you in dire times.
Gameplay
- Keep War Cry and Wrath of the Berserker up at all times. Furious Charge is a great way to evade attacks and stuns enemies while you wait for others to approach.
- Hitting 10 enemies at once with Rend without taking any Physical damage can be quite troublesome. Be patient as you drag enemies around before using Ground Stomp to pull them in, then use Rend and Whirlwind to kill them before they can attack.
- There are plenty of dense packs of enemies throughout the rift, so kill singled out enemies instead of trying to pull them along.
- Focus on getting the first objective done then simply spin around and finish off the rest of the enemies. Also look out for the swinging blades (they count as Physical damage)!
- The setup shown here is a common variant of a Whirlwind Rend Barbarian which is a staple build in Diablo 3!
Barbarian Video Guide
Crusader
The Crusader has some of the easiest and most enjoyable Set Dungeons in the game. None of these are very gear dependent and only require a few Unique Items to breeze through. Starting a Season as a Crusader also assures you an easy path through your Seasonal Journey which requires a Set Dungeon Mastery! These Set Dungeons do a great job highlighting the strengths and weaknesses of these Unique Sets and below we'll show you how to make the most of them!
| Seeker of the Light | Thorns of the Invoker | Armor of Akkhan | Roland's Legacy |
| Easy | Easy | Medium | Medium |
| Blessed Hammer Falling Sword Akarat's Champion | Consecration Iron Skin Provoke | Condemn Akarat's Champion Laws of Hope | Sweep Attack Laws of Valor Provoke |
Location
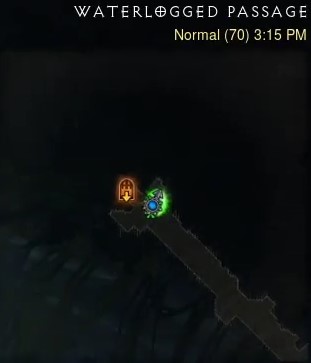
Act II - Waterlogged Passage. Take the Waypoint in Act II to the Ancient Waterway and find your way into the Waterlogged Passage. From there travel all the way to the end and the portal will appear on the right.
Objectives
- Cast Falling Sword 3 times within 15 seconds 3 different times.
- Do not get hit by a single Mortar affix.
Basic - Complete one objective and kill 202 enemies within the time limit.
Mastery - Complete both objectives and kill all enemies within the time limit.
Setup
- The Seeker of the Light set buffs Blessed Hammer and Falling Sword damage tremendously and provides you with 50% Damage Reduction.
- Cam's Rebuttal makes the first objective quite easy. Try to hit a lot of enemies when you use Falling Sword Rapid Descent to reset its cooldown faster.
- Captain Crimson's Trimmings, In-geom, Leoric's Crown, Obsidian Ring of the Zodiac and Gogok of Swiftness provide insane Cooldown Reduction for all of your skills.
- You'll use Blessed Hammer to kill off enemies with the massive buffs from the Seeker of the Light, Gabriel's Vambraces and the Guard of Johanna.
- The Stone of Jordan is helpful as it has Holy and Elite damage but isn't mandatory.
- The Flavor of Time has an extra Primary Attribute and automatically comes with Cooldown Reduction, but any amulet with good stats works fine. Note that we cannot mitigate the Mortar objective with The Star of Azkaranth as it states we cannot be "hit" by one. Never Lucky!
Gameplay
- Cast Akarat's Champion and Iron Skin at the start then use your Steed Charge to move through the dungeon as you round up enemies. Cast Laws of Hope for the Shield then jump in with Falling Sword, making sure to cast it 3 times within 15 seconds.
- Be careful near Elites! Use Laws of Hope and Steed Charge to avoid Mortars. This is the only objective that is a little challenging, so play defensively and you'll be fine.
- Once you've finished the Falling Sword objective clean up the rest of the Dungeon with Blessed Hammer while keeping your buffs up.
- To see a stronger version of this Class Set check out the Seeker of the Light Blessed Hammer Crusader Guide.

Location
Act I - Overlook Road, back to where it all started! You'll find the portal where you start the Campaign near the wagon and light post.
Objectives
- Get hit by 75 spears thrown by Blood and Moon Clan Impalers.
- Kill 5 Elites, standing in Consecration while Iron Skin is active.
Basic - Complete one objective and kill 107 enemies within the time limit.
Mastery - Complete both objectives and kill all enemies within the time limit.
Setup
- Thorns of the Invoker buffs Thorns damage by a staggering 67,500% and turns Thorns into AOE damage.
- Thorns damage can't crit so you don't need any sort of Critical Hit Chance or Critical Hit Damage on any of your gear!
- Hack with a Flawless Royal Topaz and Boyarsky's Chip will buff Thorns damage significantly and you can also roll it as a Secondary Attribute on most items. You don't need a ton of Thorns for this one though as having less allows you to take multiple spears before the enemies kill themselves, making the first objective easier.
- Captain Crimson's Trimmings, In-geom, Leoric's Crown, Obsidian Ring of the Zodiac and Gogok of Swiftness reduce cooldowns dramatically, allowing you to spam all of your Skills while you take the spears.
Gameplay
- Cast Akarat's Champion and Laws of Hope at the start and keep them up all the time.
- Leave Impalers alone and let them kill themselves on your Thorns until you've been hit by 75 spears. There are tons of Impalers in the first few rooms so as long as your Thorns damage isn't too high this one should be very easy to complete early on.
- Once you've finished the first objective, go around killing everything, making sure to kill Elites with Punish after you've cast Iron Skin and Consecration.
- To see a stronger version of this Class Set check out the Invoker Thorns Crusader Guide.
Location
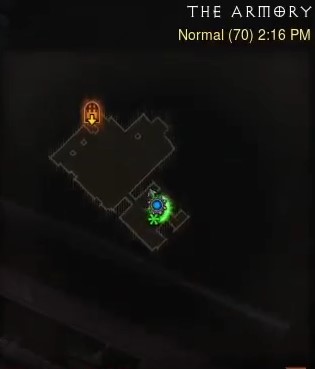
Act III - The Armory. Start in Bastion's Keep and go into the Armory in the top right corner. The portal will appear in the room on the bottom.
Objectives
- Use Condemn on 10 different enemies 10 different times.
- Kill 150 enemies while Akarat's Champion is active.
Basic - Complete one objective and kill 155 enemies within the time limit.
Mastery - Complete both objectives and kill all enemies within the time limit.
Setup
- This build focuses on Cooldown Reduction to keep Akarat's Champion active and so you can spam Condemn.
- The Blade of Prophecy and Frydehr's Wrath buff Condemn and remove its cooldown.
- What's shown is optimized for Cooldown Reduction, having almost every item from the Core Setup. Don't feel obligated to go this far as even moderate Cooldown Reduction should suffice for this Set Dungeon.
- Iron Skin Flash is great for a Toughness and Movement Speed boost. Provoke Hit Me helps generate more Wrath for every enemy taunted.
Gameplay
- Cast Akarat's Champion right away and keep it up throughout the Set Dungeon. This is especially important as one of your objectives requires you to kill 150 enemies while it's active.
- Use Provoke, Laws of Hope and Iron Skin before you engage enemies. Make sure to gather and hit 10 at a time with Condemn.
- Try not to kill way more than 10 enemies at a time as you may end up without enough density later on. If you have a massive group of enemies go to one side and Condemn 10, then hit the other side afterwards.
- Once the Condemn objective is complete, run around the map with Steed Charge, keeping Akarat's Champion up as you kill the rest of the enemies.
- To see a stronger version of this Class Set and how you can optimize it for the current Season check out the Akkhan Condemn Crusader Guide.
Location
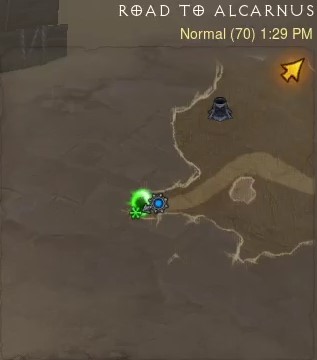
Act II - Road to Alcarnus. Take the Waypoint then head left down the road until you reach a dead end where the portal will appear.
Objectives
- Hit 15 enemies with a single Sweep Attack 7 different times.
- Spend 300 Wrath within 10 seconds 5 times.
Basic - Complete one objective and kill 440 enemies within the time limit.
Mastery - Complete both objectives and kill all enemies within the time limit.
Setup
- As usual get as much Cooldown Reduction, Resource Cost Reduction and Attack Speed as possible.
- The goal is to spam Sweep Attack to spend 300 Wrath in 10 seconds.
- Equip Pride's Fall (found in Act III Bounty Cache) and Molten Wildebeest's Gizzard to reduce Resource Cost greatly. If you don't have one just use Leoric's Crown with a Flawless Royal Topaz.
- Akarat's Champion is a staple in Crusader builds and for this Set Dungeon you'll go with the Embodiment of Power Rune. Iron Skin Flash is great for a Toughness and Movement Speed boost. Provoke Hit Me helps generate more Wrath for every enemy taunted.
- Laws of Valor Unstoppable Force is mandatory as it reduces the Wrath Cost of Sweep Attack by 50% for 5 seconds. Finally as we all know you never leave home as a Crusader without your noble Steed Charge.
Gameplay
- Cast Akarat's Champion right away then use Steed Charge to start gathering enemies.
- Once enemies are grouped up use Provoke Hit Me, Iron Skin Flash and Laws of Valor Unstoppable Force then Sweep Attack like wild to use at least 300 Wrath within 10 seconds.
- Hitting 12 enemies with a single Sweep Attack 7 different times isn't hard, just be patient and make sure you group enough enemies before attacking.
- Once you've completed the objectives simply roam around on your pony and clean up the rest of the map before the time runs out!
- To see a stronger version of this Class Set check out the Roland Sweep Attack Crusader Guide.
Crusader Video Guide
Demon Hunter
The Demon Hunter has varying difficulties on their Set Dungeons. For many you'll find yourself using Vault to fly through the dungeon decimating everything in your path. The Shadow's Mantle Set Dungeon, however, will require you to be tactical and intentional with your play if you want to succeed. Being the only class with two different Resources (Hatred & Discipline) most of these test their management in order to get to Mastery. Let's dive in and get four dungeons closer to your wings!
| Embodiment of the Marauder | Natalya's Vengeance | Unhallowed Essence | The Shadow's Mantle |
| Easy | Easy | Medium | Hard |
| Sentry Vault Multishot | Spike Trap Evasive Fire Preparation | Multishot Preparation Vengeance | Impale Vault Vengeance |

Location
Act III - Fields of Slaughter. Take the Waypoint to The Bridge of Korsikk and head to the middle until you find a bridge suspended over lava where the portal will appear.
Objectives
- Kill 140 enemies with 3 or more Sentries active.
- Do not allow any enemy to get within melee range.
Basic - Complete one objective and kill 100 enemies within the time limit.
Mastery - Complete both objectives and kill all enemies within the time limit.
Setup
- Embodiment of the Marauder grants you all the Runes from Companion and makes you do increased damage with Multishot for every active Sentry.
- Bombardier's Rucksack and Custom Engineering increase the maximum number of Sentry to 5 making it easy to lay down 3 at a time and increasing your damage even further.
- Captain Crimson's Trimmings, Leoric's Crown, Obsidian Ring of the Zodiac and Gogok of Swiftness help reduce cooldowns greatly.
- Yang's Recurve gives insane Resource Cost Reduction and paired with Dead Man's Legacy makes Multishot and Sentry do insane damage.
Gameplay
- Right away cast three Sentry before you start killing enemies. Keep placing them every few seconds as you go through the dungeon and spam Multishot so everything dies before it can get close.
- Use Preparation and Companion as you get into bigger fights and reserve Vault and Smoke Screen to evade enemies if they get close.
- As long as you're leading with Sentry and keep shooting Multishot nothing should get near you and this one should be very easy to get down.
- You need to stand still for a second to get the Rockworms to un-burrow and come after you in this dungeon, when they attack, simply vault away and take them down. If you're too mobile and never stop, Rockworms will stay underground and you'll be wondering where your last enemies are.
Location
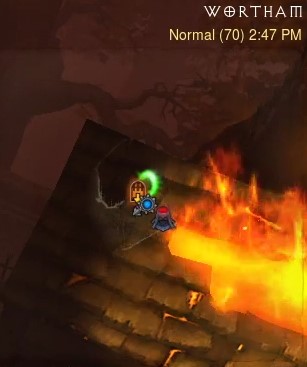
Act I - Wortham, take the Waypoint to Wortham Chapel Cellar and take the exit. The portal will appear right outside the Cellar entrance.
Objectives
- Detonate Spike Trap 300 times.
- Never deplete all of your Hatred.
Basic - Complete one objective and kill 150 enemies within the time limit.
Mastery - Complete both objectives and kill all enemies within the time limit.
Setup
- This setup literally doesn't even use hatred, so running out isn't possible! The objectives are so simple that any variation of this build should get the job done as long as it can maintain its hatred.
- Natalya's Vengeance boosts your Spike Trap damage greatly and makes them free to cast. Evasive Fire is used to detonate them since you have the Custom Trigger Rune equipped.
- Captain Crimson's Trimmings, Dawn, Leoric's Crown, Obsidian Ring of the Zodiac and Gogok of Swiftness reduce your cooldowns tremendously, making it easier to spam all of your skills.
- Aughild's Authority isn't necessary at all but provides a good damage and toughness boost. You can use anything in these slots that you're already wearing or find helpful.
Gameplay
- This is one of the easiest Set Dungeons in the game so don't worry about getting all of this gear or powerful gear in general. Just slap together the Nats set and your basically good to go.
- The gameplay is simple, just run around laying Spike Traps Then detonate them using Evasive Fire.
- Spam the rest of your abilities whenever they're available to keep your toughness and speed up.
Location
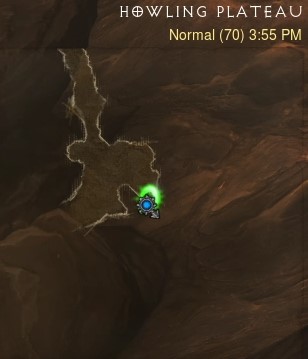
Act II - Howling Plateau. Travel south from the Waypoint until you reach a broken wagon in the southeast corner where the portal will appear.
Objectives
- Hit 20 enemies with a single Multishot 6 different times.
- Never allow your Discipline to drop below 50%.
Basic - Complete one objective and kill 270 enemies within the time limit.
Mastery - Complete both objectives and kill all enemies within the time limit.
Setup
- This setup is almost identical to the Embodiment of the Marauder Set Dungeon. We've just changed the Class Set and a couple items in Kanai's Cube.
- With this setup you won't be using any Discipline at all and won't have to worry about ever going below 50%, easy mode!
- Captain Crimson's Trimmings, Obsidian Ring of the Zodiac, In-geom and Gogok of Swiftness allow you to spam everything as you go along, while Yang's Recurve helps keep your Hatred full.
- You can move Yang's Recurve into Kanai's Cube and drop Dead Man's Legacy / In-geom to equip Danetta's Hatred. This will allow you to use Vault Tumble as much as you want and really fly through this one!
Gameplay
- This one is as simple as they come, all you have to do is take out the larger groups of enemies in a single Multishot. Vault and Smoke Screen have no Discipline cost with this setup so use them whenever you want, you literally can't fail this objective with our build!
- The larger rooms will usually have dense packs of 20+ enemies that are easy to hit at once, but since monster placement is random in Set Dungeons, you may have to reset to get a better layout.
- Once you've hit 20 enemies 6 times just clean up the remaining enemies with Multishot and you're good to go. After getting through it once, try picking up the speed and see how fast you can clear it!
- To see a stronger version of this Class Set (and one of the best speed farming builds in the game) check out the UE Multishot Demon Hunter Guide.

Location
Act V - Pandemonium Fortress Level 3. Yep, all the way to Malthael you go. Take the Pandemonium Fortress Level 2 Waypoint and walk to Level 3. Can't miss it once you're there.
Objectives
- Chain together 20 consecutive hits on enemies with Impale 5 different times.
- Slow 45 different enemies with Shadow Power.
Basic - Complete one objective and kill 72 enemies within the time limit.
Mastery - Complete both objectives and kill all enemies within the time limit.
Setup
- You need to be precise with your Impale throws so avoid things like Holy Point Shot and Runes like Ricochet or Overpenetration.
- Karlei's Point is cubed to significantly buff Impale Damage.
- Notice you do not take Vengeance here as you don't want any skills that can passively kill enemies.
- Captain Crimson's Trimmings, Obsidian Ring of the Zodiac, Leoric's Crown, In-geom and Gogok of Swiftness give you Cooldown Reduction.
- Stormshield and Elusive Ring will make you essentially immortal, allowing you to get close for the Shadow Power objective.
- The Sword of Ill Will and Spines of Seething Hatred buff your Chakram, which you'll use to clean up the rest of the dungeon once the objectives are done.
Gameplay
- You must land Impale 20 times in a row without missing a single time, 5 different times. If you use Impale and miss an enemy before landing 20 it will reset your "Impale Chain." and you’ll start back at 0. There is a counter that will appear above the skill bar that tracks your Impale Chain progress. You can also see how many enemies are left in the dungeon on the right side, allowing you to calculate if it's still possible to complete the dungeon with perfect play.

- Example: if you just missed an Impale throw and only have 18 enemies left, if you haven’t already completed the first objective, the dungeon is failed as there aren’t 20 enemies left to complete it with. You’ll need to reset and try again. With only 172 enemies in the dungeon, missing a few times can end a run. Be patient and throw carefully!
- When encountering enemies with a shield, hit them with Grenade first to break it before throwing an Impale at them.
- Shadow Power Night Bane slows nearby, making it easier to land Impales and complete the second objective. The biggest mistake people make in this dungeon is wearing gear and skills that make the Impale Chain impossible to achieve. Follow this build and strategy and you will be victorious.
- Once you have the objectives complete use Chakram to clean up the rest of the Set Dungeon.
- To see a stronger version of this Class Set check out the Shadow Impale Demon Hunter.
Demon Hunter Video Guide
Monk
The Set Dungeons for the Monk vary wildly in difficulty making them fun and challenging. They showcase the strengths of the Monk Class well and are a great way to familiarize yourself with skills and strategies to better dominate your enemies. Many of these Set Dungeons have a defensive objective that requires avoiding certain damage from enemies, highlighting the Monk's support-heavy playstyle. Below we'll show you how to be both an offensive and defensive powerhouse to dominate these Set Dungeons!
| Monkey King's Garb | Inna's Mantra | Uliana's Stratagem | Raiment of a Thousand Storms |
| Easy | Medium | Hard | Hard |
| Sweeping Wind Wave of Light Dashing Strike | Mystic Ally Wave of Light Dashing Strike | Exploding Palm Seven-Sided Strike Dashing Strike | Dashing Strike Sweeping Wind Epiphany |

Location
Act IV - The Pinnacle of Heaven. Take The Silver Spire Level 2 Waypoint and fight your way to Diablo. Right before entering the boss battle go to the left and the portal will appear.
Objectives
- Hit 20 enemies within 6 seconds using your Decoys 5 different times.
- Maintain Sweeping Wind for the entire Set Dungeon.
Basic - Complete one objective and kill 325 enemies within the time limit.
Mastery - Complete both objectives and kill all enemies within the time limit.
Setup
- The Monkey King's Garb spawns a Decoy every second that explodes for 1,000% damage for every stack of Sweeping Wind you have.
- Do not use Vengeful Wind as it gives you too much damage and you'll kill everything before the Decoys can. Lower your damage so the Decoy gets the kills.
- Make sure to equip Kyoshiro's Soul as it grants you 2 stacks of Sweeping Wind every second that you don't damage enemies, making it impossible to lose Sweeping Wind as long as you stay alive.
- Captain Crimson's Trimmings, In-geom, Obsidian Ring of the Zodiac and Gogok of Swiftness give massive Cooldown Reduction and are very helpful for this Set Dungeon.
- TzoKrin's Gaze and Incense Torch of the Grand Temple help kill off the rest of the dungeon once you've finished the Decoy Objective.
Gameplay
- Cast Sweeping Wind right away then forget about it since you have Kyoshiro's Soul equipped and it will stay up the entire dungeon!
- Get Epiphany and Mystic Ally up and proceed to let the Decoy kill everything until the first objective is complete. Don't cast Wave of Light at all until this objective is finished or the Decoy won't be able to get the kills.
- Use Dashing Strike to jump into rooms then Cyclone Strike to group enemies on top of the Decoys. Once the Decoy has done its job, start using Wave of Light to decimate the rest of the dungeon with ease!
- To really unleash with this Class Set check out the Sunwuko Wave of Light Monk Guide which is the greatest key farmer of all time!
Location
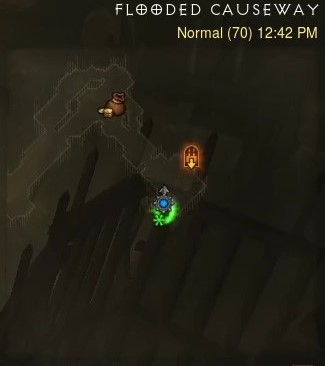
Act II - Flooded Causeway. From the Hidden Camp go into Caldeum Bazaar. Head directly to the left and enter the hole for the Flooded Causeway. Go to the end and the portal will appear before the exit.
Objectives
- Activate Mystic Ally on 10 enemies within 10 yards, 5 different times.
- Never get Frozen.
Basic - Complete one objective and kill 295 enemies within the time limit.
Mastery - Complete both objectives and kill all enemies within the time limit.
Setup
- You'll have every Mystic Ally at all times from Inna's Mantra with increased damage for each one you have out.
- You must bring your damage down quite a bit for this dungeon so you aren't killing things before your Mystic Ally can. Go for under 200k sheet damage and you should be fine.
- Mystic Ally Air Ally and Epiphany Insight are great choices for the extra Spirit and Mantra of Salvation Agility gives you more Toughness.
- Captain Crimson's Trimmings, In-geom, Obsidian Ring of the Zodiac and Gogok of Swiftness allow you to cast Mystic Ally with virtually no cooldown.
- Put Ice Climbers in the Cube so you can't get Frozen, completely negating the second objective.
- Use Pinto's Pride and Wave of Light to clean up the rest of the Set Dungeon once you've finished the first objective.
Gameplay
- Cast Epiphany at the start and use Dashing Strike to hunt down your first pack of 10 enemies. Use Cyclone Strike to gather enemies close to you then activate Mystic Ally to blow them away. Use Wave of Light to clean up any left over enemies, then simply seek another pack of 10, rinse and repeat.
- Use Mantra of Salvation as needed for extra defense. Once you've completed the first objective run around and kill everything with Wave of Light.
- The hardest part is making sure you aren't killing everything with Cyclone Strike before you can get 10 enemies close enough for Mystic Ally. Make sure you aren't too strong (under 200k sheet damage) and this one isn't too bad!
- To see a stronger version of this Class Set check out the Inna's Tempest Rush Monk Guide.
Location
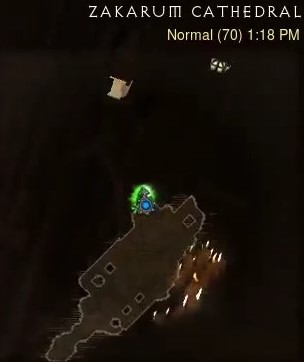
Act V - Zakarum Cathedral. Head north in The Survivors' Enclave until you reach the Zakarum Cathedral. Inside the portal will be at the end on the left.
Objectives
- Blow up 15 enemies at once with Exploding Palm 4 different times.
- Don't take any Fire damage throughout the Set Dungeon.
Basic - Complete one objective and kill 146 enemies within the time limit.
Mastery - Complete both objectives and kill all enemies within the time limit.
Setup
- You'll want to tone down your damage significantly so you aren't killing everything instantly with Cyclone Strike. Go for around 250k Sheet Damage or less to make it easier on yourself.
- Taking out the Flawless Royal Emeralds for Flawless Royal Diamonds helps reduce your damage against trash while maintaining Elite damage.
- The Fist of Az'Turrasq and Gungdo Gear helps your Exploding Palm destroy everything around you once you detonate it with Seven-Sided Strike.
- Captain Crimson's Trimmings, Obsidian Ring of the Zodiac, Gogok of Swiftness and Leoric's Crown reduce cooldowns so you can spam your skills as you please.
- Finally equip The Star of Azkaranth and you no longer need to fear Fire damage throughout this Set Dungeon.
Gameplay
- This Set Dungeon lacks monster density so you'll need to gather packs of 15 enemies together in big rooms to blow up at once. Kill the other small packs along the way so you don't run out of time running back for them later.
- Cast Epiphany at the start and keep it up throughout the Set Dungeon. Spirit shouldn't be an issue but use Crippling Wave anyway to teleport to enemies you target.
- Once you have 15 enemies nearby use Cyclone Strike to gather them, apply Exploding Palm then blow them away with Seven-Sided Strike.
- Towards the end there are more opportunities for larger packs so don't stress about trying to drag along every little pack you find as you only need to do this 4 times.
- This is one of the most challenging Set Dungeons in the game so don't be discouraged if it takes a few runs to get the cycle down and get Mastery of this one!
- Check out the Exploding Palm Monk Build Guide if you want to make the most of it!
Location
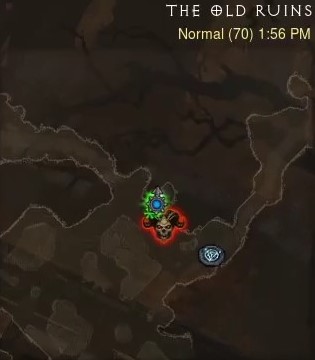
Act I - The Old Ruins. Take the Waypoint and walk northwest right past the first house and the portal will appear.
Objectives
- Reach the Golden Chest at the end of the dungeon within 2 minutes.
- Don't get hit by a single Succubus projectile.
Basic - Complete one objective and kill 410 enemies within the time limit.
Mastery - Complete both objectives and kill all enemies within the time limit.
Setup
- Raiment of a Thousand Storms makes Dashing Strike cost Spirit so Resource Cost Reduction is more important than ever and should be taken on every item that can roll it.
- You'll be alternating between Dashing Strike and your Spirit Generator which helps keep Spirit up, Prides Fall will help quite a bit with this too.
- Nemesis Bracers spawn Elites from all the Pylons, proccing In-geom letting you spam your skills for 10 seconds. Use this to your advantage to fly to the Chest at the end.
- Captain Crimson's Trimmings, Obsidian Ring of the Zodiac, Gogok of Swiftness, Messerschmidt's Reaver and Leoric's Crown are all really important with this one as you want to be able to use Dashing Strike as much as possible.
- Crystal Fist is the last addition that reduces your damage taken after using Dashing Strike by 50%
Gameplay
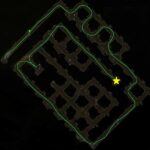
- Fasten your seat belt cause you're going to be flying in this one! Cast Epiphany, Sweeping Wind and Mantra of Conviction right away, click that first Pylon then use Dashing Strike to soar!
- Alternate between Dashing Strike and Crippling Wave to kill enemies as you rapidly make your way through the maze to the Chest at the end. The dungeon is very long so kill all of the enemies in the first several corridors so you don't have to go all the way back there. Make your way around the perimeter to the Chest in the center then back track a bit to clean up the rest of the enemies.
- Save some Pylons on your way to the Chest so you can use them to proc In-geom on the way back so you have infinite Dashing Strike. Clean up whatever is left in the areas towards the end and you'll be good to go.
- Be careful of the Succubus projectiles as you're going along. Kill them before they have a chance to throw one every time you see them! This can be a tricky part but being very offensive works well.
- Clicking Pylons with Nemesis Bracers will add more enemies to the dungeon so you can actually finish this one with enemies remaining as they aren't added to the total you need to kill for Mastery. This one really is just a race against the clock, very unique compared to the other Set Dungeons and quite challenging at the same time.
- Check out the Bounty Variant on the LoD Wave of Light Monk Guide to see something spicy!
Monk Video Guide
Necromancer
The Necromancer have the easiest Set Dungeons which makes it too bad they don't count towards the Wings of Mastery. Nonetheless if you're an achievement hunter or need one for your Seasonal Journey all of these are great options to get that accomplished. The Necromancer has some Unique Sets that showcase the class in different ways. Let's see how to be the commander of the undead below!
| Bones of Rathma | Grace of Inarius | Pestilence Master's Shroud | Trag'Oul's Avatar |
| Easy | Easy | Easy | Easy |
| Army of the Dead Revive Command Skeletons | Bone Armor Devour Skeletal Mage | Bone Spear Land of the Dead Bone Armor | Death Nova Bone Armor Blood Rush |
Location
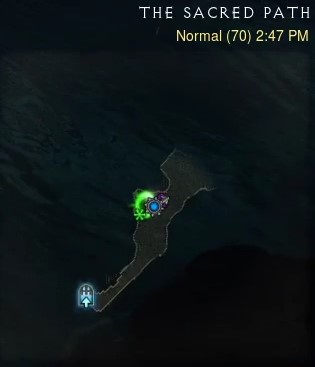
Act II - The Sacred Path. Take the Waypoint to The Temple of the Firstborn Level 1 and go backwards into The Sacred Path. Walk through until you've nearly reached the Shrouded Moors exit and the portal will appear.
Objectives
- Reduce the cooldown of Army of the Dead by 500 seconds throughout the Set Dungeon.
- Revive 100 corpses.
Basic - Complete one objective and kill 320 enemies within the time limit.
Mastery - Complete both objectives and kill all enemies within the time limit.
Setup
- The Bones of Rathma set makes your permanent minions reduce the cooldown of Army of the Dead by .5 second every time they do damage which will make the first objective very easy. Your minions also no longer take damage and buff the damage of Army of the Dead by 500% each, up to 9000%.
- Captain Crimson's Trimmings is great as you need Cooldown and Resource Cost Reduction for both objectives.
- Bonds of C'Lena buff Army of the Dead by another 100-200% depending if the enemy is the target of Command Skeletons or not.
- Fate's Vow grants the Unconventional Warfare rune as well as 250% increased damage for Army of the Dead.
- In-geom and Messerschmidt's Reaver will provide more Cooldown Reduction so you can spam Army of the Dead like crazy!
Gameplay
- Cast Command Skeletons right away and get your Bone Armor stack as soon as you engage enemies. Use Army of the Dead and your Command Skeletons to kill the first packs then get your maximum Revive minions by your side.
- As your minions do damage the cooldown of Army of the Dead will be restored very quickly. Keep casting spamming Revive until you've revive 100 corpses and to get back to max if you die.
- Frailty Aura of Frailty will curse everything around you and anything your minions don't kill will be vaporized by your Army of the Dead which you'll be able to spam quite often.
- This was already one of the easiest Set Dungeons in the game but with the new changes it's even easier, your Army of the Dead Cooldown should take care of itself so just spam Revive and plow through this one!
- This set had a big change in patch 2.7.0 to what you see here today. The previous version inspired the LoD Rat Necromancer that has ruled the Diablo 3 world for 10+ Seasons.

Location
Act I - Drowned Temple. Take the Waypoint to Drowned Temple. Walk forward, down the stairs and into the temple. The portal will appear right as you enter the first room.
Objectives
- Hit 100 enemies with Bone Armor.
- Kill 200 enemies that are affected by the Swirling Tornado of Bone created by Bone Armor and Grace of Inarius.
Basic - Complete one objective and kill 170 enemies within the time limit.
Mastery - Complete both objectives and kill all enemies within the time limit.
Setup
- The Grace of Inarius creates a Swirling Tornado of Bone around you that you'll use to kill enemies. Make sure your damage isn't too high so you can cast Bone Armor when enemies are nearby before you kill them with the Tornado.
- Almost all of the Core Setup items are here to reduce your cooldowns so you can spam Bone Armor at will.
- There aren't any specific items that buff Bone Armor other than the Grace of Inarius Set but you should have plenty of damage with it regardless.
- Bone Armor Harvest of Anguish synergizes well with Lost Time and Wreath of Lightning to give a significant Movement Speed boost, making this nice and fast!
Gameplay
- Cast Land of the Dead and Bone Armor right away then run around and hit enemies with the Bone Tornado to draw them together.
- Once you have some enemies nearby cast Bone Armor again to rip their bones away to finish them off. You'll keep doing this over and over until you've finished both objectives. Bone Armor should be strong enough to get this done but not so strong that the Tornado kills everything instantly.
- After completing both objectives use Skeletal Mages to kill the rest of the enemies as you Blood Rush around. Land of the Dead and Devour Devouring Aura should let you easily keep 10 Skeletal Mages up, making this a quick one to finish and Master.
- Check out the Grace of Inarius Poison Scythe Guide if you want to combine the Bone Tornado with a hard hitting melee skill!

Location
Act III - The Keep Depths Level 3. Go all the way to the end right before the Ghom fight in The Larder and the portal will appear on the right.
Objectives
- Hit enemies 150 times with an Empowered Bone Spear.
- Take less than 400,000 damage throughout the Set Dungeon.
Basic - Complete one objective and kill 155 enemies within the time limit.
Mastery - Complete both objectives and kill all enemies within the time limit.
Setup
- The Pestilence Master's Shroud makes every consumed corpse fire a Corpse Lance at a nearby enemy and empowers your next Bone Spear by 3,300%. This means you must use Devour to consume a corpse every time before you shoot a Bone Spear to count towards the first objective.
- Take Maltorius' Petrified Spike to buff Bone Spear to one shot everything it touches.
- Molten Wildebeest's Gizzard is great for this dungeon as the shield will help you avoid taking over 400,000 damage.
- The rest of this setup utilizes familiar Core Setup items such as Captain Crimson's Trimmings, In-geom, Obsidian Ring of the Zodiac and Gogok of Swiftness to make it easy to spam your abilities.
Gameplay
- Don't spam Devour. You need to use it sparingly to Empower and kill enemies with Bone Spear. If you spam Devour you'll kill everything with the Corpse Lances that it shoot out and fail the dungeon.
- Keep Bone Armor up whenever it's available, tap Devour then throw Bone Spear until the first objective is complete.
- Once the first objective is complete, cast Land of the Dead and spam Devour to clean up the remaining enemies.
- Taking less than 400,000 damage should be pretty easy as you have tons of range with this build and can evade enemies with Blood Rush.
- Check out the Pestilence Necromancer Guide if you want to turn up the speed and let the Set do the work!
Location
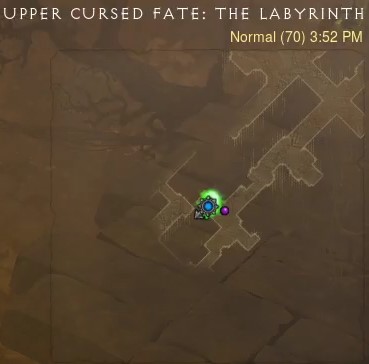
Act IV - The Labyrinth. Take the Waypoint to The Upper Realm of Cursed Fate, head down the stairs to the right and go along the path forward. The portal will appear at the top of the first staircase you have to climb.
Objectives
- Spend 1,000% of your total Life using Skills.
- Heal 1,000% of your total Life using Skills
Basic - Complete one objective and kill 290 enemies within the time limit.
Mastery - Complete both objectives and kill all enemies within the time limit.
Setup
- Trag'Oul's Avatar will give Blood Rush every rune and increases your maximum Life by up to 100%. It also makes Life-spending abilities deal 3,800% more damage making Death Nova Blood Nova insanely strong.
- Captain Crimson's Trimmings, In-geom, Obsidian Ring of the Zodiac and Gogok of Swiftness make it easy to spam Blood Rush and Bone Armor awhile resetting Land of the Dead throughout the dungeon.
- Blood Tide Blade increases the damage of Death Nova by 400% for every enemy within 25 yards so get nice and close to take down enemies with ease.
- Devour Cannibalize, Blood Rush Transfusion, Bone Armor Thy Flesh Sustained and Death Nova Blood Nova are all important for spending and healing your total life to complete the objectives.
Gameplay
- Cast Land of the Dead at the start and use it whenever it's available as it provides free corpses for Devour Cannibalize.
- You will heal yourself with Devour Cannibalize and Blood Rush Transfusion. Bone Armor Thy Flesh Sustained and Death Nova Blood Nova will be used to spend 1,000% of your Life. Spam these skills throughout the dungeon and the two objectives will be completed with ease.
- If you aren't spending or healing enough towards the end of the dungeon simply stop and spam Death Nova Blood Nova to spend a ton of health, then proceed to kill more enemies to restore it all with Devour.
- There isn't much to this one, with the right skills and minimal gear it can be Mastered effortlessly.
- This Class Set has seen better days but you can try out our version of the Trag'Oul's Corpse Lance Necromancer if you're into sadness.
Necromancer Video Guide
Witch Doctor
The Witch Doctor is great at grouping enemies with afflictions and blowing them away with their high-damage skills and creatures. It's a slow and steady Class compared to others as you're often in the Spirit Realm sneaking around for the right time to strike. Many of these Class Sets require a proper rotation of skills to work properly, but with the right strategy and supporting items you'll be victorious!
| Spirit of Arachyr | Zunimassa's Haunt | Raiment of the Jade Harvester | Helltooth Harness |
| Easy | Easy | Medium | Hard |
| Piranhas Hex Soul Harvest | Grasp of the Dead Poison Dart Spirit Walk | Soul Harvest Locust Swarm Haunt | Wall of Death Spirit Walk Grasp of the Dead |
Location
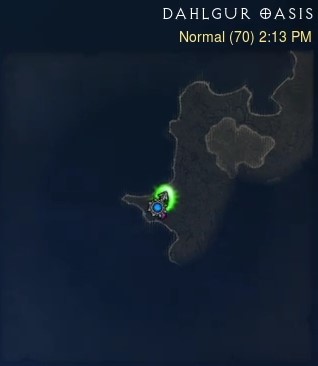
Act II - Dahlgur Oasis. Take the Waypoint to Dahlgur Oasis and head west until you hit the edge of the area. Here you'll find a protruding area with a nice little pond where the portal will appear.
Objectives
- Lick 30 enemies with a Toad.
- Kill every Elite while they're webbed by the Spider Queen and being bitten by Piranhas.
Basic - Complete one objective and kill 55 enemies within the time limit.
Mastery - Complete both objectives and kill all enemies within the time limit.
Setup
- The Spirit of Arachyr will summon a permanent Spider Queen by your side that will rush to wherever you throw Corpse Spiders.
- The Sacred Harvester combined with Lakumba's Ornament gives you massive Toughness on top of the bonus from Uhkapian Serpent and Life Link.
- Be careful to not use something like Locust Swarm that could kill an Elite before you get to it.
- Adding in Captain Crimson's Trimmings, Obsidian Ring of the Zodiac, Gogok of Swiftness, In-geom and Leoric's Crown will allow you to spam Hex, Soul Harvest and Piranhas, making it easy for the Toad and Spider Queen to do their business.
Gameplay
- Cast Hex at the beginning then let the Toad of Hugeness start getting some licks in. Once the first few enemies have been licked, Summon Zombie Dogs and use Soul Harvest to get the defensive buff and use Spirit Walk to find the first elite.
- When you get to an Elite You want to first use Piranhas then throw a couple Corpse Spiders at it so the Spider Queen can get her web down. Make sure your damage isn't too high so you can easily get the Piranhas and Spider Queen onto the Elite before it dies.
- Keep Soul Harvest up as much as you can and lead with your Toad of Hugeness so you can get the 30 licks done quickly. Otherwise just sit back and relax. As long as you're moving through the dungeon at a steady pace and don't leave any enemies behind it should be very easy to Master. Patience is a virtue in this Set Dungeon.
- Why settle for a Toad and Spider when you can be a Chicken too, check out the Chicken Witch Doctor Guide!

Location
Act III - The Core of Arreat. Take the Waypoint to The Core of Arreat and head north to The Heart of Sin. Just past the halfway point where the area curves you'll find the portal at the top of the bend.
Objectives
- Grip 150 enemies in the primary zone of Grasp of the Dead.
- Do not allow any enemies into melee range.
Basic - Complete one objective and kill 169 enemies within the time limit.
Mastery - Complete both objectives and kill all enemies within the time limit.
Setup
- Zunimassa's Haunt makes your Pets deal massive damage to any enemy hit by Grasp of the Dead along with making Fetish Army last until they die.
- Wilken's Reach combined with Grasp of the Dead Unbreakable Grasp make the skill free to cast with no cooldown, so go ahead and spam it like crazy and your Pets will decimate everything.
- Summon Zombie Dogs, Gargantuan and Fetish Army to create a front line of defense as you sit back shooting Poison Dart.
- The Dagger of Darts is a nice addition to Fetish Army Head Hunters and Mask of Jeram is going to buff you and your Pet's damage significantly.
- Make sure to equip Enforcer and Zei's Stone of Vengeance as this one is all about keeping your distance and watching the Pets destroy.
Gameplay
- Summon Zombie Dogs, Gargantuan and Fetish Army right away and stay behind them throughout the dungeon.
- Spam Grasp of the Dead as it costs you nothing and your Pets will kill things very quickly. Use Poison Dart to get the monster down a bit quicker, but don't go around shooting it like crazy and killing everything before you get it in Grasp of the Dead.
- Focus on getting the objectives done first while keeping your distance then simply go around and clean up the rest of the map. It's super easy when you have an army of Pets doing the work for you!
- There's something special about an army of dart shooters and with the Zunimassa's Poison Dart Guide you can really let 'em fly!
Location
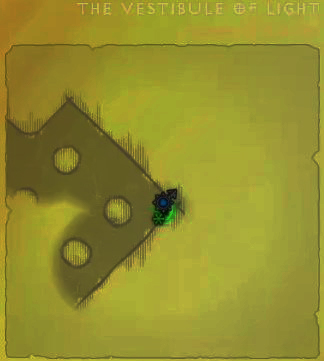
Act IV - The Vestibule of Light. Take the Waypoint to the Gardens of Hope 1st Tier and travel directly south to The Vestibule of Light. Go down to the southeast corner of the big square room and the portal will appear.
Objectives
- Hit 15 enemies at the same time with Soul Harvest 10 different times.
- Kill 100 enemies afflicted by both Locust Swarm and Haunt.
Basic - Complete one objective and kill 435 enemies within the time limit.
Mastery - Complete both objectives and kill all enemies within the time limit.
Setup
- Raiment of the Jade Harvester is all about afflicting enemies with Locust Swarm and Haunt before blowing them up with Soul Harvest. It magnifies your Damage over Time skills by an insane amount and makes Haunt deal all of its damage in an instant when hitting an already Haunted enemy.
- Make sure your damage isn't too high or Locust Swarm and Haunt will kill enemies before you can kill them with Soul Harvest. Be especially careful to not spam Haunt as hitting the same enemy twice with it will vaporize them instantly.
- The Sacred Harvester combined with Lakumba's Ornament gives you massive Toughness so survival isn't an issue..
- Finally adding in Captain Crimson's Trimmings, Obsidian Ring of the Zodiac, Gogok of Swiftness, In-geom and Leoric's Crown gives insane Cooldown Reduction for Soul Harvest and Piranhas.
Gameplay
- Cast Haunt and Locust Swarm at will in the beginning to get it on as many enemies as possible. Let them get nice and close and use Piranhas to pull them in before blowing them up with Soul Harvest.
- You can also use Spirit Walk defensively as you get close to enemies to make yourself invulnerable.
- Repeat this process throughout the entire dungeon. Locust Swarm and Haunt will do a great job attracting enemies to you and every time you cast them it reduces the cooldown on Soul Harvest from the Raiment of the Jade Harvester (4) Bonus.
- This one is another really easy one to Master as long as you aren't killing everything before you can detonate!
- You really have to hold back the damage in this one, but you won't have to following the real Jade Harvester Witch Doctor Guide.
Location
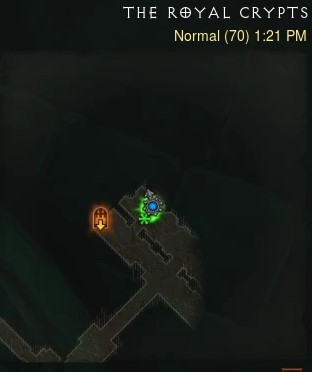
Act I - The Royal Crypts. Take the Waypoint to The Royal Crypts and find your way to the entrance of The Crypt of the Skeleton King. The portal will be on the right through the nearest gate.
Objectives
- Kill 20 enemies with a single Wall of Death 4 different times.
- Don't take any Poison Damage.
Basic - Complete one objective and kill 230 enemies within the time limit.
Mastery - Complete both objectives and kill all enemies within the time limit.
Setup
- The Helltooth Harness buffs the damage of Wall of Death by an insane amount and the first one you cast buffs the second one even more!
- Make sure your damage is tuned down so you don't one shot everything with Locust Swarm. Use Wall of Death Ring of Poison to easily trap 20 enemies inside of it at once.
- The Sacred Harvester and Lakumba's Ornament will give you insane Toughness when you get to 10 Soul Harvest stacks, making you very tanky with the other 60% Damage Reduction provided by the Helltooth Harness.
- Captain Crimson's Trimmings, Obsidian Ring of the Zodiac, Gogok of Swiftness and In-geom allow you to spam your skills as much as you please.
- To avoid Poison Damage simply equip Mara's Kaleidoscope and you don't need to worry about any fancy footwork.
Gameplay
- Cast Locust Swarm at all enemies you see as you gather up 20. It can be very hard to find 20 in this narrow dungeon so be patient. Once you have a nice group use Piranhas to pull them all together then cast Wall of Death to finish them off.
- 20 enemies is likely more than you'll anticipate and there aren't too many great opportunities to pull this off. If you notice enemies are dying before you can get enough together you need to remove more damage so they only fall when you cast Wall of Death.
- Monster allocation is random in Set Dungeons so if your first few open areas are severely lacking just head out and reset the dungeon till you can get a good pack to start with.
- With Mara's Kaleidoscope equipped there's no need to worry about anything except finding your next group to kill in the Ring of Poison.
- This one is a race against the clock for Mastery as you need to be patient when grouping up the enemies. Don't leave anything behind or you'll regret having to run back to kill it!
- Check out the Helltooth Zombie Bears Guide if you want to, uhhhh... use bears?
Witch Doctor Video Guide
Wizard
The Wizard Set Dungeons are all unique from one another and are great ways to learn some of the strengths and weaknesses of each Set. Many of these will require you to rack up high kill counts while utilizing the unique Set Bonuses which range from maximizing your cooldowns to using Arcane, Cold, Fire and Lightning at the same time in. Come learn how to control the elements and Master these Set Dungeons while you're at it.
| Vyr's Amazing Arcana | Firebird's Finery | Tal Rasha's Elements | Delsere's Magnum Opus |
| Easy | Easy | Medium | Hard |
| Archon Arcane Torrent Storm Armor | Disintegrate Explosive Blast Teleport | Electrocute Black Hole Explosive Blast | Slow Time Arcane Orb Wave of Force |
Location
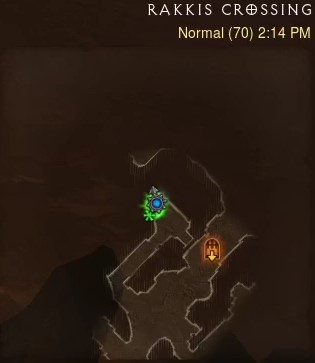
Act III - Rakkis Crossing. Take the Waypoint to Rakkis Crossing and travel all the way to the end. Right before Siegebreakers entrance head up the staircase to the left and the portal will appear in the northeast corner.
Objectives
- Get to 100 stacks while in Archon form 3 different times.
- Kill 300 enemies while in Archon form.
Basic - Complete one objective and kill 565 enemies within the time limit.
Mastery - Complete both objectives and kill all enemies within the time limit.
Setup
- The power of Vyr's Amazing Arcana and Chantodo's Resolve lead to a very powerful build for this Dungeon. Maximize Cooldown Reduction where you can and make sure you have The Swami and Fazula's Improbable Chain to make both objectives very easy to complete.
- Adding Obsidian Ring of the Zodiac, Leoric's Crown and Messerschmidt's Reaver will allow you to remain in Archon form throughout the Dungeon.
- Halo of Karini and Ashnagarr's Blood Bracer give a massive boost to Toughness making survival trivial in this dungeon.
Gameplay
- Cast Magic Weapon, Familiar and Storm Armor at the start then hop into Archon form. When in Archon you can Teleport around at will and will decimate everything you touch with any of Archon skills.
- In Archon form spam the AOE explosion while Teleporting around to vaporize everything. If you need to reach an enemy far away don't be afraid to pull out the ol' beam too!
- Float around the map clearing all of the enemies while staying in Archon as much as possible. The Swami will keep Archon stacks when it falls off, so if you don't have it ready immediately use Arcane Torrent to reset it's cooldown and jump back in.
- Both objectives should be very easy with the right amount of Cooldown Reduction and all of the gear mentioned above. The hardest thing is making sure you don't leave a few enemies scattered around as you go for Mastery.
- Make sure you sweep back and forth in the large wings of the Jail so that you don't leave stragglers behind and run out of time!
- To see a stronger version of this Class Set check out the Vyr-Chantodo Wizard Guide!
Location
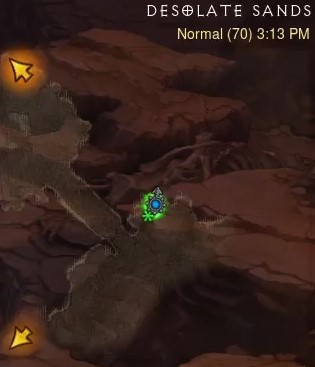
Act II - Desolate Sands.Take the Waypoint to The Archives of Zoltun Kulle then go backwards to the Desolate Sands. Go across the bridge and just to the north the portal will appear.
Objectives
- Ignite or kill 20 enemies within 3 seconds of each other 6 different times.
- Hit 50 enemies with the Meteor that revives you from Firebird's Finery.
Basic - Complete one objective and kill 355 enemies within the time limit.
Mastery - Complete both objectives and kill all enemies within the time limit.
Setup
- Firebird's Finery ignites enemies that you hit with Disintegrate making them take tremendous damage till they burn to ash. Every second you channel Disintegrate you'll gain Combustion stacks up to 50 which will allow you to Teleport at will giving you insane mobility.
- Wand of Woh will buff Explosive Blast, allowing it to be a constant barrage of explosions around you.
- Captain Crimson's Trimmings, Messerschmidt's Reaver, Obsidian Ring of the Zodiac and Gogok of Swiftness will reduce the cooldown of Explosive Blast to practically nothing, and with Familiar Arcanot you'll have no issue keeping your Arcane Power full.
- Most of this gear is overkill for the task at hand. Equip a Fire skill with any supporting item and you can get this one down!
Gameplay
- You don't have to hit 50 enemies with a single Meteor, so right away run up to the first big group of enemies and let them kill you. Plan on doing this again in 60 seconds to finish this objective. If you don't have a lot of enemies in the first room, turn around and reset the dungeon. We make our own RNG around here!
- Now that you're back up get Magic Weapon, Familiar and Storm Armor going then Teleport around as you destroy everything with Disintegrate.
- Use Disintegrate and Explosive Blast Chain Reaction to kill 20 enemies at a time and watch them burn away! As long as you keep hitting enemies and spam both skills you'll have the first objective done very quickly, you don't need to worry about Igniting them as killing them counts as well! Don't forget to die again and finish the Revive Meteor objective before finishing off this dungeon!
- Firebird's Finery received a rework in Patch 2.7.0 and with it comes a much more powerful and fun playstyle, check out the new Firebirds Mirror Image or Firebird's Flame Blades Wizard guides!
Location
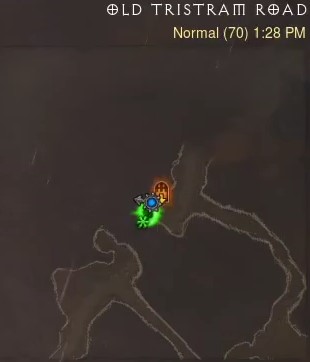
Act I - Old Tristram Road. Take the Waypoint to the Old Ruins and travel up along the path. The portal will appear on the last corner before the Cathedral where the bodies are hanging from the tree.
Objectives
- KIll 90 enemies while having 4 stacks from Tal Rasha's Elements (6) Bonus, 4 different times.
- Don't get hit by a Rockworm.
Basic - Complete one objective and kill 155 enemies within the time limit.
Mastery - Complete both objectives and kill all enemies within the time limit.
Setup
- Tal Rasha's Elements buffs Damage and Toughness based on how many different elements you've hit an enemy with recently. It also fires a Meteor of that element type every 8 seconds.
- You need to have a skill for all 4 elements to complete the objective, so you'll take Explosive Blast Chain Reaction, Electrocute Surge of Power, Black Hole Absolute Zero and Teleport Calamity to keep all 4 stacks up as you rotate through them.
- Wand of Woh buffs Explosive Blast significantly so this will be your primary source of damage (the other skills just give the elemental stacks from Tal Rasha's Elements).
- Halo of Karini and Ashnagarr's Blood Bracer give insane Toughness so have no fear as you traverse this Set Dungeon.
- Captain Crimson's Trimmings, In-geom, Obsidian Ring of the Zodiac and Gogok of Swiftness make the cooldown of Explosive Blast and Black Hole very short, allowing you to spam them at will.
Gameplay
- Cast Familiar and Storm Armor at the start then cycle through all of your skills to get all 4 elemental stacks. These stacks WILL fall off after the maximum of 8 seconds, so make sure you are cycling through all of your skills every several seconds or you will be killing enemies without the 4 stack buff.
- Spam Explosive Blast as you Teleport through the dungeon killing everything with ease. You'll need to come to a stop periodically to get the Rockworms to un-burrow and come after you. You can see them pop up on the map and start tunneling your way, when they do Teleport away then use Electrocute to stun and kill them from a distance.
- You'll be raining Meteors from the sky and damage and Toughness should be adequate here, so as long as you're keeping 4 different elemental stacks up this will be very simple to get done.
- To see a stronger version of this build check out the Tal Rasha Meteor Wizard Guide!

Location
Act III - Skycrown Battlements. Starting in Bastions Keep Stronghold go into the Skycrown Battlements on the northeast side of town. Stick to the far right side of the area and the portal will appear at the first corner.
Objectives
- Place Slow Time around 20 different enemies at once 4 different times.
- Reflect 200 projectiles.
Basic - Complete one objective and kill 297 enemies within the time limit.
Mastery - Complete both objectives and kill all enemies within the time limit.
Setup
- Delsere's Magnum Opus gives significant Toughness and Damage when a Slow Time is active, and allows your skills to lower its cooldown.
- Halo of Karini and Ashnagarr's Blood Bracer give insane Toughness so survival won't be an issue.
- Captain Crimson's Trimmings, In-geom, Obsidian Ring of the Zodiac and Gogok of Swiftness allow you to cast Slow Time at will.
Gameplay
- Cast Storm Armor right away and keep it up throughout the Set Dungeon.
- You need to cast Slow Time to slow enemy projectiles then use Wave of Force Impactful Wave to reflect the projectiles back at the enemies. Let the enemies shoot a lot of them before sending them back to get this objective done quickly.
- Gather enemies up as you go along then place a Slow Time on them once you have 20. The key is to lure enemies into the larger packs that you'll find. This won't work twice on the same enemy though, so once you do it to a pack, kill them and move to the next one.
- You can use a skill to gather enemies like Black Hole to assist you, but you need to be careful that you don't just kill everything instantly! Monster allocation is random in Set Dungeons as well, so if the big rooms lack density just reset the Dungeon.
- You can also use Arcane Orb to reduce the cooldown on Slow Time and Wave of Force if needed but don't kill all the enemies before completing your objectives!
- To see a stronger version of this Class Set check out the DMO Frozen Orb Wizard Guide.
Wizard Video Guide
Summary
Good luck on this endeavor. Mastering all Set Dungeons and claiming the wings is a major accomplishment! Getting through them all is no small task but once done you'll have experienced all of the original Class Sets in the game. Maybe someday there will be a new round of Set Dungeons made for the new Class Sets that have entered Sanctuary, but until that day comes this will wrap up our Set Dungeon overview.
Credits
Written by Facefoot
Contributions by Raxxanterax, wudijo
Reviewed by Dredscythe, Raxxanterax, wudijo