Hardcore Survival Guide
Last Updated:September 14, 2023|Changelog
Introduction
Hardcore (HC) is a game mode just like the regular game with one important twist: a character's death is permanent! When that happens your character and all their equipped items, inventory and followers are gone forever. You need to be ready to lose it all at any moment (even at no fault of your own). You can opt into this mode at the character selection screen via the Hardcore checkbox. Everything there is separated from your regular Softcore (SC) characters: you have your own stash, Paragons, unlocked transmogs, leaderboards and can only group up with other HC players. At the end of a season everything rolls over to your non-seasonal Hardcore account just like it does on Softcore.
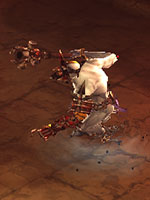
The thrill of playing on Hardcore is exhilarating, with a much greater sense of accomplishment than you'd feel in Softcore. It constantly tests both your ability to farm for long periods of time and your reactions/decision-making in the heat of combat. Pushing high on the Hardcore leaderboards is meaningful because any character might be gone at any moment.
This post covers the most important things to be successful when playing Hardcore. We hope it encourages you to try HC out for yourself for the rush and rewards it brings!
Fun Fact: Ancestor's Grace is the only Hardcore-specific item in the game. Unfortunately it doesn't hold up at all compared to typical endgame amulets and is thus never used for serious builds. Still, if you're trying to collect everything in the game, you'll have to play Hardcore to get this piece.
Top 10 Do's
- Use double cheat death (you + follower). When both procs are down, play defensively, run away or even port to town until one of them comes up again.
- Level Gem of Ease to at least 25 IMMEDIATELY. You don't want to RIP and get stuck on a level 1 character without it (trust me: been there, done that).
- Save back-up gear, especially of your main farming and pushing setups. This includes follower gear.
- Play with an exit plan. Be aware of all tools available to you. How will you leave safely if things go poorly? Remember that many classes play with an immunity to crowd control effect like Wrath of the Berserker, Epiphany, Vengeance, etc. Use these and other survival cooldowns to port out safely.
- Engage new enemies only when you're ready. Make sure you have enough life to take some hits and if you are being followed by dangerous monsters, deal with them first before moving on.
- Be aware of elite affixes that can crowd control, move you around or deal a lot of damage (esp. Knockback, Waller, Nightmarish, Wormhole, Orbiter, Mortar, Frozen, Jailer, Vortex and Arcane Enchanted).
- Monitor your defensive buffs, especially those with conditional effects or short timers (Halo of Karini, Elusive Ring, Band of Might, etc.).
- Move normal gems from your inventory into your stash once they start piling up (once a day).
- Level multiple sets of your main gems so you don't start from scratch after a RIP. You can create a new copy of a gem by putting them on another character or dropping them on the ground (only do this with level 0 gems in case you disconnect).
- Watch your teammates’ HP and cheat death procs in groups. They might be lagging or disconnected and you only have seconds to react and save them. The best option is to play on voice chat so you can call for help!
Top 10 Don't's
- Don't leave the game unattended at any moment outside of town. If you have to AFK, at least pause the game when solo or TP back to town when grouped. Be warned that the game automatically kicks you after 15 minutes AFK or paused, which means certain death when surrounded by enemies.
- Don't take unnecessary risks by choosing a high difficulty. Start out at a comfortable level and if it's too easy, slowly move up from there.
- Don’t pull so much that it lags the game. Be cautious if you are playing a build prone to lag! Remember that you can pause the game when playing solo to let the game catch up.
- Don't augment your T16 gear or use pushing gear in T16. The damage and survivability are not needed there and you shouldn't put your best items at risk for no gain.
- Don’t farm with your best items if you have a suitable replacement for them. Instead, use your second best setup to keep them safe. This especially applies to items that are extremely difficult to acquire (well-rolled weapons & jewelry or other items with big affix ranges like certain bracers). The loss in farming efficiency is marginal when replacing a few items with slightly worse versions compared to losing those items for your final end of season push. Losing such valuable items is far worse than going slightly slower in speeds.
- Don't be overconfident after some big item upgrades or augmenting your items. Test your new limits safely!
- Don't use Bottomless Potion of Chaos in any build ever. It's a sure-fire way to go out with a bang in a molten explosion. Anything "random" is always a "no" in Hardcore.
- Don't dive into Grotesque explosions, poisonous ground effects of killed Accursed or similar effects. Be aware which monster types are present and adjust your movement accordingly!
- Don't maneuver yourself into a corner where you can be surrounded and killed, even if your cheat deaths are available. Be especially careful when you play a build with very low mobility and there are Waller elites nearby!
- Don't try to save a lost push attempt with desperate measures. If you enter a terrible map after a good start and there are dangerous monsters like Oppressors, Succubi or Archers everywhere, just leave! The same applies to Rift Guardians: If you can't survive Blighter's wrecking ball melee hits, Voracity's poison clouds or Raiziel's holy bolts, take the loss and just leave. Some bosses, unfortunately, are unbeatable with certain Hardcore builds. Live to fight another day and go again!
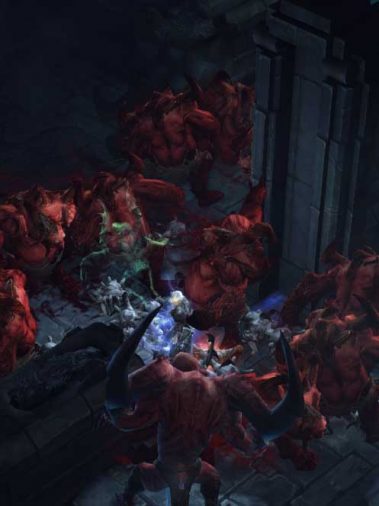
Special Maps & Mobs
Here is a list of monsters and maps that deserve special attention. Even while farming some of these present you with a sizable threat and it's best to not push your luck. When you find any of the following, fully focus on the game. In addition to the descriptions below, you should also know how every single boss in the game works by heart so that you can play around their abilities and make it out alive. Check out our Guide on Rift Guardian Mechanics for full details on them!
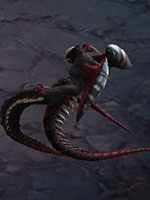
Dune Dervishes ("Spinners") & Sand Dwellers
These reflect projectiles coming from skills such as Hungering Arrow, Bone Spear or Fist of the Heavens, making it easy to oneshot yourself if you don't deal with them immediately! In some cases you have to simply walk away if it's too dangerous to fight them. Be especially careful when clicking pylons with Nemesis Bracers, as you will frequently encounter Spinners as the elite pack's minions.
Enslaved Nightmares
Pay special attention to their debuffs and try to dodge their projectile attacks. Not only do they hurt like hell, but they also shred both your Armor and your All Resistance stats, making you much more vulnerable to all other enemies around. If you are unaware of the dangers when fighting them, avoid them.
Terror Demons
Similar to Enslaved Nightmares, these also apply a reduced healing debuff. They are not as dangerous on their own but when combined with other monsters become a deadly combo, especially when they spawn as part of an elite pack.
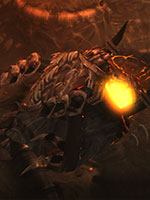
Oppressors
Their fire breath can melt you in seconds, especially when many of them gang up on you. When you move out of its AoE, they will insta-charge you for ridiculous damage. You basically can't win, so always keep your health up when they are around!
Blazing Guardians/Smoldering Constructs
These stack up an obnoxiously powerful fire ground effect under you if you stand still for too long. Builds relying on lots of Dodge Chance (Barbarians, Monks, anything in groups or simply from Gogok of Swiftness) to achieve high Toughness values will melt under its effect as it can't be dodged.
Noxious Guardians
Explode when killed for a heavy amount of damage. As they have quite little HP, you can easily oneshot these while farming without even noticing they're there, so take it slower on maps where they are present. Pay special attention to yellow elite packs of these which are harder to recognize as Noxious Guardians. Fun Fact: These and Shock Towers hold the Guinness World Record for most Rats killed in Diablo 3.
Corrupted Angels
Whenever you encounter these, avoid getting slammed by their hammer as much as possible. Sometimes they deal ludicrous hits (many times higher than normal) and oneshot even the tankiest of builds. Even when you feel safe, do not engage these when you don't have a cheat death ready. This also applies to the Rift Guardian Erethon.

Punishers/Armaddons
These bulky monsters stun with their attacks. Pay attention to them if you're vulnerable to crowd control effects. The stun won't hurt on its own, but other monsters and elites can gang up on you during that time!
Savage Beasts/Skeletal Beasts/Tusked Bogans
Their charge attack hits like a truck. Always keep an eye on these, especially when kiting many of them. Beware of charges from offscreen, too!
Dark Berserkers/Pain Mongers
Not dangerous most of the time, but when they swing their hammer with their iconic "clonk!" animation, you'll be in trouble if you don't get the hell away from them!
Barbed Lurkers
These monsters shoot powerful poison projectiles that can easily be dodged, but deal hefty amounts of damage over time. Make sure to avoid these and if you do get hit, have your Health Potion ready. Since this is a DoT effect, you can die straight through the Enchantress cheat death proc (Fate's Lapse) which has only a very short immunity phase!
Vile Swarms
As juicy as they are, they're equally dangerous. While harmless on their own, they have no collision box and can form a massive ball of flies that can all hit you simultaneously. If you pull many of them together, be extra careful about where you step!
Arreat Crater
Beware of Demonic Forges. Their fire hits like a truck and if you don't want to be barbecued, learn their spawn locations and move through them only after they've fired. There are also Demon Mines that trigger when you walk over them and can knock you around.
Keep Depths
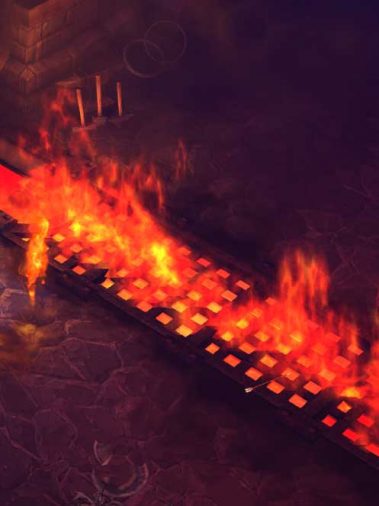
Certain rooms spawn with a Wall of Fire that regularly appears from the ground. Not only does the fire burn you for heavy damage, but it can also set monsters ablaze that turn into living torches, burning nearby targets. Stay away from enemies when fighting near these fires!
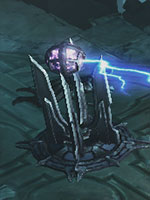
Pandemonium Fortress
Shock Towers are placed along the path and zap you for extreme damage when you move close. This is a chain lightning that can jump to you even from minions. Even if you think you're fast enough to zoom past them, they have an enormous range and more likely than not catch you anyway. And when you manage to get away, the next one might be waiting just around the corner. Either finish the towers before their attack or trigger them and teleport away immediately.
Halls of Agony
Fiery Grates regularly light up and barbecue anything standing on them. Pay attention to their timing and pass them only after their animation has finished. Additionally there are also destructible fire traps located along the walls of certain corridors that can produce a fire AoE when struck. Lastly, there are zombie pits which spawn additional enemies and with the right timing there might be some of them coming for you even after the Rift Guardian has been defeated. Always keep an eye out on this map!

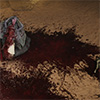
Paths of the Drowned
The Blood Pools found in this map frequently kill Hardcore players in T16 Rift farming. If your build is very squishy without Goldwrap's bonus, dodge them at all costs. We warned you!
Dahlgur Oasis
Moonseeds are found all over the map that explode shortly after being triggered. They easily oneshot most builds in T16 without Goldwrap active, so stay mobile and be extra careful in groups where others might trigger them in front of you.
Any narrow map (Keeps, Caves, Corvus)
Monsters filling up small rooms and exits may get you stuck as you try to progress or skip a rift. Use your mobility skills to get through blocked paths and keep them ready for these moments.
More Survival Tips
Setting Up
- Start new builds with maximum survivability, then slowly migrate toward full DPS when it feels comfortable. Put more Paragon points in Vitality, or use extra survivability passives over the META recommendations. That's an easy and efficient way to boost your toughness to practice any build. Before your first run, double-check that you have the right setup and a cheat death passive. Stay close to the exit of a map so you can escape if something is wrong. Consider using defensive gems like Esoteric Alteration and Molten Wildebeest to get a feel for a build first, then transition to better setups once you're sure that everything works.
- For self-boosting 1 to 70: reduce the level requirement of an Enchanting Favor Templar relic to 1 by cubing it together with a level 25 Gem of Ease. This allows any class access to a cheat death by level 20 which makes the later levels much safer when running Torment 6. Combine this with Gem of Ease in a level 70 weapon, Legacy of Dreams, Hellfire Ring, Boon of the Hoarder, Goldwrap and Leoric's Crown + Flawless Royal Ruby to make it even faster!
- In group play, running a triple support setup is a great strategy to make everyone a lot tankier while staying at comparable efficiency as standard double DPS/double support setups.
Fighting
- Use your immunity skills to teleport out of a bad situation. You can't rely on Homing Pads alone as you can still get crowd controlled and killed during your Town Portal animation.
- Fight dangerous Bosses near entrances/exits to a Greater Rift floor if possible. You can sprint towards them while the boss is spawning to force them to teleport onto you... unless it's Vesalius.
- Don’t waste a Shield Pylon. In a Greater Rift push, take them after you’ve proc’d and/or have tremendous density built up.
- Avoid fighting multiple elite packs in the same area for a prolonged period of time. Their elite affixes will build up and can become lethal even for tanky builds. Slowly kite them away as you continue to DPS them.
- Look out for leftover monsters after you have finished a Rift Guardian. In certain maps like Halls of Agony you may encounter zombies crawling out of a pit or some monsters like Corpse Raisers might have spawned bats from their death that are waiting for you. Under certain conditions adds spawned by bosses can also remain active even after the fight is over. Don't let your guard down while collecting loot and upgrading your gems!
Paying Attention to Details
- Not all cheat death passives are created equal. Unstable Anomaly for Wizards is particularly bad because it does not provide you with any damage immunity. This means you can still die immediately after a proc if you linger in a dangerous area (especially if the reason you proc'd was dropping the Halo of Karini buff)! The same applies to Barbarians with Nerves of Steel. With multiple molten explosions going off at the same time, or reflected projectiles from Spinners you might die right through their attacks!
- If you don't need the Enchantress for her extra Cooldown Reduction (Prophetic Harmony), use the Scoundrel for farming as he has the longest cheat death proc (Vanish) for the best disconnect-protection. In pushing, the Templar offers great extra healing to help you survive. Take a look at our Follower guide for full details on how to build them!
- If you're using Unity in your build, give your follower an immortality relic. Without it, their damage taken will kill even the tankiest of characters immediately!
- When there are server issues or your internet connection is having troubles, it's better to log off for a while. Take the dog on a walk, feed your cat, read some Maxroll guides, the sky's the limit!
Summary
- You have one shot with your character, don't waste it and be prepared to lose it all!
- Always start out easy with a tanky build, then progress to higher difficulties from there.
- Include cheat death passives in every build you play.
- Save back-up gear and legendary gems.
- Don't put your best set of items at risk until your final pushes.
- Pay extra attention to the things that can kill you: elite affixes, dangerous monsters, getting stuck, and dropping defensive buffs.
- Take risks only when pushing. There's no need to put yourself in danger just to slightly speed up your farming.
- RIPs happen no matter what. Don't get too attached to anything and enjoy yourself while it lasts!
- Town is Lava! Even after all these cautions, get out there and slay some minions of Hell!
Credits
Written by wudijo
Contributions by oogi3boogi3, Facefoot & Raxxanterax