Follower Mechanics
Last Updated:January 7, 2024|Changelog
Introduction
Followers are powerful companions who join you in battle. They’ll accompany you on ventures outside of the safety of town and attack any threats you come across. They have unique abilities that can slow/weaken enemies or heal you. With Patch 2.7.0 and Season 23, Followers have been reworked with additional item slots, new abilities and the Emanation of certain Legendary Powers.

Overview
Followers fight automatically, but you can choose skills for them that affect their behavior in combat. For example, if you choose the Charge skill for the Templar, he’ll begin fights by rushing at enemies with a stunning attack while Heal will cause him to stay back and restore your Life during battle.
Followers who aren’t currently traveling with you remain in your camp. To recruit a Follower to join you (replacing your existing Follower if you have one), walk to their location, interact with them, and select ‘Hire’. You can also talk with them and learn about their history or ask for their advice on your current quests.
As you grow more powerful, your Followers will gain experience and unlock new skills. You should also improve their gear often by accessing their inventory page:
- PC: Hit the “F” key or by clicking on their portrait in the upper left corner of the screen.
- Console: open the character menu (Xbox 360 and Xbox One: BACK; PlayStation®3 and PlayStation®4: SELECT), and navigate to the party menu.
- You’ll see two available skills per category. You can highlight any skill to learn about it before choosing the one you want, and you can retrain your Followers’ skills here as well. To equip your Follower, click on the item you’d like them to wield, and drag it to the appropriate slot in their inventory.
Choose the Follower and skills that best complement your play style. If you like to fight on the front lines and soak up damage, pick a Follower that will heal you or delay your enemies’ attacks.
Mechanics & Stats
Generally there are no hard mechanics rules for Followers. In our extensive testing some stats and effects randomly work while others simply don't. We will give our best to showcase these here:
General Rules
- When the Player dies the Follower also dies and all skill Cooldowns are reset (including the cheat death skills: Fate's Lapse, Vanish and Guardian).
- When a Follower dies while the player stays alive, the Follower revives automatically after 20 seconds.
- Your Follower automatically teleports to you when you are more than 75 yards away from it. This is used to reposition it at will in higher Greater Rifts.
- Only 1 Follower can fight alongside you at a time while other allies, like pets or major NPCs, can join you simultaneously (except with Asheara's Vestments).
- Followers can only be used in solo play (except with Asheara's Vestments).
- You can change Follower Skills anytime (asides while being in a Greater Rift) but cannot unlearn them. If you picked a skill you don't want, your only option is to make a new character.
- Cooldown Reduction from Follower tokens work for all their active skills, but not for their cheat death procs.
- Follower’s powers are based on their main stat (maxed at 25.000, but they have a 2.5x multiplier so you only need 10,000). This means we stack Intelligence on the Enchantress, Dexterity on the Scoundrel and Strength on the Templar.
- Guardian's Jeopardy (3) Bonus works for followers by improving their inherent stat multiplier from x2.5 to x3.5, making it slightly easier to hit the 25,000 main stat threshold if needed.
- Followers share 20% of their Experience, Magic and Gold Find stats with you.
- Legendary gems do not work on followers, except Esoteric Alteration and Mutilation Guard.
- Cooldown Reduction does not work for any follower skill except the Templar’s Heal.
- Followers never deal significant damage; you’re on your own to clear the content.
Main Stats
All 3 Followers have different main stats (see below) and get a 2.5 multiplier per stat point of Dexterity, Intelligence, Strength and Vitality. The normal class bonuses apply (Dexterity & Strength = Armor, Intelligence = All Resistance, Vitality = Life). The individual main stat increases their damage and scales their skills power linearly capping at 25,000 main stat for the maximum value.
Other Stats
Most of the normal stats work on Followers:
- Area Damage
- Attack Speed
- Block Chance
- Critical Hit Chance
- Critical Hit Damage (capped at 150%)
- Elemental Damage
- Elite Damage
- Life per Hit
- Life per Kill
- Life %
Attack Speed makes your Follower attacks faster. However all their special abilities have a cooldown, which means it simply makes them auto-attack faster. As a result, the only benefit from Attack Speed is to help them proc items like Thunderfury, Blessed Blade of the Windseeker and Blind Faith.
Cooldown Reduction works as well but only for Templar's Heal. Born’s Command and Captain Crimson's Trimmings Cooldown Reduction bonuses both work for Templar's Heal as well. Additionally, Followers share 20% of their Experience, Magic and Gold Find stats from equipped items to the Player.
Legendary Gems
Followers do not benefit from Legendary Gems equipped on them except Esoteric Alteration & Mutilation Guard. This is extremely useful to help them survive in speed content and use a token that gives Follower all skills or halves its Cooldowns.
They do benefit from Enforcer if you have it equipped. While the damage multiplier is rather useless, the 90% damage reduction works and allows builds that use this gem to make their Follower survives without immortality token in higher Greater Rifts.
Buffs & Crowd Control
Followers benefit from defensive buffs like Ignore Pain Mob Rule, War Cry and Monk's Mantras. Followers are subject to Crowd Control effects (Stuns, Freezes...) but are immune to Knockback. However Crowd Control Reduction on items work to mitigate those effects. Ice Climbers work as well and grant them immunity to Freeze, Slow and Root (Jailer) effects which is very useful in Greater Rifts.
Set Bonuses
Set bonuses like Endless Walk or Bastions of Will, Movement Speed bonuses and any Resource related bonuses do not work. Damage multipliers and damage reduction effects like Captain Crimson's Trimmings (3) Bonus, Aquila Cuirass, Stone Gauntlets, Bane of the Trapped, Legacy of nightmares and Legacy of Dreams do not work. Guardian's Jeopardy (3) Bonus works for followers by improving their inherent stat multiplier from x2.5 to x3.5, making it slightly easier to hit the 25,000 main stat threshold if needed.
Item Effects
- Oculus Ring works on Followers.
- Ring of royal grandeur works on Followers.
- The Executioner doesn't work on Followers.
- Unity works on Followers, effectively acting as a 50% damage reduction in solo.
This requires your Follower to have an immortality token equipped! - Ahavarion, Spear of Lycander only works if the Follower gets the kill, rendering it useless.
- Strongarm bracers work on Followers!Windforce and The Ess of Johan can proc them.
- Cord of the Sherma works on Followers which is nice for Krysbin's Sentence in speed content.
- Ice Climbers works on Followers, preventing them from being frozen or jailed.
- Leoric's Crown works on Followers.
- If your Follower has a Cold Damage Range on its Weapon, it procs your Lost Time Movement Speed buff if you have it equipped as a Necromancer.
- Similarly, if they have Frostburn equipped, a Cold Damage Range allows Followers to proc the freeze effect with their attacks.
Emanation
Followers have 14 equippable items, the 13 standard ones your character uses plus the follower specific item. A new feature called Emanation was introduced in patch 2.7.0 which allows players to gain the effect of certain Legendary Powers equipped on hired Followers:
- Broken Crown
- Homing Pads
- Spaulders of Zakara
- Goldskin
- Custerian Wristguards
- Nemesis Bracers
- Gladiator Gauntlets
- Gloves of Worship
- Dovu Energy Trap
- Rakoff's Glass of life
- Avarice Band
- Krede's Flame
- The Flavor of Time
- Sage's Journey (3) Bonus
- Cain's Destiny (3) Bonus
These emanated powers work as if you were the one wearing them. Items with variable powers (Homing Pads, Dovu Energy Trap, Rakoff's Glass of life) need to have good rolls. Emanated items are snapshotted on Pylon click (The Flavor of Time, Nemesis Bracers) but are not shared in groups when summoned by Asheara's Vestments.
Gameplay
The main way to "use" a Follower is to constantly be aware of where they are standing via the purple dot on your mini map. Example on Solo Barbarian Push: Pull an entire Festering Woods to a big intersection. Ideally group up enemies on to your Follower.
If you don't do that, inevitably 10-40% of the monsters will walk over to where your Follower is instead and attack them. If instead you gather them up on the Follower, you are guaranteed that the monsters will walk over to you, the player! Once you are close to your Follower, only then do you worry about re-positioning them on top of Elites or in an Oculus Ring.
Followers can be force teleported onto you by moving around 2 screens away from them if they are not crowd controlled or performing an attack animation. When kiting monsters, you have to move far enough forward to teleport your Follower to the next screen, and only then go back and pull the monsters. Be careful when you run back though as running too far will re-teleport the follower back to where it was and you’ll make no progress.
Followers can bodyblock enemy attacks for you (especially useful on Rift Guardians) by positioning them in front of you in a narrow spot and standing behind them.
Common Items
Followers have 13 item slots (Templar has 14 with Shield). Here is an overview of the commonly used items:
| SLOT | ITEM |
| Weapon | Thunderfury, Blessed Blade of the Windseeker Pig Sticker Azurewrath Buriza-Do Kyanon Cluckeye The Sultan of the Blinding Sand |
| Shield on Templar | Freeze of Deflection Wall of Man |
| Helm | Leoric's Crown Blind Faith Sage's Apogee Cain’s Insight Mempo of Twilight |
| Gloves | Gloves of Worship Cain's Scrivener Sage’s Purchase |
| Shoulders | Homing Pads |
| Chest | Tal Rasha's Relentless Pursuit Goldskin |
| Pants | Cain's Habit Captain Crimson's Thrust |
| Boots | Cain's travelers Captain Crimson's Waders Sage’s Passage Ice Climbers |
| Amulet | The Flavor of Time The Ess of Johan |
| Ring 1 | Oculus Ring Avarice Band |
| Ring 2 | Unity Ring of Royal Grandeur Hellfire Ring Wyrdward |
| Bracers | Nemesis Bracers Strongarm Bracers |
| Unique Follower Item | Enchanting Favor Skeleton Key Smoking Thurible Hand of the Prophet |
| Belt | Sage's Ribbon Captain Crimson's Silk Girdle Vigilante Belt Cord of the Sherma |
The Templar
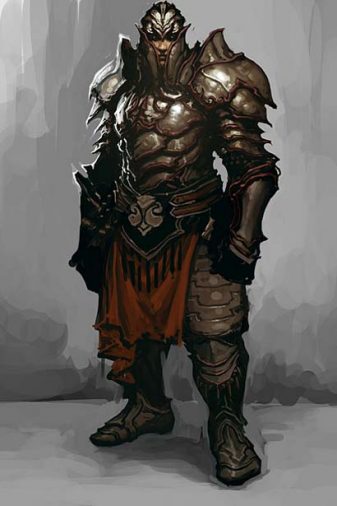
Kormac, the Templar is a dedicated master of melee arms and armor. You encounter him during the Campaign Mode in Act I.
Item Slots
Weapon: All one-handed melee weapons (Axes, Daggers, Maces, Spears, Swords)
Shield: All normal Shields in the game
Unique Item: Templar Relics - Rare or Legendary: Hillenbrand's Training Sword, Enchanting Favor, Relic of Akarat
Stats
Main Stat: Strength (increases damage and skill power)
Skills
Strength scales the following skill powers capping at 25,000 for the maximum value.
Mechanics
429,138 Life healed at 25,000 Strength
The Templar will only use this skill when your life drops below 60%. The healing effect can be increased by BOTTOMLESS POTION OF AMPLIFICATION. This is the only Follower skill that works with Cooldown Reduction!
Best use
For builds that lack recovery.
Mechanics
Maximum 6 second Taunt duration at 25,000 Strength
Taunted monsters run towards and attack you. Taunt's visual effect lasts for 2 seconds no matter what, which can trick you into thinking it does not work properly. It works and is still a hard CC so don't forget the crowd control resistance gained by the monster is tied to the duration of the taunt used, regardless of the visual effect's duration.
Best use
Almost never, don't pick this skill.
Mechanics
19,832 Life regeneration per second at 25,000 Strength
Increases your sheet Life per second. Can be increased by BOTTOMLESS POTION OF AMPLIFICATION and increases effects like Molten Wildebeest's Gizzard shield or Mantra of Healing Sustenance healing power.
Best use
For builds that lack recovery.
Mechanics
Maximum 6 seconds slow duration at 25,000 Strength
This effect will slow down monsters' Movement Speed by 80% for 3 - 6 seconds.
Best use
Pretty useful to create distance for ranged builds.
Mechanics
Maximum 6 second Stun duration at 25,000 Strength
The monster within 8 yards will be locked in place, unable to perform any action during the effect. Templar will use this skill to close the gap but if he already has an enemy in melee range he will not use it even when it’s not on cooldown.
Best use
Very rarely
This skill is almost never used, you usually don't want a random 6 second stun as it is pretty unreliable and usually does more harm than good. Sometimes this skill can be used to maintain buffs like Krysbin's Sentence for Necromancers.
Mechanics
Maximum 10% additive damage increase for 6 seconds at 25,000 Strength
This skill places a 10% increased additive damage taken debuff on a single target. Works for party members when summoned with Asheara's Vestments.
Best use
When you don't want any form of Crowd Control.
Mechanics
For Monk, Barbarian and Necromancer the 10% increased resource generation stacks additively with Hexing Pants of Mr. Yan, Animosity and The Guardian’s Path.
Best use
On resource dependent builds
Mostly used on Wizards and Necromancers.
Mechanics
Maximum 25% Life healed at 25,000 Strength
Knockbacks enemies in a 15 yard radius. Knockbacks apply a flat 40% crowd control resistance to the monster, regardless of the effect duration; but only if the monster is actually displaced. Any displacement effect (such as pulling abilities) is treated as a knockback. Moreover, any monster that has built up 65% or more CCR will be immune to any displacement effect. As a result, any "knockback attempt" when the monster is sitting at 65% CCR or above will not trigger additional CCR because it will not be displaced. Note that an attempted knockback (a displacement effect on a monster with too much resistance or an immune target like a Rift Guardian or a Juggernaut Rare Elite) triggers the damage buff from Strongarm Bracers. Click here for the full guide on Crowd Control Mechanics.
Furthermore the player gets healed by 15% - 25% of Maximum Life. This healing effect heals you instantly and can be increased by BOTTOMLESS POTION OF AMPLIFICATION.
Most importantly this effect shields the player from all incoming damage for 5 seconds!
Best use
Default choice for most builds that don’t have major resource problems. Thanks to 5 second invulnerability this proc can be used offensively to take an otherwise deadly Oculus Ring.
GR Pushing Templar
For Greater Rift pushing we recommend this Templar setup for the sustain from Heal, 10% increased damage from Onslaught, and the very powerful cheat death mechanic from Guardian. This is the only follower build that stacks Cooldown Reduction because it works with Heal. Since we take the immortality relic, we do not need any survivability stats.
Strength > Cooldown Reduction > Attack Speed.
Stat Priorities:
Since we have the immortality relic, we do not need to stack survivability on our Templar.
Strength > Cooldown Reduction > Attack Speed.
Key Items:
- The Flavor of Time: For double duration on Pylons.
- Nemesis Bracers: For more progression from Elites.
- Oculus Ring: For 85% increased damage.
- Unity: For 50% damage reduction if you're also wearing one.
- Ice Climbers: To make your follower immune to Freeze and Immobilize effects.
- Leoric's Crown and Captain Crimson's Trimmings: For more Cooldown Reduction on Heal.
The Scoundrel
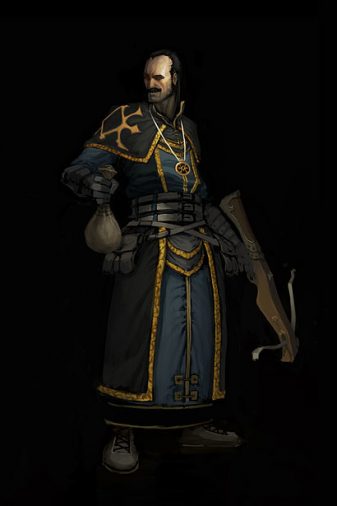
Lyndon, the Scoundrel, a selfish rake skilled in larceny and ranged weapons. You encounter him during the Campaign Mode in Act I.
Item Slots
Weapon: Bows, Crossbows (cannot use Quivers)
Unique Item: Scoundrel Tokens - Rare or Legendary: Skeleton Key, Slipka's Letter Opener, Ribald Etchings
Stats
Main Stat: Dexterity (increase damage and skill power)
Skills
Dexterity scales the following skill powers capping at 25,000 for the maximum value.
Mechanics
Maximum 6 second slow duration 25,000 Dexterity
Does "damage" and applies a slow effect. This effect will slow down monsters' Movement Speed.
Best use
Never, don’t take this skill on any build.
Mechanics
Maximum 6 second stun duration at 25,000 Dexterity
Shoots arrows at a 11 yard spread angle. The monsters hit will be locked in place, unable to perform any action during the effect.
Best use
Only in the Crowd Control Version
Mechanics
Maximum 3% additive damage increase for 6 second duration at 25,000 Dexterity
Increase sheet damage by 3% additive for 3 - 6 seconds. This skill also works in groups for you and your team members when summoned with Asheara's Vestments.
Best use
In the zDH group setup.
For solo this skill is outclassed in terms of damage output by Anatomy.
Mechanics
Maximum 4% increased Critical Hit Chance at 25,000 Dexterity
Increases your sheet Critical Hit Chance by 1.8 - 4%. This skill also works in groups for you but not your team members when summoned with Asheara's Vestments.
Best use
Almost always taken in solo runs.
This skill is the best DPS choice for solo gameplay.
Mechanics
Maximum 10% additive damage increase for 6 second duration at 25,000 Dexterity
Places an 10% additive debuff on enemies that lasts for 3 - 6 seconds. This skill also works in groups for you and your team members when summoned with Asheara's Vestments.
Best use
Default choice for most builds due to the damage increase.
Mechanics
Maximum 70% proc chance at 25,000 Dexterity
Literally deals damage, but metaphorically does nothing.
Best use
Almost never, but has a niche use for AoE CC type build that can be useful for a Necromancer in speedruns.
Mechanics
Maximum 7 seconds duration at 25,000 Dexterity
When this skill procs you can't take any damage for 3 - 7 seconds.
Best use
Almost never used because Night’s Veil is the entire reason you use Scoundrel.
Mechanics
Maximum 4 seconds duration at 25,000 Dexterity
The Scoundrel places a 20 yard cloud on the ground for 2 - 4 seconds similar to Oculus Ring. All attacks against enemies that are inside that cloud will be guaranteed Critical Hits. This also works for party members when summoned with Asheara's Vestments. Scoundrel will use this skill whenever it’s ready and will target the closest enemy.
While an increase to Critical Hit Chance is a damage increase for most builds there are some builds that rely on skills that cannot crit, like WW Rend for example.
Best use
Always! Also in the zDH group setup
Make sure that the Scoundrel is trapped inside a large group of monsters when this skill comes off cooldown to maximize the effectiveness of the debuff.
GR Pushing Scoundrel (Normal Version)
For most Greater Rift Pushing builds we recommend this Scoundrel setup for the Critical Hit Chance from Anatomy, 10% increased damage from Piercing Shot, and the insane Critical Hit Chance cloud from Night’s Veil. Don't choose either of the first skill options as they apply crowd controls that we want to avoid. If you accidentally select one, you'll either have to live with it or make a new character to fix it as there is no way to de-select a follower skill :(.
Stat Priorities:
Since we have the immortality token, we do not need to stack survivability on our Scoundrel.
Dexterity > Attack Speed.
Key Items:
- The Flavor of Time: For double duration on Pylons.
- Nemesis Bracers: For more progression from Elites.
- Oculus Ring: For 85% increased damage.
- Unity: For 50% damage reduction if you're also wearing one.
- Ice Climbers: To make your follower immune to Freeze and Immobilize effects.
- Leoric's Crown and Cain's Destiny: For more Experience and Attack Speed.
GR Pushing Scoundrel (CC Version)
For a very few Greater Rift Pushing we recommend this crowd control Scoundrel setup for the stun from Powered Shot, Critical Hit Chance from Anatomy, 10% increased damage from Piercing Shot, and the insane Critical Hit Chance cloud from Night’s Veil. Since we take the immortality token, we do not need any survivability stats.
Stat Priorities:
Since we have the immortality token, we do not need to stack survivability on our Scoundrel.
Dexterity > Attack Speed.
Key Items:
- The Flavor of Time: For double duration on Pylons.
- Nemesis Bracers: For more progression from Elites.
- Oculus Ring: For 85% increased damage.
- Unity: For 50% damage reduction if you're also wearing one.
- Blind Faith & Cord of the Sherma: For the chance to Blind.
- Ice Climbers: To make your follower immune to Freeze and Immobilize effects.
The Enchantress
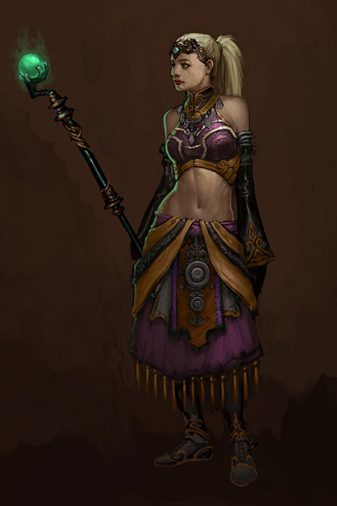
Eirena, the Enchantress, a mysterious magic-user who can confuse and debilitate enemies. You encounter her during the Campaign Mode in Act II.
Item Slots
Weapon: One and Two-Handed melee weapons (Axes, Daggers, Maces, Spears, Swords, Two-Handed Axe, Two-Handed Mace, Two-Handed Sword, Staff)
Unique Item: Enchantress Focuses - Rare or Legendary: Hand of the Prophet, Smoking Thurible, Vadim's Surge
Stats
Main Stat: Intelligence (increases damage and skill power).
Skills
Intelligence scales the following skill powers capping at 25,000 for the maximum value.
Mechanics
A single target switches sides to fight for you for 8 seconds. Cant effect Bosses
Even though this effect has two names, Charm and Confusion are the same. Confused monsters attack other monsters mostly using basic attacks (they can also cast Elite Affixes), and other monsters will attack them back. They won't attack the player and either stand still or follow the player if they have no target to attack. It is still possible for the player to attack them but they cannot apply other crowd controls.
Charm is not an uncommon crowd control with the only sources being Mass Confusion, Weapon Throw Stupefy, Shield Glare Uncertainty, Henri's Perquisition, Overwhelming Desire, Skull of Resonance, The Tormentor and the Enchantress' Charm. Click here for the full guide on Crowd Control Mechanics.
Best use
This skill is used mostly for defensive purposes.
Mechanics
Maximum 6 seconds slow duration at 25,000 Intelligence
Fire a slow slow moving projectile similar to the base Arcane Orb Wizard skill. Does meaningless damage and applies a slow effect in a 15 yard area. This effect will slow down monsters' Movement Speed for 3 - 6 seconds.
Best use
Pretty useful to create distance for ranged builds.
Mechanics
Maximum 10% elemental damage increase at 25,000 Intelligence
Increases all your elemental damage by 5 - 10%. This effect stacks additively with other elemental Bonuses from gear like Blackthorne’s Jousting Mail, Swamp Land Waders or skills like Spectral Blade Flame Blades.
Best use
Popular offensive buff.
Mechanics
Maximum 10 seconds Cooldown Reduction at 25,000 Intelligence
Increases your Cooldown Reduction by 5 - 10%. This effect stacks multiplicatively with other Cooldown Reduction sources from items or set bonuses like Born's Command or Captain Crimson's Trimmings.
Best use
For Cooldown dependent builds
Especially useful for Speed runs and Torment farming.
Mechanics
Maximum 6 seconds duration at 25,000 Intelligence
Increases your and the Followers Armor by 3% additively and reduces damage from ranged attack by 6%. On top of that melee attackers are slowed by 60%. This effect will slow down monsters' Movement Speed for 3 - 6 seconds.
Best use
Awesome defensive mechanics for solo builds!
Mechanics
Maximum 10% additive damage increase for 7 seconds duration at 25,000 Intelligence
Enemies in the affected area will take an additional 10% increased additive damage for 5 - 7 seconds. This skill also works in groups for you and your team members when summoned with Asheara's Vestments.
Best use
Decent additive offensive debuff.
This skill is mostly used in groups by zDH's.
Mechanics
Maximum 6% increased Attack Speed at 25,000 Intelligence
A nice 40 yard aura that provides 3 - 6% additive Attack Speed. This can be very useful to hit certain Attack Speed Breakpoints.
Best use
Nice offensive "passive" skill.
Used to hit new breakpoints in builds like the Masquerade Bone Spear Necromancer.
Mechanics
Maximum 7 seconds duration at 25,000 Intelligence
The Enchantress will place a bubble similar to the Wizard's Slow Time skill. This effect will slow down monsters' Movement Speed, Attack Speed and projectile moving speed by 80% for 3 - 7 seconds.
On top of that it will shield the player for 1 second duration from all incoming damage! This Shielding effect always lasts for 1 second and can NOT be increased by Intelligence.
Best use
A defensive resource mostly used in Hardcore.
This skill can be useful as a defensive touch when you build does not scale with Attack Speed or already has the desired breakpoint. This cheat death is worse than the cheat death from other Followers so you will take Focused Mind 90% of the time.
T16 Enchantress
For T16 we recommend this Enchantress setup because she is the only follower that gives Cooldown Reduction, allowing you to spam your abilities more. Since this is T16 content, she’ll stay alive with Esoteric Alteration and Mutilation Guard and use Hand of the Prophet to gain all skills. This will give us Cooldown Reduction, Elemental Damage, Reduced Damage from Ranged Attacks, Armor, Attack Speed, and a Cheat Death.
Stat Priorities:
Since we do not have the immortality focus, we need to stack survivability on our Enchantress.
Intelligence > Vitality > Life % > Armor > All Resistance > Life Per Hit > Attack Speed.
Key Items:
- The Flavor of Time: For double duration on Pylons.
- Nemesis Bracers: For extra Elites, Death’s Breaths and In-geom procs.
- Avarice Band: For the insane pickup radius.
- Ring of Royal Grandeur: To complete our sets.
- Gloves of Worship: For 10 Minute Shrine Buffs.
- Sage’s Journey: For double Death’s Breaths.
- Cain’s Destiny: For 25% more Greater Rift Keystones.
Speed GR Enchantress
For speed Greater Rifts we recommend this Enchantress setup because she is the only follower that gives Cooldown Reduction, allowing you to spam your abilities more. Since this is speed content, she’ll stay alive with Esoteric Alteration and Mutilation Guard and use Hand of the Prophet to gain all skills. This will give us Cooldown Reduction, Elemental Damage, Reduced Damage from Ranged Attacks, Armor, Attack Speed, and a Cheat Death.
Stat Priorities:
Since we do not have the immortality focus, we need to stack survivability on our Enchantress.
Intelligence > Vitality > Life % > Armor > All Resistance > Life Per Hit > Attack Speed.
Key Items:
- The Flavor of Time: For double duration on Pylons.
- Nemesis Bracers: For more progression from Elites.
- Oculus Ring: For 85% increased damage.
- Ice Climbers: To make your follower immune to Freeze and Immobilize effects.
- Hellfire Ring, Leoric's Crown and Cain's Destiny: For more Experience and Attack Speed.
GR Pushing Enchantress
For Greater Rift Pushing we recommend this Enchantress setup for the Slow from Temporal Pulse, Cooldown Reduction from Prophetic Harmony, Damage Reduction and Armor from Powered Shield, and the Attack Speed from Focused Mind.
Stat Priorities:
Since we have the immortality relic, we do not need to stack survivability on our Enchantress.
Intelligence > Attack Speed.
Key Items:
- The Flavor of Time: For double duration on Pylons.
- Nemesis Bracers: For more progression from Elites.
- Oculus Ring: For 85% increased damage.
- Unity: For 50% damage reduction if you're also wearing one.
- Ice Climbers: To make your follower immune to Freeze and Immobilize effects.
- Leoric's Crown and Cain's Destiny: For more Experience and Attack Speed.
Fun Fact
Some Solo Necromancer players use any Weapon with Cold damage and choose none of the skills to proc Lost Time permanently.
Asheara's Vestments Mechanics
Asheara's Vestments can be crafted at the Blacksmith and consists of four pieces:
- Asheara's Custodian
- Asheara's Finders
- Asheara's Pace
- Asheara's Ward
It is a very underused set but provides multiple Follower bonuses and brings them into group play. Here are the mechanics of Asheara's Vestments (4) Bonus:
- Summons all 3 Followers to your aid.
- Works in groups.
- Followers fight with you for 30 seconds.
- Cooldown of this effect is 60 seconds.
- 20% chance to proc per hit (influenced by the proc coefficient of the skill the player attacks with).
- Oculus Ring does not stack (only 1 ground effect procs).
- Unity does not stack (max. 50% damage reduction).
- Emanation only works for the one currently hired Follower and only for the player that summoned the Followers with Asheara's Vestments.
- Followers cannot proc Asheara's Vestments themselves.
- Summoned Followers give the full benefit of their skills and items to the player that summoned them.
- Skill effects do not stack with each other if multiple party members use Asheara's Vestments.
- Debuffs from Onslaught, Piercing Shot and Erosion are additive and stack additively with each other (for a maximum of +30% with all 3 Followers skills active) and also work for party members.
- Scoundrel's new Critical Hit Chance debuff Night's Veil works for party members. That is especially useful for the Rift Guardian.
- No other Follower skills work for party members.
Video Guide
Patch 2.7.0 brought Followers back to life and makes them pretty useful! This feels good for solo players and closes the, until now, ever growing gap between group and solo gameplay. Enjoy Season 24!
Credits
Written by Rob with special help from Northwar & Chewingnom.
Updated by Chewingnom.