Greater Rift Pushing Guide
Last Updated:November 8, 2023|Changelog
Greater Rifts are the main endgame activity in Diablo 3 where you spend nearly all of your playtime. After leveling to 70 and acquiring some Greater Rift Keystones in Nephalem Rifts, you gather more loot, experience and Legendary Gems here.
These rifts are randomly generated and require you to fill a progression bar that ultimately spawns a Rift Guardian you have to defeat. They have multiple floors out of a predetermined map pool with variations in their layouts. Each floor spawns with 1 out of 33 monster sets and an amount of Elite enemies corresponding to the size of the layout.
In short, Greater Rifts are designed to offer further endgame progression that goes beyond the fixed difficulty settings of Normal to Torment XVI and provides (near) infinite scaling. Meta endgame builds easily crush the highest regular difficulty and instead aim much higher in Greater Rifts, which provides bigger benefits and rewards. If you are more interested in farming, you should take a look at this post explaining Experience Mechanics for Paragon farming as well us our Experience Farming Tier List and the Group Experience Meta. The rest of this post will cover general Greater Rift pushing.
Core Concepts of Pushing
After all is said and done, the items and paragons have been farmed, the gear augmented, loads of Greater Rift Keystone acquired, there comes a point where it is time to finally see how far you can go with your character. This process is called pushing (the leaderboards or your personal best), as you try to go to the highest Greater Rift Tiers possible. This is typically done at the end of a season or when you decide your character has reached its peak.
It's easy to beat a dream rift that serves you the perfect RNG on a silver platter, but it's in those where things don't go according to plan where you can distinguish yourself as a player the most. This is why you need to learn about how to push most effectively.
Unlike speedfarming, which is what you do most of the time, pushing is a lot more slow-paced, skill-based and decision-oriented. In the end, it comes down to doing one successful run out of however many attempts you are willing to do. Pushing is more of a journey, and not something that you simply do. You need to set a goal that you want to reach, put your mind to it, and then keep at it until you reach it. Only this way you will be able to achieve the highest record you can.
This means you will have to fish for maps, you will find a lot of runs that have almost all the things lined up, and you will fail some of them very closely. Until, eventually, the stars align and you finally spawn that right Rift Guardian with enough time to finish it. Even though only one successful run counts for your personal best or a leaderboard spot, it's still very important to consistently give a good performance, as the better you play, the less you have to rely on RNG to beat your previous record or other players on the leaderboards. If you finally manage to get the dream rift and then sloppy gameplay results in a close fail, you'll have wasted a great opportunity.
Understanding Hit Points Scaling
Unlike in farming, here you will not kill anything very easily. Fights, especially against elites and Rift Guardians, usually last multiple minutes. It's very common to fight elites for minutes and eventually leave them behind at 10% HP because it would simply take too long to finish them off. Since the monster HP rises by 17% multiplicatively every single Tier, you usually cannot outright brute-force your way to GR150 because a Diablo 3 character can only be so strong before you run out of things to improve. Even farming more paragons will only squeeze out a few more Tiers at the end after gearing (e.g. the difference between a paragon 1000 and a paragon 3000 character is around 4 Tiers on average, and from there to paragon 5000 maybe another 2-3 Tiers).
Because of the multiplicative nature of GR-scaling and the exponential increases through Area Damage, the HP (and hence our required and dealt DPS) values skyrocket really quickly when entering the high Tier rifts. Here are some values to help you understand just how much more damage you need to do to beat certain levels:
- +1 Tier = 17% (x1.17 HP)
- +2 Tiers = 37% (x1.37 HP)
- +3 Tiers = 60% (x1.60 HP)
- +4 Tiers = 87% (x1.87 HP)
- +5 Tiers = 119% (x2.19 HP)
- +10 Tiers = 381% (x4.81 HP)
- +15 Tiers = 954% (x10.54 HP)
- +20 Tiers = 2211% (x23.11 HP)
- +25 Tiers = 4966% (x50.66 HP)
- +30 Tiers = 11060% (x111.06 HP)
- +35 Tiers = 20712% (x208.12 HP)
- +40 Tiers = 45530% (x456.30 HP)
- +45 Tiers = 99940% (x1000.41 HP)
- +50 Tiers = 219235% (x2193.35 HP)
As you can see, the HP scaling gets ridiculous very quickly, and even the last value of 219235% from 50 Tiers can still be taken to the power of 3 because there are actually 150 Tiers in the game. This should give you an idea how we even got into a situation where a Rift Guardian in solo 150 has roughly 500 Quadrillion HP to begin with.
This table also helps to highlight the importance of good gameplay and Area Damage especially. There is no way to increase the raw (sheet) damage of a Character by these amounts after you have already built the core setup such as your 6-piece set, the main legendary items, leveled some paragons and legendary gems, etc. Compared to these values, everything else you progress your character with becomes miniscule in the grand scheme of things, including changing your setup for some more DPS choices. Most optimized builds tend to solo speedfarm somewhere around GR90-120 in 2 to 3 minutes.
However, in pushing, they are able to do somewhere between GR130-150, which means an increase of over 100 to 200 times in monster HP. Since even the speedfarming variations typically don't drop any of the core multiplier items that make a build, you can only adjust your overall damage done by maybe a few times (e.g. by swapping legendary gems, passives, maybe 1-2 utility items to more DPS, ...) until you run out of options. The rest of that x100 to x200 gap in HP must mainly come from kiting, Area Damage, Conduit Pylons, Bane of the Stricken and a few other things.
In short: Monster HP rises extremely fast through exponential scaling because it multiplies the value of the previous GR Tier by 1.17 each time. This means that going even 2-3 Tiers below your realistic cap will make beating a rift significantly easier while barely changing the rewards.
The Value of Area Damage
The main way to scale up your damage (with only a few exceptions of builds where it doesn't work) is Area Damage. Essentially, you increase your damage done not only by adding more monsters on the screen so that you can hit more, but you also deal more damage to each of them per enemy. So by kiting big packs of monsters together, you can scale your damage exponentially, which is what eventually allows you to overcome the ridiculous requirements to beat a high Tier Greater Rift. This is also why in many guides and especially solo pushing variations, this is one of the most important stats, and playing around it well is also one of the most crucial things to learn to improve your overall performance.
To show you how important it really is, take a look at the following tables. This one shows the total damage done with a base value of 100 per target, and the damage done by Area Damage procs at three different hypothetical values (50%, 100%, 150% total Area Damage on the character). The numbers assume the (unrealistic) scenario that all enemies are stacked on top of each other, which will prove difficult to do in most solo pushing situations after a certain point.
| Targets | Damage | AD (50%) | AD (100%) | AD (150%) |
| 1 | 100 | 0 | 0 | 0 |
| 2 | 200 | 20 | 40 | 60 |
| 3 | 300 | 60 | 120 | 180 |
| 5 | 500 | 200 | 400 | 600 |
| 7 | 700 | 420 | 840 | 1260 |
| 10 | 1000 | 900 | 1800 | 2700 |
| 12 | 1200 | 1320 | 2640 | 3960 |
| 15 | 1500 | 2100 | 4200 | 6300 |
| 20 | 2000 | 3800 | 7600 | 11400 |
| 25 | 2500 | 6000 | 12000 | 18000 |
| 30 | 3000 | 8700 | 17400 | 26100 |
| 35 | 3500 | 11900 | 23800 | 35700 |
| 40 | 4000 | 15600 | 31200 | 46800 |
| 50 | 5000 | 24500 | 49000 | 73500 |
| 60 | 6000 | 35400 | 70800 | 106200 |
As you can see, while your normal hit damage simply scales linearly (100 x amount of targets hit), your area damage starts slow and then quickly overcomes your actual damage done until it eventually skyrockets to incredible values.
Below you can find a closer look at one specific data point from this table, at 25 targets:
| Targets | Damage | AD (50%) | AD (100%) | AD (150%) |
| 25 | 2500 | 6000 | 12000 | 18000 |
| Total Dmg | 8500 | 14500 | 20500 | |
| AD Share of Dmg | 70.59% | 82.76% | 87.80% | |
| DPS increase by percent | 240% | 480% | 720% | |
| DPS increase per 20% AD | 28.2% | 16.6% | 11.7% | |
As you can see, even for a character using no Area Damage at all from their items (only 50% in Paragons), the overall damage done by it is still much higher than the base damage of the hit (over 70% of total damage done). This just becomes more as the values of AD increase, up to ~83% at 100% AD and ~88% of total damage at 150% AD. Here you can also see the value of Area Damage on your items: even at an extremely high AD value of 150% already present (almost every single slot you can have it, the absolute maximum is 198%), an AD-roll is very valuable with a 11.7% overall DPS increase (given you constantly attack 25 stacked targets at a time, which is unrealistic in solo gameplay but can be achieved temporarily with grouping abilities such as Piranhas Piranhado, Ground Stomp Wrenching Smash or Black Hole). Typically Area Damage competes with stats like Attack Speed or Average Damage (on Rings), both of which give you an increase of around 5-7% DPS per roll. It's easy to see why AD generally outclasses these stats when pushing. Even at rather modest values of 5 or 10 stacked enemies, the effect is much higher than what other stats would offer:
| Targets | Damage | AD (50%) | AD (100%) | AD (150%) |
| 5 | 500 | 200 | 400 | 600 |
| Total Dmg | 700 | 900 | 1100 | |
| AD Share of Dmg | 28.57% | 44.44% | 54.55% | |
| DPS increase by percent | 40% | 80% | 120% | |
| DPS increase per 20% AD | 11.4% | 8.9% | 7.3% | |
| Targets | Damage | AD (50%) | AD (100%) | AD (150%) |
| 10 | 1000 | 900 | 1800 | 2700 |
| Total Dmg | 1900 | 2800 | 3700 | |
| AD Share of Dmg | 47.37% | 64.29% | 72.97% | |
| DPS increase by percent | 90% | 180% | 270% | |
| DPS increase per 20% AD | 18.9% | 12.9% | 9.7% | |
Obviously, for these numbers to work out in your favor, you have to be good at making big pulls and constantly fight multiple enemies at a time. This also doesn't consider that in some situations, you will simply not be able to add more monsters to the fight (e.g. at the end of a floor or when fighting most Rift Guardians) and thus gain no benefit whatsoever from Area Damage (as it only starts work with at least 2 targets present). In addition, certain builds straight up don't work with the stat at all (e.g. Witch Doctors with Spirit Barrage The Barber, Wizards with Chantodo's Resolve, Thorns of The Invoker Crusaders, etc.).
In short: the more Area Damage, the better, but generally don't roll it instead of core DPS stats such as Crit Chance, Crit Damage or Elemental Damage.
If you want to learn more about this, check out the in-depth post by sVr: Area Damage Mechanics
Rift Fishing Explained
Rift fishing is the process of opening and closing rifts until you find a good one that is worth trying. The truth is that Diablo 3 is a very RNG-based game and this includes ranking on the leaderboards, too. To even out the RNG (randomness) a bit, players especially further up on the leaderboards go straight for only the good maps and monster types, or in some cases even heavily optimize for very hard-to-find, very specific scenarios.
Greater Rift Tier Gains through Fishing
For the following, consider the example of a well-geared character playing an A-Tier build and an experienced player controlling it. The average run they could comfortably clear is around GR125, after which it starts getting a bit tougher with a real chance of failing here and there.
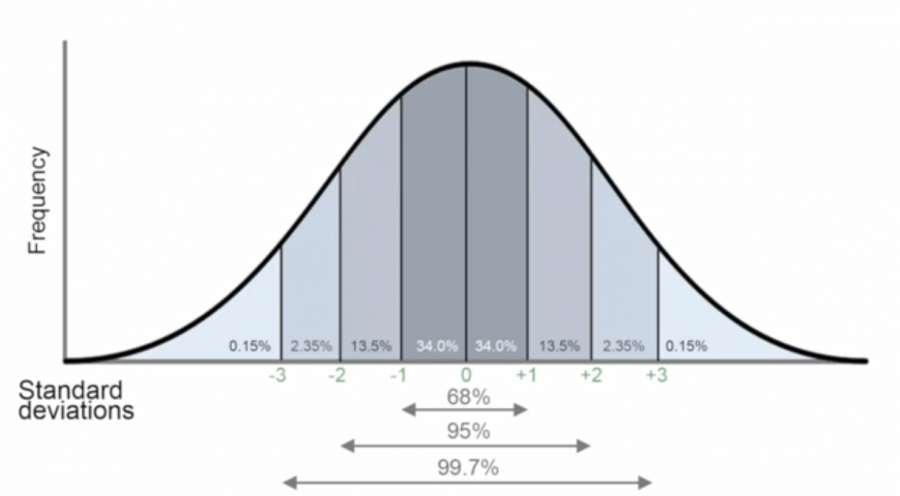
In general, the total RNG range of most builds lies somewhere between 10-16 Tiers, meaning that in the worst case scenario you could fail a GR120 (with the 1/1000 nightmare rift) and in the best case example you could clear a GR135 (with the 1/1000 dream rift), with your average successful run (around 80% of the keys) ranging somewhere in between GR126-130, and the remaining 20% of keys spread out somewhere over the other Tiers at the lower and the top and, respectively. Effectively, just like with most other real-life occurrences of randomness, the game also follows a normal distribution (Bell Curve) towards both ends of the spectrum, similar to this:
Typically I would advise even for more casual pushers to skip most bad layouts that you find on the first floor, such as Caves, Keep Depths and other narrow maps, unless they turn out to have a very good monster set (e.g. Vile Swarms). So all in all, simply leave around 4/5 keys immediately upon entering to average out a little bit on the upper side of the RNG spectrum (so around GR130-132 to stick with the above example, skipping the bottom 80% or more of all results).
To give a very broad example of the impact of fishing, here is a list that I have created based on my experience of pushing over 20000 keys throughout many seasons:
- ~10 keys: 1 Tier
- ~25 keys: 2 Tiers
- ~50 keys: 3 Tiers
- ~100 keys: 4 Tiers
- ~250 keys: 5 Tiers
- ~800 keys: 6 Tiers
- ~2000 keys: 7 Tiers
- ~5000 keys: 8 Tiers
Obviously these numbers don't necessarily mean that you will get exactly this result in that amount of keys, as the rifts and outcomes are still random. It's more meant in the sense of "on average (given the specified amount of attempts), you will find one rift that - if played perfectly - you will be able to beat on that Tier with your current character". This list does not consider your own potential failures as a player (e.g. by taking wrong decisions or dying too much), but instead focuses on the theoretical possibility of being able to clear the given rift.
Important RNG-Factors that play a Role
Here's a (very rough) list and estimation for the different RNG factors that you can encounter:
- Top 7 map (Stinging Winds / Shrouded Moors / Desolate Sands)
- Top 4 map (Briarthorn Cemetery / Fields of Misery / Battlefields of Eternity / Festering Woods)
- Good layout ("4-corner-layout")
- Top 50% mob type
- Top 10% mob type
- Conduit
- Well-positioned Conduit
- Other good pylons
- Good elites
- Even better elites
- Easy affixes
- Good follow-up maps
- Even better follow-up maps
- Good Rift Guardian
- GG Rift Guardian
- Build specifics
Each point of which would increase the overall expected result by around 1 Tier. In some cases, some factors might way more or less (e.g. a Conduit pylon is much more effective when wearing The Flavor of Time, some builds don't care much about elite affixes, some builds require open maps much more than others, some builds benefit a lot from fishing for exactly 1 specific monster type instead of simply the top 5, etc...), but typically it evens out over the different types of builds. There are certain builds (e.g. Impale Demon Hunter or Invoker Crusader that are very consistent and much lower on the RNG spectrum simply because of how they overall perform in different situations, while some others show extreme highroll potential (such as Spirit Barrage Witch Doctor) due to their extraordinary requirements of high density monster packs at all times.
In short: RNG plays a role and most of the bad stuff can be either eliminated or played around by simply throwing away 4/5 keys in order to get some decent chances for a clear already. A handful more Tiers can be squeezed out with more and more investment.
Finding the right GR Tier to push
If you are playing strictly solo (or at least unlock Tiers in solo only), you will not have such an issue with this topic. However, it can be useful to figure out how far you can realistically go by getting a few more data points from other players. It can be quite difficult to estimate what your character should be capable of doing, as especially for not close-to-maximum optimized characters there can be huge differences in how the builds play and feel (e.g. due to lack of specific resistances, lack of Cooldown Reduction rolls, low Area Damage values, ...).
Determining your "Realistic Cap"
When pushing, it is important to - in addition to your character's - understand your own personal limits that you want to stick to. You have to realize how many attempts you would like to bear before giving up or running out of time in the season. So before you start your actual Push, be aware of how far you want to go, and adjust your goals accordingly (as provided by the list above). It can feel very bad to push your character and never get a clear until the end of the season - even after hundreds or thousands of attempts - because you overstretched the RNG requirements a little too much and missing out on clears you could have achieved one level lower. Trust me - been there, done that. If you are not ready to go for an infinite amount of attempts, lower your goal by 1-2 tiers until it feels like a reasonable challenge.
Good Maps
There are varying types of maps, most of which are plain terrible or at the very least not really great to push on for most builds. As you try to make big pulls and kite elite for many minutes until they eventually die, you need something where there's a little bit of space to work with.
A good map is the most influential factor when deciding at the start of the run which is a worthy attempt and which I should remake. In essence, you can get one of the top 7 maps (Fields of Misery, Festering Woods, Battlefields of Eternity, Briarthorn Cemetery, Shrouded Moors, Stinging Winds, Desolate Sands) in around 1 in 3 keys used.
There are a few more that work well some of the time, when you get a good combination of layout and monster type on top of it. These are Plague Tunnels, the Wudicave (Vile Cavern from Act 2), Silver Spire and Arreat Crater. Combined with the top 4 maps, we are looking at a chance of around 1 in 3 keys to find one of these. However, compared to the top ones, most of the time these extra maps don't turn out very great and are simply quit after a very short time when it becomes clear that the map might be too small, has terrible monster types or simply only very narrow tiles in the layout.
Getting a good first map is the most important step to a successful run, and while theoretically some of the other maps can also turn out okay or even good because of other lucky RNG factors involved (mob type, great elites, good pylons, ...), it's very unlikely that they will and you might just waste some minutes playing through them until you enter floor 2 and leave anyway. The main advantage of the top maps is not just that they are generally wide with lots of room for big pulls and easy kiting, but also that they straight out carry more progression on one floor. This means that whenever you open a Festering Woods with one of the good monster types, you can be pretty much sure to complete at least 30-90% of the total progression bar on that one floor, even if you might have to skip certain elites, don't get crazy pylons, etc.
This heavily reduces the to RNG requirements for the follow-up maps, as you only need to do a little bit more progression to get to the Rift Guardian. Even in bad maps, it can be easy to just walk into one of the big rooms, blast down a medium-sized trash pull, and move on to the next floor, until you eventually get the last % needed. Given you have a big enough time advantage, you can usually afford to fall behind again a little bit during the end of the run when most of the juicy parts are cleared already.
Good Monster Types
In total, there are 33 different combinations of monster types you can roll on every single floor. Some of the best monster types include:
- Vile Swarms
- Transformers (Dark Vessel, Unburied, Revenants)
- Lacuni/Phasebeast
- Zombie/Grotesque
- Ghost Combo (Ghosts, Shadow Wraith, Ghastly Gravedigger)
- Chickens (Armored Destroyer, Hellflyer)
- Summoner Combo (Blazing Ghoul, Tomb Guardian, Skeletons)
- Bee/Accursed
- God Comb (Cultists, Summoner Cultists, Hellions)
These are not necessarily the only monster types that work well, and some others can also highroll to give you a very good result. However, overall, these work best for most builds as they show one or more of these characteristics:
- a decent mix of enemies with similar HP values
- extra progression/monster spawns during the run
- lots of (fast) melee trash you can kite and pull
- very stackable enemies due to small collision boxes
That doesn't necessarily mean that these monster types are easy to defeat, it just means that if you play around them properly, you will be able to get most progression out of these compared to others, as many other monster types simply don't allow you to even have a chance even when you do it well.
Regardless, it's still very likely you will fail a map with Lacuni/Phasebeast or Transformers despite those two being among the best in the game, simply because you need to micro-manage a lot of things in such a run (due to the spawner-types that give you extra Zombies / Dark Vessels that you need to avoid killing before they change forms). Along the same lines, every single monster type has its own behavior and patterns that you need to adjust to in order to play it perfectly, some more than others. This requires lots of practice and experience with all of them.
The Progress Calculation
At this point it's important to understand how much progress you gain from killing certain things. In general, progression is loosely tied to monster HP, their skills and special dangerousness, so you can understand the overall idea by looking at the following examples:
- Maggot (0.04%)
- Skeleton (0.09%)
- Accursed (0.09%)
- Enraged Phantom (0.12%)
- Vile Swarm (0.15%)
- Ice Clan Warrior (0.19%)
- Arachnid Horror (0.23%)
- Unholy Thrall (0.38%)
- Fallen Master (0.46%)
- Skeletal Beast (0.64%)
- Executioner (0.85%)
In order to fill the progress far, you need to kill a combination of monsters that will amount to 100% total (duh). You have 15 minutes time to do that and kill the Rift Guardian, which, depending on your build, will take somewhere between 1 to 6 minutes in most cases. If we calculate with an average kill time of 3 minutes, this will leave you with 12 minutes to gain 100% progression, or 8.33% progress needed per minute. From the above example, this would require us to kill
- x92 Skeletons,
- x36 Arachnid Horrors,
- x18 Fallen Masters or
- x10 Executioners
Even some of these trash fights will last for several minutes, depending on how well they are kitable. If your build is using Convention of Elements, you can even break this calculation down into individual nuke cycles (5 per minute for Necros, 3 for Monks, around 4 for other classes). As is evident, it's quite hard to find and kill close to 100 Skeletons or 10 Executioers within a minute, even when you would go at almost farming speed. This means you need extra progression coming from elites, and just relying on trash monsters is not enough.
Elites, on top of their usual monster type's progression, provide progression globes when killed. There is no inherent benefit to killing elite enemies or minions until you acquire these globes. They have higher than normal HP, but still give the same progression, so finishing them off is the only relevant step in the process of defeating them.
- Blue packs give 3 progression globes à 1.15% for a total of 3.45%.
- Yellow packs give 4 progression globes à 1.15% for a total of 4.60%.
This means that killing an elite pack is roughly the equivalent of half a minute of time during a push (bit more for Yellows, bit less for Blues). Considering that even finishing off a 5% elite pack can take longer than that, the standard setting for any pack you encounter (especially in narrow maps) is: skip it - unless you know you will spend several minutes nearby or a miracle happens. For most builds in the game (excluding Impale DH and Frenzy Barb for example) elites are only killable when you can kite them with little time loss until they die eventually, or when you get a Conduit Pylon.
There are still situations where it might be worth wasting a bit of time to finish off certain trash or elites, as long as it doesn't take excessively long. These situations arise for example when you have reached the end of the floor and you already know that the next one is quite terrible, or when you wait/gamble for the next Pylon spawn soon that would save your run and similar considerations.
In short: Killing large packs of small monsters is typcially much faster than killing a few big monsters. The same applies to Elites, which generally have too much health to be even considered worth trying. High Elite HP is the main reason why fishing for a good map is so important - you can kite them until they die eventually.
Decision Making
During the run, decision-making is key to success. It's not just about opening the right rift, and having the theoretical possibility to clear it, it's equally about what you make out of that opportunity. It's you against the world for 15 minutes, and to prove yourself, you must take each step very carefully. The main points of consideration are explained here:
Skip versus Kill
By far the most important one, and also by far the most common mistake, is fighting a hopeless fight: You need to skip enemies. A lot. As you have seen above with the details about HP-scaling and Area Damage, big pulls are key to dealing any kind of noticeable damage and thus getting any progression once you go to the highest Tiers. This means that as you thin out the density, your DPS will plummet, and you will very often find yourself in a situation with some low HP trash or elites sitting there, teasing you to finish them off, but you will simply not be able to as you have just lost 90% of your DPS from killing everything around them. Wasting time on small pulls is what holds many people back from going higher than they otherwise could.
Similarly, certain monster sets are simply so terrible that you usually want to skip the entire floor of them, as they are either too dangerous or too unrewarding or too difficult to stack up or a combination of these factors. Also, skipping elites is a decision you need to make quickly at the moment of engagement. Consider the monster type (you can't do much against Armaddons), their affixes (do they spawn Walls or Illusions all the time?), their position on the map (are they at the start or end of the floor?), the possibility for a Conduit nearby (did you spawn a pylon recently?), the dangerousness (do they have a combo that will kill you?), nearby trash monsters (can you find enough to fuel Area Damage procs on them?) and how much progression you still need to make (can you afford to begin a several minutes-long elite fight before time runs out?).
As a rule of thumb: When in doubt, SKIP IT.
Manipulating Pylon Spawns
During a Greater Rift, you get 2-4 Pylon spawns. This number is randomized and there is no way to get all 5 Pylons in the same run.
The different Pylon types ranked by overall impact are:
- Conduit Pylon
- Power Pylon
- Shield Pylon
- Speed Pylon
- Channeling Pylon
Obviously this may depend on the build you are playing, as especially Channeling Pylons can vary greatly in value for very Cooldown heavy builds such as Necromancers with Land of the Dead. Conduits are almost a necessity for builds trying to reach the highest Tiers using The Flavor of Time. Shield Pylons might be useless because your build is already tanky enough, but can be a great boon for the squishy ones to finally stand still and nuke in peace. Speed Pylons can be actively harmful to your builds (especially when you rely on grouping ability such as Ground Stomp Wrenching Smash or Piranhas Piranhado).
Pylon spawns in Greater Rifts follow these rules:
- all Pylons have equal chances to appear
- the same Pylon can never appear twice
- they spawn on fixed Pylon locations
- they can never spawn in explored areas
- they can not spawn after the Rift Guardian is summoned
- you have to make progression to have a chance of spawning one*
- the more progress you make, the more likely you are to find one
- Pylons spawn offscreen, around 1.5 screens away from the player
- typical ranges between Pylons are 10-25% progression
- if you make too much progress without ever finding a Pylon spot, you can lose it (Rifts with 0-1 Pylons are possible if that happens, but there is a bit of a buffer)
* It's possible to find Pylons at 0% without having ever killed a mob, and similarly it's possible to find two Pylons in a row without getting extra progression. These cases are very rare though (~1/100).
Use this knowledge to your advantage to play around Pylons. If you go for the highest possible Tier, you have to find a Conduit in a decent spot so you can finish off a bunch of elite packs. Learn the Pylon spots, especially on the good maps, and learn how you need to progress to find most of them. Sometimes finishing off those few monsters to get another 2% progression might just be what flipped the switch to your GG Conduit Pylon.
If you want to see more on this topic, check out the video about how Pylon Spawn Mechanics work.
Using Pylons effectively
In the end it's not just about getting the right RNG, but also about using it to your advantage. Pylons are precious and shouldn't be wasted, so especially in the big maps, you want to prepare for them. Make a pull around them, so you don't have to spend valuable time during their effect doing so. A Conduit Pylon should be used primarily for finishing off elites, as it's easier to mow down the trash yourself (benefitting from all the Area Damage you have). Best case you can stack up 4 or more packs around a Conduit, have them already a little bit damaged and the trash cleaned up, and then activate the Pylon to finish them all. Likewise, you want to use a Power Pylon or Shield Pylon at your moment of greatest strength, so it could be wise to find all the trash monsters around and bring it close before using it. Certain builds can unleash devastating combos with a Power with proper preparation (e.g. through Spirit Barrage with The Barber or Fan of Knives with Lord Greenstone's Fan).
Deciding when to leave a run
Even after you have found a really good Greater Rift, with a nice map, juicy enemies, great elites, you still might not be able to complete it because something else is missing, be it the Conduit Pylon in the right spot, be it the right Rift Guardian (as some builds require very specific RGs to have a chance), be it because of some gameplay mistakes you made or some other factors that simply didn't work out in your favor. To not waste your time in an otherwise failed run, you need to realize when it's time to cut the line and just "go next". Learn how much time you need for the typical Rift Guardian and how much you need for the best Rift Guardian for your build. Think about how likely it is find the next Pylon that could still save your run. Or skip a bad floor and see if the next one is incredibly good. Even if you have invested 10 minutes into a run already and are close to spawning the Rift Guardian, it might be already hopeless and you should simply leave and start another one. You will need many attempts to push to the highest Tier possible and every minute is valuable on your way to the one successful run.
In short: Decision making is half of your run. If you don't play around what you are given and use the odds in your favor to try to kill certain Elite packs or spawn the right Pylon in the right place, you will lose valuable good attempts that might have been a successful clear.
Creating Density
One of the biggest factors when pushing is the number of enemies you have on your screen. The more enemies you hit, the more you can kill at once, and usually the higher your DPS will be (due to the Area Damage scaling explained above). This means you have to engage as many enemies as possible, and since in many cases it will take quite long (up to multiple minutes) to kill them, you have to keep kiting them through the map as you keep adding more to the pull.
Every monster type has a slightly different behavior when it comes to following you, so you need to develop some experience with it as you try to progress your way through different rifts. Not every rift that doesn't come with a top tier map or mob type has to be automatically forfeit, there are many that still work to get a bit of progress if you play around them well. This can be especially useful to still save a run that had a great start and then got only bad follow-up maps.
Generally, most enemies will slowly follow you after you walk close or hit them with an ability. DoT effects are especially useful to keep enemies engaged, as you are constantly dealing damage to them. However, some monster types are particularly unimpressed by your attacks until you walk up to them, and even when hitting them repeatedly they will just stand still and wait until you get closer (e.g. Grotesque). Similarly, there are other monster types that follow you around quickly, but then go to do other things such as shouting at you (Fallen Master), barking at you (Fallen Cur), fly away through some walls (Enraged Phantom), burrow themselves (Burrowing Leaper) or various other things. Be aware of what each monster type does and keep an eye on their movement patterns until it becomes muscle memory for you. This is very important not just for the good monster types (as mentioned above) but for all of them, as you can always find them as an elite pack and then have to understand what to do with them.
Where to create big pulls is a decision based on the surroundings, that map layout, how much you have cleared already and how well the monsters follow you among other factors. In the good maps like a 4-corner Festering Woods, you can do as little as 2 pulls to clear the entire map and almost spawn the Rift Guardian like that. In other maps, like a Keep Depths, you simply have no choice but to move through narrow corridors where most enemies won't fit until you find a somewhat open room to kite some enemies into. It always comes down to the situation you find where you arrive.
In short: High monster density is the #1 factor for fast progression and it is your job to either go find it or create it yourself, usually a combination of both.
Fighting the Rift Guardian
As the last piece of the puzzle, you will have to defeat the Rift Guardian in time. In Diablo 3, almost all builds are traditionally very heavily AoE-focused, with very few tools to deal single target damage effectively (which is a problem amplified by Area Damage, too). With the extra HP that a Rift Guardian gets (roughly x3.5 that of a yellow elite), it can take very long times, up to half of your total 15 minutes on certain builds, to finally kill it (even with a Bane of the Stricken equipped.
Without diving too much into the mechanics of Bane of the Stricken at this point, you should be aware of the following:
- The gem has an internal Cooldown scaling with Attack Speed (faster = more stacks)
- Stacks are applied to one target per attack (first target hit)
- Most typical builds will stack up ~200-400% bonus damage per minute
- On add fights you need to make sure that you exclusively hit the Rift Guardian most of the time to stack it
- Temporary damage buffs (such as Power Pylon, Wrath of the Berserker, Land of the Dead) are more effective towards the end of the fight
Some builds have a really hard time killing the RG, mostly because the only reason they reach high Tiers at all is because of insane AoE scaling mechanics (e.g. Spirit Barrage WD). This means that in such situations, add bosses such as Hamelin or Saxtris are often optimal, as you can get extra targets for Area Damage or other effects with Stricken stacks taking a secondary role. For other builds, it can be exactly reverse, and you want to get a single target boss in every case because additional adds cannot be killed in a timely manner and the extra Area Damage value can't make up for the loss of stacks on the boss. So, when you finally spawn your first Rift Guardians, even when you know you're not going to make it in time, it could be useful to try them out to learn how to outplay them and understand how much time you need for which.
In short: Understand which Rift Guardians work best for your build and learn how to fight them. No build has to die to any Rift Guardian if you outplay them.
Additional Pushing Tips
- Make sure you take all the easy upgrades you can get before attempting to push, especially rolling the right stats to high values at the Mystic, augmenting your items with available Legendary Gems, or reforging them.
- Don't overestimate yourself from the start just because other people clear higher Tiers. Try to figure out what you can do with your character.
- Don't give up during an unlucky streak of RNG. Good rifts can be hard to find or appear back-to-back. Always remember the average number of rifts you need to fish for to reach your goal.
- Leave rifts that you know you will not have a chance of completing as soon as you know it. It doesn't matter if you have already invested 10 minutes into it, you can spend that time more efficiently another time.
Video Guide
Related Content and Videos
Make sure to check out some of these videos and posts for further informations:
- Best Greater Rift Maps explained (video by wudijo)
- Pylon Spawn Mechanics explained (video by wudijo)
- 80min Tips and Tricks for Pushing (video by wudijo)
- Area Damage explained (post by sVr)
Summary
Pushing is an endeavor that comes at the end of your journey to see what you and your character are capable of. For most builds, the difference between a veteran and an inexperienced player is immense and if you want to make your way to the top of the boards or just keep growing as a player, there are many things to learn and consider.
- Make sure you understand your limits and set realistic goals.
- Hunt for the right rifts.
- Play the RNG in your favor.
- Fight large pulls and ignore lone enemies when possible.
- Decide what is worth killing and what's a waste of time.
- Use Pylons wisely.
- Don't give up when you get unlucky!
I hope you took some things from this guide that will help you out on your own personal push. Be it just for a new personal best or to reach the top of the leaderboard, these are some of the core aspects to take to heart if you want to be successful in Diablo 3.
Good luck!
Credits
Written by wudijo.
Reviewed by Raxxanterax.