Season Journey Guide Season 35
Last Updated:May 31, 2025|Changelog
Season 35 is upon us and we all know that means one thing, another Season Journey to accomplish! In this guide we explain what the Season Journey is and how you can complete it to obtain its amazing rewards. To find the Season Journey click the progress tab on the Main Menu screen or click the Map Icon in the upper right of your interface while in game.
This can only be completed once per region, per Season but the array of rewards that come with it are well worth your time. The Season Journey is a great way to get your Season going as it provides a framework for building up a character to become stronger and provides the player with a full 6 piece Class Set after finishing the first 4 Chapters.

Haedrig's Gift
When going through your Season Journey you'll find that Chapters II, III, and IV offer Haedrig's Gift as rewards, this is what most players do the Season Journey to obtain. This gift bag will be sent to your Mailbox where you can claim it to receive 2 items for your specified Class Set. The first 2 can be obtained very easily and can result in a tremendous power boost for some classes, obtaining all 3 bags yields the entire Class Set and paves a path for your character to dominate going forward. This season, each Class will have the following sets available in Haedrig's Gift:
- Barbarian – Wrath of the Wastes
- Crusader – Roland's Legacy
- Demon Hunter – Unhallowed Essence
- Monk – Raiment of a Thousand Storms
- Necromancer – Bones of Rathma
- Witch Doctor – Helltooth Harness
- Wizard – Tal Rasha's Elements
Each Season the Class Set rotates to a new one, giving players easy access to all of these sets over multiple seasons. Some Seasons a certain Class may have a much stronger Haedrig's Gift Class Set than the others but this season they are all pretty mediocre. Haedrig's Gift is not determined until you open the gift, so you can collect Haedrig's Gift and open all of the bags on a different character to obtain the Class Set if you desire. This is a fantastic way to gear up a second character if you're able to complete this portion of the Journey without needing the Set items to do it!
Efficiency
When stepping back and looking at the entire Season Journey as a whole you'll notice that there are a lot of Objectives spread across multiple Chapters that synergize well with each other. For example you'll find that you're required to spend a considerable amount of time going through Acts I-V doing Bounties, killing Bosses and hunting Keywardens. Some of these objectives only require a low difficulty and can yield great rewards early on for progression. However if you're able to bump up the difficulty to Torment IV+ early on, you can accomplish many objectives in a single round of Bounties as you can kill all the Bosses and Keywardens while doing them. Keep in mind as you are going through your Season Journey that you can complete any of these objectives at any time but that you must complete all of a Chapter's objectives before being able to receive rewards from a subsequent chapter.
Chapter I
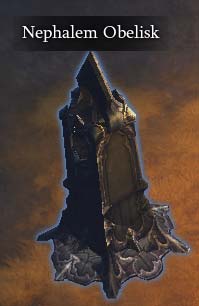
Chapter I is the easiest of them all and the objectives are rather straight forward. As mentioned above this is already where Bounties and Bosses start to be required and you can look into further Chapters to see how you can maximize your efficiency if you're strong enough to start off on a harder difficulty. For example Chapter II requires 2 Boss kills on Hard Difficulty and Chapter III requires 2 other Bosses on Master Difficulty or Higher. If you start this process by putting your game on Master Difficulty you can accomplish all of the Bounty and Boss requirements for the first 3 chapters in the same game. Keep things like this in mind as you look through all of the objectives. If you aren't familiar with Nephalem Rifts they're dungeons that you open up using the Nephalem Obelisk located in every town. The first 3 Chapters require you to clear one of these each time, again if you start on a higher difficulty the previous ones will be finished as well.
| OBJECTIVE | REQUIREMENTS |
| Complete a Nephalem Rift | While on Normal difficulty or higher |
| Complete 5 Bounties | Complete any 5 Bounties on at least Normal difficulty Do them all in the same Act to get a Bounty Cache from Tyrael |
| Socket 5 Gems into your gear | Possible sockets include Helm (1), Chest (3) and Pants (2) |
| Raise the Blacksmith to level 10 | Level up the Blacksmith in town to level 10 |
| Raise the Jeweler to level 10 | Level up the Jeweler in town to level 10 |
| Raise the Mystic to level 10 | Level up the Mystic in town to level 10 |
| Kill a Boss (Check in game) | Any Difficulty |
| Kill a Boss (Check in game) | Any Difficulty |
| Reach level 50 | Slay Demons |
Reward
None, but keep going!
Chapter II
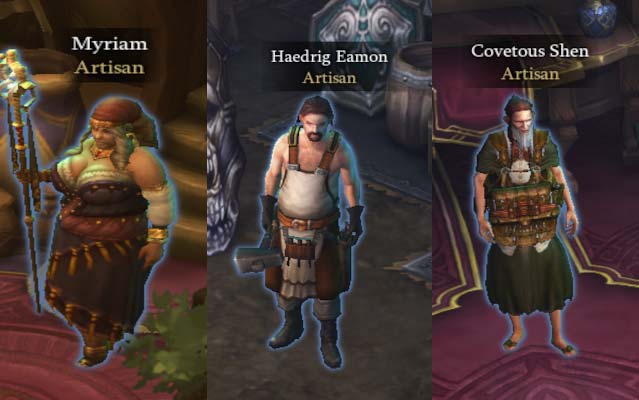
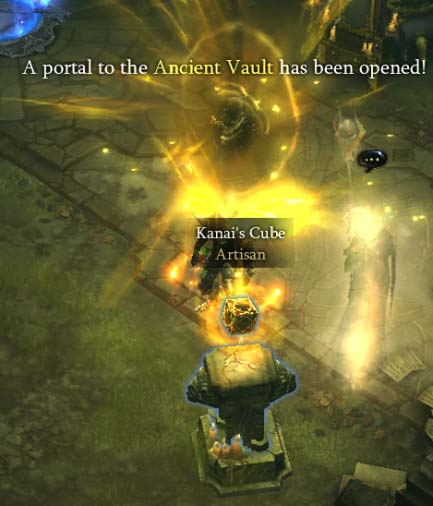
Chapter II focuses more on introducing you further to the Artisans in town and how you can utilize the Jeweler, Blacksmith and Mystic to Craft and Enchant new or existing gear. You're tasked with 2 more Bosses to kill on at least Hard difficulty as well as needing to complete a Nephalem Rift on at least Expert. If you haven't went to get Kanai's Cube now is the time and it is a bit of a walk but keep going and you'll find the Elder Sanctum inside The Ruins of Sescheron soon enough, once you're there go all the way to the end and you can't miss it!
| OBJECTIVE | REQUIREMENTS |
| Complete a Nephalem Rift | While on Expert difficulty of higher |
| Craft a level 70 Weapon or Armor piece | Use the Blacksmith in town |
| Fully equip one of your followers | Can utilize Blacksmith & Jeweler for crafting items |
| Raise the Blacksmith, Jeweler & Mystic to level 12 | Will need Death's Breath (dropped form Elites) to do this. |
| Find Kanai's Cube | Hidden in the Elder Sanctum which is within The Ruins of Sescheron in Act III |
| Reach level 70 | Slay Demons |
| Kill a Boss (Check in game) | Must be level 60 or higher and on at least Hard difficulty |
| Kill a Boss (Check in game) | Must be level 60 or higher and on at least Hard difficulty |
| Craft a level 70 Ring or Amulet | Use the Jeweler in town |
| Replace a property by Enchanting at the Mystic | Use the Mystic in town to replace an undesirable affix on an item |
| Transmogrify an item at the Mystic | Change the appearance of an item using the Mystic in town |
Reward
Haedrig's Gift - Class Set Helm & Gloves. You now have your 2 piece Class Set bonus.
Chapter III
In this chapter the Nephalem Rift as well as the Bosses need to be completed on Master difficulty or higher. You'll be introduced to Kadala and Greater Rifts now as you'll need to gamble with Blood Shards for the first time which drop from Greater Rift Guardians. Kadala can be found in every town right near the Nephalem Obelisk. Blood Shards are a great way to get pieces of gear your missing but there's always a chance to get nothing but sadness. Complete higher difficulty Greater Rifts to increase your maximum Blood Shard storage, +5 for every level reached. Master difficultly is usually very feasible in early game and this is a great starting place, at the same time Chapter IV and Torment I are just one difficulty ahead and will make our run even more efficient so highly consider making that jump especially if you have a group.
| OBJECTIVE | REQUIREMENTS |
| Complete a Nephalem Rift | While on Master difficulty of higher |
| Craft a Gem of Imperial or greater quality | Use the Jeweler in town, requires 3 Marquise Gems |
| Spend Blood Shards at Kadala | Obtain Blood Shards from Greater Rifts and gamble them in town for gear with Kadala |
| Kill a Boss (Check in game) | Must be level 70 or higher and on at least Master Difficulty |
| Kill a Boss (Check in game) | Must be level 70 or higher and on at least Master Difficulty |
| Obtain a Act I Bounty Cache | Must complete all 5 Bounties in Act I in the same game Tyrael rewards the Bounty Cache in town |
| Obtain a Act II Bounty Cache | Must complete all 5 Bounties in Act II in the same game Tyrael rewards the Bounty Cache in town |
| Obtain a Act III Bounty Cache | Must complete all 5 Bounties in Act III in the same game Tyrael rewards the Bounty Cache in town |
| Obtain a Act IV Bounty Cache | Must complete all 5 Bounties in Act IV in the same game Tyrael rewards the Bounty Cache in town |
| Obtain a Act V Bounty Cache | Must complete all 5 Bounties in Act V in the same game Tyrael rewards the Bounty Cache in town |
| Extract a Legendary Power | Use the "Archive of Tal Rasha" Recipe in Kanais Cube to Extract a Legendary Power. (Recipe #1) |
Reward
Haedrig's Gift - Class Set Boots & Shoulders. You now have your 4 piece Class Set bonus.
Chapter IV
Chapter IV is where you get the last pieces of your Class Set from Haedrig's Gift but it's also where things get a bit more difficult! Now you have 4 pieces of your Class Set though and should be ready to take on these higher difficulties and new challenges. For your solo level 20 Greater Rift check out Wudijo's guide to see how you can optimize your current 4 piece set bonus to stroll through this objective. You'll also need to hunt down the 4 Keywardens placed across Acts I-IV, these fights aren't necessarily difficult but you must find them within their designated areas. From the Bounties you've done by now you've surely found some Blacksmith and Jeweler Recipe's and likely possibly have already learned 5 of each, if not run another full act of Bounties to receive quite a few recipes in the Bounty Cache.
| OBJECTIVE | REQUIREMENTS |
| Complete a level 70 Nephalem Rift | Must be on Torment I difficulty or higher |
| Reforge a weapon property to a socket | Use the Mystic in town to Enchant a Primary Attribute to a Socket |
| Slay Odeg The Keywarden | Act I, Fields of Misery Must be level 70 on Torment IV or higher |
| Slay Sokahr The Keywarden | Act II, Dahlgur Oasis Must be level 70 on Torment IV or higher |
| Slay Xah'Rith The Keywarden | Act III, Stonefort Must be level 70 on Torment IV or higher |
| Slay Nekarat The Keywarden | Act IV, Gardens of Hope 2nd Tier Must be level 70 on Torment IV or higher |
| Kill a Boss (Check in game) | Must be level 70 on Torment IV or higher |
| Kill a Boss (Check in game) | Must be level 70 on Torment IV or higher |
| Reach Greater Rift level 20 Solo | Find Greater Rift Keystones from Rift Guardians in Nephalem Rifts Use a Greater Rift Keystone at the Obelisk in town |
| Upgrade a rare item to legendary quality | Use the Hope of Cain Recipe in Kanais Cube to upgrade a Rare item to a legendary item (Recipe #3) |
| Learn 5 Blacksmith Recipes | Recipes drop from Bounty Caches as well as Odious Collector Goblins Running Bounties is the best way to find Blacksmith Recipes |
| Learn 5 Jewelcrafting Recipes | Recipes drop from Bounty Caches as well as Odious Collector Goblins Running Bounties is the best way to find Jewelcrafting Recipes |
Reward
- Haedrig's Gift - Remaining 2 Class Set pieces depending on what is needed for completion.
- You now have your full 6 piece Class Set bonus!
- Conqueror Set boots and pants, portrait frame.
Slayer
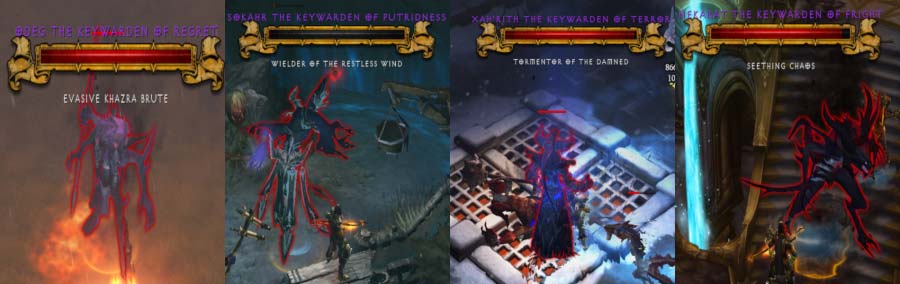
During the Slayer Objectives you'll be introduced to Infernal Machine's (Infernal Machine of Regret, Infernal Machine of Putridness, Infernal Machine of Terror, Infernal Machine of Fright) for the first time. These items open up special dungeons inside the Heretic's Adobe in Act I, here you'll fight familiar Bosses now known as "Ubers" that are super charged and paired up for battle against you. Upon killing the Ubers there is a chance to obtain a Demonic Organ (Leoric's Regret, Vial of Putridness, Idol of Terror, Heart of Fright) which drop more often as you increase the difficulty.
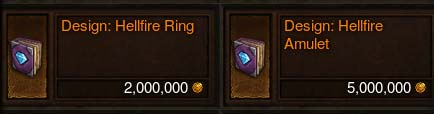
Once you've collected all four Demonic Organ's you'll be able to craft a Hellfire Amulet or Hellfire Ring at the Jeweler after obtaining the recipe from Squirt in Act II. The Hellfire Amulet is very unique in that it allows any class to pick up a 5th Passive skill however this is usually overshadowed by stronger Amulet's in the game such as Squirt's Necklace and The Flavor of Time. The Hellfire Ring offers two interesting features, one being that it has no required level and can be very useful when leveling up your next character and the other being that it always rolls with increased experience. This ring is great for the group when worn by a support character or your follower when playing solo. Keep in mind this bonus is only 20% of what's stated when your follower wears it but it's still extra experience!
| OBJECTIVE | REQUIREMENTS |
| Complete a level 70 Nephalem Rift | Must be on Torment V difficulty or higher |
| Level one Legendary Gem to level 25 | Legendary Gems drop from Rift Guardians in Greater Rifts Speak to Urshi at the end of a Greater Rift to upgrade them |
| Slay The King of the Dead and The Merciless Witch in the Realm of Regret | Must be level 70 or higher and on at least Torment I Difficulty Open the Infernal Machine of Regret which drops from Odeg the Keywarden in the Fields of Misery, Act I |
| Slay The Vile Executioner and The Foul Desecrator in the Realm of Putridness | Must be level 70 or higher and on at least Torment I Difficulty Open the Infernal Machine of Putridness which drops from Sokahr the Keywarden in the Dahlgur Oasis, Act II |
| Obtain a Legendary item by spending Blood Shards | Gamble Blood Shards with Kadala until you find a Legendary item |
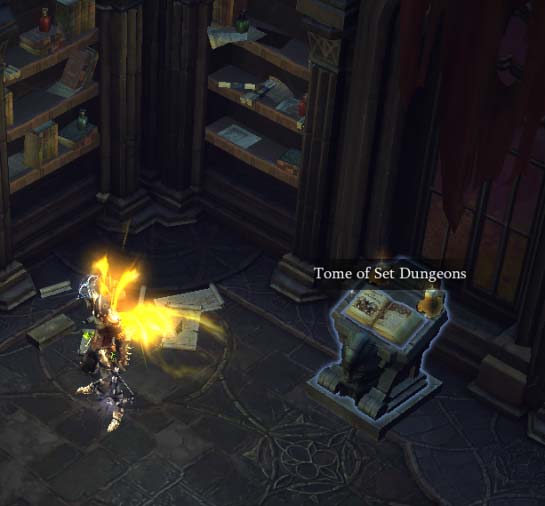
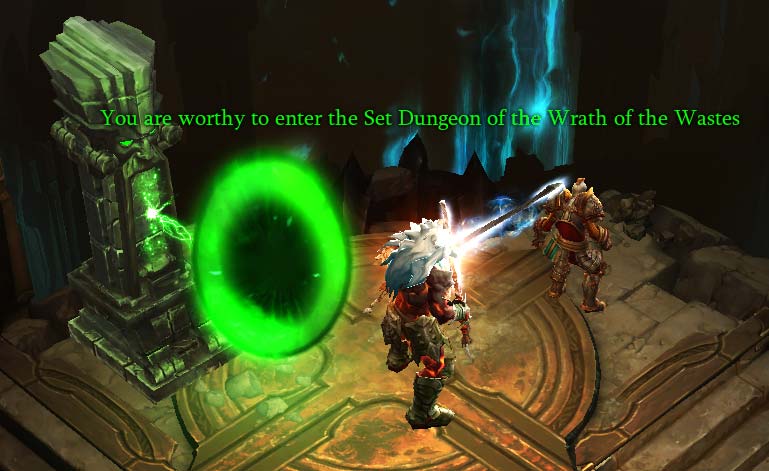
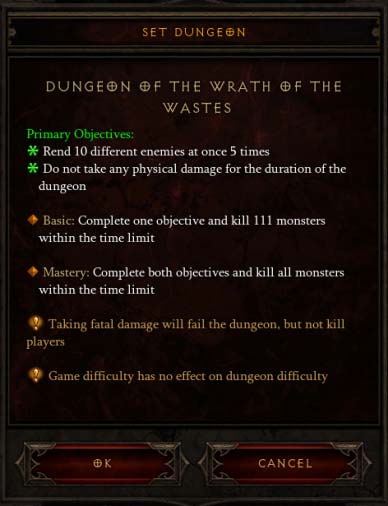
| Complete any Set Dungeon | While utilizing a 6-piece Class Set bonus use the Tome of Set Dungeons in Leoric's Manor for a clue that will lead to the Set Dungeon's entrance |
| Kill a Boss (Check in game) | Must be level 70 and on Torment VII or higher |
| Kill a Boss (Check in game) | Must be level 70 and on Torment VII or higher |
| Reach Greater Rift level 30 Solo | Find Greater Rift Keystones from Rift Guardians in Nephalem Rifts Use a Greater Rift Keystone at the Obelisk in town |
| Equip Kanais Cube with a Weapon, Armor and Jewelry Legendary Power | Must fill all 3 slots on the same character |
The Slayer objectives also will introduce you to Set Dungeon's for the first time. These are unique dungeons dedicated to highlighting unique Class Sets. Every class has 4 Set Dungeon's based off 4 different Class Sets that can be completed, each offering unique challenges and restrictions that make them fun to complete and difficult to master. To find the entrance to each Class Set Dungeon you must put on the Class Set and visit the Tomb of Set Dungeons for a clue, this is found in the Royal Quarters which is in Leoric's Manor up the staircase to the right. Completing Set Dungeons won't lead to Unique item drops or crafting possibilities however mastering 24 of the 28 Set Dungeons (excluding Necromancer) will reward the player with arguably the coolest cosmetic wings in the game the "Wings of Mastery."
Reward
Portrait Frame
Champion
So you think you're a Champion? Well you're going to have to prove it with this set of objectives before moving on to the next step on your Season Journey. To be a Champion also means you must craft a Flawless Royal Gem which will require you to find the recipe and it costs 81 Marquise Gems to create. Make sure you're always picking up Gems once they're dropping at Marquise and Imperial quality as you'll need quite a few to have all max level Gems in your gear.
| OBJECTIVE | REQUIREMENTS |
| Complete a Nephalem Rift | Must be level 70 and on Torment X or harder Nephalem Rift has to be completed within 6 minutes |
| Level 3 Legendary Gems to 35 | Legendary Gems drop from Rift Guardians in Greater Rifts Speak to Urshi at the end of a Greater Rift to upgrade them |
| Craft a Flawless Royal Gem | Must find this recipe from Bounty Cache's or Goblins |
| Slay The Savage Behemoth and The Undying One in the Realm of Terror | Must be level 70 or higher and on at least Torment X Difficulty Open the Infernal Machine of Fright which drops from Xah'Rith the Keywarden in Stonefort, Act III |
| Slay The Soul of Evil in the Realm of Fright | Must be level 70 or higher and on at least Torment X Difficulty Open the Infernal Machine of Terror which drops from Nekarat the Keywarden in the Gardens of Hope 2nd Tier, Act IV |
| Complete an Echoing Nightmare | Fins a Petrified Scream to open an Echoing Nightmare |
| Kill a Boss (Check in game) | Must be at level 70 and on Torment X or higher |
| Kill a Boss (Check in game) | Must be at level 70 and on Torment X or higher |
| Reach Greater Rift level 40 Solo | Find Greater Rift Keystones from Rift Guardians in Nephalem Rifts Use a Greater Rift Keystone at the Obelisk in town |
| Convert a Set item with Kanais Cube | Use the "Skill of Nilfur" Recipe in Kanai's Cube to convert a Set Item (Recipe #4) |
Reward
Portrait Frame
Destroyer
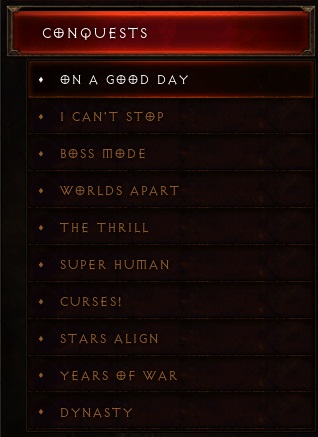
Now that you're a Champion it's time to be introduced to another unique challenge you haven't seen yet, Conquests are unique Season Challenges that come with their own Leaderboards as well. In this Chapter you'll need to complete one of these Conquests, to find them check out our Conquests Guide or check out the Leaderboard Menu in game. Shown on the right is the list of Conquests that you can find within the Leaderboard, there are always 5 each Season with a Softcore and Hardcore version of them.
It's time to use the Demonic Organs you've collected as well and will need to buy Design: Hellfire Amulet from Squirt in Act II as well as learning and crafting the Amulet at the Jeweler. Everything else in this Chapter should be feeling rather familiar by now, the remainder of the Season Journey will have very similar objectives and Torment XIII is the extent of how hard you must set the difficulty to complete them.
| OBJECTIVE | REQUIREMENTS |
| Complete a Nephalem Rift | Must be level 70 and on Torment XII or harder Nephalem Rift has to be completed within 6 minutes |
| Level 3 Legendary Gems to 45 | Legendary Gems drop from Rift Guardians in Greater Rifts Speak to Urshi at the end of a Greater Rift to upgrade them |
| Craft a Hellfire Amulet | Buy the Recipe from Squirt in Act II and use your Demonic Organs at the Jeweler |
| Complete 1 Conquest | Check out the list of Season Conquests on the in game Leaderboard menu |
| Kill a Boss (Check in game) | Must be at level 70 and on Torment XIII or higher |
| Kill a Boss (Check in game) | Must be at level 70 and on Torment XIII or higher |
| Reach Greater Rift level 50 solo | Find Greater Rift Keystones from Rift Guardians in Nephalem Rifts Use a Greater Rift Keystone at the Obelisk in town |
| Extract 20 Legendary Powers using Kanai's Cube | Use the "Archive of Tal Rasha" Recipe in Kanai's Cube to Extract a Legendary Power. (Recipe #1) Try to extract powers that will benefit your character or others you plan to make |
Reward
Portrait Frame
Conqueror
For the 2nd to last step of the Season Journey you'll have a few new objectives that include reforging a Legendary item, Augmenting your first Ancient Legendary item as well as visiting The Vault and Slay Greed. Reforging Legendary items is a very expensive recipe and should only be used to turn a poorly rolled item into the chance for a better one, doing this can yield Ancient and Primal Ancient items but the cost is immense, do it once here for the Season Journey but try to save this recipe for later in a Season when you are seeking that final piece of amazing gear like a Primal Horadric Hamburger.
Augmenting
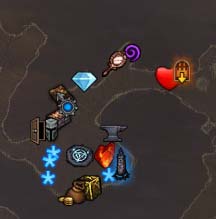
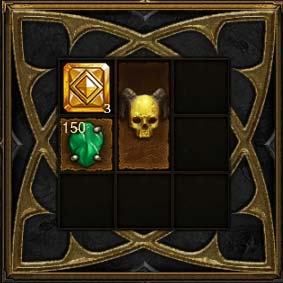
Caldesann's Despair or Recipe #10 in Kanai's Cube aka Augmenting Ancient Legendary items is a great way to increase your power once you find a great piece of gear worthy of the investment. Having excess Legendary Gems around to use on Augmentation will take quite a few Greater Rifts to obtain so use this recipe wisely on your best Ancient Legendary items. The process is relatively simple, you put the Ancient Legendary, Legendary Gem and corresponding Gem that you want to gain Primary Stat from into the cube. Flawless Royal Ruby will yield Strength, Flawless Royal Emerald will yield Dexterity and Flawless Royal Topaz will yield Intelligence. Kanai's cube should look similar to the image on the right then you click Transmute and the Ancient Legendary will now have a significant Primary Stat boost as an additional Primary attribute.
Greed
To access The Vault and fight Greed simply place a Puzzle Ring into Kanai's Cube and click Transmute, this will open a gold portal to The Vault where you'll find an abundance of Goblins and riches. Try out an Ancient Puzzle Ring sometime to experience a super charged Vault that will exceed expectations and yield a massive amount of Gems, Materials and Gold. Equip Sages Journey and a Broken Crown before going in to get double Death's Breaths and Gems.
| OBJECTIVE | REQUIREMENTS |
| Complete a Nephalem Rift | Must be level 70 and on Torment XII or harder Nephalem Rift has to be completed within 5 minutes |
| Level 3 Legendary Gems to 55 | Legendary Gems drop from Rift Guardians in Greater Rifts Speak to Urshi at the end of a Greater Rift to upgrade them |
| Complete 2 Conquests | Check out the list of Season Conquests on the in game Leaderboard menu |
| Kill a Boss (Check in game) | Must be at level 70 and on Torment XIII or higher |
| Kill Greed | Find Greed in The Vault and slay him on Torment XIII or higher Access The Vault by putting a Puzzle Ring into Kanai's Cube |
| Reach Greater Rift level 60 solo | Find Greater Rift Keystones from Rift Guardians in Nephalem Rifts Use a Greater Rift Keystone at the Obelisk in town |
| Augment an Ancient Legendary Item in Kanai's Cube | Must use a level 50+ Legendary Gem Place the Ancient Legendary, Legendary Gem and associated Flawless Royal Gem in Kanai's Cube to Augment |
| Reforge a Legendary Item | Use the "Law of Kulle" Recipe in Kanai's Cube to Reforge a Legendary item. (Recipe #2) |
Reward
Portrait Frame and +1 Stash Space
Guardian
The final stage of the Season Journey has a third Conquest to complete which means the easy ones might be done by now and you might be getting into more challenging territory! Further progression of your Legendary Gems and Solo Greater Rift achievements is demanded up to level 70. You're also going to have to kill Adria in under 15 seconds! Luckily at this point killing Adria in this amount of time should be trivial, let her know who's boss and claim the final stage of your rewards! To finish this chapter you'll need to extract quite a few more Legendary Powers using Kanai's Cube consider other Classes and Builds you might play while extracting all of these items, it's expensive!
| OBJECTIVE | REQUIREMENTS |
| Complete a Nephalem Rift | Must be level 70 and on Torment XIII or harder Nephalem Rift has to be completed within 4 minutes |
| Level 3 Legendary Gems to 70 | Legendary Gems drop from Rift Guardians in Greater Rifts Speak to Urshi at the end of a Greater Rift to upgrade them |
| Complete 3 Conquests | Check out the list of Season Conquests on the in game Leaderboard menu |
| KIll a Boss in less than 20 seconds (Check in game) | Must be at level 70 and on Torment XIII or higher |
| Reach Greater Rift level 70 solo | Find Greater Rift Keystones from Rift Guardians in Nephalem Rifts Use a Greater Rift Keystone at the Obelisk in town |
| Extract 40 Legendary Powers using Kanai's Cube | Use the Archive of Tal Rasha Recipe in Kanai's Cube to Extract a Legendary Power. (Recipe #1) |
Reward
Complete the Season Guardian Journey to earn exclusive cosmetic rewards!
Summary
Congratulations if you've made it this far you've completed your Season Journey and have obtained Haedrig's Gift, the portrait frames, stash tab and Pets! The cosmetics are exclusive and shall be your tokens of Glory moving forward to the next Season, no one can deny your accomplishment and many shall envy you. If you're looking for more challenges beyond the Season Journey check out the other Season Conquests.
Credits
Written by Facefoot.
Updated by Chewingnom.
Reviewed by Raxxanterax.