Wizard of Legend 2 Beginner’s Guide
Last Updated:June 9, 2025|Changelog
The trials have many challenges that you need to overcome if you want to be the Wizard of Legend. But even the best wizards need a helping hand from time to time. This Wizard of Legend 2 Beginner's Guide helps you get started by picking your initial Arcana, providing tips and tricks to help you navigate the trials, conquer bosses, and become the Wizard of Legend!
Pick your Element
Wizard of Legend 2 wastes no time with hand-holding and dumps you straight into the action. The first thing you need to do is pick your starting element. While this determines your initial Arcana, later on, you can earn Chaos Gems and spend them to purchase more, so don't worry too much about your choice long term.
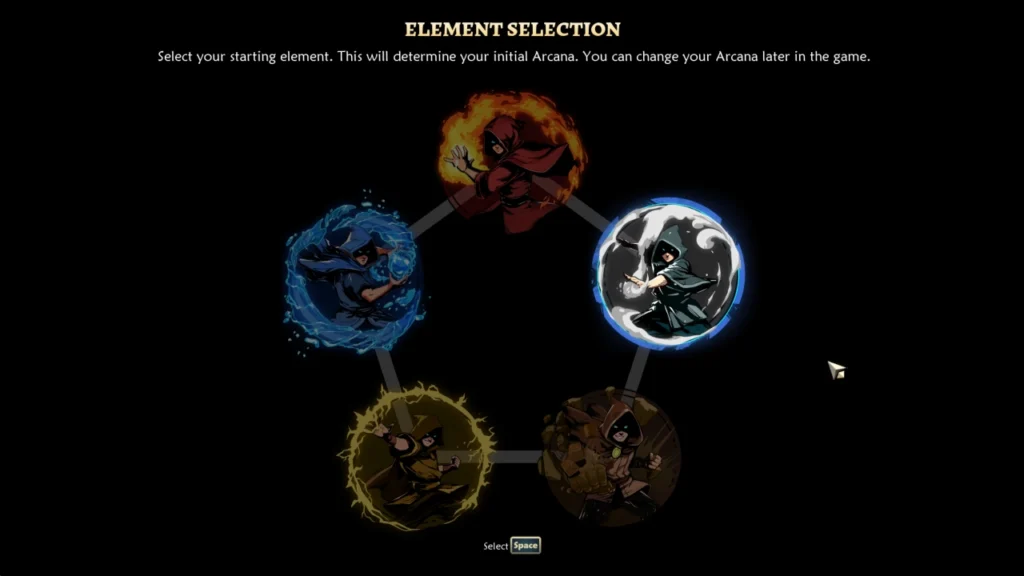
Starting Loadouts
- Fire - Fireball, Magma Trap, Flame Breath, Flying Kicks, Ifrit’s Matchstick
- Air - Aeromancer’s Grasp, Vortex Drive, Zephyr Whirl, Terra Ring, Rudra’s Pinwheel
- Earth - Earth Knuckles, Rumble Dash, Stonestrike Kick, Lightning Spear, Gaia’s Shovel
- Lightning - Bolt Rail, Circuit Line, Volt Surge, Blizzard, Battery of Tanaris
- Water - Frost Blade, Wave Front, Ice Blast, Dragon Arc, Shiva’s Water Bottle
Combat
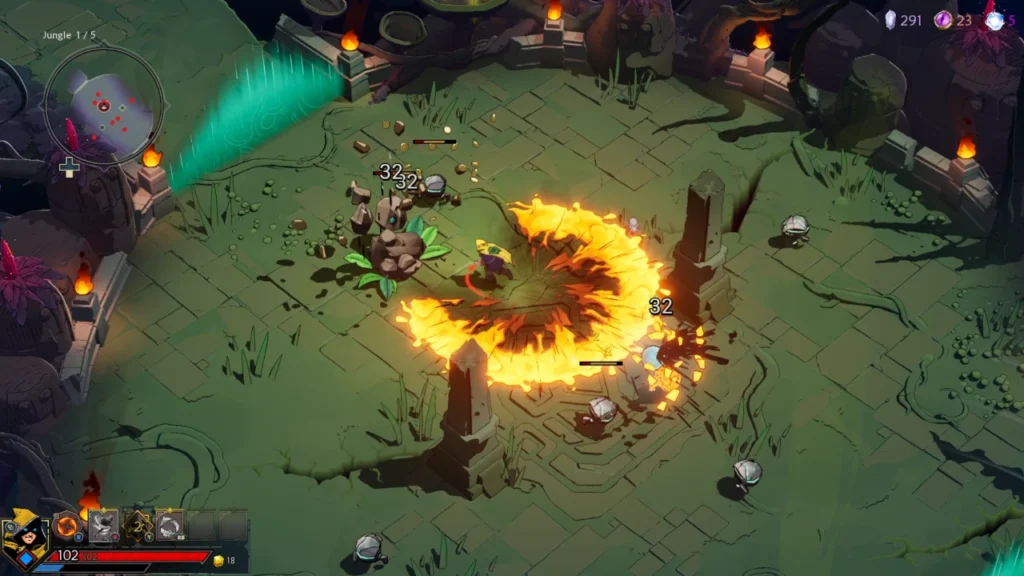
After you pick your starting loadout, it's time to try it out on some enemies! Think of your basic Arcana as your default attack; it has no cooldown but lower damage. Most basic Arcana have a simple 3-hit combo with the third hit doing more damage or proccing an additional effect. Keep the pressure on when fighting unarmored foes as your damage temporarily interrupts their attacks!
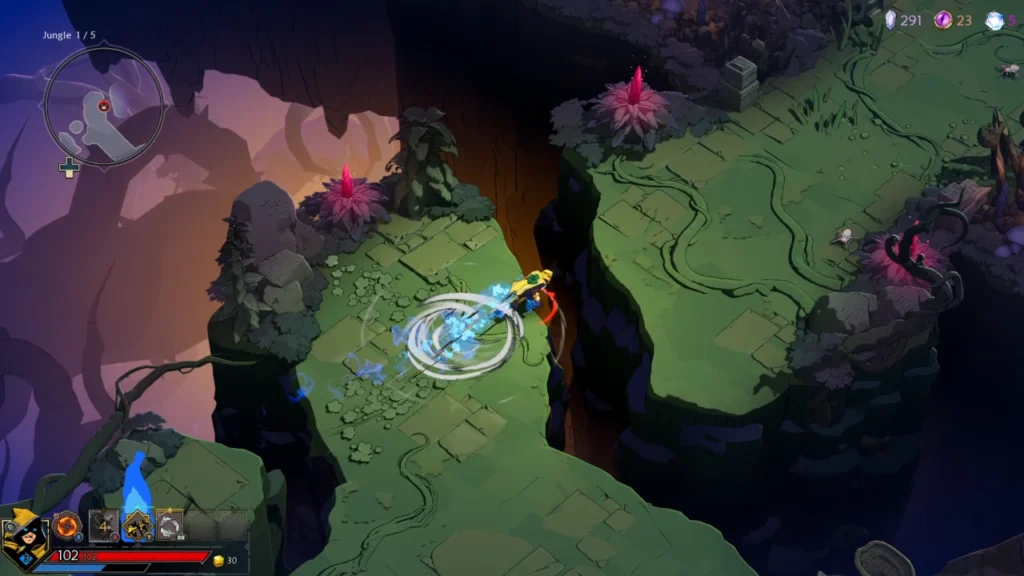
Next up, a well-timed dash makes it easy to cross gaps or avoid enemy attacks. A poorly timed dash is a quick trip to the bottom of the nearest pit or a good way to lose some health. Maybe use your dash to reposition, then knock an enemy into a nearby pit? You can also equip a dash Arcana to trigger an additional effect as you dash around the levels.
Signature and Standard Arcana are where the big damage comes in. These skills hit hard and have a cooldown. As you kill enemies and use your other Arcana, your Signature builds charge, allowing you to unleash a powerful Ultimate when fully charged. Later on, there are ways to build Ultimate Charge faster, and some Standard Arcana have an additional Ultimate variant. Your loadout starts with one Standard Arcana, but you can equip up to 3 total.
Combat Tips
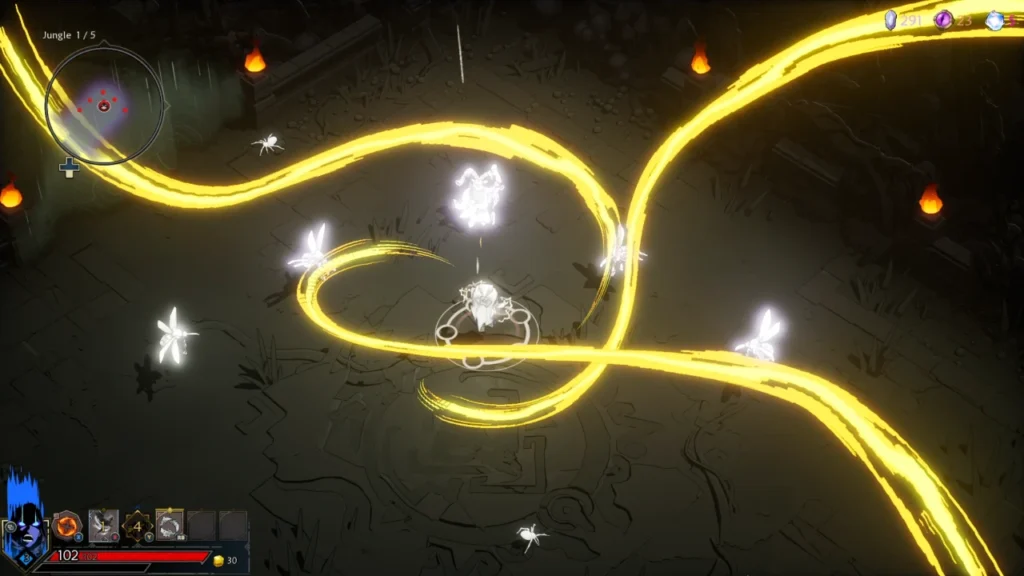
Many of your Arcana provide crowd control effects, Shock foes, knock them Airborne, or Freeze them in their path to prevent them from attacking you. There are also a variety of damaging effects, like Fracture (which causes enemies to take damage when they move or are moved), which you can wield to take out foes more quickly. Some skills can knock enemies back; you can use this to knock them into a pit, leading to an instakill, or Slam them into walls for additional damage.
Check out our Afflictions guide to learn about all the negative statuses you can inflict upon foes.
Your Ultimate and many of your Standard Arcanas have iframes, rendering you invulnerable while executing them. Use this to your advantage to avoid damage while finishing off low health foes. This is especially helpful against armored enemies (yellow health), as they cannot be interrupted by your attacks.
Don't underestimate Arcanas that group enemies. Not only does this crowd control your foes, but AoEing down enemies you grouped with your Arcana is like shooting fish in a conjured barrel!
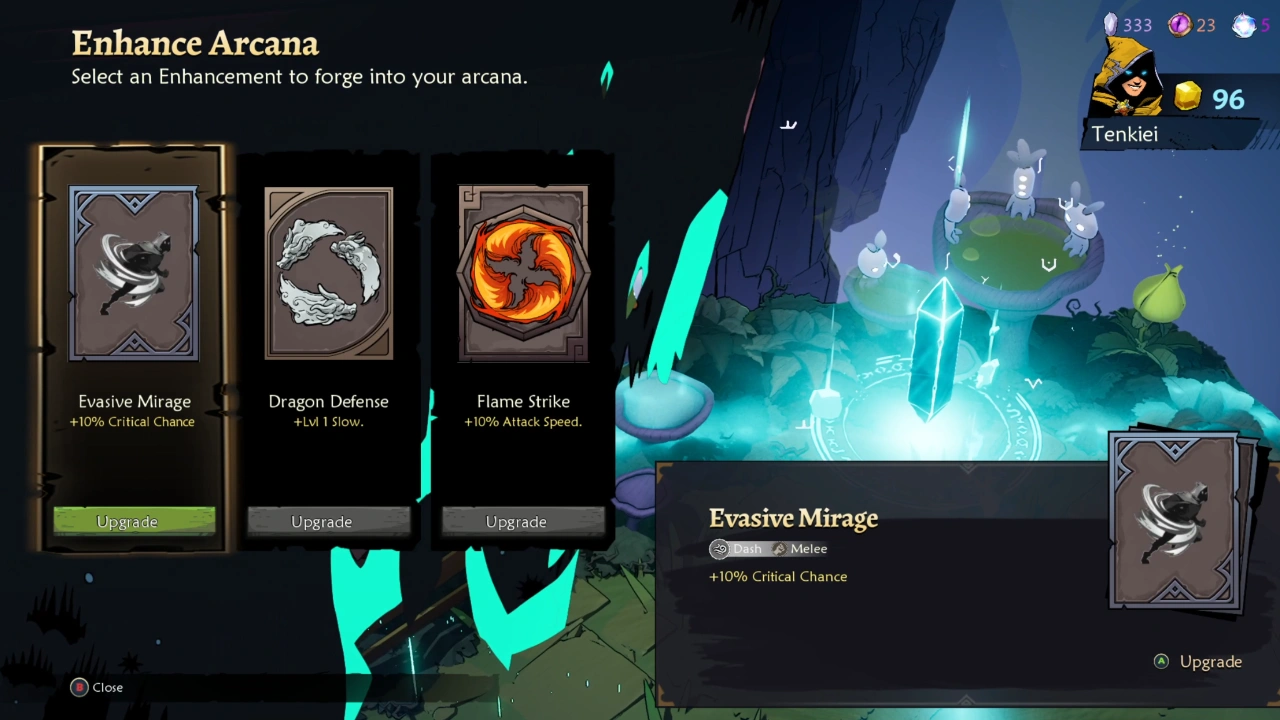
Enhancements and Variants
Complete encounters at the mysterious crystals to enhance your Arcanas. Enhancements add damage, critical strike chance, critical strike damage, or more. After beating Wizard Champions, you can obtain Variant Arcana. These are not merely damage increases, they transform how the Arcana functions. Sometimes this makes the Arcana worse, but in most cases it enhances them with more damage, additional crowd control, or the ability to group enemies.
Exploring the Trials
Each zone is broken down into a number of smaller areas. For example, in the first stage, there are 2 regular stages, then a Wizard opponent, followed by another regular zone before you challenge the boss. After you win, rest at the fountain to restore (or gain) health before moving on to the second stage. The early stages have simple enemies and relatively few traps, but on zones 2, 3, and 4, you can expect dangerous foes with more complex patterns and mazes of devilish traps. Many of the events you encounter have a teleporter; use this to get around more quickly and avoid backtracking.
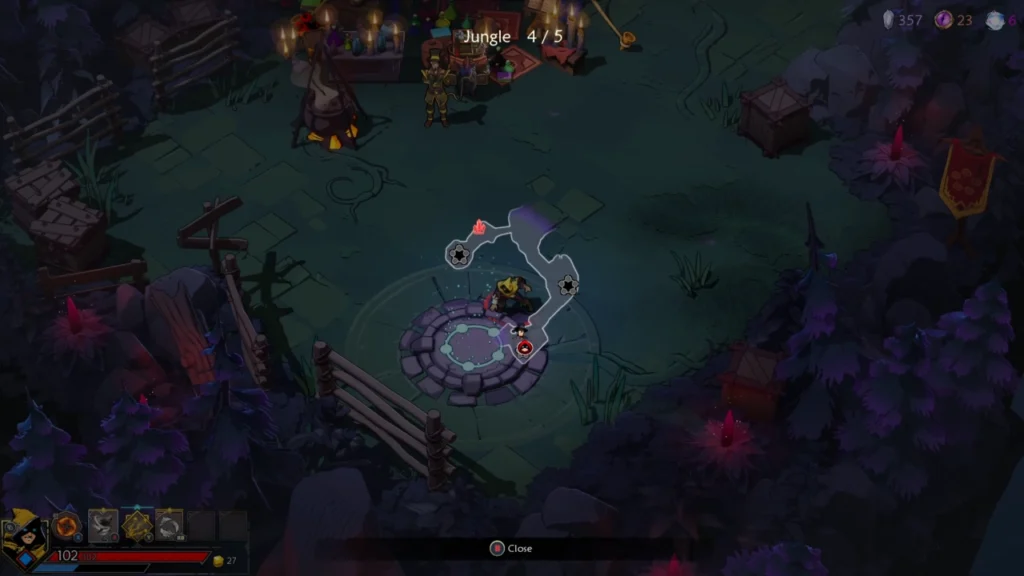
As you're exploring an area, there are some foes wandering around. But most of the challenge comes from the encounters that start when you enter certain rooms. Waves of enemies spawn in, and you need to defeat everything for the magical walls to dissipate so you can progress. Remember to look for treasure chests and smash pots to gain additional resources. If you ever need to backtrack, you can use the teleport points that appear in most rooms.
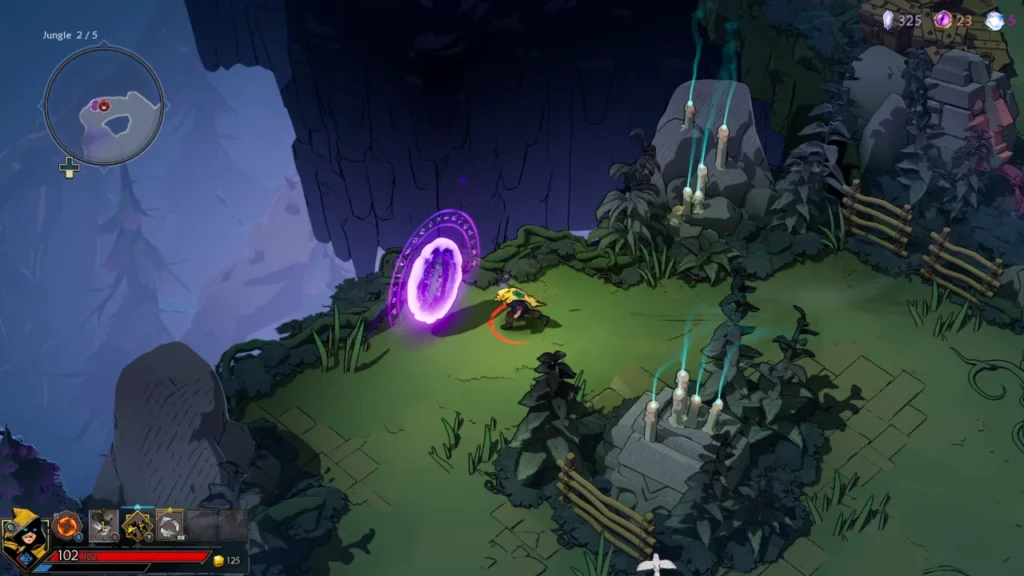
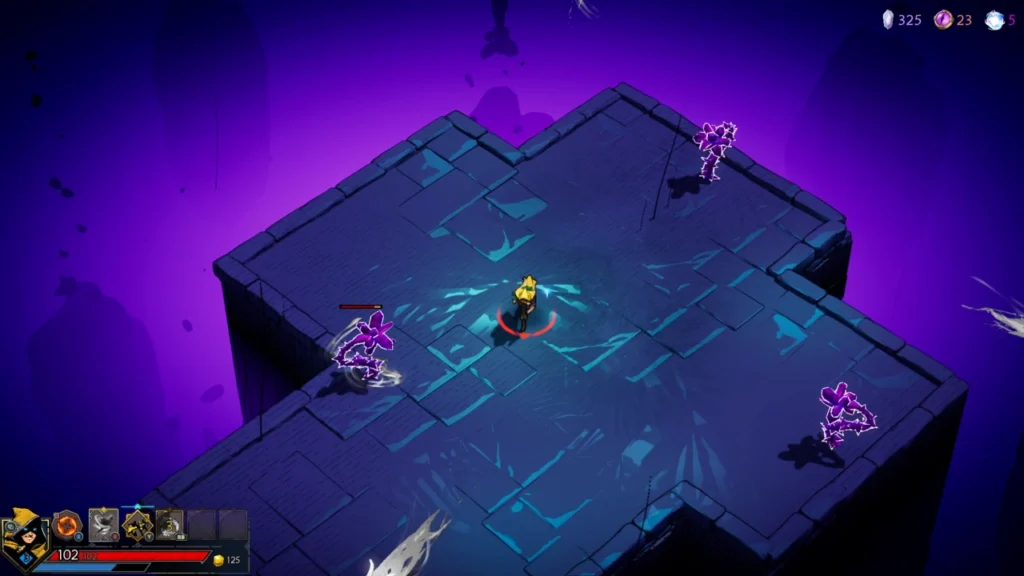
Events
There are many events to encounter during the Trial. This mysterious purple portal leads to many places. You might find yourself entering into gladiatorial combat, rescuing some friendly spirits, or exploring an otherworldly zone in pursuit of Cursed Relics.
A few other events you might encounter include:
- Wizard Combat - sometimes you're not the only Wizard in the trial. You can duel this Wizard, team up with him against a golem, defeat foes within 20 seconds, or beat enemies without getting hit. Rewards range from additional gold to new Arcana.
- Sometimes you encounter a larger chest, activating it summons enemies, but you get a Relic if you defeat them.
- There are also various magical crystals. Some can be shattered to get Chaos Gems or Health. You can activate others to summon foes, beat them to get an enhancement for one of your Arcanas.
- If you find a mysterious Pinata, it's time to get ready to do big damage. If you take too long, his health resets!
- A large chest unguarded in the middle of the room? This looks too good to be true... because it is! But if you overcome the Mimic, there's a wealth of rewards.
- Meet up with mysterious frogs who can swap out an unwanted Arcana or Relic for a random replacement.
Check out our Events guide to learn about all of the events you may encounter during your Trials.
Purple Portal
Enter the mysterious purple portal to partake in a random challenge. This portal can contain an arena where you fight groups of armored enemies, face off against a powerful golem, or participate in a forbidden Wizard tournament. It can also lead to a mysterious realm where you face off against foes to earn Cursed Relics. You never know quite what to expect when entering a purple portal, but many of the events are highly rewarding.
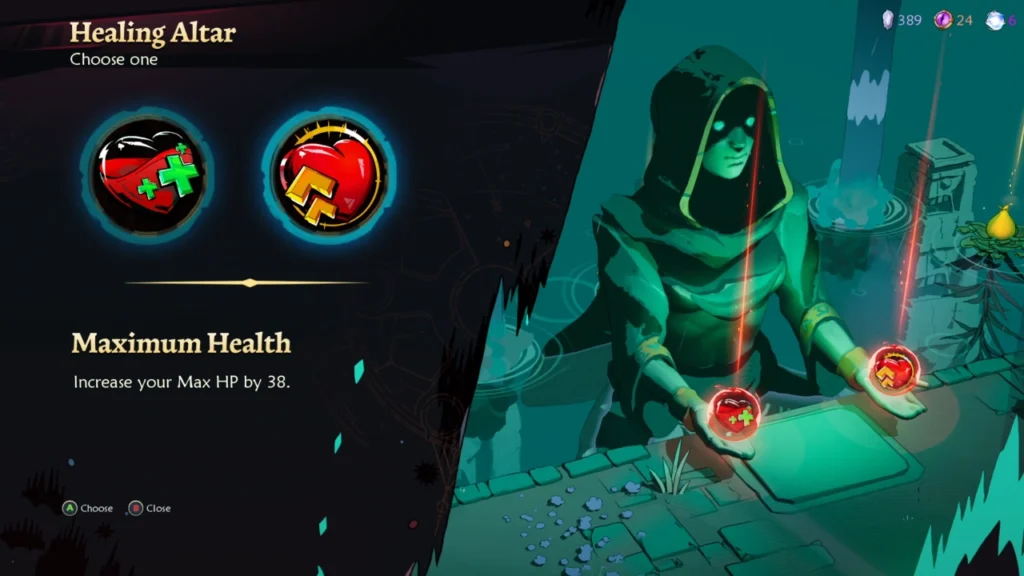
Healing Room
After beating the zone boss, one final room awaits. Luckily, this one is not filled with deadly enemies and wicked traps. Instead, it has a fountain where you're offered a simple choice: heal a large portion of your health, or gain max HP for the rest of this run.
Vendor
There are a variety of vendors to meet as you explore the trial. Each of them is happy to help you progress your Trials, so long as you have enough gold to pay for their wares or at least something else interesting to trade.
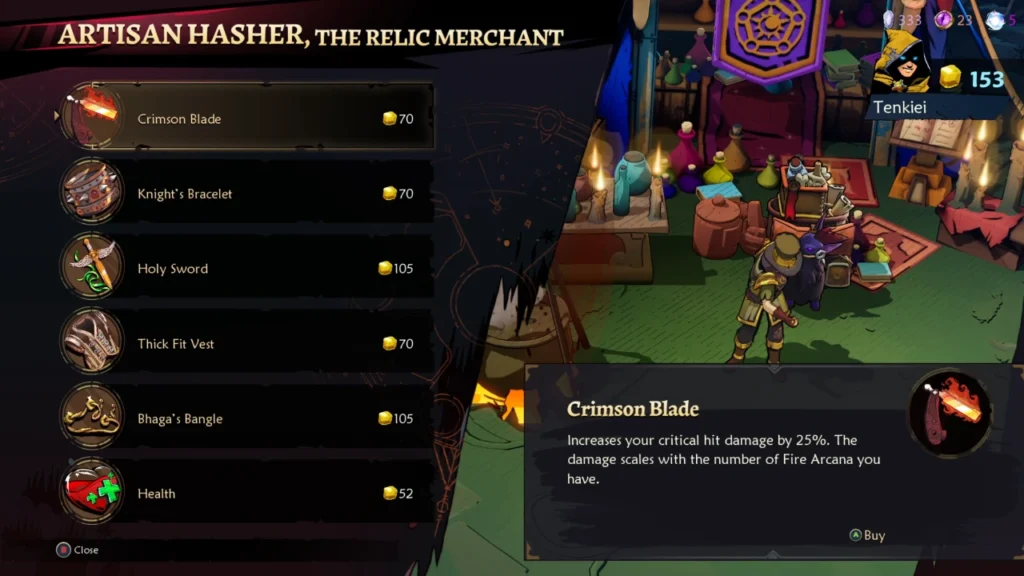
The Relic Merchant
Artisan Hasher, the Relic Merchant, sells a variety of Relics. In addition, he also sells Health, which heals both you and any allies you have in multiplayer. Keep an eye out for synergistic relics because this is a great way to get an early power spike.
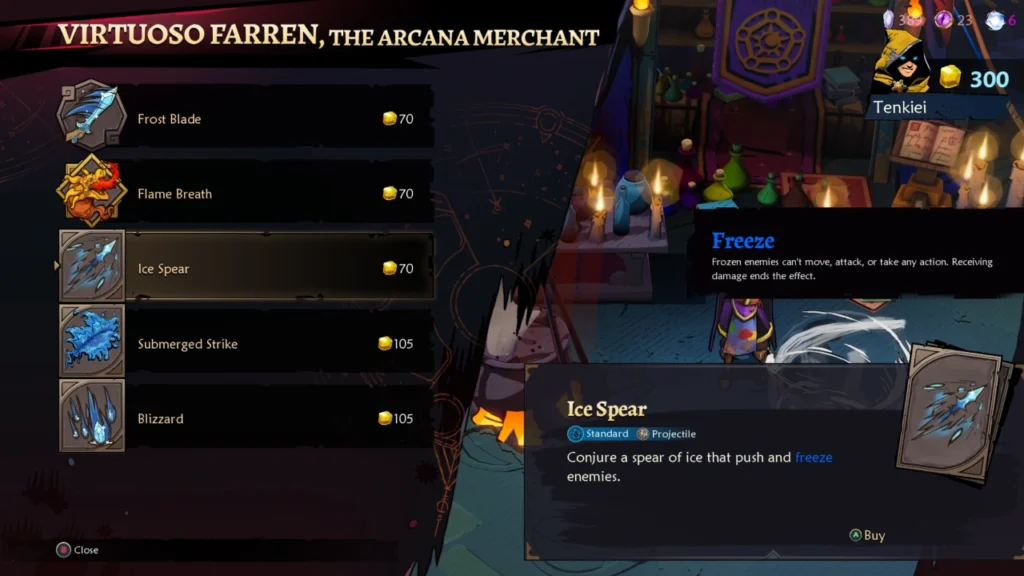
Arcana Vendor
Virtuoso Farren, the Arcana Merchant, sells a variety of spells. If you purchase a basic, dash, or signature Arcana, it swaps with whatever you currently have equipped. But remember, you can use up to 3 standard Arcana and only take 1 into your run. So this is a great opportunity to pick up 2 powerful new spells to help you overcome the Trials.
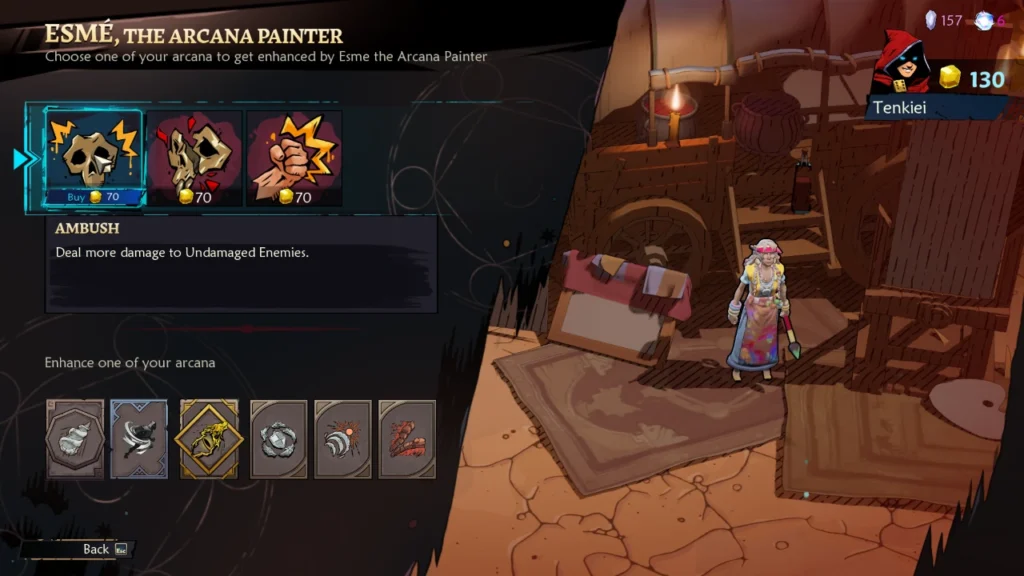
Enhancements
Esme, the Arcana Painter, sells various enhancements for your Arcana. In general, these enhancements aren't as impactful as the other things you can spend gold on, but it's still worth checking her shop in case you find something desirable, like damage to elites and bosses.
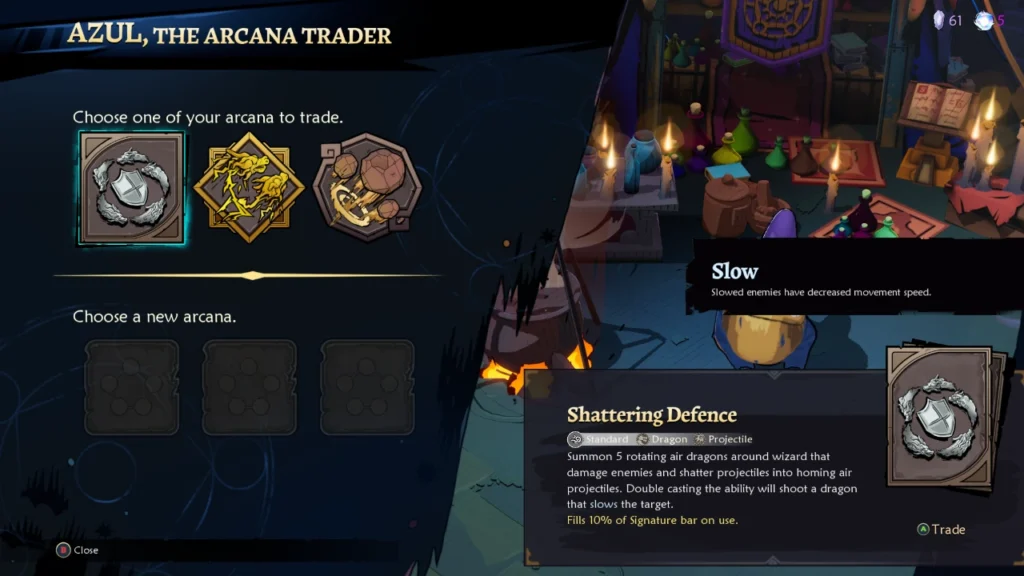
The Arcana Trader
Give Azul, the Arcana Trader, one of your unwanted Arcana to exchange it for a different one. This is a good way to swap out a skill and try something new, or search for a powerful new Variant.
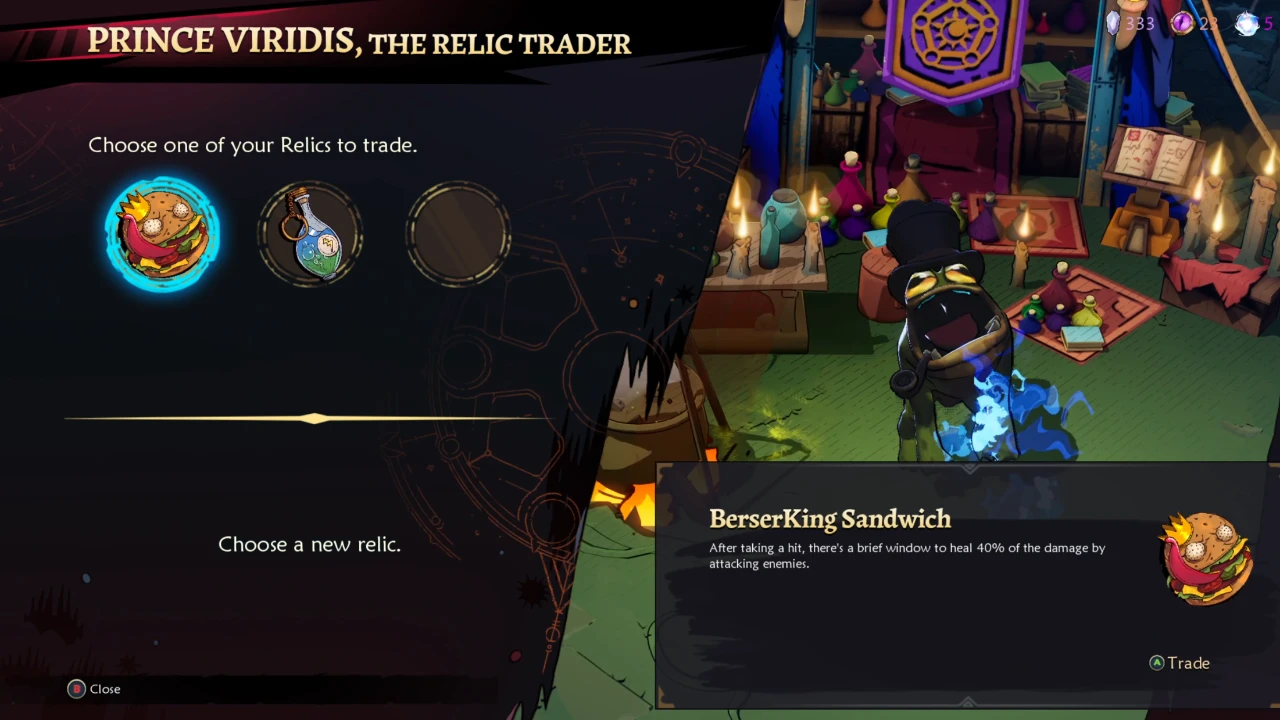
Relic Trader
Give Prince Viridis, the Relic Trader, 1 of 3 Relics, and then pick a Relic from the random selection he offers in return. Since a lot of Relics are build-enabling, you might get something awesome, or be offered a bunch of things that don't work for your build at all.
Check out our NPC and Vendor Guide to learn about all of the folks you may encounter.
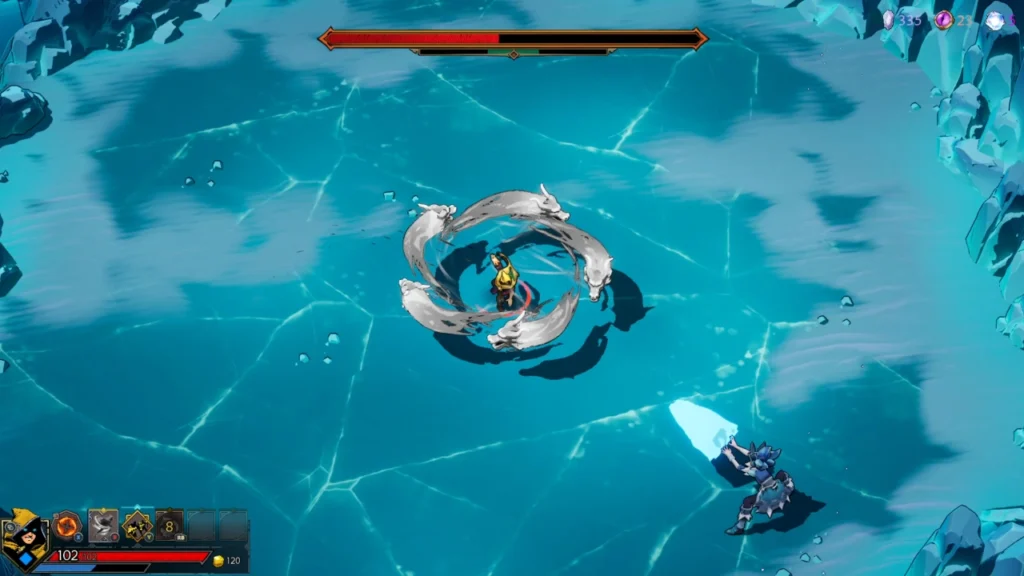
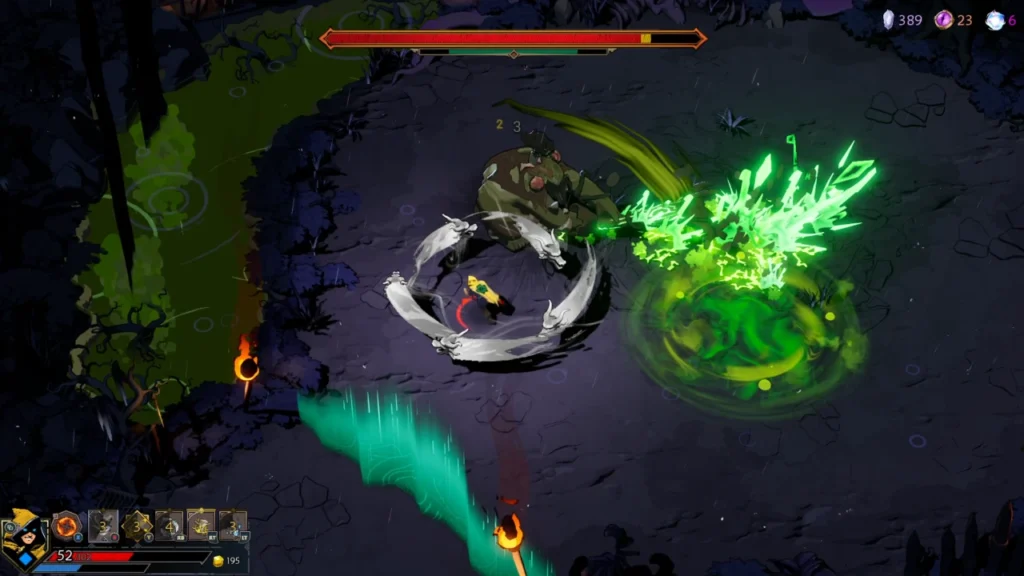
Dangerous Foes
During the Trial, you encounter powerful Wizards and dangerous bosses. Each wizard adeptly wields their element of choice. As you progress through later stages in the Trials, these Wizards gain additional moves, adding quite a bit of complexity to the fight. Once you defeat them, you can upgrade one of your Arcana to its Forgotten Variants, which are more powerful and add unique effects.
Zone Bosses
Each zone culminates in a boss battle, and all of them are uniquely challenging. You need to defeat them to advance to the next stage and ultimately become the Wizard of Legend. Difficulty-wise, these fights are a cut above anything else in the game, so pay close attention to their mechanics and time your dodges. After winning, you gain a new Arcana and can travel to the healing chamber.
- Jungle - Akram & Bahadur
- Desert - Jabara
- Castle - King & Queen
- Final Zone - Wizard of Legend Hieronymus
After defeating the bosses for Zones 1-3, you gain a new Standard Arcana to add to your loadout (or exchange for one of your existing options).
Metaprogression
There are a variety of metaprogression systems in Wizard of Legend 2. Some of these, like Arcana and Relics, are also available during a run in the form of progression. But you only interact with others, like Runes and Medallions, between runs.
Medallion
Interact with the Talking Mirror to select your Medallion or spend Chaos Gems to unlock new ones. You begin with the Basic Wizard Medallion, which provides no bonuses, but other Medallions provide powerful build-defining effects.
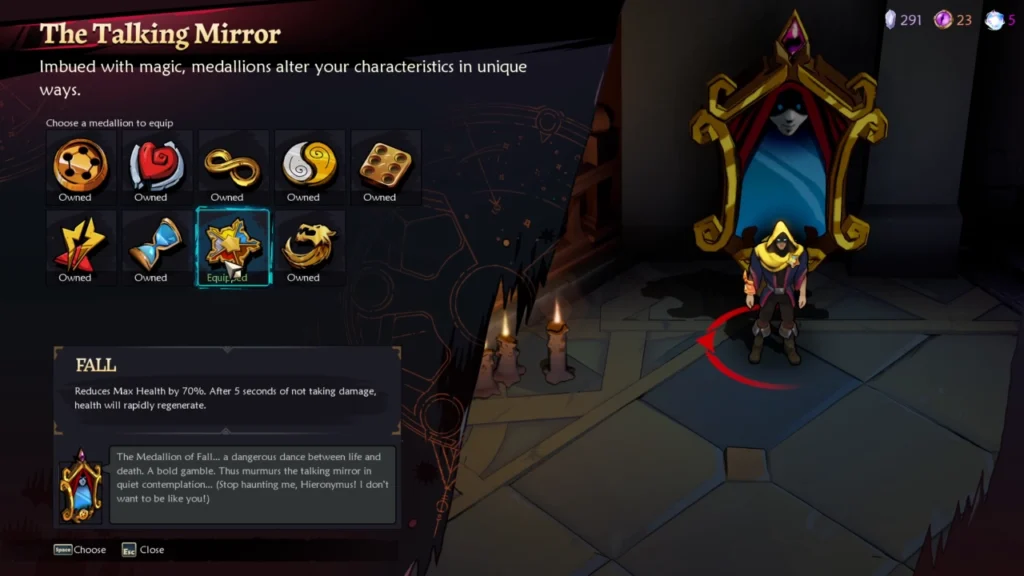
If you're just starting out, the Vigor Medallion is a great way to get some extra health to make it a bit easier to learn the trial.
Arcanas
To unlock new Arcanas, speak to Serjik the Arcana Mentor. This wizard is always up for a fight, and if you give him a few Chaos Gems, he is happy to provide wizards with more spells to use in their trials. Change your loadout or add something new by speaking to Tomi, the Living Spellbook, who hangs out near Serjik. Combine the powers of Air, Lightning, Fire, Water, and Earth to create your own build. During your run, you can find Enhancements and Variant Arcanas to improve your spells, but sadly, these do not carry over from run to run.

When making a loadout, check your Arcana's tags. The primary distinction is between Projectile and Melee. With a Melee Arcana, you are more likely to dash to an enemy and strike them from close range. Many Melee Arcana have iframes (invulnerability frames) that temporarily render you immune to damage, whereas most Projectile Arcana don't have a movement component and instead rely on the safety provided by distance. Other tags synergize with your Relics; for example, Azhi Dahaka's Eye synergizes with Dragon-tagged Arcanas.
Relics
Spend your Chaos Gems with Madame Moulin, the Relic Historian, to purchase a variety of relics. Then head over to Mimi the Relic Bank to select the Relic you take into your next run. During your trial, you can find more Relics and equip up to a maximum of 10.
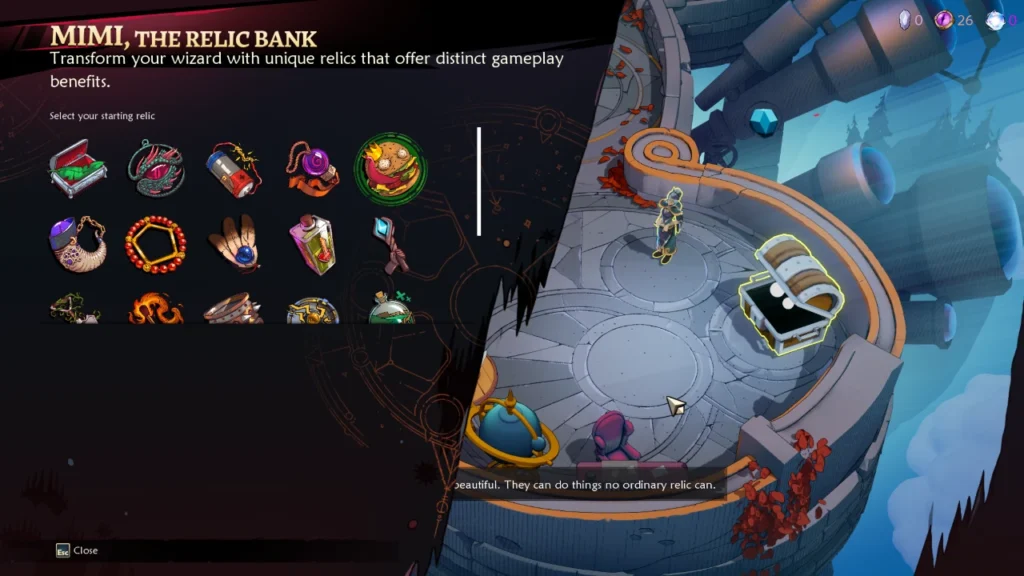
There are a wide variety of relics to find, and many of them have synergies that empower your Arcana or let you change your build. Sometimes, when exploring purple portals, you're offered a powerful cursed Relic. Each of these has bigger upsides than normal Relics but comes with some sort of penalty. Some Relics are part of a hidden set; collect two or more to combine them into a Legendary Relic.
Runes and Difficulty
Speak to Nazradin, the Trials Warden, to use materials earned through killing bosses to purchase Runes. Then equip Rune effects and adjust the difficulty you face in the Trials. On lower difficulties, you get more positive Runes, whereas the higher difficulties give more Chaos Gems in exchange for running dangerous negative Runes.
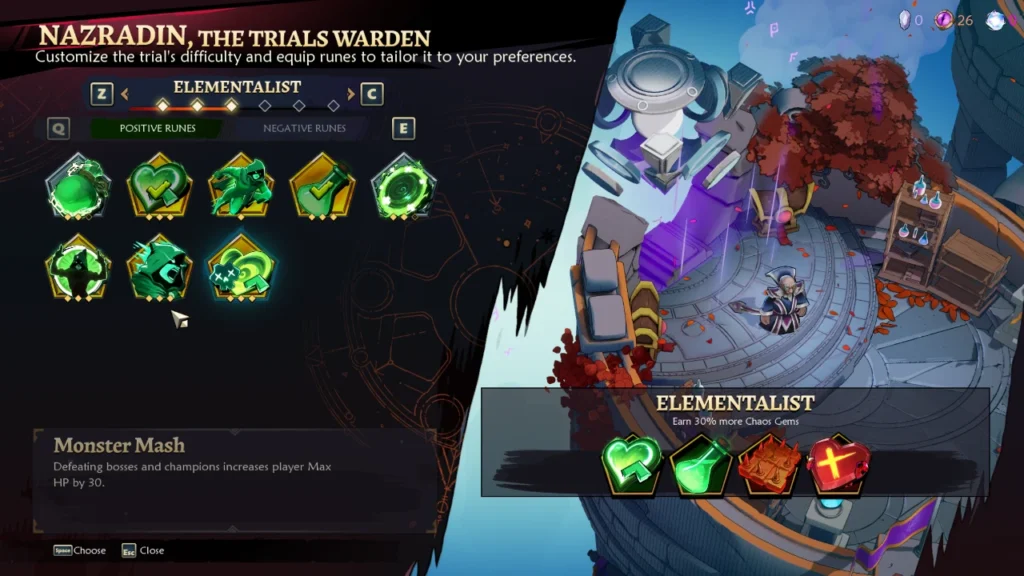
If you're looking for a good Rune loadout for your first Trial runs, unlock Heartstone of Healing, Illusionary Offer, and Orb Catcher. This gives you more health to tank damage, better access to Merchant's wares, and easier access to your Ultimate Arcana.
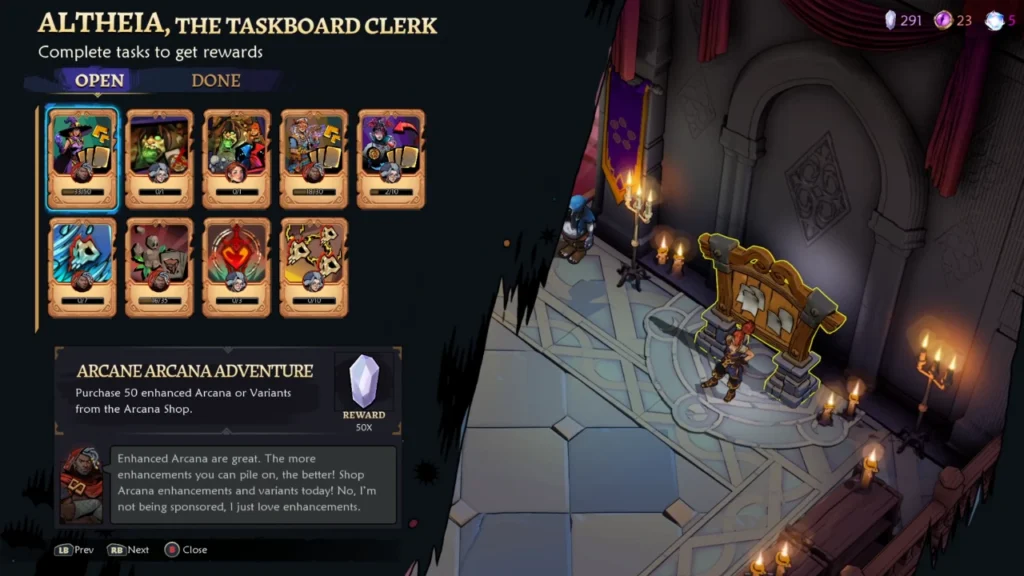
Task Board
Between your runs, be sure to check back with Altheia, the Taskboard Clerk. She has a wide variety of tasks for you to complete. You can turn these in for more metaprogression materials, including numerous Chaos Gems that you can use to unlock new Medallions, Arcanas, and Relics.
Check out our Metaprogression guide to learn about all of the metaprogression systems and how they help you succeed.
Other
You can customize your appearance in Wizard of Legend 2 using spare Chaos Gems. Head back from your starting location then interact with the wardrobe.

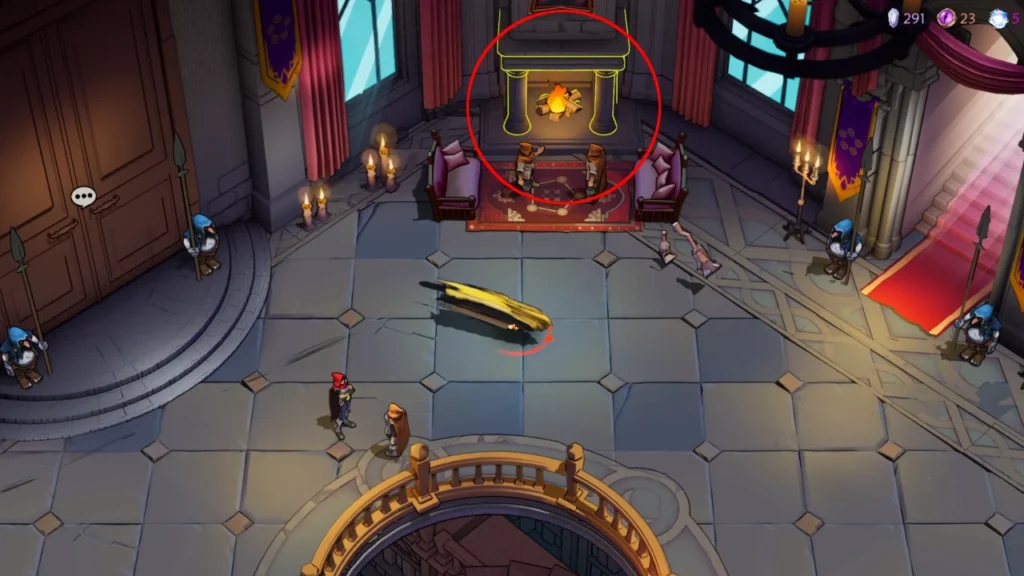
In the main room, you can interact with the fireplace to enter multiplayer. The game supports both local co-op and online play via Steam. Grab your friends and become Wizards of Legend together!
Summary
There's a lot to do in Wizard of Legend 2. This beginner's guide helps you get started by introducing you to the game's various systems and setting you up for success in the trials.
- Begin by selecting an element of your choice.
- Dive into the combat system using your Basic, Dash, Signature, and Standard Arcanas.
- Explore the trials, participate in events, and defeat bosses.
- Keep an eye out for various NPCs and vendors.
- Use metaprogression systems to do better in your next run.
Credits
Written by: Tenkiei
Reviewed by: IBoilerUp