Powered By

Engraving System Guide

Last Updated:September 20, 2024

In Tier 1-3, Engravings are empowerment that are applied to your character for various buffs that alter your playstyle. They can be either a Class Engraving or a  Combat Engraving and are found in various endgame content. Other sources include Endgame Accessories and Ability Stones which contain positive and malus Engraving Points that help form the build of your choice. All of this is trackable in your character profile under the Engraving Tab. Why someone should bother to get them, where they can be found and how they actually work are all the questions we will answer here, so buckle up and let's learn all about them!

The Engraving system changes as soon as you switch to the Ark Passive system in Tier 4. To learn about the changes, skip to the Tier 4 section in this article.

Engraving Support System

Characters who have not unlocked the Ark Passive System (Tier 4) get access to free 5x3 Engraving Support. There are two ways to activate them:

  • Alt+I to open the engraving window and selecting Eng. Settings in the top right.
  • Clicking on the Engraving Supp. icon next to the mini-map.
Engraving Support 900 X 383
Engraving Support Access

Once you open it, you may freely plug and play any 5 engravings from the list to form a build for the content you wish to do. Things to note while using the free engraving support:

  • The free support will override engravings on your currently equipped accessories and ability stone.
    • This means you may use high quality accessories with irrelevant engravings if you want to get a maximum stat benefit from them while retaining a 5x3 build.
  • The engraving level is fixed at level 3 and cannot be adjusted.
  • These engravings can be saved in your Mass Preset page for your raids or chaos dungeons (ALT+E).
  • If you wish to go back to your regular setup, uncheck "Toggle Engraving Support" in your engraving page (ALT+I).
Engraving Toggle 660 X 506
Toggle Engraving Support On/Off

If you want to make a build that uses more than a 5x3 setup, refer to the information below on how to go about creating that using the regular method through accessories and ability stones.

Engraving Point System

Engravings
Character Engraving Window

The bread and butter of Engravings is the point system attached to them. By accumulating points, you reach specific thresholds which activate the different levels of your Engravings and their respective buffs. The 3 different levels can be activated by obtaining 5, 10 and 15 points. Note that any points that do not unlock a specific level threshold or go over 15 points are inactive and provide no bonuses.


Did I mention Malus Effects yet? That's right! Not only do you have to manage your Engravings giving you positive effects, but Ability Stones and Accessories also contain maluses which function under the same point system. There are 4 different effects and while some are not as harmful as the others, your objective is to avoid unlocking any of them.

Malus EffectLevel 1Level 2Level 3
Attack Speed Reduction-2%-4%-6%
Move Speed Reduction-2%-4%-6%
Attack Power Reduction-2%-4%-6%
Defense Reduction-5%-10%-15%

Engraving Recipes

Image 565
Engraving Book

There are two types of Engraving Recipes that a character in Lost Ark can obtain. These recipes are used to unlock Imprints that further the progress of your Engraving Setup.

  • Battle Engraving Recipes - General Engravings that can be used by any class.
  • Class Engraving Recipes - Class specific Engravings that can only be used by the class they are assigned to.

There are 43 different Battle Imprints and 52 Class Imprints to unlock but beware that only two can be applied to a single character at a time. To unlock an Engraving eligible for Imprinting you need to activate 20 Battle or Class Engraving Recipes of the same rarity. This would enable tier 1 of it, granting you +3 points to the respective engraving of your choice. There are multiple tiers to these Imprints, and each tier has to be unlocked in order. Once unlocked, these Imprints can be reused an unlimited amount of times and shared across every character of the same server.

TierEngraving PointsRequired Recipe Amount
2+6x20 Battle Engraving Recipe
3+9x20 Battle Engraving Recipe
4+12x20 Battle Engraving Recipe

Accessories

Aside from your core stats like Crit, Specialization and Swiftness accessories drop with random positive and negative Engraving Points attached to them. These cannot be altered in any way and have variable rolls depending on the rarity of your item. Accessories can drop with Class Specific Engravings on them, but only for the class you're currently playing. Legendary rarity and upwards contains 2 lines of positive Engravings.

RarityEngraving PointsMalus
Rare+1 to 2 Random EngravingN/A
Epic+1 to 3 Random Engraving+1 to 3 Random Malus
Legendary+2 to 3 Random Engraving
+2 to 3 Random Engraving
+1 to 3 Random Malus
Relic+3 Random Engraving
+3 to 5 Random Engraving
+1 to 3 Random Malus
Ancient+3 Random Engraving
+3 to 6 Random Engraving
+1 to 3 Random Malus

Ability Stones

Ability Stones are acquired through various endgame activities such as Chaos Dungeons, Guardian Raids, Field Bosses and many more. They are useful for their properties that grant 2 random engravings (these cannot include Class Specific Engravings) and 1 random malus which you can process at a Stone Cutter NPC in any major city of a continent. The higher the rarity of your stone, the more Engraving Points it can obtain. Keep in mind that the stone cutting process is based on chance.

RarityEngraving PointsMalus
Rare+0 to 6 Random Engraving
+0 to 6 Random Engraving
+0 to 6 Random Malus
Epic+0 to 8 Random Engraving
+0 to 8 Random Engraving
+0 to 8 Random Malus
Legendary+0 to 9 Random Engraving
+0 to 9 Random Engraving
+0 to 9 Random Malus
Relic+0 to 10 Random Engraving
+0 to 10 Random Engraving
+0 to 10 Random Malus

Engraving Setup

Build Order

Having 3 different ways of obtaining Engraving Points for your build introduces a lot of complexity and confusion. But it doesn't have to be complicated. Let’s break down how to tackle your Engraving Setup in the best way possible!

  1. Ability Stones
    This should be your first step in the process. These stones provide a big chunk of points towards the two Engravings of your choice. Prioritize the two best options discussed in our Class Guides. Just remember that Ability Stones cannot include your Class Engraving.
  2. Necklaces
    First focus on obtaining the optimal attributes for your build be it Crit, Specialization or Swiftness. Then get the highest quality Necklace possible, as it gives the most Stat Points of any accessory. All of these steps make the perfect Necklace, and the chances of you finding it yourself are slim to none, so the Auction House is your best friend in this endeavor.
  3. Engraving
    Every character can imprint two Engravings of their choice as long as they have them learned (Note: you can imprint the same Engraving twice). Depending on which tier you have unlocked this provides anywhere from +3 to +12 points for a single engraving. Generally these should be reserved for your Class Engraving and the most important Battle Engraving for your build.
  4. Remaining Accessories
    With all the previous steps in place, fill out your Engravings with the help of the remaining 2 Earring and 2 Ring slots. Go for the correct substats depending on your build and calculate the exact amount of points needed to reach any Engraving threshold that you're still working on while prioritizing reaching level 3 for your important engravings. Avoid going over the maximum points (+15) for a single Engraving and balance out the negative malus to make life easier.

Sounds easy right? With a little bit of tinkering here and there you'll grasp how to manage your engravings in no time!

Engraving Recipe Sources

Sources for engravings in Lost Ark include:

  • Clearing your daily Chaos Dungeons.
  • Clearing certain stages in Shadespire Tower.
  • Class Engraving Recipe for clearing daily Guardian Raids.
  • Cube clear reward.
  • Random Battle & Class Engraving Recipe for clearing Abyssal Dungeons.
  • Procyon’s Compass
  • Side quest completions in East Luterra reward Battle & Class Recipe Selection Pouches.
  • Story questline completion for specific Islands rewards Battle & Class Recipe Selection Pouches.
  • Island exchange merchants that offer Battle & Class Recipe Selection Pouches with a limited availability per week in return for currency found on their Islands.
  • Buy from Auction House.
  • Legion Raid Exchange NPC
  • Event Rewards

Tier 4

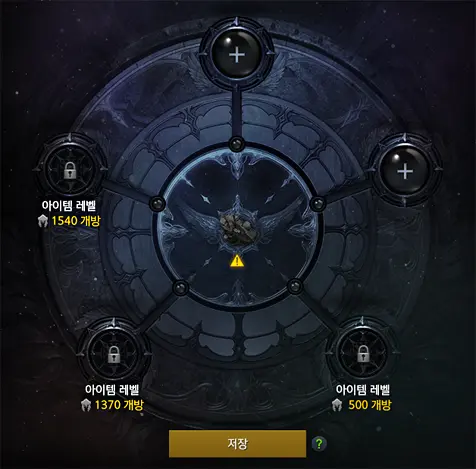
While the Ark Passive system is enabled, Engravings can only be obtained by using Combat Engraving Recipes, and have different values than in the Tier 3 system. Each engraving starts off at Rare grade, and can be further enhanced by learning Epic Grade Recipes, Legendary Grade Recipes, and Relic Grade Recipes, with gradual increases for every 5 books. Ability Stones further increase the effects of engravings at 6, 7, 9, and 10 nodes. The values in the table below only refer to the positive side of each engraving, and downsides are not mentioned.
After switching to the Ark Passive system, accessories stop interacting with the Engraving system. Instead, they provide new passives and points for the Enlightenment Tree.

Grudge

+12% Damage

+0.75/1.5/2.25/3% Damage

+0.75/1.5/2.25/3% Damage

+0.75/1.5/2.25/3% Damage

+3/3.75/5.25/6% Damage

Cursed Doll

+8% Damage

+0.75/1.5/2.25/3% Damage

+0.75/1.5/2.25/3% Damage

+0.75/1.5/2.25/3% Damage

+3/3.75/5.25/6% Damage

Keen Blunt Weapon

+28% Crit Damage

+2/4/6/8%
Crit Damage

+2/4/6/8%
Crit Damage

+2/4/6/8%
Crit Damage

+7.5/9.4/13.2/15%
Crit Damage

Hit Master

+8% Damage

+0.75/1.5/2.25/3% Damage

+0.75/1.5/2.25/3% Damage

+0.75/1.5/2.25/3% Damage

+3/3.75/5.25/6% Damage

Ambush Master

+3.2% Damage

+9% Back Attack Damage

+0.2/0.4/0.6/0.8% Damage

+0.75/1.5/2.25/3% Back Attack Damage

+0.2/0.4/0.6/0.8% Damage

+0.75/1.5/2.25/3% Back Attack Damage

+0.7/1.4/2.1/2.8% Damage

+2.7/3.4/4.7/5.4% Damage

Master Brawler

+3.2% Damage

+9% Front Attack Damage

+0.2/0.4/0.6/0.8% Damage

+0.75/1.5/2.25/3% Front Attack Damage

+0.2/0.4/0.6/0.8% Damage

+0.75/1.5/2.25/3% Front Attack Damage

+0.7/1.4/2.1/2.8% Damage

+2.7/3.4/4.7/5.4% Damage

Heavy Armor

+58% Defense

+4/8/12/16% Defense

+4/8/12/16% Defense

+4/8/12/16% Defense

+12/15/21/24% Defense

Stabilized Status

+8% Damage

+0.75/1.5/2.25/3% Damage

+0.75/1.5/2.25/3% Damage

+0.75/1.5/2.25/3% Damage

+3/3.75/5.25/6% Damage

Magick Stream

+1.4% MP Regen

+4% CDR

+0.15/0.3/0.45/0.6% MP Regen

+0.75/1.5/2.25/3% CDR

+0.75/1.5/2.25/3% CDR

+0.6/0.75/1.05/1.2% MP Regen

Adrenaline

+8% Crit Rate

+2.4% Attack Power

+0.78/1.5/2.28/3% Attack Power

+1.5/3/4.5/6%
Crit Rate

+1.5/3/4.5/6%
Crit Rate

+2.88/3.6/4.98/5.7% Attack Power

Values are shown at full stacks (6).

Mass Increase

+10% Damage

+0.75/1.5/2.25/3% Damage

+0.75/1.5/2.25/3% Damage

+0.75/1.5/2.25/3% Damage

+3/3.75/5.25/6% Damage

Raid Captain

Damage +24% of Mov. Speed

Damage +2/4/6/8% of Mov. Speed

Damage +2/4/6/8% of Mov. Speed

Damage +2/4/6/8% of Mov. Speed

Damage +7.5/9.4/13.2/15% of Mov. Speed

Precise Dagger

+12% Crit Rate

+0.75/1.5/2.25/3% Crit Rate

+0.75/1.5/2.25/3% Crit Rate

+0.75/1.5/2.25/3% Crit Rate

+3/3.75/5.25/6% Crit Rate

All-Out Attack

+12% Cast Speed

+14% Damage

+1/2/3/4% Cast Speed

+0.5/1/1.5/2% Damage

+1/2/3/4% Cast Speed

+0.5/1/1.5/2% Damage

+0.75/1.5/2.25/3% Damage

+3/3.7/5/6% Damage

Ether Predator

+12.6% Attack Power

+12% Defense

+4.5/9/13.5/18% Defense

-1.5/3/4.5/6s Cooldown

+0.9/1.8/2.7/3.6% Attack Power

+3/3.9/5.4/6% Attack Power

Values are shown at full stacks (30).

Barricade

+8% Damage

+0.75/1.5/2.25/3% Damage

+0.75/1.5/2.25/3% Damage

+0.75/1.5/2.25/3% Damage

+3/3.75/5.25/6% Damage

Awakening

+38% Awakening CDR

+1 Awakening cast

+1.5/3/4.5/6% Awakening CDR

+0/1/1/2 Awakening casts

+0/1/1/2 Awakening casts

+6/7.5/10.5/12% Awakening CDR

Propulsion

+8% Damage

+0.75/1.5/2.25/3% Damage

+0.75/1.5/2.25/3% Damage

+0.75/1.5/2.25/3% Damage

+3/3.75/5.25/6% Damage

Drops of Ether

22s Cooldown

-1.5/3/4.5/6s Cooldown

-1.5/3/4.5/6s Cooldown

+4/8/12/16% Efficiency

+12/15/21/24% Efficiency

Expert

+16% Heal & Shield Efficiency

+1/2/3/4% Heal & Shield Efficiency

+1/2/3/4% Heal & Shield Efficiency

+1/2/3/4% Heal & Shield Efficiency

+4/5/7/8% Heal & Shield Efficiency on targets under 50% HP

All values shown for book effects have 1.5x efficiency if the target is under 50% HP.

Vital Point Hit

+22% Stagger

+1.25/2.5/3.75/5% Stagger

+1.25/2.5/3.75/5% Stagger

+1.25/2.5/3.75/5% Stagger

+4/5/7/8% Stagger

Master's Tenacity

+8% Damage

+0.75/1.5/2.25/3% Damage

+0.75/1.5/2.25/3% Damage

+0.75/1.5/2.25/3% Damage

+3/3.75/5.25/6% Damage

Spirit Absorption

+7% Attack & Movement Speed

+0.75/1.5/2.25/3% Attack & Movement Speed

+0.75/1.5/2.25/3% Attack & Movement Speed

+0.75/1.5/2.25/3% Attack & Movement Speed

+3/3.75/5.25/6% Attack & Movement Speed

Explosive Expert

+40% Bomb/Grenade DMG

+1 Bomb/Grenade

+10/20/30/40% Bomb/Grenade DMG

+0/1/1/2 Bombs/Grenades

+0/1/1/2 Bombs/Grenades

+40/50/70/80% Bomb/Grenade DMG

Super Charge

+24% Charge Speed

+14% Damage

+2/4/6/8% Cast Speed

+0.5/1/1.5/2% Damage

+2/4/6/8% Cast Speed

+0.5/1/1.5/2% Damage

+0.75/1.5/2.25/3% Damage

+3/3.75/5.25/6% Damage

Max MP Increase

+20% Max MP

+1/2/3/4% Max MP

+1/2/3/4% Max MP

+1/2/3/4% Max MP

+4/5/7/8% Max MP

Crisis Evasion

720s Cooldown

+40% HP Recovered

-20/40/60/80s Cooldown

-20/40/60/80s Cooldown

-20/40/60/80s Cooldown

+30/37.5/52.5/60% HP Recovered

MP Efficiency Increase

+12% MP Regen

+9% Damage

+1/2/3/4% MP Regen

+0.5/1/1.5/2% Damage

+1/2/3/4% MP Regen

+0.5/1/1.5/2% Damage

+0.75/1.5/2.25/3% Damage

+3/3.75/5.25/6% Damage

This engraving only increases the damage of skills that consume MP.

Summary

Try to maximize your engraving points by utilizing all three ways of obtaining them, be it Ability Stones, Engraving Recipes or Accessories. Spread out malus points across all 4 negative options to avoid reaching the activation threshold and making your character weaker.

  • The same engraving can be Imprinted in both available slots if necessary, be it a class or battle engraving.
  • Class specific engravings cannot spawn on Ability Stones.
  • Minimize the excess points by not going over +15 in any engraving.
  • Checkout our Class Guides to know which engraving to choose.

Credits

Written & Updated by Choilicious.
Reviewed by Raxxanterax.

© 2025 Maxroll Media Group, All Rights Reserved