Last Updated:June 3, 2025|Changelog
Introduction
View all variants
With Reapers of Souls release, Might of the Earth got introduced to the game and instantly became one of the strongest Barbarian builds out there for T6 farming. In conjunction with its supporting item Lut Socks, the build quickly earned its gimmicky "Leapquake" nickname.
While the set was originally intended for Earthquake builds, Seismic Slam got incorporated into Might of the Earth to create a new build variation using the set.
Unfortunately, while offering a very unique ranged playstyle, MotE Seismic Slam has never been the top dog on the Barbarian leaderboards, despite holding a decent potential with a (6) Bonus granting a whopping 20,000% damage multiplier since Season 16.
Most recently with Season 19, Fjord Cutter got reworked and Bracers of Destruction buffed. Season 23 offered unconditional MotE players the chance to shine with the addition of Set specific leaderboards! Finally, Season 30 nearly doubled the (6) Bonus damage multiplier to help out the set be competitive!
This is an Area Damage (AD) build, since Seismic Slam can proc it. This is further enhanced by the high damage multiplier from Bracers of Destruction (see Mechanics) in combination with the crazy Attack Speed granted by Fjord Cutter, allowing for great burst damage. This guide will explain everything there is to know for you to master this unique ranged Barbarian and conquer the Might of the Earth leaderboards!
Flavourful ✔
Fast Paced ✔
Ranged Playstyle ✔
Have Fun Leaping Around! ✔
❌ Static Playstyle
❌ Limited Item Options
❌ Band of Might Dependency
❌ Damage Caps at 10 Monsters
Core Setup
Items
- The Might of the Earth (6) Bonus is where the majority of our damage comes from.
- We add that up with Bracers of Destruction, Fury of the Vanished Peak and the relatively new Fjord Cutter to further increase the damage, attack speed and reduce resource costs.
- Captain Crimson's Trimmings set is used for a great damage buff and the crazy cooldown reduction it provides for our Wrath of the Berserker (WotB).
- Echoing Fury is nice to have for additional Attack and Movement Speed.
- Mortick's Brace is a nice overall stat boost with Life per Fury Spent and additional toughness.
- Convention of Elements for multiplicative damage and Band of Might for toughness.
- Endless Walk for good offense and defense
- Obsidian Ring of the Zodiac can be a nice alternative for cooldown reduction but you have to drop the damage multiplier from either Captain Crimson's Trimmings set or Convention of Elements to equip it.
Season Theme - Eternal Conflict
For the duration of this season, all players will benefit from the Pandemonium Kill Streak buff initially available in Season 19. For each stack of this buff, you’ll receive a small boost to movement speed and bonus damage, ultimately capping out at 50% movement speed and 100% damage at 1000 stacks. In addition, reaching certain kill streak goals will trigger a special effect and cause even more mayhem on the battlefield! For full details on how this works, check out this exclusive Seasonal Guide!
The Kill Streak effects are:
- 15 Kills: Exploding Chickens seek and destroy
- 30 Kills: A wide Frost Nova freezes enemies
- 50 Kills: Corpses rain from the sky
- 100 Kills: Five massive Energy Twisters are unleashed
- 150 Kills: Dark Geysers form beneath enemies
- 200 Kills: Treasure Chests fall from the sky
- 300 Kills: A Ring of Fire engulfs everything
- 400 Kills: Meteors hail from above
- 500 Kills: Angels descend upon the battlefield to fight
- 1000 Kills: Diablo appears!
In speedruns, you usually don't profit much from this season theme, however in pushing it opens up a lot of strategic depth by playing around various key kill counts. Especially the Geysers (150), Meteors (400) and Angels (500) are the most impactful and can kill anything in an instant, allowing you to get a significant progression boost if used correctly.
Depending on the situation, it may be best to voluntarily reset your kill streak after 150 to get the Geysers multiple times, or to set up for a boss kill by getting as close as possible to that number and then hoping for a Rift Guardian with adds or a few kills from Nemesis Bracers.
Build Adjustments
Furthermore, each of these three procs can finish the rift guardian instantly all the way up to GR150, allowing you to push without Bane of the Stricken if you manage to set it up properly. If you are willing to give up consistency for more power, you can replace this gem with Pain Enhancer.
Global Stat Priorities
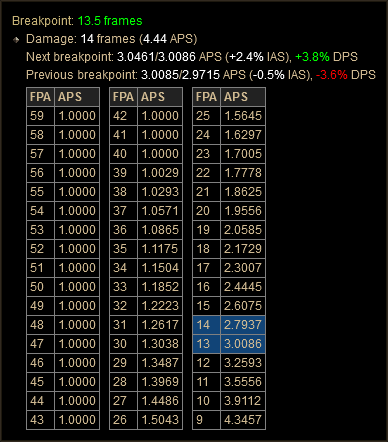
You want to stack damage stats wherever possible, especially Cooldown Reduction, Critical Hit Chance and Damage, Attack Speed, Area Damage as well as Cold Damage and Seismic Slam Damage. Make sure to optimize your Attack Speed to reach certain Breakpoints. A single 7% Attack Speed roll on your gear allows you to land on the 13 / 14 frames Breakpoints thanks to Echoing Fury.
Aim for around 55-60% Cooldown Reduction to ensure a decent Wrath of the Berserker uptime using Boon of Bul-kathos and potential complementary items like Obsidian Ring of the Zodiac. Area Damage is still very decent in this build and should be stacked on items like Shoulders and Weapons if possible.
1. Do the Challenge Rift for the materials to cube Legendary Powers. You can complete this once a week for additional resources and we always update the guide for you!
2. Gather the full Might of the Earth set. Each piece can be gambled from Kadala for Bloodshards. Do not salvage any duplicate pieces you find! Instead convert them to another part of the set with Recipe 4 in Kanai's Cube. If you have extra materials you can use Recipe 3 to craft the remaining pieces, but this is expensive and not recommended for new players.
3. Gamble from Kadala in this order:
- The full Might of the Earth set
- Create a level 1 Barbarian and gamble for Band of Might
- Bracers of Destruction, Mortick's Brace and Nemesis Bracers
- Convention of Elements, Focus and Restraint
4. Craft using Recipe 3 in Kanai's Cube in this order:
- Two-Handed Mighty Weapons to get Fury of the Vanished Peak
- Mighty Weapons to get Fjord Cutter
- Create a level 1 Witch Doctor and upgrade Maces to get Echoing Fury
- Rings to get Convention of Elements, Focus and Restraint
- Anything from the Gamble list in Step 3 that you haven't already acquired.
5. Do Bounties to acquire several important items for this build:
- Act 1: Ring of Royal Grandeur
- Bounty Turn In: Recipes for Captain Crimson's Trimmings and Cain's Destiny (for your follower)
6. At this point you can somewhat comfortably farm Nephalem or Speed Greater Rifts where you can find all the remaining items you need for different variants of the build. It's better to spend your materials improving your set pieces, getting ancient weapon etc. Finally you can spice up your season by doing some Ubers to craft Hellfire Amulet (recipe can be bought from Squirt the Peddler in Act 2).
7. Use Primordial Ashes in Kanai's Cube with the new Curiosity of Lorath Nahr recipe to obtain a free Crafted Primal Ancient. Since you can only equip one of them, choosing the right item to focus matters! Great candidates are Weapons, Offhands, Jewelry or any item with an important multiplier. With that in mind, we recommend getting one of the following items:
- Fjord Cutter
- Band of Might
- Bracers of Destruction
| SLOT | ITEM | STAT PRIORITY |
| Main-Hand | Fjord Cutter Fury of the Vanished Peak (Cubed) | 1. Damage Range 2. Socket Ramaladni's Gift 3. Cooldown Reduction 4. Damage % 5. Area Damage 6. Elite Damage 7. Strength |
| Off-Hand | Echoing Fury | 1. Damage Range 2. Socket 3. Cooldown Reduction 4. Damage % 5. Attack Speed 5. Area Damage 7. Elite Damage 8. Strength |
| Helm | Eyes of the Earth | 1. Socket Flawless Royal Diamond 2. Critical Hit Chance 3. Seismic Slam Damage 4. Strength 5. All Resistance 6. Vitality |
| Gloves | Pull of the Earth | 1. Critical Hit Chance 2. Critical Hit Damage 3. Cooldown Reduction 4. Attack Speed 5. Strength |
| Shoulders | Spires of the Earth | 1. Strength 2. Cooldown Reduction 3. Area Damage 4. All Resistance 5. Vitality |
| Chest | Spirit of the Earth | 1. Sockets Flawless Royal Diamond 2. Strength 3. All Resistance 4. Elite Damage Reduction 5. Vitality |
| Pants | Weight of the Earth Captain Crimson's Thrust (Crafted) | 1. Sockets Flawless Royal Diamond 2. Strength 3. 2 Sockets 4. All Resistance 5. Vitality |
| Boots | Foundation of the Earth Captain Crimson's Waders (Crafted) | 1. Seismic Slam Damage 2. Strength 3. All Resistance 4. Vitality 5. Armor |
| Ring 1 | Restraint The Compass Rose Convention of Elements Ring of royal Grandeur (Bounties A1, Cubed) | 1. Socket 2. Critical Hit Damage 3. Critical Hit Chance 4. Cooldown Reduction 5. Damage Range |
| Ring 2 | Focus Band of Might Obsidian Ring of the Zodiac | 1. Socket 2. Critical Hit Damage 3. Critical Hit Chance 4. Cooldown Reduction 5. Damage Range |
| Bracers | Bracers of Destruction Mortick's Brace Nemesis Bracers | 1. Cold Damage 2. Critical Hit Chance 3. Strength 4. All Resistance 5. Vitality |
| Amulet | Squirt's Necklace The Flavor of Time The Traveler's Pledge | 1. Socket 2. Critical Hit Damage 3. Cold Damage 4. Critical Hit Chance 5. Strength |
| Belt | Captain Crimson's Silk Girdle (Crafted) | 1. Strength 2. All Resistance 4. Vitality 5. Life % |
| Potion | Bottomless Potion of Kulle-Aid | For breaking walls to pull enemies and increase DPS |
- This is one the very few Barbarian ranged builds so we use Zei's Stone of Vengeance as our main damage gem.
- Bane of the Trapped is the most common damage gem and we can proc it with our Seismic Slam Permafrost skill constantly providing us a flat 1.6 damage multiplier.
- Other popular choices are Bane of the Stricken for solo gameplay to kill the Rift Guardian, Boon of the Hoarder for Torment farming. Molten Wildebeest's Gizzard can be used to gain a shield buff in combination with Squirt's Necklace for double damage output, some additional toughness & insane healing.
- Seismic Slam Permafrost as your main long ranged damage dealer. We can only choose this Cold rune so we can proc our Fjord Cutter 2.5 damage boost.
- Leap Call of Arreat together with the Might of the Earth (4) Bonus for a crazy Armor buff combined with the ability to proc our Band of Might.
- Wrath of the Berserker as an overall stat boost & to gain Crowd Control immunity. You want to pair this skill with Boon of Bul-kathos and potentially Obsidian Ring of the Zodiac.
- The last three skill slots are very situational: Most builds use Call of the Ancients Ancients' Fury to regain Fury, War Cry for toughness, Furious Charge for extra mobility or Threatening Shout Falter for an damage debuff on the monsters. You can also use Ignore Pain to have a Crowd Control immunity option combined with some nice toughness during Wrath of the Berserker down time or Battle Rage for a pure damage boost.
- As a ranged build we can choose a crazy damage passive: No Escape for a flat 1.3 damage multiplier.
- Rampage is the strongest Barbarian passive there is with it's 25% buff to total Strength. It provides a massive boost to both offense and defense (Armor).
- Boon of Bul-kathos for Wrath of the Berserker & Call of the Ancients Ancients' Fury up time.
- Another damage option is Ruthless to finish low hit-point targets quickly or we take Nerves of Steel as a defensive touch for a cheat death.
| Core | Offensive | Defensive | Utility |
| 1. Movement Speed | 1. Critical Hit Damage | 1. All Resistance | 1. Area Damage |
| 2. Strength | 2. Critical Hit Chance | 2. Life % | 2. Pickup Radius |
| 3. Vitality1 | 3. Cooldown Reduction | 3. Armor | 3. Resource Cost Reduction |
| 4. Maximum Fury2 | 4. Attack Speed | 4. Life Regeneration | 4. Life per Hit |
1 Add a bit of Vitality if you feel too squishy (a total of 700,000 Life is recommended).
2 Not really necessary, but can be played at high Attack Speed Breakpoints to not run out of Fury during your Cold Convention of Elements rotation.
The Altar of Rites is a tree that grants tremendous powers to your entire account in exchange for sacrifices. It requires you to farm Bounties, kill the Ubers, craft the Staff of Herding, and more. Completing all 26 of these tasks, along with sacrificing 6 Primal Ancients grants you extra Damage, Defense, Quality of Life, Increased Drops and 3 Potion Super Powers. Read the full guides on Unlocking the Altar and the Altar Mechanics by Raxxanterax and Chewingnom to learn everything about this fantastic mechanic!
Note: The suggested path assumes you are playing Solo and used the Challenge Rift Cache to help you level up.
Optimal Path
Node 2: Choose Anointed to gain a full set of 70 yellows from level 18-70!
Node 6: Rush to gain double Bounties to help unlock other Nodes in the Altar.
Node 7: Take Vigor to help your build sustain its resources.
Nodes 8-14: These are the last Nodes you can gain until the Challenge Rift resets. Take at least 1 Node at the bottom of each path to unlock all 3 Potion Super Powers. Pick up the Mirror Node at the top for a colossal 41% extra XP all season. Remember to unlock Father once you clear GR70 solo and have your first Primal!
Nodes 15-26: Pick up the final Quality of Life, Damage, and Defense Nodes (in that order) to finish the Altar.
Potion Super Powers: Take Father first, then Mother, and finally Mortal.
Disclaimer: The Mortal and Mother Potions require you to salvage 2 and 3 Primals respectively. Unlock them as soon as you have those materials as they don't cost a point!
Use the Scroll Bar to see Altar Progression
Patch 2.7.0 revamped the follower system giving all 3 hirelings new powers and the emanate system. The first thing you should do is read our complete follower guide and remember the key takeaways:
- The emanation system allows followers to share certain legendary and set powers with you. The most important ones are: The Flavor of Time, Nemesis Bracers, Avarice Band, Sage’s Journey and Cain’s Destiny. Click the guide above for the full list.
- Follower’s powers are based on their main stat (maxed at 25.000, but they have a 2.5x multiplier so you only need 10.000). This means we stack Intelligence on the Enchantress, Dexterity on the Scoundrel and Strength on the Templar.
- Guardian's Jeopardy (3) Bonus works for followers by improving their inherent stat multiplier from x2.5 to x3.5, making it slightly easier to hit the 25,000 main stat threshold if needed.
- Followers share 20% of their Experience, Magic and Gold Find stats with you.
- Legendary gems do not work on followers, except Esoteric Alteration and Mutilation Guard.
- Cooldown Reduction does not work for any follower skill except the Templar’s Heal.
- Followers never deal significant damage; you’re on your own to clear the content.
With these in mind, let’s get into our recommendation for this build:
Select Follower
For speed Greater Rifts we recommend this Enchantress setup because she is the only follower that gives Cooldown Reduction, allowing you to spam your abilities more. Since this is speed content, she’ll stay alive with Esoteric Alteration and Mutilation Guard and use Hand of the Prophet to gain all skills. This will give us Cooldown Reduction, Elemental Damage, Reduced Damage from Ranged Attacks, Armor, Attack Speed, and a Cheat Death.
Stat Priorities:Since we do not have the immortality focus, we need to stack survivability on our Enchantress.
Intelligence > Vitality > Life % > Armor > All Resistance > Life Per Hit > Attack Speed.
Key Items:
- The Flavor of Time: For double duration on Pylons.
- Nemesis Bracers: For more progression from Elites.
- Oculus Ring: For 85% increased damage.
- Ice Climbers: To make your follower immune to Freeze and Immobilize effects.
- Hellfire Ring, Leoric's Crown and Cain's Destiny: For more Experience and Attack Speed.
For Greater Rift Pushing we recommend this Enchantress setup for the Slow from Temporal Pulse, Cooldown Reduction from Prophetic Harmony, Damage Reduction and Armor from Powered Shield, and the Attack Speed from Focused Mind.
Stat Priorities:Since we have the immortality relic, we do not need to stack survivability on our Enchantress.
Intelligence > Attack Speed.
Key Items:
- The Flavor of Time: For double duration on Pylons.
- Nemesis Bracers: For more progression from Elites.
- Oculus Ring: For 85% increased damage.
- Unity: For 50% damage reduction if you're also wearing one.
- Ice Climbers: To make your follower immune to Freeze and Immobilize effects.
- Mempo of Twilight and Cain's Destiny: For more Attack Speed.
Cast your War Cry to start and group up monsters by Leaping around proccing your Might of the Earth (4) Bonus toughness bonus. Cast your Wrath of the Berserker before you start attacking with Seismic Slam Permafrost.
If there are many Elite packs or you engage dangerous monsters, especially during Wrath of the Berserker downtime, cast Call of the Ancients Ancients' Fury to regain Fury. Use Threatening Shout Falter to debuff the monsters ideally just before your Convention of Elements Cold cycle for a nice damage burst.
This build can be played in hardcore but is not particular HC friendly. Make sure to always use Nerves of Steel as a cheat death. You can always add more Paragon points into Vitality for a toughness boost as well. Another option is to use the high toughness setup with Obsidian Ring of the Zodiac and Ignore Pain.
Check out our dedicated Hardcore Survival Guide to learn more about how to succeed in this game mode!
Variants
Concept
This build can be played both for solo or for lower group speed Greater Rifts. We play a ranged Barb and can either have a teammate group up enemies for us and keep them at distance or we do it our self by using Leap Call of Arreat and hit them with long ranged Seismic Slam Permafrost.
Gameplay
With In-Geom and Furious Charge Merciless Assault combined we are able to move around quickly! Start by grouping up a bunch on monster with Leap Call of Arreat and use Call of the Ancients Ancients' Fury to regain Fury. Once monsters are grouped up activate Wrath of the Berserker for more damage. Run or Leap out to create some distance for No Escape and Zei's Stone of Vengeance for an additional maximum 2,34x damage multiplier. Now burst them with Seismic Slam Permafrost on your Cold rotation of Convention of Elements.
Setups
Feel free to switch Threatening Shout Falter into Battle Rage.
Concept
Here we focus mainly on trash monsters while we damage and drag Elites along in open maps to finish them off with a sick Conduit Pylon enhanced by The Flavor of Time. Of course we have to add Bane of the Stricken to be able to kill the Rift Guardian.
Gameplay
Keep Battle Rage up at all times and create huge pulls by using Leap Call of Arreat. Run to create some distance for No Escape and Zei's Stone of Vengeance for an additional maximum 2,34x damage multiplier. Now attack the enemies with Seismic Slam Permafrost for massive Area Damage. Keep Wrath of the Berserker active as often as you can and avoid to move around to much to keep the offensive buff from Endless Walk.
Setups
Feel free to to drop Captain Crimson's Trimmings to take Obsidian Ring of the Zodiac for cooldown resets and add a Pride of Cassius together with Ignore Pain instead of Threatening Shout Falter for more toughness.
Concept
For more information, check out our full Echoing Nightmare Guide and take a look at our Echoing Nightmare Build Tier List and our META post for the best builds and strategies! This build is good for this game mode. This Build utilize the Speed Greater Rift setup with a one tweak.
Changes
- No changes needed.
Gameplay
- Click Speed Pylon instantly to boost your mobility and dodge Green Meteors.
- Around Wave 90, click Channeling Pylon and Power Pylon.
- After Wave 100, use Conduit Pylon.
- At Wave 122, stop attacking and run to the corner to let the timer run out.
With In-Geom and Furious Charge Merciless Assault combined we are able to move around quickly! Start by grouping up a bunch on monster with Leap Call of Arreat and use Call of the Ancients Ancients' Fury to regain Fury. Once monsters are grouped up activate Wrath of the Berserker for more damage. Run or Leap out to create some distance for No Escape and Zei's Stone of Vengeance for an additional maximum 2,34x damage multiplier. Now burst them with Seismic Slam Permafrost on your Cold rotation of Convention of Elements.
Mechanics
- On the top section of this guide we already briefly touched the Bracers of Destruction problem. Indeed, the 6.0 damage multiplier of this item only applies to a maximum of 10 targets.
- For this reason you will not get as much benefit from big monster pulls in comparison to AoE heavy builds like the Whirlwind Barb. Thus you will not focus on stacking Area Damage on your gear too much. This also means you will not be spending minutes trying to pull half the Greater Rift floor into one spot with Ancient Spear Rage Flip.
- On some item pieces like Shoulders it is still worth going for, as this slot in particular lacks any decent alternative. On other items, like Rings or Echoing Fury, there are just better options with Cooldown Reduction or Physical Damage.
- For a full in-depth Area Damage mechanics guide check out this post by sVr!
Summary
- Put together the core items and acquire the full Might of the Earth set.
- Lack of large AOE damage due to Bracers of Destruction limitations.
- Fun and unique ranged Barbarian playstyle with Leap.
- The Earthquake version of the build is not very viable at the moment.
- Easy to play the base version but difficult to master in Solo Pushes!
The Seismic Slam build can be fun to play but is far behind the other top Barbarian builds like the Whirlwind Rend Barb. Let us hope we can get some nice additions to the set in future patches!
Credits
Written by Rob. Introduction by Chewingnom.
Reviewed by Northwar & Raxxanterax.
Shoutout to Rage for additional insights on mechanics and endgame push variants.
Updated by Chewingnom.