Marksmanship Hunter Mythic+ Guide
Welcome to the Marksmanship Hunter Mythic+ guide for the World of Warcraft patch 11.1.7! This guide covers everything you need to know to understand your character! Are you starting out and leveling up from 70? Check out the leveling guide!
Overview
Hero Talents
- Your two Hero Talent trees are Dark Ranger and Sentinel.
- They both provide different defensive benefits that are important to your survivability and should be taken into account, with Dark Ranger being more useful defensively in general.
- Sentinel will be used in all content currently due to Dark Ranger being very undertuned.
- The Sentinel hero talent tree mostly provides passive benefits and does not introduce an additional button to your rotation.
- Mainly revolves around Sentinel applying up to 10 stacks to your targets through different means within the hero talent tree which have a chance to activate, removing stacks and dealing damage to the target.
- The talent Symphonic Arsenal makes Multi-Shot proc some extra damage on AoE.
- The capstone talent, Lunar Storm, makes it important for you to time a Rapid Fire whenever Lunar Storm is off cooldown to proc this ability on your target and increases the damage you do to it and enemies around it.
- It has also changed to slowly moving after your target, making it less punishing on fights with movement.
- Sentinel grants you Don't Look Back, giving you some extra survivability through absorbs.
- This hero talent tree introduces Black Arrow to replace Kill Shot, changing how it interacts with your gameplay.
- Usable on enemies below 20% health, above 80% health through The Bell Tolls, and whenever you proc Deathblow.
- Interacts with Trick Shots through Bleak Powder, giving it more AoE potential.
- Many talents in the Dark Ranger tree like Shadow Surge, Banshee's Mark and Phantom Pain all incentivizes you to always use your Black Arrow on different targets, spreading out the DoT effect and increasing its effectiveness.
- Will cleave to nearby targets during Trueshot through the talent Withering Fire.
- Bleak Arrows increases the value of your auto shots, giving you a chance to proc Deathblow.
- Dark Ranger applies Survival of the Fittest to you when you use Exhilaration through the talent Smoke Screen, making it an on demand damage reduction cooldown.
- Using Survival of the Fittest with this talent chosen also heals you for 50% of what a normal Exhilaration would.
- Shares choice node with Embrace the Shadows, providing a decent amount of consistent self healing.
Talents
When to use this Spec
Use this spec on all key levels.
Gameplay Altering Talents
Discover all talents that significantly alter your gameplay within the Spec and Class Talent trees. This section gives a concise overview of these talents and their applications but for a more detailed look check out the Rotation and Deep Dive sections below.
Spec Tree
- Rapid Fire + Aimed Shot
- Your core damage dealing abilities as a Marksmanship Hunter. They are buffed by a lot of other talents you pick throughout your Talent Tree.
- Multi-Shot + Trick Shots + Volley
- Enables your entire AoE damage dealing kit. Only used in 3+ target scenarios.
- Precise Shots + Streamline
- Important passives that enables your more heavy hitting abilities.
- Bullseye
- Gives you extra damage potential on targets below 20%.
- Eyes in the Sky + Improved Spotter's Mark
- Replaces your ability to use a pet with a non-interactive eagle that grants you certain active and passive abilities.
- Deathblow
- Enables Kill Shot/Black Arrow usage in your rotation over the entire duration of a fight, as opposed to its usual use on targets below 20% health.
- Trueshot
- Your main offensive cooldown, enhanced by multiple talents below it to make it a very important part of your kit.
Class Tree
- Padded Armor
- Grants Survival of the Fittest two charges. This and Lone Survivor make up for a majority of your Defensive capabilities.
- Natural Mending
- Heavily reduces the cooldown of your Exhilaration ability, allowing you to heal yourself on demand quite often.
- Emergency Salve
- Grants Feign Death and Aspect of the Turtle the capability to dispel yourself from Poison and Disease debuffs. Occasionally extremely useful to help yourself and your group.
Hero Talents
- Lunar Storm
- You want this to line up with your cooldowns and big damage, meaning you will sometimes hold Rapid Fire for a few seconds while waiting for Lunar Storm to be ready.
- Sentinel Watch or Eyes Closed
- Both valuable choices depending on your gear and length of combat.
- Overwatch
- Overall more value in keys, although Crescent Steel can be good for bosses/minibosses.
- Sideline
- Always picked since Catch Out can cause issues with its random roots.
Rotation
Tier Set
- 2-Set: Your spells and abilities have a chance to hit a Jackpot! that increases your auto shot damage by 200% and reduces the time between auto shots by 0.5 sec for 10 sec. Casting Trueshot always hits a Jackpot!.
- 4-Set: Consuming Lock and Load also fires an Explosive Shot at 300% effectiveness.
Single-Target
Opener
- Your goal in the opener and all your Trueshot windows is to use as many Aimed Shots empowered by Moving Target and Streamline as possible, while filling with your other abilities to empower it and regain focus.
- Always apply Hunter's Mark on the highest health target before combat.
- There can be some variance in the opener since you have talents that have a chance to reset the cooldown of certain abilities.
- Surging Shots can reset Rapid Fire's cooldown.
- Lock and Load can also grant a charge of Aimed Shot and make it instant.
- If you are unlucky with procs you may run out of Focus even during Trueshot, in that case fill with a Steady Shot.
- Use any on-use trinket, racials and Tempered Potion with your Trueshot.
Priority List
This is a general priority you aim to maintain throughout the fight.
- Cast Rapid Fire if Bulletstorm and In the Rhythm are not up, and to proc and to proc Lunar Storm if ready.
- Use Aimed Shot if empowered by Moving Target and Streamline.
- Use Arcane Shot if you have Precise Shots stacks.
- Cast Rapid Fire on cooldown.
- Use Explosive Shot.
- Use Kill Shot if available through Deathblow or if your target is below 20% health.
- Cast Steady Shot if you're too low on Focus or if everything above is on cooldown.
AoE
Opener
- Your goal in the AoE opener and all your Trueshot windows is to use as many Aimed Shots empowered by Moving Target, Streamline and Trick Shots as possible, while filling with your other abilities to empower it and regain focus.
- Always apply Hunter's Mark on the highest health mob before combat.
- Your AoE opener can vary depending on procs from Lock and Load and Surging Shots.
- Use any on-use trinket, racials and Tempered Potion with your Trueshot.
Priority List
- Cast Rapid Fire if you have Trick Shots active AND if Bulletstorm and In the Rhythm are not up OR to proc Lunar Storm if ready.
- Use Explosive Shot if you can follow it up with a Aimed Shot on the same target.
- Cast Aimed Shot on cooldown if you have Trick Shots active.
- Cast Rapid Fire on cooldown if you have Trick Shots active.
- Use Multi-Shot to activate Trick Shots if it is NOT currently active.
- Cast Steady Shot if you are low on Focus or everything else is on cooldown.
Deep Dive
The Importance of Trick Shots on AoE
- It is crucial for you to ALWAYS have the Trick Shots buff active before you use Rapid Fire or Aimed Shot in AoE scenarios no matter what.
- Remember that using either of them always consumes your current Trick Shots buff, except when you have Volley running which constantly applies Trick Shots while active.
- Not doing this in all AoE cases results in a significant loss of overall damage.
Maximizing your Trueshot uses
- Trueshot has a baseline cooldown of 2 minutes, but with the talents Calling the Shots and Sentinel Watch you reduce it to about 1:10-1:20~ seconds depending on how many Spotter's Mark procs you get.
- Always try to use it again as soon as possible after it comes up, since you lose out on cooldown reduction for your next Trueshot if you don't, decreasing the number of uses you get over the duration of the dungeon.
- However, you don't want to use your Trueshot in a way that leaves it active while you're in between pulls and not doing damage to anything. If a pull is close to dying when Trueshot comes off cooldown you should still hold it for the next pull instead.
Potentially good Talent Swaps you can make
- Swapping to Kodo Tranquilizer or Devilsaur Tranquilizer if you need more Magic or Enrage dispels.
- Bursting Shot if you find yourself in need of more stops or another knockback.
- Moment of Opportunity to get a burst of movement speed increase when a Trap that you placed is triggered.
- Ghillie Suit can be useful on certain trash, giving you an extra defensive cooldown by using Feign Death + Camouflage in quick succession.
- Binding Shackles if you don't find any use for either of the aforementioned talents.
- You can always swap from Implosive Trap to High Explosive Trap if you ever need to push the mobs away rather than keeping them in place.
Understanding Mechanics
Rotational min-maxing is just one aspect of mastering a specialization, but there are numerous other key mechanics that influence your performance. Use the following guides to improve them.
Dungeons
← Scroll for more Dungeons →
Boss Tips
Brew Master Aldryr
- Be in position next to the bosses' table when he is reaching 66% and 33% to pick up the drinks and bring them to the adds to stop the Happy Hour phase.
- Use a defensive if Throw Cinderbrew is applied to you.
- Dodge the circles on the ground.
I'pa
- Use all your crowd control to control the Brew Drop adds and kill them off, ideally as stacked as possible.
- Use a defensive if Burning Fermentation is applied to you.
Benk Buzzbee
- When the Ravenous Cinderbee reach 1% health, click one to get on it and move into position to hit the barrels in the room with the new ability you get to clear them.
- Avoid flying the bee into the pools on the floor since that heals them and makes them hostile again.
- Use a defensive when the boss casts Fluttering Wing.
- Don't stand near the tank to avoid Honey Marinade.
Goldie Baronbottom
- Don't stand in the path where the tank is facing the boss to avoid Cash Cannon.
- Stay away from all the barrels in the room when they are about to explode to dodge the circle around them and the lava waves spawning from them afterwards.
- If necessary, walk close to an active bomb with Burning Ricochet to clear it before the intermission.
- During the Let It Hail! intermission, find the safest spot in the room and focus on dodging.
Trash Tips
- Important abilities to interrupt in this dungeon are:
- Rejuvenating Honey from Flavor Scientists.
- Free Samples? from Taste Tester.
- Boiling Flames from Venture Co. Pyromaniacs.
- Bee-stial Wrath from Bee Wrangler.
- Abilities you can purge with Tranquilizing Shot:
- Rejuvenating Honey from Flavor Scientists.
- Thirsty on Hired Muscle, Venture Co. Patron and Venture Co. Pyromaniacs.
- Spill Drink on Taste Tester.
- Bee-stial Wrath from Bee Wrangler.
- In the trash area before I'pa, make sure you focus on killing any Failed Batch mobs that spawn from the Flavor Scientists.
- Aim Reckless Delivery from Careless Hopgoblins into a nearby wall and dodge the charge yourself.
Pre Dungeon Start
- Use Tempered Potion just before the key is activated to increase your damage on the first pull.
Boss Tips
Ol' Waxbeard
- Misdirection your tank on cooldown to help them pick up any adds during the fight.
- Swap to the Dynamite Mine Cart instantly every time it spawns.
- If targeted by Reckless Charge, charge into the closest wall and dodge the charge yourself.
- Use a defensive if you are targeted by Luring Candleflame.
Blazikon
- Stay at a good range away from the boss when it casts Wicklighter Barrage and dodge the swirlies that you drop.
- Dodge Enkindling Inferno and use a defensive afterwards for the DoT.
- Aim Extinguishing Gust at candles and dodge the tornado when they spawn.
- Find the safe spot for Incite Flames towards where candles are not lit.
- Make sure you are topped before Dousing Breath hits.
The Candle King
- Make sure you hit any Wax on the ground with Darkflame Pickaxe and Throw Darkflame to clear them, reducing damage taken on the group.
- Interrupt Paranoid Mind.
- Use a defensive if there are many wax statues up and when targetted by Throw Darkflame.
The Darkness
- Help pick up candles if necessary to fuel the light.
- Interrupt Call Darkspawn as soon as possible and kill any adds summoned by the cast.
- Use a defensive for Shadowblast and Eternal Darkness.
- If the candle is out of light or you are in a bad position, you can place a Flare and stand in the area since that will make the area act as its lit up for 10 seconds.
Trash Tips
- Important abilities to interrupt in this dungeon are:
- Wicklighter Bolt from Royal Wicklighter.
- Mole Frenzy from Lowly Moleherd.
- Explosive Flame from Blazing Fiend.
- Flame Bolt from Kobold Flametender.
- Candleflame Bolt from Sootsnout.
- Flaming Tether from Sootsnout.
- Drain Light from Shuffling Horror.
- Abilities you can purge with Tranquilizing Shot:
- Enrage on Pack Moles.
- Panicked! on Lowly Moleherd.
Pre Dungeon Start
- Use Tempered Potion just before the key is activated to increase your damage on the first pull.
Boss Tips
Tussle Tonks
- Use Feign Death if targeted by Foe Flipper.
- Bait B.4.T.T.L.3. Mine well and dodge them when on the ground.
- Kill both bosses at the same time.
K.U.-J.O.
- If you are the furthest away player targeted by Explosive Leap, it will leap at you first and right after the cast goes through you can Feign Death to cancel the entire ability.
- You can damage the boss even when hiding from Venting Flames if the boss is placed correctly. Just make sure you have the Hiding Behind Junk buff on you.
Machinist's Garden
- Always keep your eyes open for Self-Trimming Hedge moving around the room to dodge them.
- Swap to Inconspicuous Plants when they spawn.
- Watch the middle of the room to see where "Hidden" Flame Cannon will spawn and dodge.
- Dodge Discom-BOMB-ulator on the ground.
King Mechagon
- Dodge and bait any Plasma Orb well.
- Use a defensive if targeted by Mega-Zap.
- Stay far away from Magneto-Arm whenever it spawns in phase 2.
Trash Tips
- Important abilities to interrupt in this dungeon are:
- Detonate from Bomb Tonk.
- Giga-Wallop from Mechagon Tinkerer.
- Tune Up from Mechagon Mechanic.
- Abilities you can purge with Tranquilizing Shot:
- Overclock from Mechagon Mechanic.
Boss Tips
Big M.O.M.M.A.
- Focus on cleaving the adds down and interrupt any Maximum Distortion casts.
- Save Single-Target cooldowns for Jumpstart phase.
- Aim Sonic Boom away from the group and dodge it yourself when its out.
- Dodge any blue swirlies on the ground.
Demolition Duo
- When the boss casts Big Bada BOOM!, make sure you aim any Barreling Charge at as many barrels as possible and stand close to barrels with Kinetic Explosive Gel and get dispelled to clear them.
- Also use a defensive when targeted by Kinetic Explosive Gel, especially if you are also hit by Quick Shots.
- Make sure you kill both bosses at the same time.
Swampface
- Make sure you always move together with Razorchoke Vines throughout the fight, especially when dodging Mudslide frontal and Rushing Tide waves.
Geezle Gigazap
- Use a defensive if you are targeted by Gigazap and don't hit any Dam Water on the ground with your circle.
- Kite your Leaping Sparks into Dam Water to despawn it.
Trash Tips
- Important abilities to interrupt in this dungeon are:
- Trickshot from Mechadrone Sniper.
- Surveying Beam from Venture Co. Surveyor.
- Bloodthirsty Cackle from Darkfuse Hyena.
- Blood Blast from Darkfuse Bloodwarper.
- Restorative Algae from Disturbed Kelp.
- Harpoon from Venture Co. Diver.
- Lightning Bolt from Venture Co. Electrician.
- Abilities you can purge with Tranquilizing Shot:
- Bloodthirsty Cackle on Darkfuse Hyenas.
- Start moving just before Shreddinator 3000's Shreddation cast finishes to dodge it just as it spawns.
Pre Dungeon Start
- Use Tempered Potion just before the key is activated to increase your damage on the first pull.
Boss Tips
Captain Dailcry
- Dodge the line from Hurl Spear.
- Interrupt Battle Cry.
- When the boss casts Savage Mauling on a player, break the absorb shield as quickly as possible.
- If its on you, you can Feign Death to interrupt it if you are fast enough.
Baron Braunpyke
- Dodge the swirlies place by Castigator's Shield.
- Interrupt Burning Light.
- Dodge the swirlies placed by Hammer of Purity and the hammers coming out afterwards.
- Move into the big circle spawned by Sacrificial Pyre three times to clear it.
- The group needs to move into it five times once it is empowered by Vindictive Wrath.
Prioress Murrpray
- Interrupt Holy Smite.
- Dodge the swirlie from Holy Flame.
- Turn around when the boss casts Blinding Light.
- Use a defensive for Inner Fire.
- Kite the circle that follows you from the The Sacred Flame cast.
- Teleports upstairs at 50% casting Barrier of Light. Break the shield and interrupt her after.
- Kill and control any Arathi Neophyte's spawning in phase 2.
Trash Tips
- Important abilities to interrupt in this dungeon are:
- Holy Smite from High Priest Aemya
- Holy Smite from Devout Priest.
- Greater Heal from Devout Priest.
- Fireball from Fanatical Conjuror.
- Flamestrike from Fanatical Conjuror.
- Abilities you can purge with Tranquilizing Shot:
- Reflective Shield on High Priest Aemya.
- Templar's Wrath on Zealous Templars.
- Stop Defend on any Arathi Footman with crowd control.
- Use Feign Death if targeted by Purification from Lightspawns.
Boss Tips
Kyrioss
- Casts Lightning Torrent on 100 energy that spawns four beams of lightning in different direction from the middle that start rotating after they spawn.
- Make sure you look at the lightning balls around the boss to see where they will be aimed and don't stand in those directions.
- Spread with Crashing Thunder.
- Dodge blue swirlies on the ground.
Stormguard Gorren
- Stand in a good position, ideally close to walls, to bait Crush Reality well since it leaves a puddle on the ground where it hits.
- Dodge the waves coming out right after the boss lands from casting this ability.
- Move away from the boss during Dark Gravity.
- Bounce Chaotic Corruption between the players in your group, making sure no one gets the debuff too often.
Voidstone Monstrosity
- Make sure all players have a decent spread around the boss area for when the boss casts Null Upheaval.
- This ability will spawn circles around four players and swirlies to dodge on the ground.
- After you dodged the swirlies, make sure you hit one of the rocks that also spawn from this ability with your circle to clear it.
- This ability will spawn circles around four players and swirlies to dodge on the ground.
- The boss has an absorb shield through Void Shell. Once its broken you deal 100% increased damage to the boss for 20 seconds, so make sure you have your cooldowns ready for when it breaks.
- If you get Unleash Corruption, move back in the room to get dispelled since it leaves a puddle behind that you want to keep out of the way of your playing area.
Trash Tips
- Important abilities to interrupt in this dungeon are:
- Lightning Bolt from Cursed Thunderer.
- Void Bolt from Corrupted Oracle.
- Void Bolt from Void Ascendant.
- Abilities you can purge with Tranquilizing Shot:
- Lightning-Infused on Cursed Thunderer.
- Lightning Surge on Stormrooks.
Pre Dungeon Start
- Use Tempered Potion just before the key is activated to increase your damage on the first pull.
Boss Tips
Coin-Operated Crowd Pummeler
- Summons clickable balls with Footbomb Launcher that you need to aim towards the boss, increasing the bosses' damage taken with each hit.
- Make sure you try to take care of further away balls and kick them into the boss/closer to melee.
- Save one ball until right before it explodes to extend the damage taken increase as much as possible.
- Dodge Shocking Claw frontal.
- Use a defensive for each Static Pulse.
Azerokk
- Use your crowd control on the Earthrager adds and kite them if they fixate you.
- When an add gets empowered by Azerite Infusion, focus it until its dead.
- Use a defensive for Resonant Quake.
- Dodge the Tectonic Smash frontal.
Rixxa Fluxflame
- Dodge the ground effects spawned by Gushing Catalyst and move into a safe spot.
- If you get targeted by Azerite Catalyst, place the puddles well to give you and your group some space left to stand on.
- If targeted by Propellant Blast, make sure you aim it towards puddles on the ground to push them away for space.
Mogul Razdunk
- Its very important to not stand too far away from the boss just before it casts Gatling Gun since it is very difficult to dodge unless you are in melee.
- Move out if targeted by Homing Missile until the red circle around it doesn't hit anyone else in the group then walk into it.
- If you move far away from the boss when a Homing Missile is coming towards you, you can Feign Death while the red circle is not hitting anyone, including yourself, to avoid all damage by this ability.
- There are B.O.O.M.B.A. Drones that fly around the room in the first and last phase, periodically shooting out rockets straight ahead of where they are facing that you need to dodge.
- Make sure you look at where they fly at all times to find a safe spot where they will not shoot.
- In the intermission, focus on killing the Venture Co. Skyscorchers, use defensives if you are targeted by them too much, and move to the rockets on the floor if you are targeted by Drill Smash to destroy them.
Trash Tips
- Important abilities to interrupt in this dungeon are:
- Toxic Blades from Hired Assassins.
- Iced Spritzer from Refreshment Vendors.
- Rock Lance from Venture Co. Earthshapers.
- Furious Quake from Stonefury.
- Tectonic Barrier from Stonefury.
- Transmute: Enemy to Goo from Venture Co. Alchemists.
- Abilities you can purge with Tranquilizing Shot:
- Inhale Vapors on Addled Thugs.
- Overtime! cast by Taskmaster Askari.
- Make sure you stop Activate Mech with any crowd control if its being cast by Mech Jockeys.
- Before last boss, make sure you focus down Crawler Mine mobs when they are up.
Pre Dungeon Start
- Use Tempered Potion just before the key is activated to increase your damage on the first pull.
Boss Tips
An Affront of Challengers
- Noxious Spores spawns green swirlies that you need to dodge.
- Don't be too far away from the bosses to more easily dodge the frontal from Decaying Breath.
- Spread for Searing Death and use a defensive.
- Interrupt Necromantic Bolt.
- Use a defensive for Mighty Smash.
Xav the Unfallen
- The boss sometimes casts Blood and Glory, bringing two players down into an arena to fight each other where the winner gets a damage increase buff.
- Just try to finish this duel as fast as possible, regardless of who wins.
- Spawns an Oppressive Banner that slows your group, swap to this or cleave it down depending on what your group decides.
- When the boss casts Might of Maldraxxus it will do three abilities after each other at random:
- Deafening Crash that creates a big circle around him that you need to move out of.
- Massive Cleave, a frontal covering half the room that you need to get out of.
- Crushing Slam, a smaller frontal aimed at a player that you need to move out of.
- Make sure you save Disengage and Aspect of the Cheetah to help dodging in this phase.
Kul'tharok
- When the group gets Draw Soul, stack up away from the boss to spawn the adds well and kill them as soon as possible.
- Place a Tar Trap and Binding Shot every time these spawn to help control them.
- Spread with Well of Darkness and use a defensive.
- Look out for your tank's position to avoid the Necrotic Eruption frontal.
- Watch the orbs spawning from Death Spiral throughout the fight.
Gorechop
- Watch the sides of the rooms for Meat Hooks, some of them spawn earlier and move earlier to give you a passage between the hooks so you don't get hit.
- Make sure you stand about 10 yards away from the boss whenever Meat Hooks is not happening. This prevents you from getting gripped by Tenderizing Smash while also being able to dodge the circle around the boss after easily.
Mordretha, the Endless Empress
- Move away from the Grasping Rift when it spawns.
- Look where the boss faces when casting Dark Devastation to dodge the frontal beam.
- The beam will rotate after it spawns, so be close to the boss to more easily dodge it.
- When targeted by Manifest Death, don't stand too close to anyone else in the group but not too far away from the boss since it spawns an add when the debuff runs out.
- Counter Shot the add you spawn right away and Misdirection the adds to the tank.
- In Phase 2 the boss casts Echoes of Carnage that spawns spirit adds that you need to keep an eye out for and dodge, both around the room and charging from the sides.
Trash Tips
- Important abilities to interrupt in this dungeon are:
- Necrotic Bolt from Battlefield Ritualists.
- Unholy Fervor from Battlefield Ritualists.
- Demoralizing Shout from Ancient Captain.
- Necrotic Bolt Volley from Maniacal Soulbinder.
- Necrotic Bolt from Maniacal Soulbinder.
- Bone Spear from Bone Magus.
- Grave Spike from Bone Magus.
- Spirit Frost from Nefarious Darkspeakers.
- Bind Soul from Shackled Souls.
- Withering Discharge from Blighted Sludge-Spewer.
- Decaying Filth from Blighted Sludge-Spewer.
- Abilities you can purge with Tranquilizing Shot:
- Raging Tantrum on Raging Bloodhorn.
- Death Wish on Unyielding Contender.
- Bone Shield on Bone Magus.
Affixes
The Affix system got revamped going into The War Within Season 1 retiring most Affixes as well as introducing new kiss-curse ones while also changing on which key level these appear.
- +4 Affixes -- Rotates on a weekly basis
- Xal'atath's Bargain: Ascendant
- Xal'atath's Bargain: Voidbound
- Xal'atath's Bargain: Oblivion
- Xal'atath's Bargain: Devour
- Xal'atath's Bargain: Pulsar
- +7 Affixes -- Alternates between each other on a weekly basis
- Tyrannical
- Fortified
- +10 Affixes -- Alternates between each other on a weekly basis, is always the opposite of the +7 Affix
- Tyrannical
- Fortified
- +12 Affix
- Xal'atath's Guile -- Replaces the +4 Affix
Below you get some useful tips for handling different Mythic+ Affixes as a Marksmanship Hunter.
- Xal'atath's Bargain: Ascendant
- Your strongest tools to deal with these spawns are Implosive Trap and Tranquilizing Shot with Kodo Tranquilizer talented, so make sure you swap to that talent for Ascendant weeks.
- Xal'atath's Bargain: Voidbound
- The talent Bullseye get extra value on Voidbound weeks since the spawn starts at low health.
- Make sure you swap to it right away, ideally with a Rapid Fire if ready, to gain a lot of Crit from this affix.
- Xal'atath's Bargain: Oblivion
- During Oblivion weeks, make sure you play closer to melee in general to intercept these orbs. Both Mastery and Leech are very helpful stats for you so prioritize this over fully minmaxing your damage when they spawn.
- Xal'atath's Bargain: Devour
- Your best tool to deal with Devour weeks is Emergency Salve which becomes mandatory in every dungeon. Simply use Feign Death every time this affix is activated to deal with your own debuff instantly.
- Xal'atath's Bargain: Pulsar
- Whenever you can move without losing damage, make sure to help soak other player's orbs and if all of them are already soaked just move yours into someone else.
Stat Priority
Understand your secondary stat priority and the tertiary stats needed for optimal performance during Mythic+ dungeons as a Marksmanship Hunter. For more detailed information, visit the Stats and Attributes guide.
Higher Item level items are better in most scenarios. For an accurate representation of what item to equip you should use Simcraft! A static "Stat Priority" is just a starting point and can easily shift depending on your individual gear.
All secondary stats are affected by diminishing returns. Click here to learn more!
Tertiary
- Avoidance - Great stat to reduce the damage intake of "Area of Effect" abilities.
- Leech - Provides additional healing through dealing damage. Great stat especially in AoE scenarios.
- Speed - Way less useful for you since Marksmanship Hunter already has great mobility, but it can help you deal with certain mechanics on bosses, increase your DPS slightly during heavier movement or just help you move through the dungeon quicker.
Gear
| Slot | Item | Location |
|---|---|---|
| Head | Tireless Collector's Chained Cowl | The One-Armed Bandit / Catalyst |
| Neck | Undermine Merc's Dog Tags | Raid BoE |
| Shoulder | Crashguard Spaulders | The MOTHERLODE!!(Vault) |
| Cloak | Consecrated Cloak | Crafted |
| Chest | Tireless Collector's Battlegear | Sprocketmonger Lockenstock / Catalyst |
| Wrist | Glyph-Etched Vambraces | Crafted |
| Gloves | Tireless Collector's Gauntlets | Cauldron of Carnage / Catalyst |
| Belt | Durable Information Securing Container | Delves |
| Legs | Tireless Collector's Armored Breeches | Stix Bunkjunker / Catalyst |
| Boots | Shrapnel-Ridden Sabatons | Vexie and the Geargrinders |
| Ring 1 | Miniature Roulette Wheel | The One-Armed Bandit |
| Ring 2 | The Jastor Diamond | Chrome King Gallywix |
| Trinket 1 | House of Cards | One Armed Bandit |
| Trinket 2 | Improvised Seaforium Pacemaker | Operation: Floodgate |
| Weapon | "Tiny Pal" | Mug'Zee |
Below you are presented with a good list of farmable alternatives that are obtainable outside of WoW’s weekly lockout system. While replaced in time as you progress, these offer immediate character power.
| Slot | Item | Location |
|---|---|---|
| Head | Psychogenic Prognosticator's Lenses | Mechagon Workshop |
| Neck | Flickering Glowtorc | Darkflame Cleft |
| Shoulder | Crashguard Spaulders | The MOTHERLODE!! |
| Cloak | Chef Chewie's Towel | Cinderbrew Meadery |
| Chest | Boltbreaker Armor | The Rookery |
| Wrist | I'pa's Pale Aleguards | Cinderbrew Meadery |
| Gloves | Linked Pummeler Grips | The MOTHERLODE!! |
| Belt | Portable Power Generator | Operation: Floodgate |
| Legs | Divine Pyrewalkers | Priory of the Sacred Flame |
| Boots | Boots of Shuddering Matter | Theater of Pain |
| Ring 1 | Hoop of the Blighted | The Rookery |
| Ring 2 | Ring of Perpetual Conflict | Theater of Pain |
| Trinket 1 | Improvised Seaforium Pacemaker | Operation: Floodgate |
| Trinket 2 | Signet of the Priory | Priory of the Sacred Flame |
| Weapon | Keeza's 'B.' B.B.B.F.G | Operation: Floodgate |
Trinkets
Below you can find active and passive alternatives to our recommended trinkets. Do note that some trinkets are better than others depending on the mythic+ dungeon.
Active Trinket alternatives
- House of Cards
- Funhouse Lens
- Good alternative to House of Cards, though only on lower item levels since it only drops from Delves.
- Signet of the Priory
Passive Trinket alternatives
- Improvised Seaforium Pacemaker
- Mechano-Core Amplifier
- Overall good value trinket. Only available from Delves.
- Suspicious Energy Drink
- Good alternative to Mechano-Core Amplifier. Only available from Delves.
Embellishments
- 2x Dawnthread Lining
- Best choice overall unless since you usually stay over 80% health over the majority of a Mythic+ dungeon.
- Craft this on Wrists and Cloak. Other slots can be considered depending on your available gear.
Remaining Sparks
- Crafted items are 681 item level and regular items are 684 on max item level therefore it's not beneficial to equip crafted items outside of your 2x embellishments unless you don't have access to other high item level gear on that slot.
Simcraft
To find the best combination of gear available to you or identify the best possible upgrades, visit our Simcraft guide to learn how to utilize Simcraft easily and effectively.
Consumables
- Phials
- Flask of Alchemical Chaos -- maximum DPS.
- Flask of Tempered Versatility -- less DPS but more survivability.
- Food
- Beledar's Bounty
- Feast of the Divine Day
- Combat Potion
- Tempered Potion
- Health Potion
- Algari Healing Potion
- Weapon Oil
- Algari Mana Oil
- Augment Rune
- Crystallized Augment Rune
- Sockets
- Masterful Ruby
- Culminating Blasphemite -- Unique, use one of each gem color to enhance your Culminating Blasphemite.
- Deadly Onyx
- Deadly Sapphire
- Deadly Emerald
Enchantments
| Head | Greater Rune of the Void Ritual S.A.D. |
| Neck | Magnificent Jeweler's Setting 2x |
| Cloak | Enchant Cloak - Chant of Winged Grace |
| Chest | Enchant Chest - Crystalline Radiance |
| Wrist | Enchant Bracer - Chant of Armored Avoidance S.A.D. |
| Waist | S.A.D. |
| Legs | Stormbound Armor Kit |
| Boots | Enchant Boots - Defender's March or Enchant Boots - Scout's March |
| Ring 1 | Enchant Ring - Radiant Critical Strike Magnificent Jeweler's Setting 2x |
| Ring 2 | Enchant Ring - Radiant Critical Strike Magnificent Jeweler's Setting 2x |
| Weapon | Enchant Weapon - Authority of Radiant Power |
You buy S.A.D. from the Great Vault Vendor to add sockets to your Helm, Wrists & Waist.
Races
For min-maxing a Marksmanship Hunter in Mythic+, different racial traits can provide a tremendous benefit to your character. If this is not your top goal, picking a race that fits your style works just as well.
Alliance
- Stoneform -- Dwarf
- Able to dispel a lot of debuffs from you on demand, while also providing you with a 10% physical damage reduction upon use.
- Might of the Mountain -- Dwarf
- Passively increasing your Critical Damage and Healing done by 2%.
- Will to Survive -- Human
- Can break you out of certain CC, even in PvE scenarios.
- The Human Spirit -- Human
- You gain 2% more secondary stats from all sources.
- Spatial Rift -- Void Elf
- Throws out a shadowy projectile in front of you, if you press this button again after the projectile is thrown out, you teleport to its current location. Occasionally extremely helpful for movement.
- Entropic Embrace -- Void Elf
- Occasionally empowering you to deal 5% more damage with all your spells for 12 seconds.
Horde
- War Stomp -- Tauren
- Stuns 5 enemies close to you for 2 seconds.
- Endurance -- Tauren
- Increases your maximum health.
- Brawn -- Tauren
- Passively increasing your Critical Damage and Healing done by 2%.
- Ancestral Call -- Mag'har Orc
- Increasing one of your two highest stats on a two minute cooldown.
- Berserking -- Troll
- Increases your Haste by 10% for 12 seconds. Useful if you want a damage racial that provides more burst damage.
- Rocket Jump -- Goblin
- About the same as Disengage, except it launches you forward instead of backwards. Can be very useful on certain encounters with heavy movement.
- Time is Money -- Goblin
- Increases your Haste by 1%.
- Gnome and Night Elf, with the active abilities Escape Artist for Gnome to break roots and Shadowmeld for Night Elf, have proven useful in the past.
- However, you already have access to the same capabilities as Marksmanship Hunter with Disengage breaking roots on use and Feign Death generally working on the same things as Shadowmeld does, so they are much less useful for you.
Recommendation
For you as a Marksmanship Hunter, the overall most useful races to play would be Mag'har Orc or Tauren for Horde and Dwarf for Alliance. Mag'har Orc will provide you with a little bit more damage output while the other two will provide some extra defensive value through Endurance for Tauren and Stoneform for Dwarf.
Whenever Stoneform has usefulness it is the superior choice.
Macros
Discover recommended macros for Marksmanship Hunter during Mythic+ dungeons and watch a quick video guide on creating simple macros for your character.
@Cursor Macros simply uses whichever ability you combined it with directly where you have your cursor without the usual second click confirmation. Can take some getting used to if you've never used it but makes all abilities like this faster to throw out.
@Cursor Volley
#showtooltip
/cast [@cursor] Volley
@Cursor Freezing Trap -- Freezing Trap can sometimes require very precise placement, in those cases, you might want to avoid using this macro.
#showtooltip
/cast [@cursor] Freezing Trap
@Cursor Tar Trap
#showtooltip
/cast [@cursor] Tar Trap
@Cursor Binding Shot
#showtooltip
/cast [@cursor] Binding Shot
@Cursor Implosive Trap
#showtooltip
/cast [@cursor] Implosive Trap
@Cursor High Explosive Trap -- High Explosive Trap can sometimes require very precise placement, in those cases you might want to avoid using this macro.
#showtooltip
/cast [@cursor] High Explosive Trap
@Cursor Flare
#showtooltip
/cast [@cursor] FlareThese macros stop your chosen ability from being used while Rapid Fire is channeling. This enables you to spam your next button while Rapid Fire is still channeling without losing out on any damage by interrupting the cast too early.
Stop Macro Aimed Shot
#showtooltip
/stopmacro [channeling: Rapid Fire]
/cast Aimed Shot
Stop Macro Arcane Shot
#showtooltip
/stopmacro [channeling: Rapid Fire]
/cast Arcane Shot
Stop Macro Steady Shot
#showtooltip
/stopmacro [channeling: Rapid Fire]
/cast Steady Shot
Stop Macro Kill Shot
#showtooltip
/stopmacro [channeling: Rapid Fire]
/cast Kill Shot
Stop Macro Black Arrow
#showtooltip
/stopmacro [channeling: Rapid Fire]
/cast Black ArrowMisdirection Mouseover -- Casts Misdirection on your mouseover target. Secondary use where you can replace @Solwinas in the macro with the name of the target you want to Misdirect and it casts it on them without the need for any mouseover at all.
#showtooltip
/cast [@mouseover, help][@Solwinas]Misdirection; Misdirection
Cancelaura Aspect of the Turtle Macro -- Removes Aspect of the Turtle from you when pressed.
/cancelaura Aspect of the TurtleAddons
Below, you see a screenshot of the author's User Interface for their Marksmanship Hunter, outlining which addons are used and how they are utilized in Mythic+ dungeons to make your life easier.
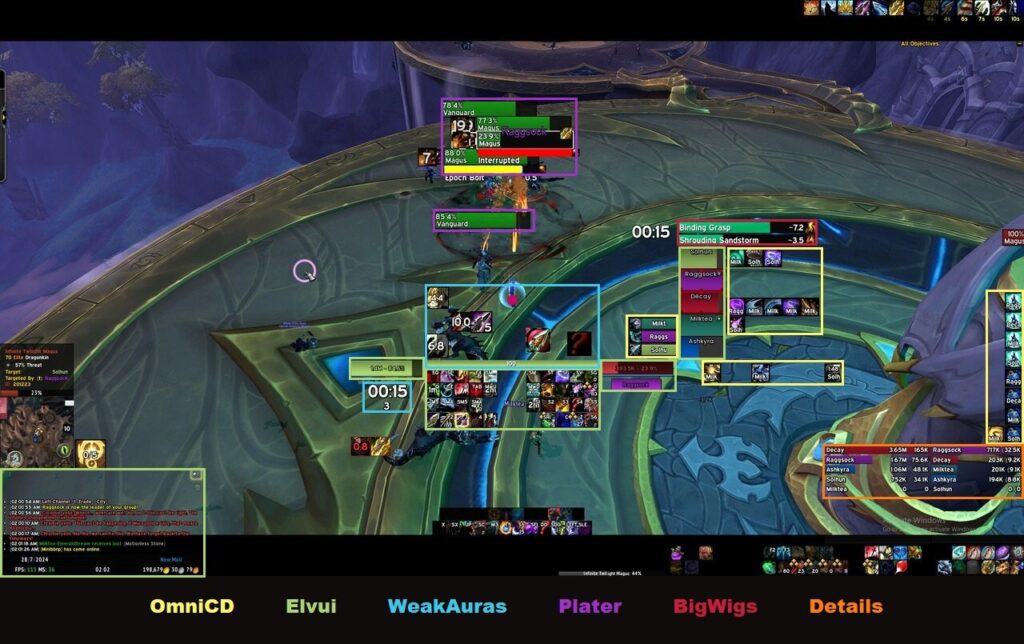
- OmniCD -- Party track addon
- Helpful addon for Mythic+ to check the available cooldowns of your party.
- ElvUI -- Full User Interface replacement
- A user interface designed around user-friendliness with extra features that are not included in the standard UI.
- Alternatively, you can also use Shadowed Unit Frames (SUF) and an action bar addon of your choice or of course stick to the default UI.
- BigWigs + LittleWigs -- Generic Boss Mod
- LittleWigs is a sub add-on to BigWigs, designed to alert you of dangerous abilities with messages and sounds, give you timers for bosses and more throughout all Mythic+ dungeons.
- WeakAuras -- Jack of all trades
- WeakAuras is a powerful and flexible framework that allows the display of highly customizable graphics on World of Warcraft's user interface to indicate buffs, debuffs, and other relevant information. This addon was created to be a lightweight replacement for Power Auras but has since introduced more functionalities while remaining efficient and easy to use.
- Plater -- Advanced Nameplates
- Plater is a nameplate addon with an extraordinary amount of settings, out of the box debuff tracking, threat coloring, and support for scripting similar to WeakAuras and wago.io + the WeakAuras-Companion for Mod/Script/Profile updates.
- Details -- In-depth Damage Meter
- Most powerful, reliable and handsome damage meter.
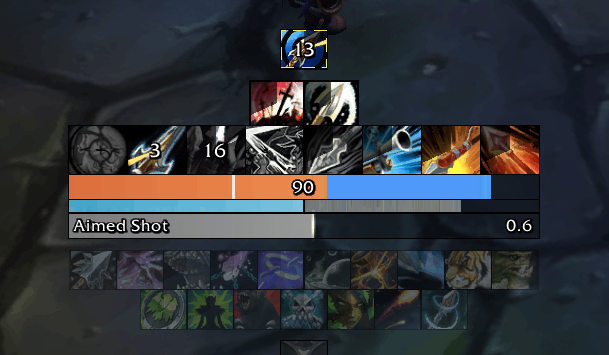
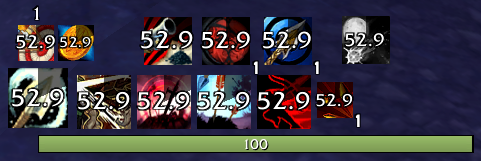
Buff Tracker
Tracks your most important buffs and your Focus if you prefer using your own UI.
Changes this Patch
- Developers’ Note: Dark Ranger’s performance is lower than expected, so we are making some substantial tuning changes to bring them closer to where we’d expect. We’d like Phantom Pain to be a compelling source of damage and worth playing around in Mythic+ and AOE scenarios, especially when combined with Trueshot and Withering Fire.
- Explosive Shot damage increased by 15%.
- Volley damage increased by 25%.
- Dark Ranger: Black Arrow damage increased by 50%.
- Dark Ranger: Black Arrow periodic effect duration increased to 14 seconds (was 10 seconds).
- Dark Ranger: Phantom Pain damage share increased to 24% (was 8%).
- Dark Ranger: Bleak Powder damage increased by 100%.
- Dark Ranger: Withering Fire now prioritizes enemies that do not have the Black Arrow periodic effect.
Hunter Changes
- Kindling Flare has been redesigned – Now increases the radius of flare by 50%.
- Territorial Instincts has been redesigned – Now reduces the cooldown of Intimidation by 10 seconds and no longer summons a pet for you if you do not have a pet out.
- Wilderness Medicine has been updated – Now additionally increases the cooldown reduction effect of Natural Mending by 0.5 seconds.
- No Hard Feelings has been updated – Now additionally reduces the cooldown of Misdirection by 5 seconds.
- Roar of Sacrifice has been updated for Marksmanship Hunters only – Instructs your pet to protect a friendly target from critical strikes, making attacks against that target unable to be critical strikes. Lasts 12 seconds. While Roar of Sacrifice is active, your Spotting Eagle cannot apply Spotter’s Mark.
- Intimidation now has a unique variant when you’re in Marksmanship spec that does not require line of sight and uses your Spotting Eagle.
- Eyes of the Beast is now only learned by Survival and Beast Mastery Hunters.
- Eagle Eye is now only learned by Marksmanship Hunters.
- Freezing Trap now breaks based on a small damage threshold instead of any damage.
- Implosive Trap knock up radius increased to 8 yards (was 5 yards).
- Explosive Shot and Tranquilizing Shot travel speeds increased.
- Panthara cats no longer require Fresh Talbuk Meat to tame.
- Many talents have changed positions in the class and specialization trees.
- The following abilities have had their visuals updated:
- Aspect of the Cheetah
- Counter Shot
- Disengage
- Hi-Explosive Trap
- Implosive Trap
- Posthaste
Dark Ranger Changes
- Withering Fire has been updated – Withering Fire now triggers from casting Black Arrow during Trueshot/Bestial Wrath and no longer auto-fires Black Arrow instead of gaining Deathblow.
- Developers' notes: A common complaint of Withering Fire is its consistency. The goal with this change is to raise Withering Fire’s randomness floor while lowering its ceiling, still allowing for exciting high-roll moments where you get many Deathblow procs rapidly and reducing the times where nothing happens during Withering Fire.
- Shadow Hounds has been updated – Dark Hounds now deal damage to nearby enemies when they attack for Marksmanship and Beast Mastery Hunters (was Beast Mastery only).
- Fixed an issue preventing Bleak Powder’s cone from dealing damage over its intended area.
- Fixed an issue causing Dark Hounds to trigger less often than intended.
- Withering Fire has been updated – No longer allows Black Arrow to ignore health requirements.
- Developers' notes: Marksmanship does not struggle to produce Deathblow procs, so this effect was being largely wasted.
- Black Arrow damage increased by 15%.
- Fixed issues with Phantom Pain’s interactions with Double Tap and Aspect of the Eagle.
- Fixed an issue causing Unnatural Causes to benefit Black Arrow’s direct damage rather than just its periodic damage.
- Fixed an issue causing Black Arrow to deal more damage than intended in PvE only.
Sentinel Changes
- Developers' notes: Our goal with these changes is to help make Lunar Storm feel like more of a “moment” be reducing its frequency and increasing its damage. We’re also looking to increase its usability by allowing it to slowly track its target. Since Lunar Storm is spawned at your enemy’s position, and in most content, Hunters have very little agency over where enemy's are moving, we felt that allowing it to slowly follow your target is more justifiable relative to other ground / area spells.
- Lunar Storm damage increased by 25%.
- Lunar Storm’s radius increased to 12 yards (was 8 yards).
- Lunar Storm's duration increased to 12 seconds (was 8 seconds).
- Lunar Storm now triggers once every 30 seconds (was 15 seconds).
- Lunar Storm now does initial damage in addition to its periodic damage.
- Lunar Storm's visual effects have been updated.
- Lunar Storm’s cooldown can now be tracked via an aura on the player.
- Lunar Storm will now present an aura on the personal resource display when it is ready to be fired.
- Lunar Storm now follows its target very slowly.
Marksmanship Changes
- Developers' notes: Moving into Undermine(d), we are looking to reimagine Marksmanship’s Sharpshooter fantasy and reconcile some large spec friction points such as Lone Wolf. Undermine(d) is seeing Marksmanship lose their pet functionalities and it is instead joined in battle by a unique Eagle pet that will exist outside of the game space but continue to support you in combat in a uniquely Marksmanship way.
- New Ability: Harrier's Cry – Your Eagle descends from the skies with a screech, giving the signal to attack. Increases Haste by 30% for all party and raid members for 40 seconds. Allies receiving this effect will become Sated and unable to benefit from Harrier's Cry or similar effects again for 10 minutes. Learned at level 48.
- New Passive: Manhunter – Damaging a player with Aimed Shot applies Grievous Injury, reducing the healing they receive by 25%. Learned at level 11.
- Developers' notes: Marksmanship lost access to Mortal Wounds by losing pet access, so we’re returning Aimed Shot’s ability to apply Mortal Wounds.
- New Passive: Eyes in the Sky – Gain the aid of a Spotting Eagle. Damaging an enemy with an ability empowered by Precise Shots has a 30% chance to cause your Spotting Eagle to mark your target. Enemies marked by your Spotting Eagle take 10% increased damage from your Aimed Shot. Replaces Call Pet and all associated Pet abilities. Learned at level 13.
- New Talent: Aspect of the Hydra – Aimed Shot, Rapid Fire, and Arcane Shot now hit a second nearby target for 60% of their damage.
- New Talent: Improved Spotter's Mark – Spotter's Mark's damage bonus is increased by 20%.
- New Talent: Moving Target – Consuming Precise Shots increases the damage of your next Aimed Shot by 20% and grants Streamline.
- New Talent: Obsidian Arrowhead – The damage of Auto Shot is increased by 25% and its critical strike chance is increased by 15%.
- New Talent: Shrapnel Shot – Damaging an enemy with Explosive Shot increases the damage they receive from your next Arcane Shot or Multi-Shot by 30%.
- New Talent: Magnetic Gunpowder – Consuming Precise Shots reduces the cooldown of Explosive Shot by 2 seconds. Consuming Lock and Load reduces the cooldown of Explosive Shot by 8 seconds.
- New Talent: Precision Detonation – Casting Explosive Shot grants Streamline. When Aimed Shot damages a target affected by your Explosive Shot, Explosive Shot instantly explodes, dealing 25% increased damage.
- New Talent: On Target – Consuming Spotter’s Mark grants 4% increased Haste for 10 seconds, stacking up to 4 times. Multiple instances of this effect can overlap.
- New Talent: Quickdraw – Lock and Load now increases the damage of Aimed Shot by 15%.
- New Talent: Target Acquisition – Consuming Spotter's Mark reduces the cooldown of Aimed Shot by 2 seconds.
- New Talent: Eagle’s Accuracy – Spotter’s Mark’s Aimed Shot damage bonus is increased by 5/10%.
- New Talent: Headshot – Kill Shot can now benefit from Precise Shots at 25% effectiveness. Kill Shot now consumes Precise Shots.
- New Talent: Feathered Frenzy – Trueshot sends your Spotting Eagle into a frenzy, instantly applying Spotter's Mark to your target. During Trueshot, your chance to apply Spotter's Mark is increased by 100%.
- New Talent: Tensile Bowstring – While Trueshot is active, consuming Precise Shots extends Trueshot’s duration by 1 second, up to 5 seconds. Additionally, Trueshot now increases the effectiveness of Streamline by 50%.
- New Talent: Incendiary Ammunition – Bulletstorm now increases your critical strike damage by 2% and Bulletstorm now stacks up to 5 more times.
- New Talent: Bullet Hell – Damage from Multi-Shot reduces the cooldown of Rapid Fire by 0.3 seconds. Damage from Volley reduces the cooldown of Rapid Fire by 0.5 seconds. Damage from Aimed Shot reduces the cooldown of Volley by 0.25 seconds.
- New Talent: Improved Streamline – Streamline’s cast time reduction effect is increased to 30%.
- New Talent: Windrunner Quiver – Precise Shots can now stack up to 2 times, but its damage bonus is reduced to 90%. Casting Aimed Shot has a 100% chance to grant an additional stack of Precise Shots.
- New Talent: Eagle’s Accuracy – Aimed Shot and Rapid Fire's damage is increased by 2.5/5%.
- New Talent: Cunning – Your Spotting Eagle gains the Cunning specialization, granting you Master’s Call and Pathfinding.
- New Talent: Tenacious – Your Spotting Eagle gains the Tenacity specialization, granting you Air Superiority and Endurance Training.
- New Talent: Ohn’ahran Winds – When you Eagle applies Spotter’s Mark, it has a 25% chance to apply a Spotter’s Mark to up to 3 additional nearby enemies.
- New Talent: Double Tap – Casting Trueshot or Volley grants Double Tap, causing your next Aimed Shot to fire again at 80% power, or your next Rapid Fire to fire 80% additional shots during its channel. This talent's effectiveness is reduced by 50% in PvP combat.
- New Talent: Killer Mark – Spotter's Mark now additionally increases the critical strike chance of Aimed Shot by 15%.
- New Talent: Deadeye – Kill Shot now has 2 charges and has its cooldown reduced by 2 seconds.
- Developers' notes: Headshot has substantial rotational implications, and Deadeye should provide a simpler option for players who want to improve Kill Shot’s throughput without substantially increasing cognitive load.
- New Talent: Unbreakable Bond – Regain access to Call Pet. While outdoors, your pet deals 15% increased damage and takes 15% reduced damage.
- Developers' notes: While Marksmanship's unique Eagle pet will continue to be the source of their pet utility, such as Master's Call, Bloodlust, and similar effects, we want to provide the option for Marksmanship Hunters to be able to continue to traverse Azeroth with their beloved companions.
- Streamline has been updated – Rapid Fire’s damage is increased by 15%. Casting Rapid Fire grants Streamline. Streamline: Your next Aimed Shot has a 20% reduced cast time. Stacks up to 2 times.
- Precise Shot renamed to Precise Shots and has been updated – Aimed Shot causes your next Arcane Shot or Multi-Shot to deal 100% more damage and cost 40% less Focus. Your Auto Shot damage is increased by 100% and increases the time between Auto Shots by 2 seconds.
- Focused Aim has been updated – Precise Shots reduces the cooldown of Aimed Shot by 0.75 seconds.
- Trueshot has been redesigned – Increases your critical strike chance by 10% and critical strike damage by 15 seconds. Reduces the cooldown of Aimed Shot and Rapid Fire by 60%.
- Razor Fragments has been updated – Now only triggers when Deathblow is gained (was when Trick Shots was consumed or Deathblow was gained).
- Calling the Shots has been updated – Consuming Spotter’s Mark reduces the cooldown of Trueshot by 2 seconds.
- Bulletstorm has been updated – Damage from Rapid Fire increases the damage of Aimed Shot by 2% for 15 seconds, stacking up to 15 times. New stacks do not refresh duration and are removed upon casting Rapid Fire. This talent's effectiveness is reduced by 50% in PvP combat.
- In the Rhythm has been updated – Channeling Rapid Fire decreases the time between Auto Shots by 1 second for 12 seconds.
- Intimidation has been updated – Now requires line of sight against non-players.
- Fan the Hammer renamed to Ammo Conservation and has been updated – Now also reduces Aimed Shot’s cooldown by 1 second.
- Nerub-ar Palace 4-set bonus updated – Now increases Aimed Shot and Rapid Fire damage by 4%.
- Multi-Shot now learned at level 10 (was a talent).
- All damage dealt increased by 6%.
- Aimed Shot damage increased by 26%.
- Aimed Shot cast time increased to 3 seconds (was 2.5 seconds).
- Rapid Fire now grants 2 Focus per shot (was 1).
- Volley damage increased by 100%.
- Steady Shot damage increased by 30%.
- Steady Shot now grants 20 Focus.
- Trueshot now increases your critical strike damage by 20% (was 10%).
- Spotter’s Mark damage bonus increased to 20% (was 10%).
- Small Game Hunter now increases Explosive Shot's damage by 15% (was 25%).
- Pin Cushion’s functionality is now baseline to Steady Shot (was a talent).
- Salvo is now passive and only triggers from Volley.
- Surging Shots will now properly highlight Rapid Fire when its cooldown is reset.
- Many tooltips, talents, and aura descriptions have been updated for clarity.
- Bullseye is now a 2-point talent.
- The following talents have been removed:
- Barrage
- Careful Aim
- Chimera Shot
- Crack Shot
- Heavy Ammo
- Hydra’s Bite
- Improved Steady Shot
- Legacy of the Windrunners
- Light Ammo
- Lone Wolf
- Multi-Shot (now learned at level 10)
- Pin Cushion (effect added to Steady Shot)
- Rapid Fire Barrage
- Readiness
- Serpentstalker’s Trickery
- Steady Focus
- Tactical Reload
- Wailing Arrow
FAQ
A: With the changes in patch 11.1, Marksmanship Hunter will never use a pet if you are trying to maximize the specs potential.
Credits
Written By: Solwinas
Reviewed By: Shodam