Beast Mastery Hunter Raid Guide
Welcome to the Beast Mastery Hunter Raid guide for the World of Warcraft patch 11.1.7! This guide covers everything you need to know to understand your character! Are you starting out and leveling up from 70? Check out the leveling guide!
Overview
Hero Talents
- The new patch brings about a newly reworked Pack Leader hero talent tree that outperforms Dark Ranger in both AoE and Single-Target.
- Your Kill Shot is replaced by Black Arrow.
- Just like Kill Shot you can only use Black Arrow whenever your target is at a certain HP threshold. Normally this is 20% but changes once The Bell Tolls is talented allowing for use above 80% and below 20%.
- Also since Beast Mastery Hunter's gained access to Deathblow this patch there are multiple new hero talents that reset Black Arrows cooldown.
- Bleak Arrows
- Ebon Bowstring
- The new talent tree also gives you massive amounts of passive AoE damage. Currently the largest source from the tree is Bleak Powder with Shadow Surge being a smaller amount.
- Your capstone Withering Fire, gives you a proc of Deathblow every 4 seconds and causes 2 extra Black Arrows when casted while under the effect of Call of the Wild. Compared to what we had in 11.0.5, this is a massive downgrade.
- Also with the amount of passive shadow damage that we now do Embrace the Shadows is an interesting choice vs Smoke Screen.
- Every 25 seconds gain Howl of the Pack Leader
- This will summon one of three Beasts
- The Wyvern will give you up-to 20% increased damage for you and your pet for up-to 25 seconds.
- The Bear will initially leap in and Rend Flesh up-to 8 nearby enemies and then auto attack your current target.
- The Boar will charge your target 3 times dealing a large amount of damage to your primary target and a lesser amount to nearby enemies.
- This will summon one of three Beasts
- Bestial Wrath has had even more power baked into it with Lead From the Front being added.
- Consuming Howl of the Pack Leader will now also increase the damage of your next Kill Command by 50% and reduce the cooldown of your Barbed Shot by 10 seconds.
- A new choice node was added changing either Disengage or Binding Shot.
- Slicked Shoes will reduce the cooldown of Disengage by 4 seconds whenever it also removes a movement impairing effect.
- Horsehair Tether allows your Binding Shot to act like a Ursol's Vortex and will pull enemies back to the center + trigger the 3 second stun effect when they move to far from the center.
- Shell Cover was also added and is an incredibly small amount of passive damage reduction that will almost always constantly proc.
Talents
When to use this Spec
Use this spec if you're fighting a singular enemy for an extended period of the fight.
Spec Tree
- Animal Companion
- Large single-target and AoE increase since your secondary pet will now cast Kill Command.
- Poisoned Barbs
- Moderate AoE increase and minor ST increase.
- Barbed Scales
- Makes Thrill of the Hunt upkeep extremely easy
- This also raises the overall uptime on Bestial Wrath since you are casting more Barbed Shots.
- Wild Call
- Since Stomp was buffed this is a decently large ST and AoE increase.
- Bloodshed
- Since we take Venomous Bite this is a very powerful 1 minute cooldown.
Class Tree
- Padded Armor
- A large survivability increase since you gain an extra charge of Survival of the Fittest.
- Scout's Instincts
- Nice quality of life passive incase there are slow effects during encounters.
- Implosive Trap
- Can be exchanged with High Explosive Trap if you need a knockback effect instead.
- Emergency Salve
- A survivability increase on encounters with poisons or diseases present.
Hero Talents
- Ursine Fury
- Better than Envenomed Fangs because Serpent Sting benefits from Unnatural Causes.
- Horsehair Tether
- Better than Slicked Shoes because it turns your Binding Shot into a very strong button that you can proc yourself with Implosive Trap or High Explosive Trap.
When to use this Spec
Use this spec if you're fighting a singular enemy for an extended period of the fight.
Talent Adjustments
Listing all the changes within the Class and Spec tree compared to the default build.
Spec Tree
- Added
- Call of the Wild
- Main 2 minute burst cooldown.
- Added interaction with Wild Instincts.
- Call of the Wild
- Removed
- Bloodshed
- Removed for Call of the Wild
- Venomous Bite
- Removed for Wild Instincts
- Bloodshed
When to use this Spec
Use this spec if you're fighting a singular enemy for an extended period of the fight.
Talent Adjustments
Listing all the changes within the Class and Spec tree compared to the default build.
Spec Tree
- Added
- Multi-Shot
- Used to trigger Beast Cleave.
- Beast Cleave
- Largest source of passive AoE we have access to.
- Kill Cleave
- 2nd largest source of AoE we have.
- Scent of Blood
- This allows for slightly higher uptime on Bestial Wrath as well as being a small AoE increase.
- Bloody Frenzy
- Large AoE increase since you don't have to worry about Beast Cleave upkeep.
- Multi-Shot
- Removed
- Barbed Scales
- Removed for Beast Cleave.
- Snakeskin Quiver
- Removed for Kill Cleave.
- A Murder of Crows
- Removed for Multi-Shot.
- Serpentine Rhythm
- Removed for Scent of Blood.
- Wild Instincts
- Removed for Bloody Frenzy.
- Barbed Scales
Rotation
Tier Set
- 2-Set: Your spells and abilities have a chance to hit a Jackpot! that fires a Barbed Shot at 100% effectiveness. Casting Bestial Wrath always hits a Jackpot!
- 4-Set: Hitting a Jackpot! infuses your pet with a mutagen, causing its auto-attacks to deal (103.661% of Attack power) Nature damage to its target and up to 5 enemies within 10 yds for 8 sec. Mutagenic attacks reduce the cooldown of Bestial Wrath by 0.3 sec.
Single-Target
Opener
- The goal of your opener is to simply cast as many Kill Commands as possible. Since Focus management will be an issue you will also weave in some Barbed Shots.
- Use your active trinkets, Tempered Potion and racials like Blood Fury or Berserking after using Bestial Wrath or Call of the Wild proc.
Priority List
This is a general priority you aim to maintain throughout the fight.
- Cast Bestial Wrath.
- Cast Kill Command.
- Cast Barbed Shot.
- Cast Cobra Shot if Barbed Shot and Kill Command are on cooldown.
- Cast Kill Shot.
AoE
Opener
- The goal of your opener is to cast as many Kill Commands as possible while maintaining uptime on Beast Cleave.
- Use your active trinkets, Tempered Potion, and racials like Blood Fury or Berserking after using Call of the Wild.
Priority List
- Cast Multi-Shot if Beast Cleave isn't active or expires in less than 2 seconds.
- Cast Call of the Wild.
- Cast Bestial Wrath.
- Cast Kill Command.
- Cast Barbed Shot if Kill Command is on cooldown. Try to use these on different targets.
- Cast Dire Beast.
- Cast Cobra Shot if Barbed Shot and Kill Command are on cooldown.
Deep Dive
Maximizing your damage output during Bestial Wrath
- Ensure you are going into Bestial Wrath with at least 1 charge of Kill Command, but having 2 is best.
- Make sure you don't focus starve yourself by weaving in Barbed Shots during this window and not letting it over-cap on charges.
- Try to line this damage window up with either of the buffs provided by Huntmaster's Call. These are quite large and Bestial Wrath windows are further buffed by these.
Tracking Thrill of the Hunt and knowing when to use Barbed Shot
- Unless you have 1 point in Scent of Blood, never cast 2 Barbed Shots back-to-back.
- Outside of Bestial Wrath you want to have at least one spell cast between Barbed Shot casts.
- The amount of casts you should have between Barbed Shots increases the less haste you have.
- High Thrill of the Hunt uptime comes from doing these things and just naturally spacing out uses of Barbed Shot.
Below, you find an example of how to correctly manage Barbed Shot casts.
Maximizing your damage output during Bloodshed
- The damage you deal during Bloodshed should be consistent because you should always pair it with Bestial Wrath.
- Since you are pairing Bloodshed and Bestial Wrath together you also follow the Bestial Wrath rotation.
Below is an example of what happens when you correctly manage your Bloodshed window and you are talented into Killer Cobra.
- This is not a fixed rotation; This is just one example of how to play during your Bestial Wrath window. War Orders procs can increase your amount of Kill Command resets without needing to cast Cobra Shot along with Wild Call increasing the amount of Barbed Shot resets you can have.
Understanding Mechanics
Rotational min-maxing is just one aspect of mastering a specialization, but there are numerous other key mechanics that influence your performance. Use the following guides to improve them.
Liberation of Undermine
← Scroll for more Bosses →
Offensive Cooldown Usage
Boss Tips
- Always pair Call of the Wild and Bestial Wrath together.
- During the intermission you can use Binding Shot and Implosive Trap to help interrupt the Pit Mechanics Repair cast.
Offensive Cooldown Usage
Boss Tips
- Always pair Call of the Wild and Bestial Wrath together.
- Always have a defensive ready whenever you are soaking a Scrapbomb.
- Whenever you are on the side with the gorilla be careful with your movement. Moving will generate a stacking charge on you and if it hits 100 you will be stunned.
- Thunderdrum Salvo is the only spell that will force you to move. For this you can stutter step the swirles under you instead of just running the whole time. This will give you a small window each time you move for your charge to deplete a little bit.
Offensive Cooldown Usage
Boss Tips
- Always pair Call of the Wild and Bestial Wrath together.
- Try to always have Bestial Wrath for when the boss casts Sparkblast Ignition.
- Whenever you interact with an Amplifier you will gain Lingering Voltage. This is a stacking dot and this is when you should use your defensives as its the primary damage source of the fight.
Offensive Cooldown Usage
Boss Tips
- Always pair Call of the Wild and Bestial Wrath together.
- Rotate through your defensives whenever the boss targets you with Incinerator.
- When the boss casts Electromagnetic Sorting he will summon 3 types of adds.
- Scrapmaster
- Always interrupt Scrap Rockets whenever this is cast.
- Territorial Bombshell
- Always focus these until they are die as they will blow up and leave a nasty DoT on the raid if they live for to long. These will also blow up if they come into contact with someone picked for Rolling Rubbish.
- Junkyard Hyena
- These don't do anything important, if you need help controlling them you can use Binding Shot or Implosive Trap.
- Scrapmaster
Offensive Cooldown Usage
Boss Tips
- Always pair Call of the Wild and Bestial Wrath together.
- Use Aspect of the Cheetah or Disengage if you need to detonate a far Foot-Blasters mine.
- You should always have a defensive ready if you need to detonate one of these as well.
- Rotate between your defensives for Voidsplosion during the intermissions.
Offensive Cooldown Usage
Boss Tips
- Always pair Call of the Wild and Bestial Wrath together.
- Always try to stand close to the Pay-Line chip since it rewards High Roller!.
- Use a defensive whenever the boss targets you with Withering Flames. This will only happen during the Spin To Win! intermission.
Boss Tips
- Whenever you are on Mug's side always use a defensive when your targeted by Stormfury Finger Gun.
- Whenever you are on Zee's side always use a defensive when you soak the Goblin-guided Rocket, you are targeted for Spray and Pray, or your targeted with Double Whammy Shot which will explode with an Explosive Payload.
- During Phase 2 all of these mechanics can happen so be sure to plan your defensives so that you have one available.
Stat Priority
Understand your secondary stat priority and the tertiary stats needed for optimal performance during Raid boss fights as a Beast Mastery Hunter. For more detailed information, visit the Stats and Attributes guide.
Higher Item level items are better in most scenarios. For an accurate representation of what item to equip you should use Simcraft! A static "Stat Priority" is just a starting point and can easily shift depending on your individual gear.
- All secondary stats are affected by diminishing returns. Click here to learn more!
Tertiary
- Avoidance - Great stat to reduce the damage intake of "Area of Effect" abilities.
- Leech - Provides additional healing through damage dealing. The damage of your pets does not heal you thus Leech is an awful tertiary for you since most of your damage is coming from your pets.
- Speed - Niche tertiary that can be very useful and has been proven useful in the past. Makes playing certain mechanics a lot easier.
Gear
| Slot | Item | Location |
|---|---|---|
| Head | Tireless Collector's Chained Cowl | One-Armed Bandit / Catalyst |
| Neck | Semi-Charmed Amulet | Rik Reverb |
| Shoulder | Epaulettes of Failed Enforcers | Mug'Zee |
| Cloak | Test Pilot's Go-Pack | Sprocketmonger |
| Chest | Tireless Collector's Battlegear | Sprocketmonger / Catalyst |
| Wrist | Glyph-Etched Vambraces | Crafted |
| Gloves | Tireless Collector's Gauntlets | Cauldron of Carnage / Catalyst |
| Belt | Durable Information Securing Container | Overcharged Delves |
| Legs | Tireless Collector's Armored Breeches | Stix Bunkjunker / Catalyst |
| Boots | Glyph-Etched Stompers | Crafted |
| Ring 1 | The Jastor Diamond | Chrome King Gallywix |
| Ring 2 | Miniature Roulette Wheel | One-Armed Bandit |
| Trinket 1 | Eye of Kezan | Chrome King Gallywix |
| Trinket 2 | Improvised Seaforium Pacemaker | Operation: Floodgate / Vault |
| Weapon | "Tiny Pal" | Mug'Zee |
Below you are presented with a good list of farmable alternatives that are obtainable outside of WoW’s weekly lockout system. While replaced in time as you progress, these offer immediate character power.
| Slot | Item | Location |
|---|---|---|
| Head | Psychogenic Prognosticator's Lenses | Operation: Mechagon |
| Neck | Strapped Rescue-Keg | Cinderbrew Meadery |
| Shoulder | Crashguard Spaulders | The MOTHERLODE! |
| Cloak | Cloak of Questionable Intent | The MOTHERLODE! |
| Chest | Triumphant Combatant's Chainmail | Theater of Pain |
| Wrist | I'pa's Pale Aleguards | Cinderbrew Meadery |
| Gloves | Grips of Overwhelming Beatings | Theater of Pain |
| Belt | Durable Information Securing Container | Overcharged Delves |
| Legs | Pollen-Lugger Treads | Cinderbrew Meadery |
| Boots | Boots of Shuddering Matter | Theater of Pain |
| Ring 1 | Bloodoath Signet | Theater of Pain |
| Ring 2 | Ring of Perpetual Conflict | Theater of Pain |
| Trinket 1 | Signet of the Priory | Priory of the Sacred Flame |
| Trinket 2 | Azerokk's Resonating Heart | The MOTHERLODE! |
| Weapon | Keeza's 'B.' B.B.B.F.G | Operation: Floodgate |
Trinkets
Below you can find active and passive alternatives to our recommended trinkets. Do note that some trinkets are better than others depending on the raid boss.
Active Trinket alternatives
- Signet of the Priory
- This is the best on-use m+ option if you can force it to pick Crit or Mastery.
- Funhouse Lens
- Good alternative if you don't have access to Signet of the Priory.
Passive Trinket alternatives
- Reverb Radio
- Good alternative as this has a really high uptime on around 1k passive haste with a 3k haste proc.
- Suspicious Energy Drink
- This has around a 50% uptime and is very good if you don't have access to the other 2 options.
Embellishments
- 2x Dawnthread Lining
- It is a good choice if you have over 80% health most of the time and during your cooldowns.
- The optimal slots to craft on are Wrists, Waist or Boots depending on your available gear.
Remaining Sparks
- Crafted items are 681 item level and regular items are 684 on max item level, therefore, it's not beneficial to equip crafted items outside of your 2x embellishments unless you don't have access to other high item level gear on that slot.
Simcraft
To find the best combination of gear available to you or identify the best possible upgrades, visit our Simcraft guide to learn how to utilize Simcraft easily and effectively.
Consumables
- Phials
- Flask of Alchemical Chaos -- maximum DPS.
- Flask of Tempered Versatility -- less DPS but more survivability.
- Food
- Feast of the Divine Day
- Feast of the Midnight Masquerade
- Weapon Oil
- Algari Mana Oil
- Combat Potion
- Tempered Potion
- Health Potion
- Algari Healing Potion -- a big burst of healing
- Augment Rune
- Crystallized Augment Rune
- Sockets
- Quick Ruby
- Culminating Blasphemite -- Unique, use one of each gem color to enhance your Culminating Blasphemite.
- Quick Onyx
- Deadly Emerald
Enchantments
| Head | Greater Rune of the Void Ritual S.A.D. |
| Neck | Magnificent Jeweler's Setting 2x |
| Cloak | Enchant Cloak - Chant of Winged Grace |
| Chest | Enchant Chest - Crystalline Radiance |
| Wrist | Enchant Bracer - Chant of Armored Avoidance S.A.D. |
| Waist | S.A.D. |
| Legs | Stormbound Armor Kit |
| Boots | Enchant Boots - Scout's March |
| Ring 1 | Enchant Ring - Radiant Critical Strike Magnificent Jeweler's Setting 2x |
| Ring 2 | Enchant Ring - Radiant Critical Strike Magnificent Jeweler's Setting 2x |
| Weapon | Enchant Weapon - Council's Guile |
You buy S.A.D. from the Great Vault Vendor to add sockets to your Helm, Wrists & Waist.
Races
For min-maxing a Beast Mastery Hunter in raiding, different racial traits can provide a tremendous benefit to your character. If this is not your top goal, picking a race that fits your style works just as well.
- Stoneform -- Dwarf
- Dispels Magic and Bleed debuffs. Has been useful in the past on some bosses with Bleeds.
- Rocket Jump -- Goblin
- Do a small jump in the direction your character is facing.
- While you're in the Rocket Jump animation you are placed on a global cooldown until your character lands.
- Berserking -- Troll
- Strong DPS racial but lines up poorly with Call of the Wild.
- Reduce the duration of movement-impairing effects by 20%. This was only useful once in the recent history of progression raiding but is still worth noting.
- Blood Fury -- Orc
- Strong racial for damage because of both Command and Blood Fury which lines up with Call of the Wild.
- 20% reduced stun duration on you which can be useful in some situations.
- Spatial Rift -- Void Elf
- Spawn a shadow traveling into your facing direction, and activate it again to teleport to it.
- Maximum range of 100 yards.
- Ancestral Call -- Mag'Har Orc
- Strong damage racial that lines up well with Call of the Wild or every other Bloodshed.
Recommendation
In general, it's safe to say that if you care about min-maxing your DPS, you should go with the highest DPS racial. That being said, the story is a bit different if it's about progression raiding. Some help out massively to speed up the progression on certain bosses. Notably, Dwarf with their Stoneform helped out on Tindral Sageswift and Fyrakk the Blazing in the latest Race to World First by having easy access to dispelling yourself at crucial points of the fights mentioned.
Macros
Discover recommended macros for Beast Mastery Hunter during Raid encounters and watch a quick video guide on creating simple macros for your character.
Binding Shot -- Casts Binding Shot on your cursor without confirmation.
#showtooltip
/cast [@cursor] Binding Shot
Tar Trap - Uses Tar Trap on your cursor position without confirmation.
#showtooltip Tar Trap
/cast [@cursor] Tar TrapBarbed Shot -- Casts Barbed Shot on your mouseover or target.
#showtooltip
/cast [@mouseover] Barbed Shot
Tranquilizing Shot -- Casts Tranquilizing Shot on your mouseover target.
#showtooltip
/cast [@mouseover] Tranquilizing Shot
Concussive Shot -- Casts Concussive Shot on your mouseover target.
#showtooltip
/cast [@mouseover] Concussive ShotWe're mainly using custom macros for Pets because pets don't cast their own abilities reliably enough and doing it yourself is a DPS gain.
Kill Command pet attack -- Casts Kill Command and your pets basic attack at your target.
#showtooltip Kill Command
/petattack
/cast Kill Command
/cast [@pettarget]Claw
/cast [@pettarget]Bite
/cast [@pettarget]Smack
Multi-Shot pet attack -- Casts Multi-Shot and your pets basic attack at your target.
#showtooltip Multi-Shot
/petattack
/cast Multi-Shot
/cast [@pettarget]Claw
/cast [@pettarget]Bite
/cast [@pettarget]Smack
Barbed Shot pet attack -- Casts Barbed Shot and your pets basic attack at your target.
#showtooltip Barbed Shot
/petattack
/cast Barbed Shot
/cast [@pettarget]Claw
/cast [@pettarget]Bite
/cast [@pettarget]Smack
Cobra Shot pet attack -- Casts Cobra Shot and your pets basic attack at your target.
#showtooltip Cobra Shot
/cast Cobra Shot
/cast [@pettarget]Claw
/cast [@pettarget]Bite
/cast [@pettarget]SmackCounter Shot focus -- Casts Counter Shot at your focus target or your current target if your focus target doesn't exist.
#showtooltip Counter Shot
/cast [@focus,exists,harm,nodead][] Counter Shot
Aspect of the Turtle cancelaura -- Casts Aspect of the Turtle and allows you to immediately cancel it upon pressing it again.
#showtooltip
/cast Aspect of the Turtle
/cancelaura Aspect of the Turtle
Addons
Below, you see a screenshot of the author's User Interface for their Beast Mastery Hunter, outlining which addons are used and how they are utilized in Raids to make your life easier.
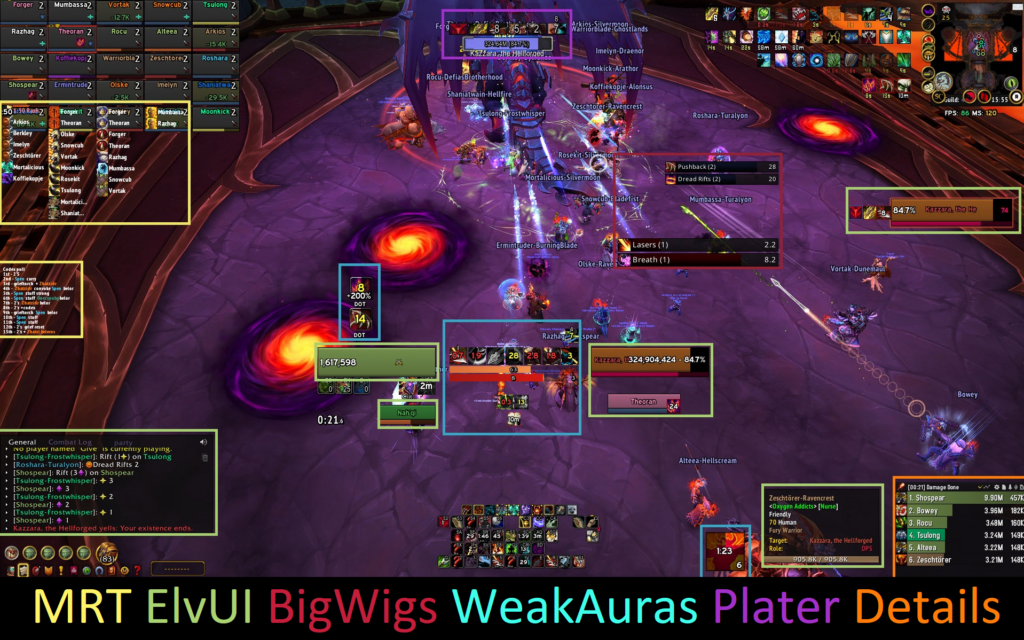
- MRT -- Notes, Raid cooldowns, and more
- Helpful addon for Raiders, especially for Raid leaders and officers.
- ElvUI -- Full User Interface replacement
- A user interface designed around user-friendliness with extra features that are not included in the standard UI.
- Alternatively, you can also use Shadowed Unit Frames (SUF) and an action bar addon of your choice or of course the stock UI.
- BigWigs -- Generic Boss Mod
- BigWigs is a boss encounter add-on. It consists of many individual encounter scripts, or boss modules; mini add-ons that are designed to trigger alert messages, timer bars, sounds, and so forth, for one specific Raid encounter.
- WeakAuras -- Jack of all trades
- WeakAuras is a powerful and flexible framework that allows the display of highly customizable graphics on World of Warcraft's user interface to indicate buffs, debuffs, and other relevant information. This addon was created to be a lightweight replacement for Power Auras but has since introduced more functionalities while remaining efficient and easy to use.
- Plater -- Advanced Nameplates
- Plater is a nameplate addon with an extraordinary amount of settings, out of the box debuff tracking, threat coloring, and support for scripting similar to WeakAuras and wago.io + the WeakAuras-Companion for Mod/Script/Profile updates.
- Details -- In-depth Damage Meter
- Most powerful, reliable, handsome, damage meter.
Focus Bar
Shows your current focus.

Thrill of the Hunter tracker
Tracks the uptime of your Thrill of the Hunt and the current stack count.

Beast Cleave Tracker
Tracks the remaining time on your Beast Cleave.
Changes this Patch
- Hunter
- Kindling Flare has been redesigned – Now increases the radius of flare by 50%.
- Territorial Instincts has been redesigned – Now reduces the cooldown of Intimidation by 10 seconds and no longer summons a pet for you if you do not have a pet out.
- Wilderness Medicine has been updated – Now additionally increases the cooldown reduction effect of Natural Mending by 0.5 seconds.
- No Hard Feelings has been updated – Now additionally reduces the cooldown of Misdirection by 5 seconds..
- Roar of Sacrifice has been updated for Marksmanship Hunters only – Instructs your pet to protect a friendly target from critical strikes, making attacks against that target unable to be critical strikes. Lasts 12 seconds. While Roar of Sacrifice is active, your Spotting Eagle cannot apply Spotter’s Mark.
- Intimidation now has a unique variant when you’re in Marksmanship spec that does not require line of sight and uses your Spotting Eagle.
- Eyes of the Beast is now only learned by Survival and Beast Mastery Hunters.
- Eagle Eye is now only learned by Marksmanship Hunters.
- Freezing Trap now breaks based on a small damage threshold instead of any damage.
- Implosive Trap knock up radius increased to 8 yards (was 5 yards).
- Explosive Shot and Tranquilizing Shot travel speeds increased.
- Panthara cats no longer require Fresh Talbuk Meat to tame.
- Many talents have changed positions in the class and specialization trees.
- The following abilities have had their visuals updated:
- Aspect of the Cheetah
- Counter Shot
- Disengage
- Hi-Explosive Trap
- Implosive Trap
- Posthaste
- Beast Mastery
- Developers' notes: We’re happy with how Beast Mastery Hunter is playing and performing, we are just adding more hooks to ensure that this spec has appropriate area of effect tunability.
- New Talent: Dire Cleave – When summoned, Dire Beasts gain Beast Cleave at 100% effectiveness for 8 seconds.
- New Talent: Poisoned Barbs – Direct damage from Barbed Shot has a 30% chance to explode on impact, applying Serpent Sting and dealing Nature damage to nearby enemies. Damage reduced beyond 8 targets.
- New Talent: Solitary Companion – Your pet damage is increased by 35% and your pet’s size is increased by 10%.
- Developers' notes: Our vision for Beast Mastery's fantasy is tied to Animal Companion, but for players who would like to opt-in to solo-pet Beast Mastery, this talent should allow you to enjoy that playstyle with only a marginal throughput loss. We've taken some initial steps to ensure that this talent doesn't dramatically increase the throughput of spells like Call of the Wild and we'll be making changes as necessary if issues arise.
- New Talent: Thundering Hooves – Casting Explosive Shot causes all active pets to Stomp at 200% effectiveness.
- Stomp has been updated – Now deals separate damage instances between its primary target and secondary targets.
- All damage dealt reduced by 8%.
- Kill Command damage increased by 10%.
- Serpent Sting damage increased by 50%.
- Barrage damage increased by 100%.
- Barrage focus cost reduced to 40 (was 60).
- Bestial Wrath damage bonus increased to 30% (was 25%).
- Beast Cleave effectiveness reduced to 80% (was 90%).
- Kill Cleave effectiveness reduced to 80% (was 90%).
- Alpha Predator now increase Kill Command's damage multiplicatively rather than additively.
- Additional Kill Shots fired from Hunter’s Prey will now target enemies regardless of health percentage.
- Call of the Wild now reduces the cooldown of Barbed Shot and Kill Command by 25% per pet summoned (was 50%).
- Dire Command summon chance reduced to 20% (was 30%).
- Dire Beast's visual effects have been updated.
- Dire Frenzy is now a 2-point talent and replaces Basilisk Collar.
- Barbed Shot's travel speed increased and visuals have been updated.
- Solitary Companion’s aura will now be removed and applied more consistently.
- Serpent Sting is no longer tracked on nameplates for Beast Mastery only.
- Fixed an issue causing Dire Command to grant stacks to Huntmaster’s Call.
- The following talents have been removed:
- Basilisk Collar
- Explosive Venom
- Venom’s Bite
FAQ
A: You need to space out your Barbed Shots better. In general outside of the opener or right before Bestial Wrath windows you should never send 2 Barbed Shots back-to-back.
Credits
Written By: Shodam
Reviewed By: Soda