The Comprehensive League Start Leveling Guide
Last Updated:April 9, 2025|Changelog
Whenever there’s a new league that refreshes the economy, leveling through Path of Exile 2's Campaign can be challenging for new or returning players. You don't have access to powerful leveling gear and a stash full of currency. In the Comprehensive League Start Leveling Guide you learn how to tackle the fresh-start Campaign experience effectively, and with everything you need to know about gearing and crafting so you can deal lots of damage and stop dying.
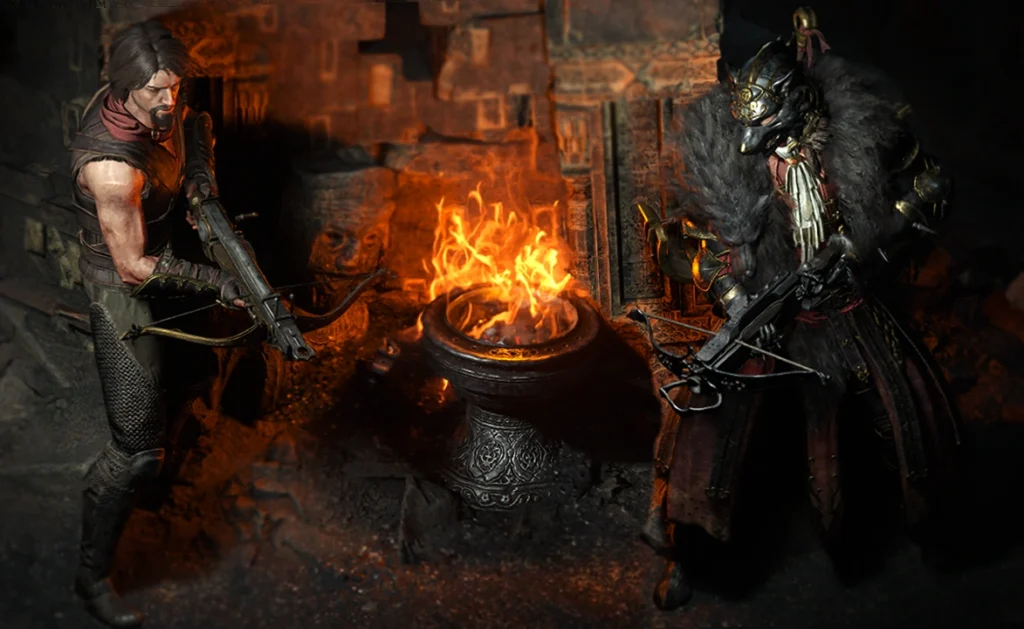
Use the Leveling Gear Quick Reference to learn at what levels you can get new Flasks, Movement Speed Boots and other key items. Follow the Efficient Leveling guide to learn what to do and where to go, step-by-step (including the best hidden loot caches and all the permanent buffs)! Then learn how to gear, craft, scale your damage, stay alive, solve mana issues and much more in each part of this comprehensive guide to leveling in Path of Exile 2!
Path of Exile 2 is in Early Access and the campaign and game mechanics can change rapidly. Pin the Comprehensive League Start Leveling Guide to be notified of any updates!
Leveling Gear Quick Reference
A key to efficient league start leveling on any build is knowing what gear upgrades are available to you and when (along with how to get them). Use the following guide to reference each key leveling breakpoint for notable gear upgrades and options. You should also consider adding your own key items specific to your build to your personal notes, such as "look for Bombard Crossbows at Level 33" if you are leveling a Grenadier build.
Boots Modifier, "Runner's" (Prefix): 10% increased Movement Speed
- Search all Boot drops and Boots in vendors until Movement Speed Boots are obtained.
- Transmute Boots aggressively and Augment Magic boots without a Prefix.
- Suffixes are easily identified on Magic (Blue) boots by the name "Boots of the Suffix name".
Medium Life Flask / Medium Mana Flask
- Available as free drops from the Cauldron in the Witch Hut encounter in the Grelwood, be sure to grab them!
Rings and Amulets are fairly rare drops at low levels, so consider searching the NPC vendors to supplement your drops if you have an excess of unused Gold.
Ruby Ring
- A Ruby Ring can possibly drop from the Cemetery of the Eternals Ancient Ruins Site (one attempt), though you have a high chance of getting an Iron or Lazuli Ring instead.
Amber Amulet / Jade Amulet / Lapis Amulet
- While solving attributes with passives is fairly easy these Amulets can get you a much higher total Attributes so that you can focus on better passive clusters whilst still being able to equip any good item drops. Note that it often doesn't matter which Attributes you get on gear because you can simply change your Attribute Passives.
Flask Modifier, "of the Foliage" (Suffix): Gains 0.15 Charges per Second
- Keep an eye on vendor Flask options for "Gain Charges per Second" Suffixes as these ensure you always have flask charges, even in boss fights.
Stone Charm
- Stone Charms are great for leveling as they prevent you from getting stunned repeatedly by groups of enemies.
Greater Life Flask / Greater Mana Flask
- If you don't obtain these as drops while clearing the Hunting Grounds then you should return to town and buy a pair of Greater Flasks from Una for 80 to 500 Gold each (depending on modifiers).
Sapphire Ring
- If your cold Resistance is only the base 10% from Beira of the Rotten Pack then look for Sapphire Rings from now on.
- It's a good idea to try and get one by Level 15 for the Count Ogham boss fight at the end of Act 1.
- Many players struggle with Act 1's final boss if they have less than 30% to 40% Cold Resistance!
Boots Modifier, "Sprinter's" (Prefix): 15% increased Movement Speed
- If you already have 10% Movement Speed Boots it's not vital for you to immediately upgrade, just keep an eye on any drops or vendor boots for easy upgrades.
- If you have no Movespeed at all by this point begin aggressively searching and crafting boots for either 10% or 15% movement speed to avoid the game getting more and more difficult.
- Transmute white boots, Augment boots with a Suffix but no Prefix.
Grand Life Flask / Grand Mana Flask
- The Act 1 Vendors max out at Item Level 15, so the only way to get a Grand Life or Mana Flask in Act 1 is as a lucky drop from Ogham Manor.
- If you don't get any buy some as soon as possible in Act 2.
Topaz Ring
- Topaz Rings are available from now on and are useful to supplement low Lightning Resistance.
Giant Life Flask / Giant Mana Flask
- Around the middle of Act 3 (Keth / Mastodon Badlands / Valley of Titans) begin looking for Flask upgrades.
Belt Modifier, "of Symbolism" (Suffix): +1 Charm Slot Belts:
- Keep an eye on any belt drops for extra charm slots, the modifier is rare but useful and potentially valuable.
Flask Modifier, "of the Verdant" (Suffix): Gains 0.2 Charges per Second (and later higher tier versions)
- In addition to checking vendors and Flask drops, you should have more spare Transmutes and Augments by this level to craft each new tier of flask looking for better affixes, which make a big difference.
- Flask Charge Regeneration of any tier is effective for most players at ensuring you don't have to retreat or die to attrition in boss fights.
Colossal Life Flask / Colossal Mana Flask
- Zarka in Act 2's town can sell Colossal Flasks at the end of Act 2, just in time for the challenging Dreadnought zones and final boss. Try to upgrade by then.
Boot Modifier, "Stallion's" (Prefix): 20% increased Movement Speed
- Upgrade to 20% Movement Speed boots as soon as possible, especially if you have been stuck on 10% for a while.
Solar Amulet
- Solar Amulets allow most builds to add an extra Support Gem to one of their Spirit skills, such as Precision or Clarity (and even Cannibalism later on).
- Keep in mind that any Amulet with useful modifiers is helpful, it may not be worth prioritizing a Solar Amulet over another type that grants you Life and Resistances.
Pearl Ring (Spellcasters Only)
- This guide is non-build specific overall but Pearl Rings are notable because increases to Cast Speed feel very good and make leveling more comfortable on most spellcaster builds.
- Resistance Rings may still be a higher priority unless your Resistance totals are high enough from other gear.
- The Hanging Tree event in Act 3's Sandswept Marsh has a small chance of dropping one for free.
- This event is good regardless due to being quick, easy, and because of the rarity of jewelery while leveling.
- Reminder! Don't forget to complete the Orok Campsite for a free Jeweller's Orb!
Prismatic Ring
- Prismatic Rings give roughly the same amount of total Resistances as the other types of Rings. That's because every 1% of "All Elemental Resistance" is 1% Fire, 1% Cold, and 1% Lightning Resistance combined!
Gargantuan Life Flask / Gargantuan Mana Flask
- Start looking for Flask upgrades when you get to The Drowned City in Act 3. These Flask upgrades help with the upcoming difficult boss fights.
Boot Modifier, "Gazelle's" (Prefix): 25% increased Movement Speed
- As always, upgrade movement speed boots whenever possible and start check drops and vendors as well as crafting more aggressively from level 50, especially if you are currently on 15% or lower.
- This is the fastest modifier you can get until level 70!
- As such, consider using a Regal Orb a pair of 25% Movespeed boots (ensure it has a Suffix too with an Orb of Augmentation), especially if it has a Resistance Suffix!
Transcendent Life Flask / Transcendent Mana Flask
- Start looking for level 50 Flask upgrades when you finish Ogham Village in Cruel.
Ultimate Life Flask / Ultimate Mana Flask
- When you get to Jiquani's Sanctum in Act 3 Cruel you can start looking for the final and best Flask base type.
- Keep finding, buying, and crafting Ultimate Flasks until you get your desired modifiers.
- It's worth spending a decent sum of gold and Transmutes and Augments to get well-rolled Flasks at this level, they can carry into endgame well.
Fine Belt
- Used instead of (or in addition to) the charge gain modifier on Flasks this helps ensure you always have charges when you need them. The Vendor Oswald in Act 3 Cruel can sell Fine Belts.
Efficient Leveling Guide
This guide takes you through where you need to go and what you need to do in every single zone of the Campaign on your first character in a new League. While some things can be done differently, the written aims to help you progress in both an efficient and easy-to-follow manner. It includes mandatory quests, permanent buffs, bonus Passives, and the most powerful bonus loot caches. Some sacrifices to pure speed are made to give you an easier time, especially if you are a beginner or playing a difficult build. Skip optional steps if you feel you don't need them.
This guide is about building the knowledge and skills to quickly and cleanly complete the Campaign at league start. This guide does not explain how to do each quest and beat each boss. If you need more detail and guidance on any of these specifics, consult the following guides:
Act 1 - Normal
The Riverbank
- Follow the Tutorial and kill the Bloated Miller.
The Clearfell Encampment (Town)
- Claim your Quest Reward Skill Gem from Renly.
- (Tip) Check Renly's Shop for any items you can afford.
Clearfell
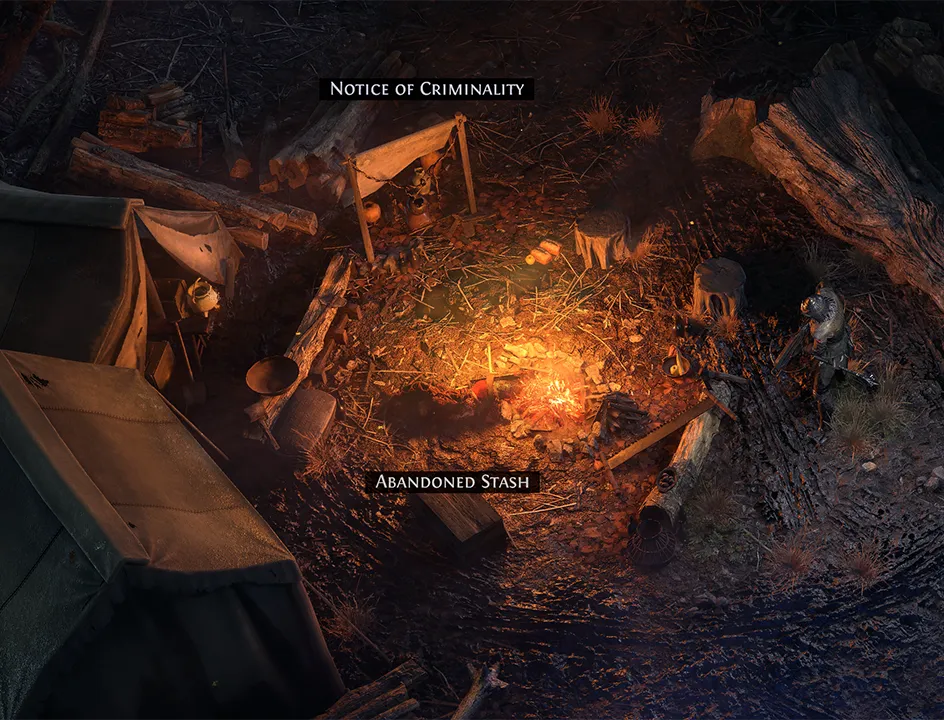
- (Optional: Recommended) Loot the Abandoned Stash in the Mysterious Campsite: Uncut Skill Gem.
- (Permanent Buff: +10% to Cold Resistance) Defeat Beira of the Rotten Pack in the Middle North of the zone.
- Activate the Waypoint and enter the Mud Burrow.
The Mud Burrow
- (Optional: Recommended) Kill The Devourer: Level 2 Uncut Skill Gem Drop.
- Portal to Town and Speak to Renly for Uncut Support Gem Quest Reward.
The Grelwood (Part 1)
- Return to Clearfell via the Waypoint and head North East to enter The Grelwood.
- (Optional) Areagne's Hut (Witch Hut): Flask Upgrades from Cauldron + Kill Areagne for an Uncut Support Gem.
- (Optional) Kill Brambleghast: Level 1 Uncut Skill Gem drop.
- Activate Tree of Souls Waypoint.
- Enter the Grim Tangle Entrance.
- Activate the Waypoint inside and return to The Grelwood.
- Enter the Red Vale.
- (Tip) The entrance is usually near Brambleghast.
The Red Vale and The Grelwood (Part 2)
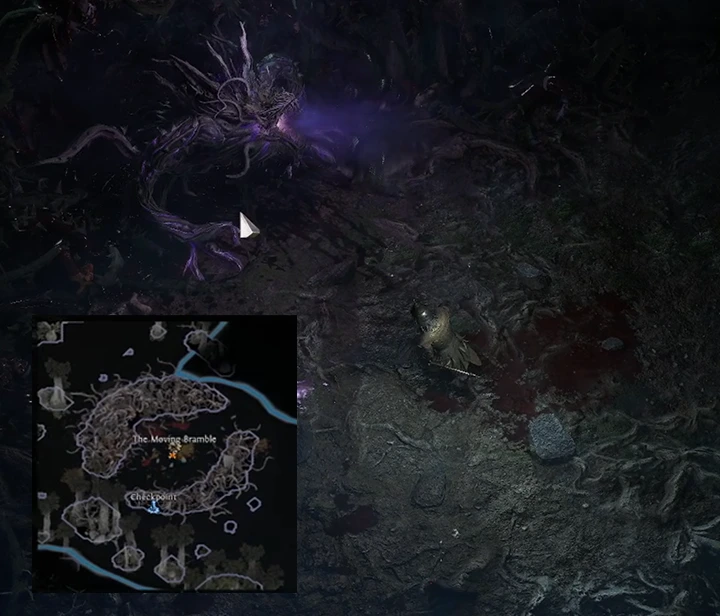
- Activate three Rust Altars and kill The Rust King.
- (Tip) Each Altar is located in a broad loop around the zone.
- Portal to Town.
- Return all three Runed Quest Items to Renly.
- Go to The Grelwood via the Waypoint.
- Summon Una (if you haven't already) and Runed Spike the Tree of Souls.
- Waypoint to Town speak to Una again.
- Return to The Grelwood and enter the Grim Tangle.
The Grim Tangle
- (Optional) Kill The Rotten Druid: Uncut Support Gem.
- Enter The Cemetery.
The Cemetery of the Eternals (Part 1)
- (Optional) Loot the Ancient Ruins Grave Site: Random Ring.
- Locate and complete both (in any order):
- Mausoleum of the Praetor.
- Tomb of the Consort.
Mausoleum of the Praetor
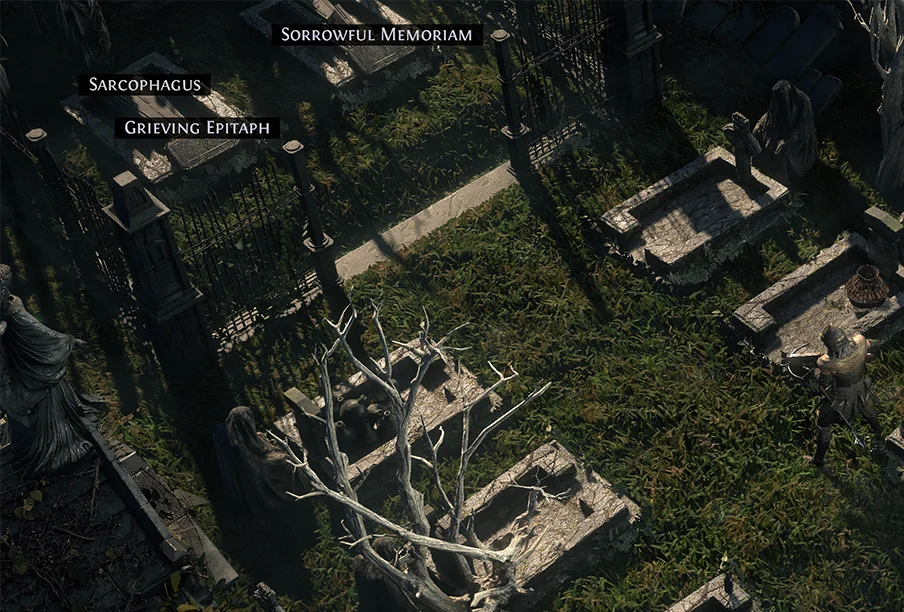
- (Optional) Loot the Forgotten Riches: Gold and Random Loot.
- Defeat Draven, Eternal Praetor.
- Return to The Cemetery.
Tomb of the Consort
- (Optional) Activate the Embattled Trove ambush and defeat the Rare Eternal Knight: Uncut Support Gem.
- Kill Asinia, Praetor Consort.
- Return to The Cemetery.
The Cemetery of the Eternals (Part 2)
- Once you have killed both Asinia and Draven return to Lachlann and open the Memorial Gate.
- Defeat Lachlann of Endless Lament.
- Enter the Hunting Grounds, Waypoint to Town and speak to Una.
The Hunting Grounds
- (Tip) Most points of interest are in roughly each corner of the Zone.
- (Permanent Buff) Kill The Crowbell: +2 Passive Skill Points.
- (Tip) Look for a wooden swing door with an obvious arena nearby.
- (Optional) Kill the Dryads at the Dryadic Ritual: Uncut Support Gem.
- (Optional) Complete the Ritual Site: Level 4 Uncut Skill Gem.
- Enter Freythorn, and activate the Waypoint.
- Enter Ogham Village, and activate the Waypoint.
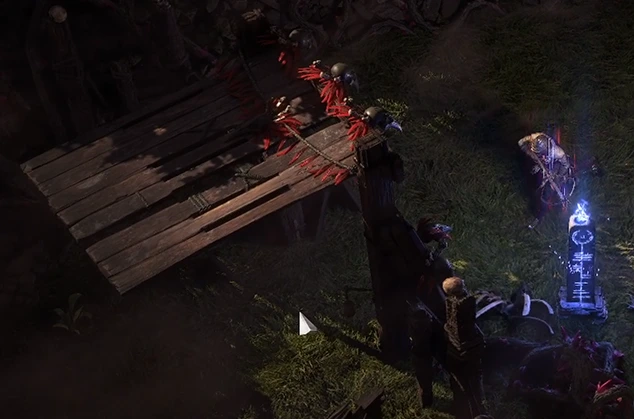
Freythorn (Permanent Buff Side Quest)
- (Tip) Return to Town via Waypoint and check Una for Greater Life Flask and Greater Mana Flask if needed.
- Locate and complete three Rituals.
- Activate the final Ritual and kill The King in the Mists.
- (Tip) You can purchase Items from the Ritual Altar afterwards.
- Activate Gembloom Skull: +30 Spirit and Uncut Spirit Gem.
- Portal to Town and speak to Finn for a Quest Reward choice of Ruby Charm, Sapphire Charm or Topaz Charms.
- (Tip) A Sapphire Charm is recommended for the upcoming final Act 1 boss!
Ogham Farmlands
- Take the Waypoint to Ogham Farmlands (or via the exit in Hunting Grounds if you haven't found it yet).
- (Permanent Buff) Find Una's Lute in a ruined hut (behind broken carts).
- Return Lute to Una in town for +2 Passive Skill Points. Portal or Waypoint from Ogham Village later.
- (Optional): Kill the Rare Feral Mutt in the Crop Circle: Level 4 Uncut Skill Gem.
- Enter Ogham Village.
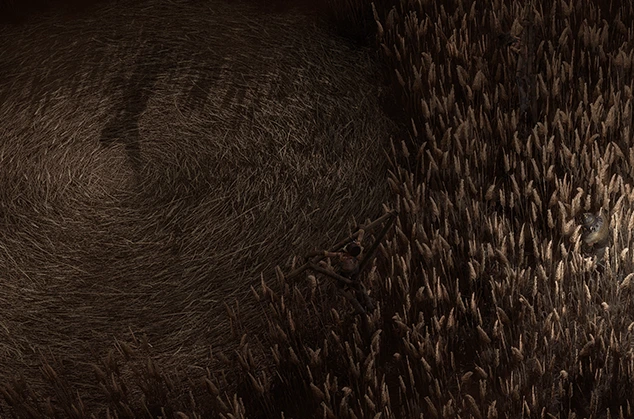
Ogham Village
- Locate Renley's Workshop Smithing Tools (Anvil Sign, Large Building).
- Return them to Renley during your next Town visit to Unlock the Salvage Bench.
- NOTE: This is only needed on the first character per league.
- Kill The Executioner.
- Free Leitis.
- Proceed to Manor Ramparts.
The Manor Ramparts
- Waypoint to town to talk to Leitis: Level 5 Uncut Skill Gem.
- (Tip) This is a good time to turn in Una's Lute, Renley's Tools and do some gear management.
- Waypoint back to The Manor Ramparts.
- (Optional) Cut down the Hanged Man at the Gallows: Uncut Support Gem.
- Enter Ogham Manor.
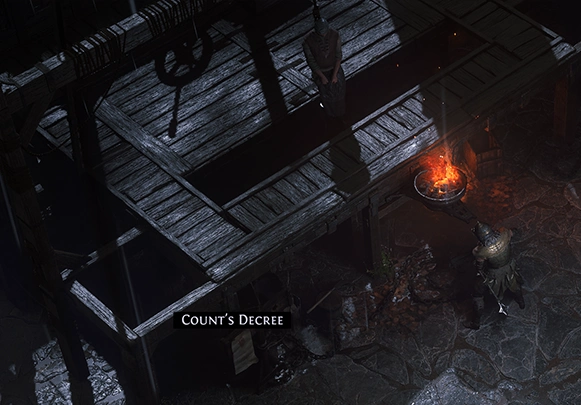
Ogham Manor
- (Tip) Start looking for 15% Movespeed boots from now on!
- (Permanent Buff) Defeat Candlemass: +20 Maximum Life.
- Defeat Count Ogham.
- Portal to Town and speak to The Hooded One to proceed to Act 2.
Act 2 - Normal
Vastiri Outskirts
- Kill Rathbreaker.
- Portal to Town (or respawn at checkpoint).
- Enter the Caravan.
Ardura Caravan (Town)
- Speak to Risu and Asala.
- This is a good time to shop and gear up!
- Use the Desert Map to take the caravan to Mawdun Quarry.
The Golden Chisel shows quest zones.
Before the Mawdun Mines, check vendors for a Grand Life Flask and Grand Mana Flask, and look for 15% Movespeed Boots. Also, ensure your Fire Resistance is as high as possible for the upcoming Mawdun Mines boss Rudja.
Mawdun Quarry
- Proceed through the zone and take the exit to Mawdun Mine.
Mawdun Mine (and Town)
- Kill Rudja, the Dread Engineer.
- Free Risu from the cage and speak to them.
- Portal to Town and speak to Risu and Asala.
- Use the Desert Map to travel to the Halani Gates.
- Enter the Halani Gates zone and speak to Asala.
- Travel to the Traitor's Passage via the Desert Map.
Traitor's Passage
- (Ascendancy) Locate and open the Ancient Seal.
- Defeat Balbala, the Traitor: Balbala's Barya for Trial of Sekhemas.
- Exit to the Halani Gates.
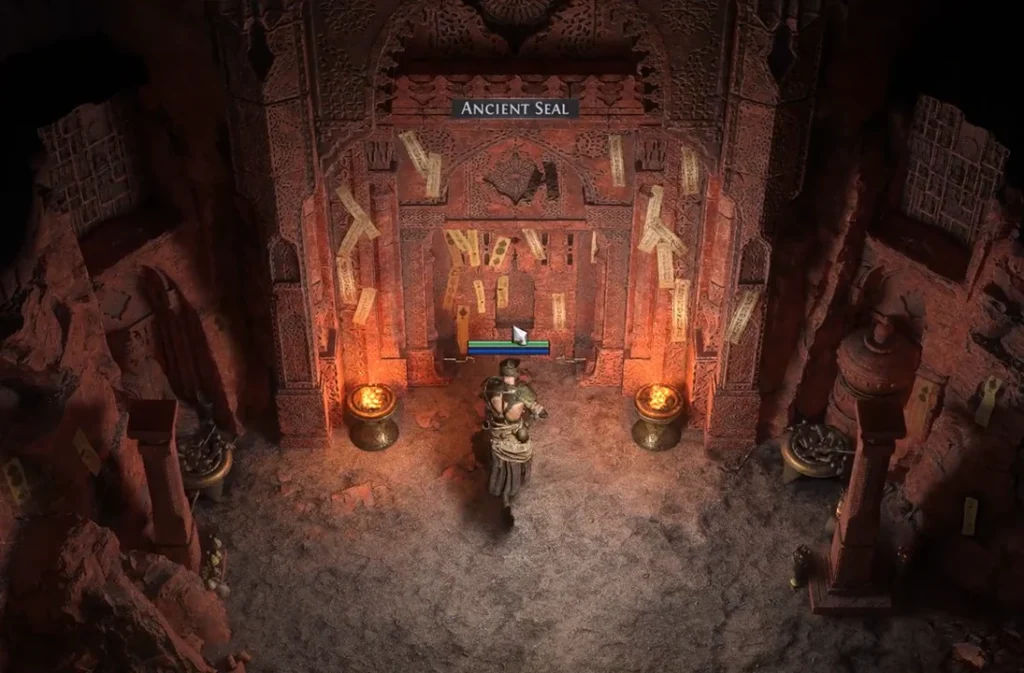
The Halani Gates (Part 1)
- Summon Asala and proceed through the zone.
- (Optional) Kill L'im the Impaler: Level 6 Uncut Skill Gem
- Defeat Jamanra.
- Run to the sandstorm until prompted to leave, then return to town.
- Speak to Zarka for a Level 7 Uncut Skill Gem.
- (Tip) Start looking for Giant Life Flask and Giant Mana Flask upgrades if you are level 23.
Act 2 has an unusual navigational mechanic because of the moving Caravan town. Use the Desert Map whenever you want to travel to a new location!
Trial of the Sekhemas (Ascendancy Unlock)
- Travel to the Trial of the Sekhemas via the Desert Map.
- Speak to Balbala.
- Place Balbala's Barya in the altar.
- Place the Urn Relic in the Altar.
- Use and Orb of Augmentation to enhance the Relic if you have one.
- Enter the Trial of the Sekhemas.
- Complete the first floor and defeat Rattlecage, the Earthbreaker.
- Enter the Treasure Room.
- Touch the Altar of Ascendancy.
- Loot any chests, if able.
- Purchase Relics from Balbala, if able.
- Leave the Trial and return to Town.
The Trial of the Sekhemas' unique Honour mechanic is more challenging for slower builds and playstyles that get hit by monsters more easily. If you fail your first attempt that's okay! You can reattempt the quest as many times as you need. Equip any Relics in the Relic Altar and it will become easier — alternatively, consider returning after gaining a few levels when you are more powerful.
Keth
- Travel to Keth via the Desert Map.
- Kill snake monsters until you find the Kabala Clan Relic (Quest Item for later).
- (Permanent Buff) Kill Kabala, Constrictor Queen: +2 Passives.
- Located in the middle of the zone, hiding underground in a pit with a checkpoint.
- (Optional) Enter and loot the Abandoned Shrine: Chest with a guaranteed Magic Amulet.
- Exit to the Lost City.
- Located opposite side to the zone entrance, after a big bridge.
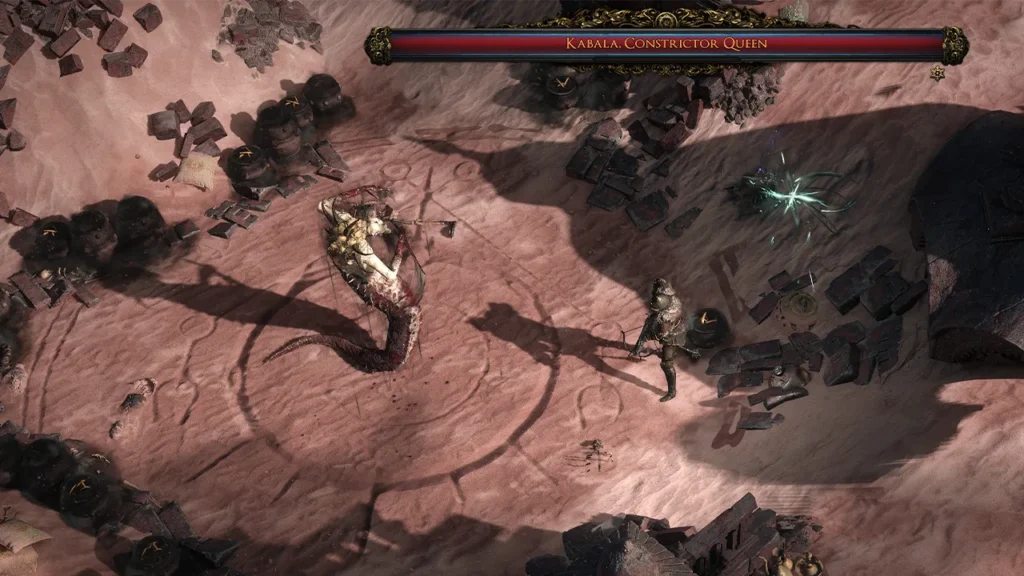
The Lost City
- (Optional) The Golden Chest: Uncut Spirit Gem.
- (Optional) The Gilded Beetle: Random Ruby, Sapphire, or Emerald Jewel.
- Locate and use the exit to Buried Shrines.
Buried Shrines
- (Optional) The Elemental Offering: Choose an Offering to obtain a Resistance Ring of the matching element.
- (Tip) Choose Fire if Fire Resistance is low for the upcoming boss fight.
- (Optional) Open the Guarded Sarcophagus: Uncut Support Gem.
- Defeat Azarian the Forsaken Son.
- Speak to the Water Goddess and use the Everburning Cinders to ignite her and claim the The Essence of Water.
- Portal to Town and speak to Zarka for an Uncut Support Gem.
- Travel to the Mastodon Badlands via the Desert Map.
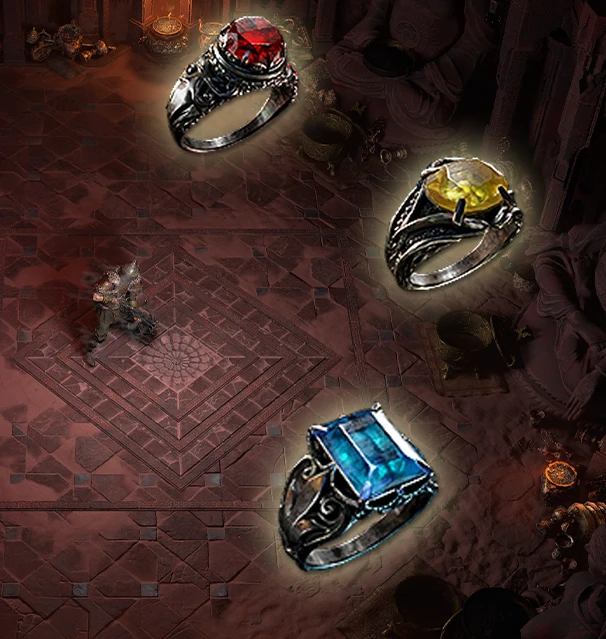
Mastodon Badlands
- (Optional) Loot the Shrine of Bones: Uncut Support Gem.
- The Sun Clan Relic can sometimes drop here (depending on monster spawns) but it's more reliably found in The Bone Pits.
- Enter The Bone Pits.
The Bone Pits
- Kill Monsters until you obtain the Sun Clan Relic.
- Locate and defeat Iktab and Ekbab.
- Portal to Town.
- Travel to The Valley of Titans via the Desert Map.
The Valley of the Titans
- Find and click the three ancient seals located by Titans to open the Titan Grotto.
- (Permanent Buff) Locate the Relic Altar near the Waypoint and place the Sun and Kabala Clan Relics inside.
- Choose a buff (can be changed later).
- Enter the Titan Grotto.
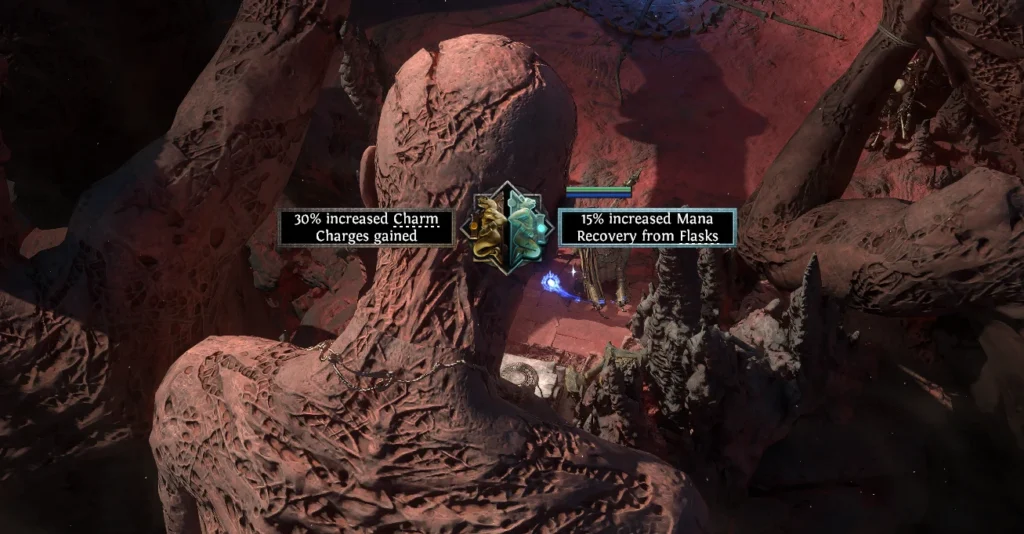
The Titan Grotto and Halani Gates (Part 2)
- Defeat Zalmarath, the Colossus.
- Portal to Town and speak to Zarka: Uncut Support Gem.
- Travel to the Halani Gates.
- Use the The Horn of the Vastiri at the front of the Caravan.
- Speak to Asala.
- Travel to Deshar via Desert Map.
Deshar
- (Permanent Buff) Locate the Fallen Dekhara and take the Final Letter
- (Tip) Check the base of each round building for the Dekhara.
- Exit to the Path of Mourning.
The Path of Mourning
- Waypoint to Town.
- Deliver Final Letter to Shambrin: +2 Passive Points
- Return to the Path of Mourning.
- (Optional) Shifting Vases event: Uncut Support Gem.
- Exit to The Spires of Deshar.
The Spires of Deshar
- (Permanent Buff) Activate the Sisters of Garukhan shrine: +10% Lightning Resistance.
- Defeat Tor Gul, the Defiler.
- Portal to Town.
- Speak to Asala.
- (Tip) Vendors can sell level 30 key items around here: 20% Movespeed Boots, Colossal Flasks, and Solar (Spirit) Amulets.
- Purchase or craft Colossal Flasks with Flask Charge gain Suffixes for an easier end of Act 2.
- Travel to The Dreadnought via Desert Map.
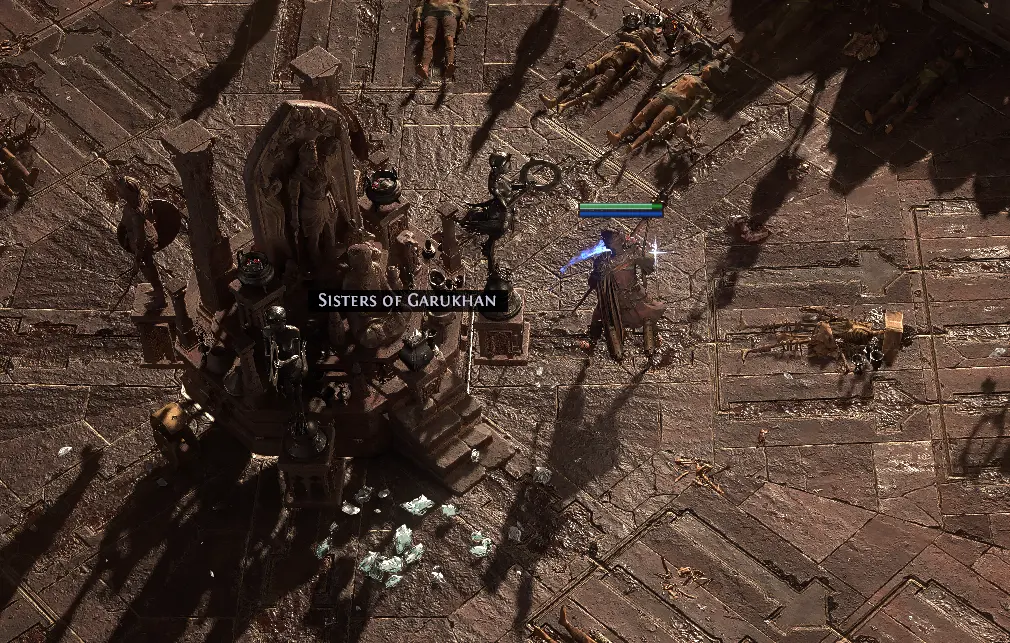
The Dreadnought
- Fight your way to the Dreadnought Vanguard exit.
- (Tip) The final checkpoint in this zone has multiple blue monsters you can farm by killing them and using reset to the checkpoint. Good for a quick level or two (which lets you vendor shop more too).
The Dreadnought Vanguard
- Locate and defeat the end of Act 2 boss Jamanra, the Abomination.
- Speak to Asala.
- Return to Town.
- Speak to the Hooded One.
- Speak to Asala and Travel to the Sandswept Marsh in Act 3.
Act 3 - Normal
Sandswept Marsh
- (Optional) Kill Rootdredge: Level 9 Uncut Skill Gem
- (Optional) Loot Corpse at Hanging Tree: Random Magic Ring.
- (Optional - Highly Recommended) Kill Rare Oroks and Loot Basket in Orok Campsite: Lesser Jeweller's Orb.
- Exit to Ziggurat Encampment (Town).
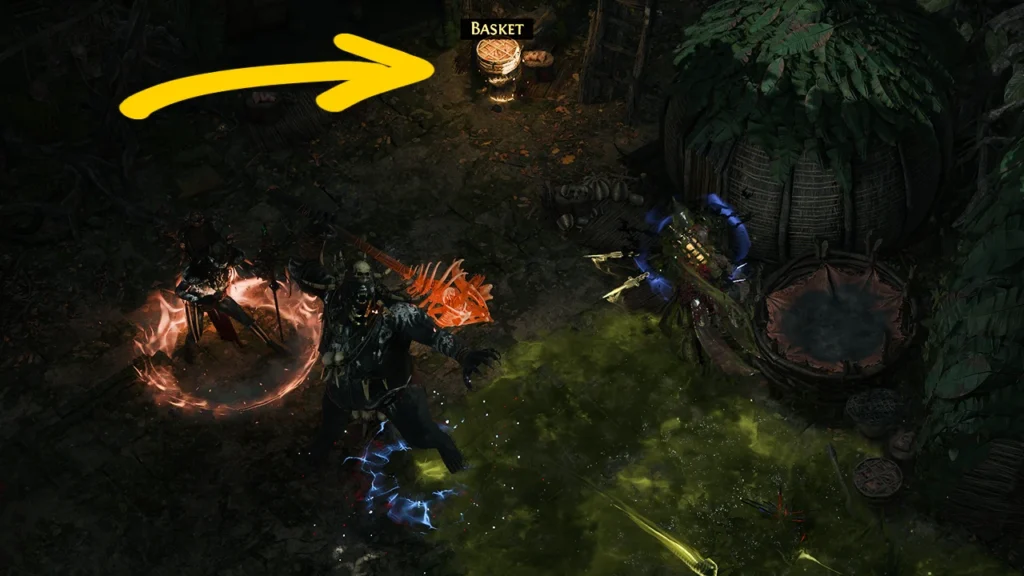
Ziggurat Encampment
- Speak to Alva and Oswald.
- This is a good opportunity to hunt for Flask upgrades and 20% Movespeed Boots.
- Exit to the Jungle Ruins, located near the top of town.
Jungle Ruins
- Defeat Silverfist: +2 Passives
- Located within stone ruins.
- (Optional) Summon the NPC to the Jungle Grave: Rare Belt.
- Likely only worth doing if you accidentally find it or if your belt is very bad.
- (Optional) Loot the white chest in Gwendolyn Albright's Troubled Campsite.
- Gwendolyn sells high quality armour, check for upgrades.
- Activate the Waypoint and Enter the Venom Crypts.
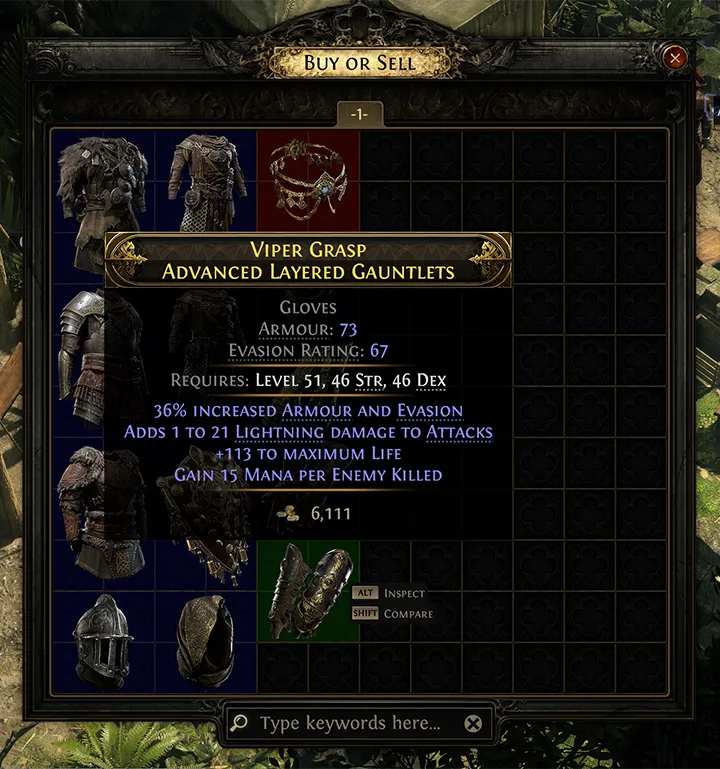
The Venom Crypts (Permanent Buff)
- Locate the Den of the Serpent Priestess and Loot the Corpse-snake Venom.
- Portal to Town.
- Give the Corpse-snake Venom to Servi.
- Choose a permanent buff reward. WARNING: This cannot be changed later!
Infested Barrens
- Waypoint to Jungle Ruins.
- Take the exit to Infested Barrens,
- Located on one of the outer zone edges (typically opposite the exit to town).
- Activate the Waypoint and summon Alva.
- Look for a stone platform near the water with the waypoint and a checkpoint nearby.
- (Optional) Loot the white chest in Sebastian Carroway's Troubled Campsite: Rare Boots.
- This vendor also sells higher-quality weapons, check them for upgrades on attack builds.
- Hug the outside wall to locate the exit to the Azak Bog.
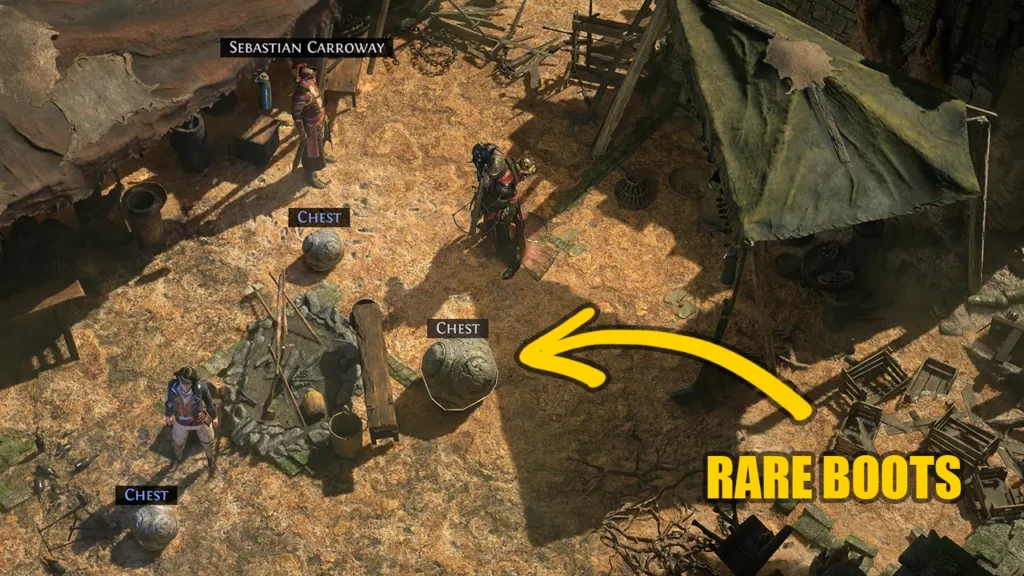
The Azak Bog (Permanent Buff)
- Summon and speak to Servi, if needed.
- (Optional) Complete the Flameskin Ritual for a temporary boost to Fire Resistance and Rarity.
- Only needed to make the boss easier if your Fire Resistance is currently very low (below 30 to 40%).
- (Permanent Buff) Defeat Ignagduk, the Bog Witch: +30 Spirit and an Uncut Spirit Gem.
- Portal to town.
- Speak to Servi to obtain the quest reward for your choice of Charm. Thawing is recommended if you don't have one already, otherwise Antidote.
Chimeral Wetlands
- Take the Waypoint to Infested Barrens, hug the wall until you locate the exit to the Chimeral Wetlands.
- Enter The Temple of Chaos and activate the waypoint, then return to the Chimeral Wetlands.
- Defeat Xyclucian, the Chimera: Obtain Chimeral Inscribed Ultimatum for Ascendancy.
- Exit to Jiquani's Machinarium.
Jiquani's Machinarium
- Locate a Small Soul Core located in one of the two entrance offshoot rooms.
- Use Soul Core to open the door.
- Locate an additional Small Soul Core.
- (Permanent Buff) Open the door and kill Blackjaw, the Remnant: +10% Fire Resistance.
- (Optional - Low Priority) use a third Soul Core to unlock and loot the Treasure Vault.
- Obtain another Small Soul Core.
- Use Soul Core to open the exit to Jiquani's Sanctum.
Jiquani's Sanctum
- Head to the left or right generator and look for a Medium Soul Core.
- Place Medium Soul Core inside generator.
- Cut through the middle of the zone to the second generator, looking for another Medium Soul Core on the way (or around the second Generator).
- Using reset at checkpoint repositions the Soul Cores if you have trouble finding them!
- Place Medium Soul Core in second generator.
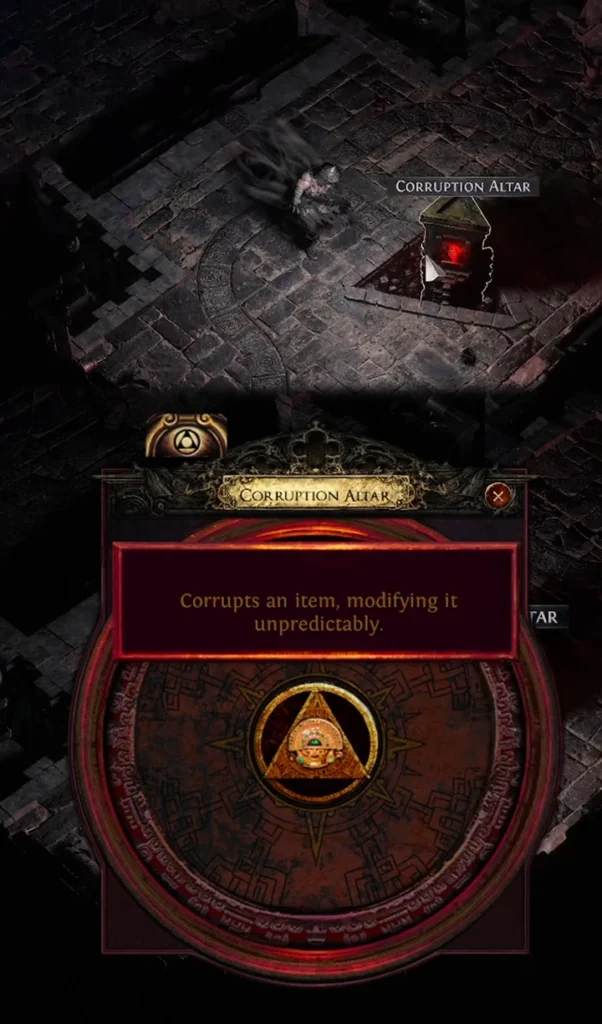
- (Optional) use the Corruption Altar to corrupt an item (gamble).
- Return to Alva (can portal to town and return via waypoint).
- Defeat Zicoatl, Warden of the Core.
- Obtain Large Soul Core.
- Portal to Town and Waypoint to Infested Barrens.
- Place Large Soul Core in the device to reveal the exit to Matlan Waterways.
The Matlan Waterways
- Activate Levers to drain water as you proceed through the zone.
- Activate the large Lever at the end to reveal the Drowned City on the World Map.
- Portal to Town.
The Trial of Chaos (Ascendancy Passives 3 and 4)
- You can technically do this anytime after getting the Chimeral Inscribed Ultimatum, but this is likely a good time for most people to do it.
- Waypoint to the Temple of Chaos.
- Use the Inscribed Ultimatum to open the Trial of Chaos.
- Defeat several encounters and the first randomized boss.
- Activate the Altar of Ascendancy.
- Portal to town.
The Drowned City
- Descend the stairs in town to enter the Drowned City.
- Follow a wall and proceed through the zone until you get to either exit.
- Enter The Molten Vault and activate the Waypoint.
- Complete the Molten Vault now if your DPS is feeling high as the boss is a DPS check. Otherwise, return via the waypoint after you beat Act 3. This can be a difficult fight to beat, consider over-leveling if you struggle!
- Enter The Apex of Filth and activate the Waypoint.
- If you don't have both Molten Vault and Apex of Filth Waypoints activated, use a checkpoint to return to the bridge ambush and continue searching for the missing zone (This is to prevent having to reexplore the full zone later).
- Enter The Molten Vault and activate the Waypoint.
The Molten Vault (Reforging Bench Unlock)
- NOTE: Like the Salvage Bench Quest, this only needs to be completed once per "League" or Game Mode.
- Activate the lever to release liquid hot molten metal.
- Use the elevator to enter the boss arena.
- Defeat Mektul, the Forgemaster: Level 10 Uncut Skill Gem + Reforging Bench.
- This boss is a DPS check with a time limit, if you have low DPS you can return after you beat Act 3.
- Take the The Hammer of Kamasa to town via Portal and give it to Oswald.
The Apex of Filth
- Waypoint to Apex of Filth.
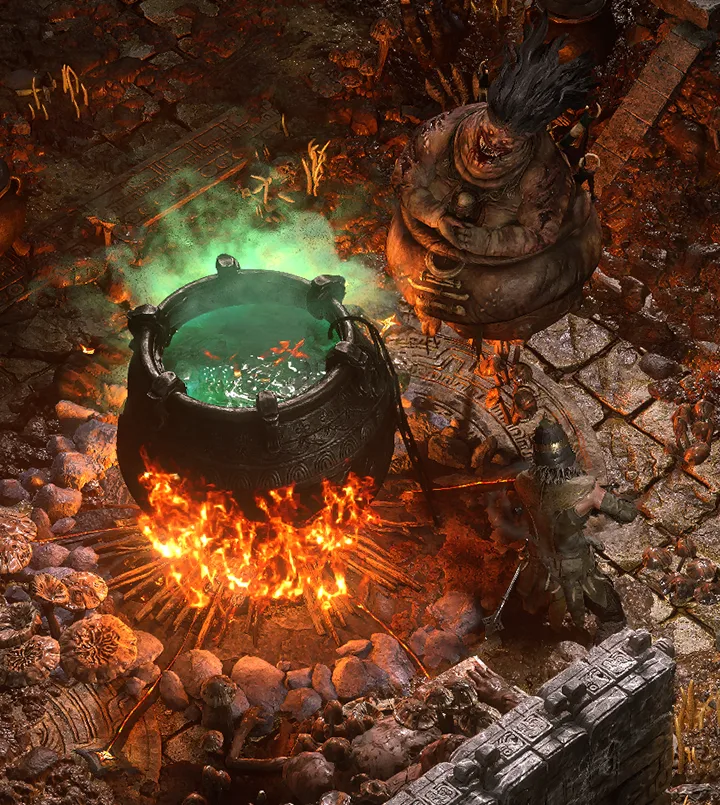
- (Optional) Collect the Red Mushroom, Green Mushroom and Blue Mushrooms and activate the Cauldron Keeper's Cauldron for: Quality Flasks.
- The Cauldron Keeper is an NPC vendor that sells Jewelry and spellcaster gear. Check for upgrades.
- Defeat the Queen of Filth.
- Obtain the Temple Door Idol and Portal to Town.
- Descend the stairs and speak to Alva to open the door to the Temple of Kopec.
The Temple of Kopec
- Check the corners of triangular temple for the first exit.
- Check corners for the second zone exit.
- You can Leap Slam over the large gap for a shortcut.
- Defeat Ketzuil, High Priest of the Sun.
- Speak to Alva.
- You can portal to town after Alva says "Wait!" to skip the rest of the Lore sequence.
- Follow Alva through the time portal, and take the steps to Utzaal.
Utzaal (Past)
- Follow the main road through the zone until you get to a cutscene.
- Defeat Viper Napuatzi.
- Exit to Aggorat.
Aggorat (Past)
- (Permanent Buff) Kill Vaal enemies until the Sacrificial Heart drops (this can also drop in Utzaal).
- Cross through the worship altar gateway.
- (Permanent Buff) Use the Sacrificial Altar and Dagger to sacrifice the Heart: +2 Passive Points.
- Exit to The Black Chambers.
The Black Chambers (Past)
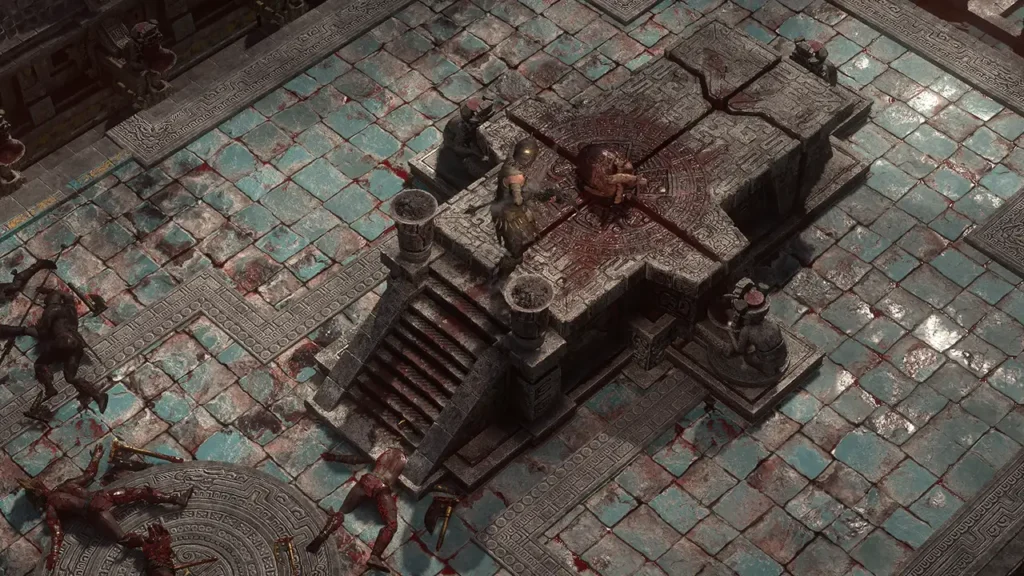
- Defeat Doryani, Royal Thaumaturge.
- Portal to Town.
- Take the gateway to Act 1 Cruel Difficulty.
Cruel Difficulty Route and Reward Changes
Cruel is a repeat of the first 3 Acts with very few differences. However, many of the hidden loot caches and some of the permanent buffs do change in Cruel. The following list only notes important reminders, substantial changes to the progression, and good loot caches to grab in your Cruel playthrough.
- Clearfell:
- Kill Biera of the Rotten Pack again for another +10% Cold Resistance.
- Mud Burrow:
- (Optional Zone) Worth doing as The Devourer now gives a Level 11 Uncut Skill Gem + Level 11 Uncut Spirit Gem.
- The Grelwood:
- New rewards for Brambleghast (Level 11 Uncut Skill Gem)
- New rewards for Areagne (Gargantuan Life Flask and Gargantuan Mana Flask).
- The Red Vale:
- Unchanged.
- The Grim Tangle:
- The Rotten Druid now drops a Level 2 Support Gem.
- Cemetery of the Eternals:
- The Forgotten Gravesite drops a larger variety of higher level Rings.
- Tomb of the Consort:
- Haunted Treasure Ambush drops a level 2 Support Gem.
- Mausoleum of the Praetor:
- Unchanged.
- The Hunting Grounds:
- Kill Crowbell again for +2 Passive Points.
- Unless you need another Uncut Support Level 2 you can skip the Dryad Ritual this time.
- Freythorn:
- (SKIP!) There is no reason to come here in Cruel as you cannot get another Spirit Buff here. It's a waste of time to do the whole zone for a Charm, Spirit, and random loot.
- Ogham Farmlands:
- Get Una's Lute again for another +2 Passives.
- Ogham Village:
- You do not have to get Renley's tools again!
- Manor Ramparts:
- Loot the Hanged Man again for another Uncut Gem.
- Ogham Manor:
- Kill Candlemass again but this time for +5% Max Life.
- Vastiri Outskirts:
- Rathbreaker quest gives a Level 13 Uncut Skill Gem now.
- Mawdun Quarry and Mines:
- Unchanged.
- Traitor's Passage:
- You do not need to kill Balbala.
- You cannot ascend again from the key she drops here (Need a Level 60+ key for the next Ascendancy unlock).
- Trial of the Sekhemas:
- You cannot ascend in Trial of the Sekhemas at this time.
- You can use it to farm relics with low level Djinn Barya keys.
- Keth:
- Kill Kabala again for +2 Passives.
- Get the Kabala Clan Relic again!
- The Lost City:
- You can get another Spirit Gem from the Gilded Chest and another Jewel from the Gilded Beetle.
- Buried Shrines:
- Can get another Resistance Ring from Elemental Offering.
- Mastodon Badlands:
- Shrine of Bones now gives an Uncut Skill Gem.
- The Bone Pits:
- Get the Sun Clan Relic again!
- The Valley of Titans:
- Place the Kabala and Sun Clan Relics again, buffs are different this time.
- Titan Grotto:
- Unchanged.
- Deshar:
- The Final Letter still grants +2 Passives.
- The Path of Mourning:
- Shifting Vases now gives an Uncut Skill Gem.
- The Spires of Deshar:
- Sisters of Garukhan Shrine gives another +10% Lightning Resistance
- The Dreadnought:
- Unchanged.
- Sandswept Marsh:
- You can get another Lesser Jeweller's Orb from Orok campsite!
- Hanging tree drops another random Ring. Rootdredge drops nothing special now.
- Jungle Ruins:
- Silverfist grants another +2 Passive Skill Points.
- Gwendolyn is still a great NPC vendor and her chest still drops Rare gloves.
- The Venom Crypts:
- You can do this quest again for another permanent buff! Do it.
- Infested Barrens:
- Sebastian Carroway sells good weapons again and his chest drops Rare boots still.
- Azak Bog:
- +40 SPIRIT BUFF! Kill the Bog Witch again for your final Spirit unlock.
- Chimeral Wetlands:
- Unchanged but you cannot ascend again from the Key Xyclucian drops this time.
- Trial of Chaos:
- You cannot unlock any Ascendancy passives here at this time (wait until Level 60+).
- Jiquani's Machinarium:
- Kill Blackjaw again for +10% Fire Resistance!
- Jiquani's Sanctum:
- The Corruption Altar can be used again in Cruel.
- The Matlan Waterways:
- Unchanged.
- The Drowned City:
- Unchanged.
- The Molten Vault:
- SKIP! You should have already unlocked the Reforging Bench in Normal.
- Apex of Filth:
- The Crone is still a great Jewelry and Spellcaster Vendor and you can get some decent Quality flasks for the mushrooms.
- The Temple of Kopec:
- Unchanged.
- Utzaal:
- Get the Sacrificial Heart again!
- Aggorat:
- Sacrifice the Heart again for +2 Passive Points!
- The Black Chambers:
- Unchanged. This time, however, after defeating Doryani you gain access to Endgame!
How to Get Good Gear
Rarity Isn't Everything
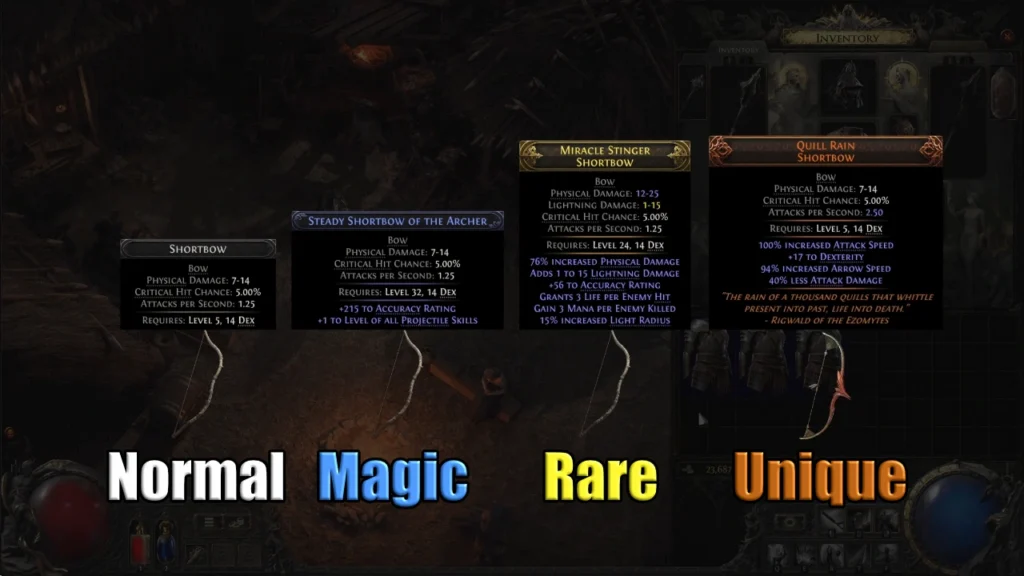
The most important thing to remember is that there's no hidden bonus for an item being Rare or Unique. Items are only as good as the sum of the specific stats they give you. A very common mistake for new players is to keep wearing a Rare or Unique item even when they are presented with Magic items that are far better.
What's the better Helmet? This Overly Shiny Soldier Greathelm, or, this Stout Spired Greathelm of the Narwhal? Well unless you're playing a summoner, it's the Magic hat. It's got great Life, a good Resistance and it's got a lot more Armour. It's not fancy, but it gets the job done (not to mention it's just waiting for a Regal Orb drop).
A Rare item only really means that it had more potential to be better, but all that matters is what the actual stats are.
Remember the Gearing Fundamentals
The main things you want on your gear while leveling (in rough order):
- Movement Speed.
- Resistances.
- Life (remember Strength is Life!).
- Base Damage (Physical Weapons and Flat Added Damage for Attack Builds. +Skill Levels for Spellcaster Builds).
- Damage Scaling (Attack/Cast Speed, "Increased" Damage).
- Armor / Evasion (and Energy Shield if You Have Passives for It).
Get a Loot Filter
Loot Filters are essential. Every player runs one and you should too.
- They lower the visual clutter by hiding items that have virtually no chance of being useful.
- They highlight the best or most relevant items contextually, based where you're up to!
- They can highlight items for Salvaging.
- You can customize them to your needs. Playing melee? Hide the bows and highlight the Maces!
The gold standard of loot filter customization comes from Neversink. Get a loot filter here. I Suggest starting on "Semi-Strict" filters if you are brand new and upgrading to "Strict" or "Very Strict" filters once you're in endgame and settled in.
Vendor Shopping
The NPC Vendors in each town (and the amazing hidden ones in Act 3) are an essential tool for Campaign gearing, whether you're brand new or a top speedrunner. They regularly sell items worth using and provide a more deterministic way of getting base items you need to craft for chances at an upgrade.
- Vendors reset frequently as you progress. Check them each time you visit town.
- Keep an idea in mind of what your current most pressing needs are and focus on solving those problems with Vendors.
- Are you two tiers of Flasks behind and you keep running out of Mana?
- Are you straight up missing an item?
- Do you have a Resistance that's super low?
- Have you not been able to find Movement speed boots?
- Is your Mace or Bow from Act 1 and you're at the end of Act 2?
- If you have excess Gold the Gambler in each Act is a powerful, but expensive tool to get a very specific item.
- If I was in Act 3 on a Grenadier build and I hadn't yet managed to get a Bombard Crossbow, and the weapon Vendor didn't have any then I would gamble Crossbows to get that essential upgrade ASAP!
- If you're really struggling somewhere, get a level up and check the vendors again.
Runes are Your Most Powerful Crafting Tool
In the Campaign, there is one thing you can always count on to have your back: Runes.
- It's a high priority on weapon attack builds to get a weapon with 2 sockets (or add them to a decent one) and socket them with any damage Runes.
- Iron Rune is usually best but any of them are a huge boost.
- Even a white 2-socket weapon with Runes can be enough to progress.
- Runes are how you fix your Resistances or get past that boss you're stuck on.
- Get that socketed Armour and fill those sockets for Resists. Life is great but prioritize Resistances first.
- Keep dying to Rudja, the Dread Engineer in the Mawdun Mines? One or two Desert Runes make all the difference.
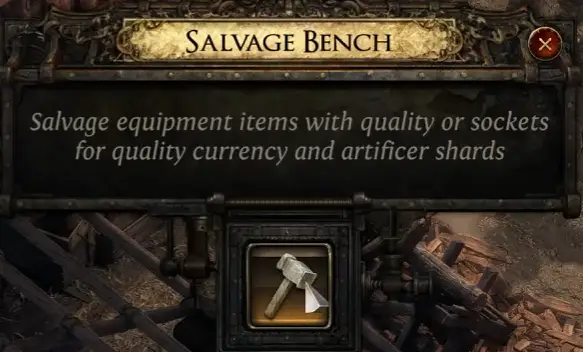
- Runes themselves are fairly common but getting enough sockets on gear or Artificer's Orbs to add them is tricky.
- Unlock the Salvaging Bench in Act 1 Ogham Village (Renley's Tools) and use it to salvage ALL socketed gear you aren't going to use. Salvage any Quality gear while you're at it.
- You can swap Runes, but unless you plan on using an item for a long time (or unless you have spare Runes) it may be better to keep the Runes aside for the next item upgrade. Gear tends to change over fairly quickly during the campaign.
What to Disenchant and What to Sell for Gold
Crafting with Orbs of Transmutation and Regal Orbs is a key part of gearing in the campaign. You can get Transmutation Shards and Regal Shards by disenchanting Magic and Rare items you don't need at an NPC in each of the towns. You also need Gold to buy items from the NPC vendors, both to use right away or to craft. As such, you should be balancing a mixture of selling for Gold and Disenchanting as your current needs dictate.
Here's an outline of a typical strategy:
- Very early on prioritize selling items for Gold.
- This is to buy needed items such as Flasks, weapon upgrades, and Jewelry.
- Transition to Disenchanting most items to build up a stockpile of Transmutes and Regals.
- This is to craft those obtained items, to craft for Movement Speed boots, and add modifiers to decent Jewelry and weapons.
- Start Disenchanting Rares and selling Magic items for Gold as needed.
- Do this once you start to have more Transmutes than you're using. Ensure you're actually using them though! For example, whenever there's a chance to upgrade to a new Flask tier, a new tier of Movement speed, or a new weapon base.
- You can stop picking up irrelevant Magic items unless you need Gold soon.
- Prioritize Salvaging Quality and Socketed items for the entire campaign.
- Only stop salvaging Socketed items if you desperately need gold or Regal Shards and have adequate Artificer's Orbs (and your gear is all socketed).
There are no explicit levels here, and that's because this is an organic process that's based on your evolving needs over time. You should break the rules when needed too. Do you really need a specific Weapon Base? Sell some Rares for gold to Gamble for it!
Campaign Crafting with Currency
Trading is an exceptionally powerful tool for improving your League Start Campaign leveling. Two minutes spent searching for a high DPS weapon for your level can easily double your damage output. During the average Campaign run you will find several Exalted Orbs, and often one or two of them can buy you a significant gear upgrade from another player.
In Trade Leagues Use Major Currency Orbs for Trading
If you are playing in a Trade League (and plan on trading), you should avoid using Exalted Orbs, Chaos Orbs, and Divine Orbs. These Currencies are useful and valuable at endgame and typically have a greater value to you in trade than what you'd get by using them. Exalted Orbs can be used sparingly to enhance your very best items you can keep using into the endgame, such as adding a sixth modifier to a great Ring you find at level 50.
When you first get to endgame your priorities are getting your Elemental Resistances capped to 75%, ensuring you have 25-30% Movespeed Boots, a passable weapon, and perhaps some extra Lesser Jeweller's Orbs to socket your Skill Gems. These things can be purchased in a fresh economy with just a few Exalted orbs (and even more cheaply in a matured economy). Learn more about Trading in Path of Exile 2 here.
Or, you could make your leveling much easier with a leveling Unique with those lucky Exalts. Many of the best leveling Uniques in our guide here can be purchased up for only a few Exalts.
These are the Currencies you can and should use to enhance your leveling gear:
- Orb of Transmutation: Transmute Normal items freely as needed.
- Early on prioritize new weapon bases (especially for attack builds), Boots (for movement speed), gloves (for damage in attack builds), Flasks (from level 30 onwards especially), and Jewelry.
- Orb of Augmentation: Augment Magic items that have a good single modifier already.
- They are a bit more rare than Transmutes and cannot be created from Disenchanting. Prioritize items that you are likely to keep for a bit longer like Jewelry or a pair of Boots with movement speed.
- Regal Orb: Regal Magic items to enhance them and to extend how long they remain useful.
- Prioritize Magic items that have 2 good Modifiers already, like boots with Movespeed and a Resistance, or a Ring with Life and a Resist.
- Regals are fairly easy to obtain thanks to Disenchanting, but you wont get enough while leveling to Regal everything.
- Stick to Regaling your best few items that you wont have to replace soon. Don't Regal 15% movement speed boots if you can start finding 20% movement speed drops in 2 levels. Don't Regal a Mace if you're already finding better bases, even if it's modifiers are great.
- Orb of Alchemy: These are fairly rare drops in the campaign and get a lot of demand in endgame but can be used sparingly where they make a big difference.
- The most impactful thing you can use an Orb of Alchemy on is often an up-to-date weapon. When your damage is low get an Normal weapon base close to your level and craft it.
- Get a Normal Solar Amulet, which you needed to run an extra Support gem on a Spirit Skill? That's a good Alch target. Make it Rare, as you are unlikely to swap it for a while.
- If unsure, keep them in reserve until you really struggle or save them for endgame.
- Blacksmith's Whetstone / Armourer's Scrap / Glassblower's Bauble: Adding Quality to your gear while leveling is only worth it in a few specific cases. These Currencies can be worth a good amount to people gearing at endgame so using them on gear you replace quickly is rarely worth it. The exceptions:
- For attack builds it's worth it to Whetstone decent weapons you plan to use for a while (from level 30 onwards, roughly). Especially if they happen to have Flat Added Physical Damage (which gets multiplied by the Quality).
- Well-rolled Energy Shield gear can be worth adding Quality to from levels 30+ if you are invested in Energy Shield.
- Quality only Ultimate Flasks when you find some with good Prefix and Suffixes.
- Gemcutter's Prism can be used on your skill gems any time with no risk (provided you are planning on using the skill long term). Go for it!
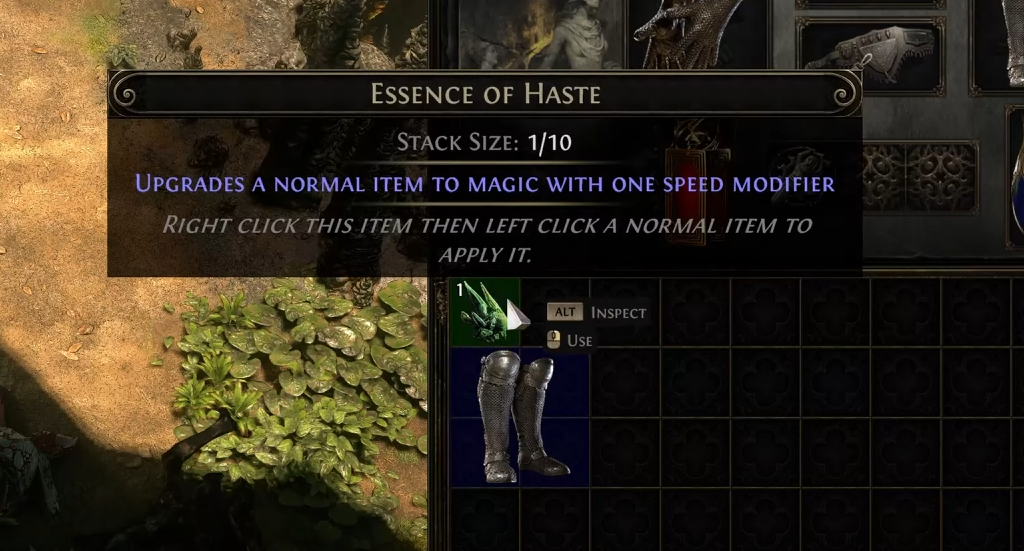
- Essences: Guaranteeing a specific modifier on a needed item type is a powerful tool to take advantage of.
- An Essence of Torment on a new weapon that's close to your level could give you an immediate damage upgrade.
- An Essence of the Infinite on a Ring or Amulet is guaranteed to give you Attributes so you can equip your gear. Use Gold to respec your Attribute nodes after equipping to get what you specifically need.
- Orb of Chance: You should only use this if you know what you're doing with it. Check out our guide on the best items to Chance.
The Reforging Bench for Important Items
The Reforging Bench can do a lot of different things, but during the campaign it has one very specific way of helping you. When you really need a good version of a specific item it saves you 1/3rd of your Gold and Currency costs to get it. Consider the example of trying to get a good Advanced Bombard Crossbow on a Grenadier build in Act 3 Cruel. You would:
- Drop, Buy or Gamble Advanced Bombard Crossbows.
- Craft each of them if they have potential.
- Keep the failures.
- For every set of 3 Magic or Rare failures use the Reforging Bench to create a new one for free.
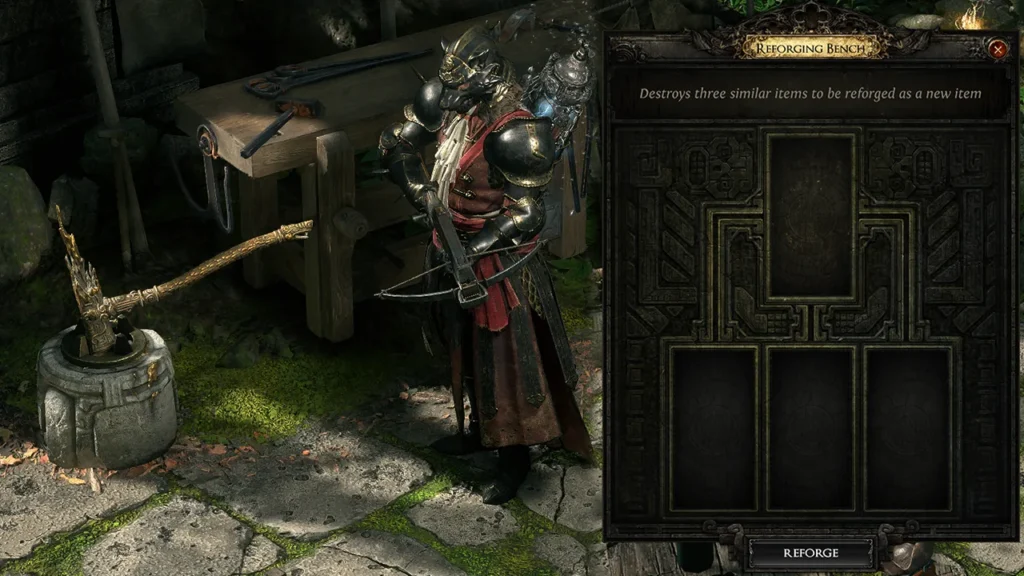
For every 3 items you invest in crafting or that you pick up you get one extra chance back at getting a good one. They have to be the exact same item base type and Rarity, so it's only really useful when you need specific items like this. Widely applicable to all builds for Jewelry.
How to Stop Dying?
The three most common reasons players die in the campaign are:
- Engaging enemies poorly.
- Poor Flask use (including bad Flasks of a low level, or those with ineffective modifiers).
- Bad Life and Resistances.
When you consider that most deaths can be linked to one of those factors you have a pretty easy cheat sheet for improving your survivability.
Playing to Live
- Rule #1: Keep moving, standing still is death.
- Just the simple act of not standing still avoids the majority of attacks, especially ranged ones.
- Rule #2: Run circles, not lines.
- When moving you want to run around things, not away from them. Consider the classic meme of running away from a crashing spaceship instead of simply running to the side.
- Rule #3: Hug the boss.
- Most boss attacks track or are a cone. Staying close to the scary thing uses the power of math to keep you alive. If you are next to the boss you only have to move 3 steps to dodge the attack, if they are at the edge of your screen you have to move 30 steps.
- Rule #4: Keep your Life above 0.
- Use your Life Flask before your life gets low. Anticipate the hit and already be pressing the button to heal before the next hit comes in. This "preemptive" Flask use strategy can be a bit more wasteful on charges but it results in moments where you say "I shouldn't be alive...".
- Rule #5: Dodge Roll!
- Dodge Roll is there for you in your times of greatest need — whether you are about to be slammed by a boss attack, swarmed by Werewolves, or just need some personal space. When you Dodge Roll you actually become smaller, allowing you to slip between monsters that otherwise would block your escape. Take advantage of that to make some narrow escapes!
Take Half the Damage with Resistances
If you're newer to Path of Exile then you likely don't value Resistances correctly.
Having 50% Cold Resistance instead of 75% Cold Resistance means you take double damage.
Despite being mathematically true it can feel unintuitive. Think about taking 100 points of damage at 75% Resistance (25 damage taken) vs. 100 points at 50% Resistance (50 damage taken). It's helpful to frame it this way in your mind to emphasize the effects of Resistance on incoming damage.
75% Resistance is the cap, and in the campaign, your goal should be to get as close to that as possible. To help, focus on specific Resistances you need for upcoming content. If you know you're soon fighting a Fire Damage boss, get more Fire Resistance by swapping to a Ruby Ring, Ruby Charm, or by adding some Desert Runes. A simple Ruby Ring swap when you had 45% Fire Resistance means you now take less than half the damage you would have!
To learn more about staying alive in Path of Exile 2's Campaign and the Endgame check out the following guides:
How to Get More Damage
Understand Skill Tags
Knowing the difference between Spell and Attack skills and how tags affect their damage scaling is the most important first step. Once you know how to identify what a skill is then its far easier for you to look at your options and know exactly how they affect it.
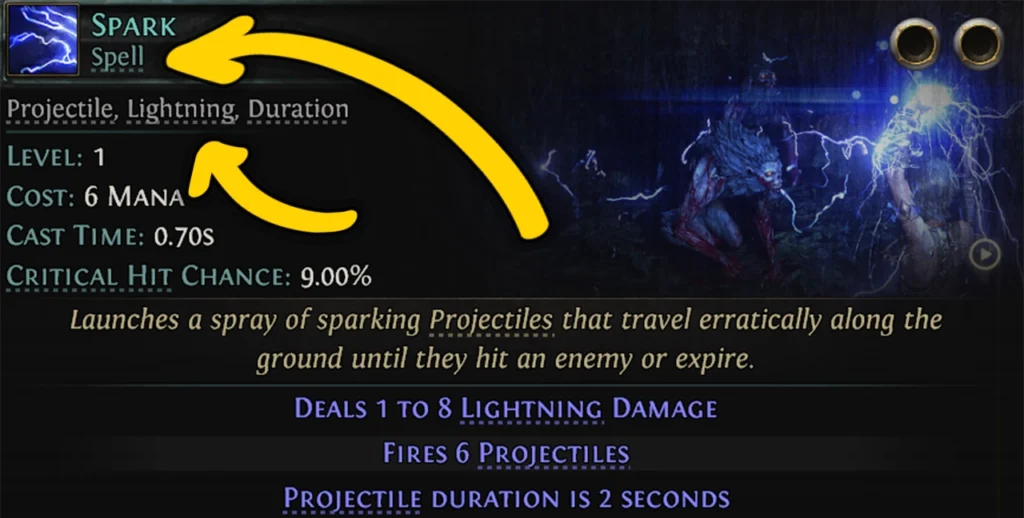
The underlined keywords below a skill's name in it's tooltip are the skill's "Tags". You can click each tag in-game for more information on what a tag means, but the tag alone tells you your scaling options.
Take the skill Spark for example:
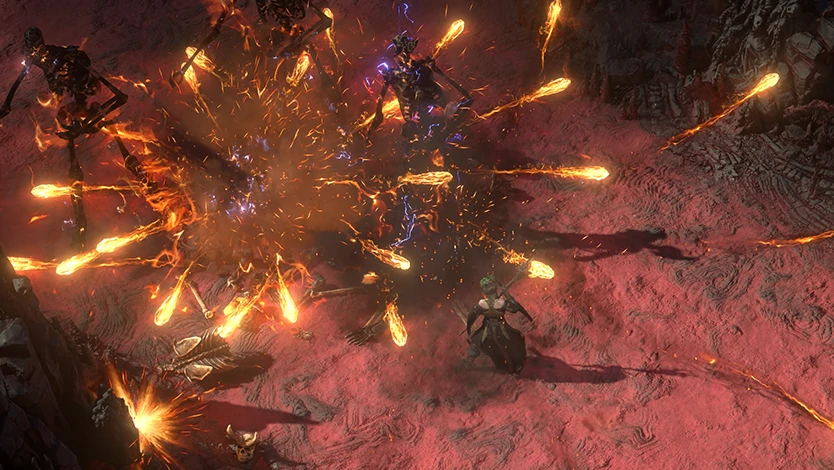
- It's a Spell: That means anything in the game that specifies "Spells" such as "Spell Damage" works with it.
- Note that part of the "Spell" tooltip description explains that "Spells have their own base damage, cast speed and Critical Hit chance determined by the skill."
- Anything that says "Cast Speed" likely works with Spark.
- And Spark's base speed and critical chance is not based on a held weapon (unlike attacks).
- And the base damage numbers on a spell come from the skill gem's level, not a held weapon (unlike most attacks).
- Note that part of the "Spell" tooltip description explains that "Spells have their own base damage, cast speed and Critical Hit chance determined by the skill."
- It's a Projectile: Anything that says "Projectile" such as "Projectile Speed" or "Projectile Damage" work.
- Tags also tell you what Support gems work. Both from the Tags on a support gem like Pierce and from the actual descriptive text. Of course, you have to use your testing and reasoning skills to figure out whether a support is actually good with that skill — or follow a build guide that tells you!
- It's a Lightning Skill: "Increased Lightning Damage" or "Cast Speed with Lightning Skills" are going to work.
- It also means your final Lightning Damage dealt with be affected by the enemy's Lightning Resistance (which you can lower! See: Conductivity).
- It has a Duration: Same as the previous tags, this tells you what works with the skill but it also works as a good hint for what you can do with it:
- "What if I make the Sparks longer?" — Such questions can lead to noticing that more projectiles last long enough to hit an enemy.
- "What happens to the projectiles when they hit? Oh, they disappear. What if I make them Pierce too?"
- Questions like these are how you come up with combinations of Passives, Gear and Support Gems to elevate a skill's power.
The Basics of Damage Scaling
For Attacks:
- Get a better weapon with more damage on it. Especially combined Physical damage.
- The damage of Attack Skills is almost fully based on the damage of your weapon making it your first thing to upgrade.
- Example: Big Shooter Composite Bow. Note the combined physical damage, which is added to the Physical Damage a basic Composite Bow already has. The Iron Runes further boost the damage total as does the 20% quality!
- Get Flat Added Damage on other gear like Rings, Amulets, Gloves and Quivers.
- Example: DPS Iron Ring. This is a leveling Ring any attack build would love, it's got Life and a Resist but the physical and cold damage are both "Added Flat" damage, which is added to your weapon's damage before any other scaling happens.
- Note that some other things like the Lightning Infusion Support also give "Added" damage, in this case, Added Lightning (based on your weapon and gear damage).
- Get "Increased" and "More" damage of compatible types.
- This mostly comes from Passives and Support Gems.
- Example: Careful Aim and Lightning Damage Passives for Lightning Arrow, which has the Projectile Tag and deals Lightning Damage.
- Example: Using Concentrated Effect Support on Lightning Rod, which has the "AoE" tag and deals Area Damage.
- Get Faster Attack Speed.
- Most important is often attack speed on the weapon itself (including weapons that are faster by default).
- Examples: Martial Tempo Support and Great Attack Gloves.
- Get More Gem Levels.
- Skill Gem Levels are a potent way to scale your damage.
- Prioritize leveling up your main damage dealers with higher level Uncut Skill Gems.
- You can also get +Levels on gear (note the matching Tags!), weapons being the main source.
- Be warned that increasing levels can significantly increase Mana Costs as well.
For Spells:
- Higher Gem Levels.
- Unlike attacks, Spells get their base damage from the gem instead of your weapon.
- Weapons for spellcasters often do give additional bonus levels though! But they are primarily about forms of scaling.
- Spell Weapon Scaling.
- Example: Spell Scaling Wand.
- "Gain % of Damage as Extra X Damage" adds more base damage and can be nice for activating things such as Freeze and Shock.
- "Increased" Damage comes in a variety of flavors, you want what matches your Skill (and to a lesser extent added) damage types.
- Cast Speed makes deal the same damage faster (and thus more DPS).
- Critical Chance and Damage is also a scaling option, but only effective if you are more invested in it.
- The above wand is an efficient example because it also shows the types of things you can look for on Passives and other gear!
Your damage as a spellcaster is typically fine in the campaign if you just keep leveling your Spells and get an appropriate weapon like the above (which is above average but low level). The main thing that can go wrong for Spells is inappropriate Support gem picks. Consult a build guide that uses your skill for ideas, even if you aren't following a build guide!
These are the main considerations in the Campaign but there are many more ways to scale your damage! To learn more about Damage Scaling check out our guide here.
Solving Attribute Problems
Attribute requirements for gear and skills in Path of Exile 2 can be fairly high, and using anything that's outside of your build's archetype can be tricky! While leveling in the campaign you often get great items for your spellcaster that have some Armour or Evasion on them, and you can and should try to equip these if you can!
- Respec the flexible Attribute passive nodes for small amounts. One or two nodes only costs a small amount of gold.
- Get Attributes on Gear to ease the total you need. This includes the base Amulets that have Attributes but also random modifiers. This Attribute Amulet is honestly a great amulet as Strength gives even more Life — in this example, you would likely Exalt slam such an Amulet while leveling.
- Grab some Bonus Attribute Nodes such as Battle-hardened early on. Because the travel Attribute nodes can be changed, even getting more of your main Attribute gives you more flexibility. And there's always Beef!
Solving Mana Problems
Some skills and builds are very hungry indeed and running out of Mana constantly hurts your damage, gets you killed, and isn't a whole lot of fun! But there are many solutions, you typically want to use a combination of the following strategies:
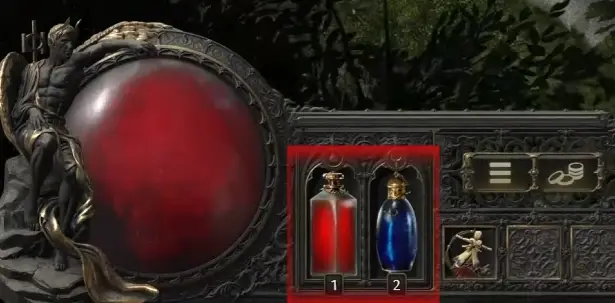
- Keep upgrading your Mana Flasks! They recover more Mana, faster. It's the single most powerful tool you have so refer to the "Key Leveling Gear Upgrades By Level" section earlier in this article and pay attention to when you can upgrade and do it!
- Modifiers on Mana Flasks make a big difference too! Especially "Gain X Charges Per Second" because it restores your empty flask in long boss fights.
- Example: Compact Transcendent Mana Flask of the Verdant
- Check Your Support Gems! Some Support Gems have an increase to mana costs of linked skills, such as Acceleration. If a Support gem isn't doing all that much but is increasing costs then ditch it!
- Get More Mana and Mana Regeneration. Even just one or two gear modifiers can be surprisingly effective! That Cerulean Topaz Ring of Elation is better than it looks if you're struggling.
- Mana on Kill Solves Sustain While Clearing. Robust Ruby Ring of Enveloping may not seem like much but most of the time you kill many enemies at a time and just a single modifier like this can almost completely solve mana by itself — but only while clearing. Combine an item like this with a Charge Regen Mana Flask and you're covered for clearing and bosses.
- Mana Leech is unfortunately only supplemental at low levels. That's because many skills deal minimal Physical Damage (which leech typically relies on) and the damage numbers are too low for it to do more than boost your regen a little bit.
- If you've got some spare Exalts then also consider picking up a great Mana Solving Unique item from trade!
Quick Tips and Tricks
- CTRL+CLICK: Your shortcut to most NPCs. Usually opens the sell window but for The Hooded One in the campaign it instantly identifies all of your loot!
- CHECKPOINTS: Click any Checkpoint you can instantly teleport to any other Checkpoint you've found in the current zone. You can also open the menu and select "Respawn at Checkpoint" to quickly teleport to your last checkpoint. Respawning also resets the zone for easier farming or even re-randomizing random drop quest items you are struggling to find!
- ANYONE CAN LEAP SLAM: If you're not using your weapon swap for anything then throw on a low level Mace from Act 1 and use a low level Uncut Skill Gem to create an easy to equip, low Strength requirement Leap Slam. You can even use your weapon swap passives to allocate Strength nodes to assist in hitting the minimum Strength on a spellcaster. It's worth the effort as Leap Slam helps get up and down ledges and gives countless shortcut opportunities throughout the campaign. Practice dodge rolling at the end of the slam to animation cancel the slow landing! If you want to go really fast then also equip a shield and get Shield Charge for faster movement (dodge roll animation cancel works for it too)!
This guide is for every build but how you approach your Gems, Skills and Passives do make a big difference in how powerful you are leveling. Your build also determines whether you need to spend extra time trying to get a certain item or more Uncut gems! Write out notes on any big milestone gear and gems and consult them alongside the broader info in this guide. And check out some leveling build guides too!
Summary
To level efficiently through the Campaign in Path of Exile 2 as a beginner or returning player in a fresh League ensure you take note of the Key Leveling Gear Upgrades such as:
- Movement Speed Boots: Prioritize getting boots with +10% movement speed early (Level 1) and upgrade to +15% at Level 15 and +25% at Level 50.
- Flask Upgrades: Regularly upgrade your flasks at Levels 4, 10, 16, 23, 30, 40, 50, and 60.
- Rings and Amulets: Look for specific rings (Ruby at Level 8, Sapphire at Level 12, Topaz at Level 16, Cast Speed at Level 32, Prismatic at Level 35) and attribute/spirit amulets (Level 8, 30).
- Flask Charge Mods: Obtain flask charge regen mods around Levels 26 and 45.
And while following the Efficient Campaign Leveling Guide make sure you remember these important points:
- Grab all of the Permanent Stat buffs for bonus Resistances, Passive Points, Spirit and Increased Maximum Life!
- Take advantage of the listed special loot caches for extra Uncut Gems and guaranteed gear drops.
- Cruel Difficulty changes quest rewards and loot caches. And some quests and zones such as Act 1's Freythorn can be skipped entirely to save you time.
To make your character more powerful while progressing remember the important gearing and crafting tips:
- Rarity Isn't Everything: Focus on useful stats like resistances, life, and movement speed over item rarity. Magic items can often be better than Rare or Unique items during leveling.
- Prioritize Life and Resistances: These are the most crucial stats for survival while leveling.
- Use a Loot Filter: Implement a loot filter to reduce visual clutter and highlight useful items.
- Vendor Shopping is Key: Regularly check NPC vendors in towns for upgrades to flasks, weapons, armor, and movement speed boots.
- Craft with Runes: Utilize runes in socketed gear to boost damage and resistances. Salvage quality and socketed gear for crafting materials.
Follow these and the other tips in this guide and your Path of Exile 2 Campaign leveling experience at league start is going to be faster and more fun than ever.
Credits
Written by: ZIGGYD
Content Reviewed by: Palsteron
Language Reviewed by: Tenkiei