Trials of Ascendancy Guide
Last Updated:April 16, 2025|Changelog
Completing the Trials of Ascendancy allows you to choose an Ascendancy Class and gain additional Ascendancy Passives. This guide shows how to Ascend in Path of Exile 2, and how to unlock all 8 Ascendancy Passives in the Trial of the Sekhemas and the Trial of Chaos. There are multiple Trials hidden throughout the campaign and you can choose in which to gain your Ascendancy Class and additional Passive skill points. Ascendancies are powerful, build-defining subclasses that grant you an additional passive tree in which you can spend Ascendancy Passives. Your build is defined by the combination of your Character Class and Ascendancy Class. Each of the 12 classes (6 in early access) has a choice of 3 Ascendancies (2 in early access).
Path of Exile 2 is currently in early access, this means rapid development including frequent changes to how Trials of Ascendancy work. Pin this page to be notified of any updates.
How to Ascend
There are 3 Trials of Ascendancy and you can unlock your Ascendancy Class through a Trial of your choice. In order to Ascend you must locate a quest item key, travel to the Trial's entrance and then complete the trial by navigating through its challenges and defeating the final boss. Your first completion of any Trial of Ascendancy unlocks your Ascendancy Class and grants you 2 Ascendancy passive points.
There are three Trials of Ascendancy:
- ACT 2: Trial of the Sekhemas
- ACT 3: Trial of Chaos
- ACT 4: Unknown (Currently not in Early Access)
How to Unlock ALL Ascendancy Passives
Here is a summary of how to get each set of 2 Ascendancy Passives in Path of Exile 2:
- To Unlock Ascendancy and gain Passive Points 1 and 2 complete:
- The Trial of the Sekhemas via the quest with Balbala's Barya in Act 2.
- For Passive Points 3 and 4 complete:
- The Trial of Chaos via the quest with the Chimeral Inscribed Ultimatum in Act 3.
- For Passive Points 5 and 6 complete either:
- The Trial of the Sekhemas via a Level 60+ Djinn Barya with "Number of Trials: 3" (3 floors), OR,
- The Trial of Chaos via a Level 65+ Inscribed Ultimatum with "Number of Trials: 10" (10 Rounds).
- Passive Points 7 and 8: Complete either:
- The Trial of the Sekhemas via a Level 75+ Djinn Barya with "Number of Trials: 4" (4 floors) AND its Pinnacle Boss Fight, OR,
- Defeat the Pinnacle Boss Fight behind the locked doors in the Trial of Chaos via a Level 65+ Inscribed Ultimatum with "Number of Trials: 10" (10 Rounds) AND all three fragments; Cowardly Fate, Deadly Fate, and Victorious Fate.
The Level 60+ Djinn Barya is a randomized drop that is obtainable in the end of Act 3 Cruel (Act 6) and in any endgame Waystone (Tier 1+) Map, or similar level activity.
The Level 75+ Djinn Barya and the Level 65+ Inscribed Ultimatum are randomized drops that are obtainable from endgame Waystone Maps of the same zone level or higher. You can also trade with other players for these endgame Trial keys.
The most efficient route is to get your Ascendancy Class unlocked and the first two Passive Points in Act 2 via the Trial of Sekhemas. Follow that with Act 3's Quest for Trial of Chaos to unlock Ascendancy Points 3 and 4. Then, use a Djinn Barya Level 60+ to unlock Points 5 and 6 in the Trial of Sekhemas. Finally, unlock Passives 7 and 8 in a Level 75+ Trial of Sekhemas OR in a Level 65+ Trial of Chaos with all three Cowardly Fate, Deadly Fate, and Victorious Fate.
Trial of the Sekhemas
During the Trial of Sekhemas in Act 2 you face a series of challenge rooms and bosses in a Roguelike dungeon. Each room has a challenge you must overcome such as navigating traps, surviving waves of enemies or completing a time trial. Rooms also feature boons to aid in your survival, opportunities to heal or keys for a treasure trove at the end of the Trial of Sekhemas. Your primary goal is to reach the final boss, defeat it and claim your Ascendancy Class or passive unlocks. But the Trial of the Sekhemas, like all Trials, also has the potential to provide long term loot and endgame content.
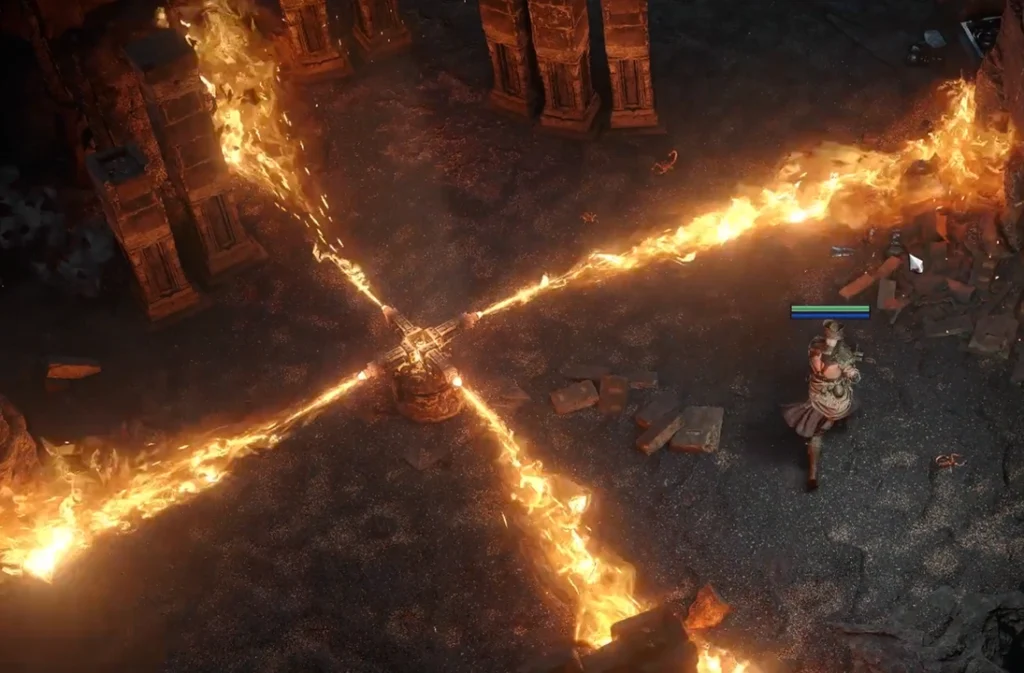
How Honour Works
In the Trials of Sekhemas you have a unique addition to your character — a new health-bar called Honour. Honour is based on your combined total Life and Energy Shield but it is separate from them. Whenever you take damage to your Life and Energy Shield you also take damage to your Honour. If you lose all of your Honour, you fail the Trial. You can fail by dying normally or by losing all of your Honour, which removes you from the Trial.
Honour is unique in that it cannot be recovered or healed through normal means such as life flasks, regeneration or life leech. Honour can only be restored through special Artifacts and Boons or room reward Shrines. Honour is what reinforces the Roguelike nature of this Trial: you try to avoid taking too much damage because restoring it is difficult. If your Honour is low avoid taking risks, potentially even passing up great treasures to try and survive.
The good news is that the Trial of the Sekhemas is carefully designed with monsters that have slower, well-signaled attacks and traps that are all doable without getting hit. Play carefully and assess your current Honour level and room for error when deciding which room you take on next to survive with your Honour intact.
Should You Ascend in Act 2?
You gain access to the Trial of the Sekhemas earlier in the campaign, making it the best choice for getting your Ascendancy class and first 2 passive points as soon as possible. Waiting until a later trial in Act 3 or 4 would leave you without that notable power for a considerable length of time. Outside of the (perfectly legitimate) reason of personal preference, not claiming your Ascendancy in Act 2 is only advisable if you have reason to fear the Trial of the Sekhemas. In the case of an underperforming build it may still be better to attempt the Trial of the Sekhemas but to do so later in Act 2 — after you have gained some levels and gear improvements to make the Trial considerably easier.
Where is the Trial of the Sekhemas?
During the quest The Trail of Corruption you find yourself Ascending the Traitor's Passage. Within this zone filled with interconnected caves is a sealed door, plastered with warding glyphs. Imprisoned within you can release a character that grants you access to the Trial of the Sekhemas — for a price.
If you are struggling to find the sealed door there is a pillar of stone with relevant lore explaining the imprisonment nearby which you may be able to see on your minimap. Within you can claim a key, check the spoiler below for more information on obtaining it.
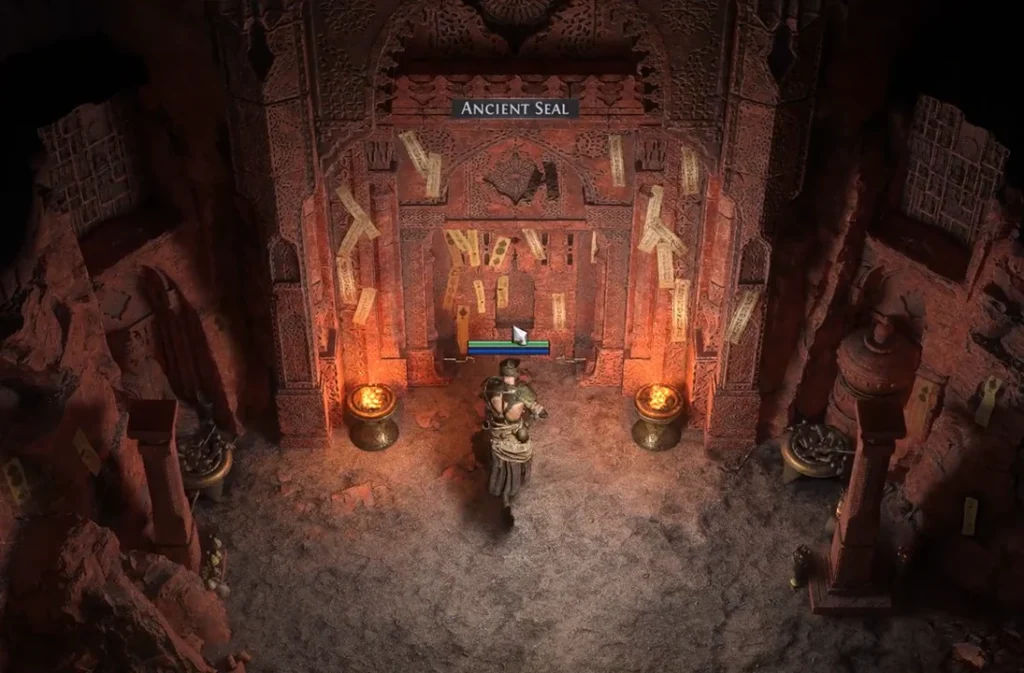
Balbala, the Traitor is a Djinn who is imprisoned within the Ancient Seal. In order to truly release them and earn their assistance in locating the Trial of the Sekhemas you must first defeat them in combat. This boss fight can be a challenging test of cunning as Balbala is a fast rogueish boss with a lot of tricks up their ethereal sleeves.
Tips for Defeating Balbala, the Traitor
- Balbala deals a lot of Chaos damage through poison, improving your Chaos resistance this early in the game is difficult but if you can it makes certain attacks much easier.
- Balbala is resistant to Fire damage but vulnerable to Cold. Use this to your advantage.
- Slower attacks such as big slams or grenades may struggle to land because of the Balbala's mobility, limit their use to when the boss is stunned, frozen or otherwise rendered less mobile. Being weak to cold makes building up freeze particularly effective.
- Balbala appears to disappear and flood the room with poisonous gas, in order to stop this you must locate the boss hiding in plain sight.
Once you have defeated Balbala, the Traitor you can claim the Quest item Balbala's Barya. This coin is the key to the Trial of the Sekhemas.
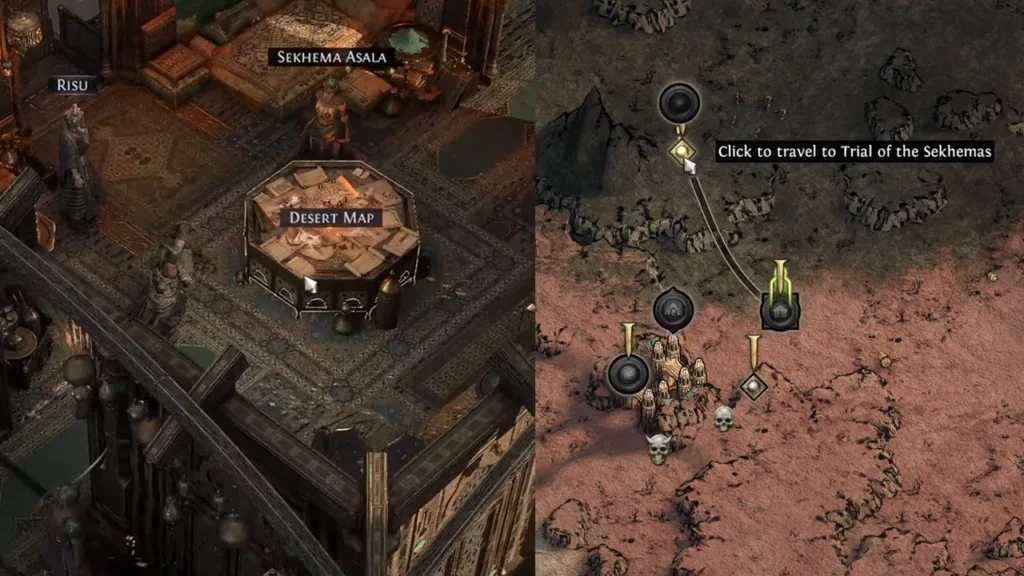
With the coin key you are able to travel to the location of the Trial of the Sekhemas and you can do so via the Desert Map in 'town'.
How Relics Work
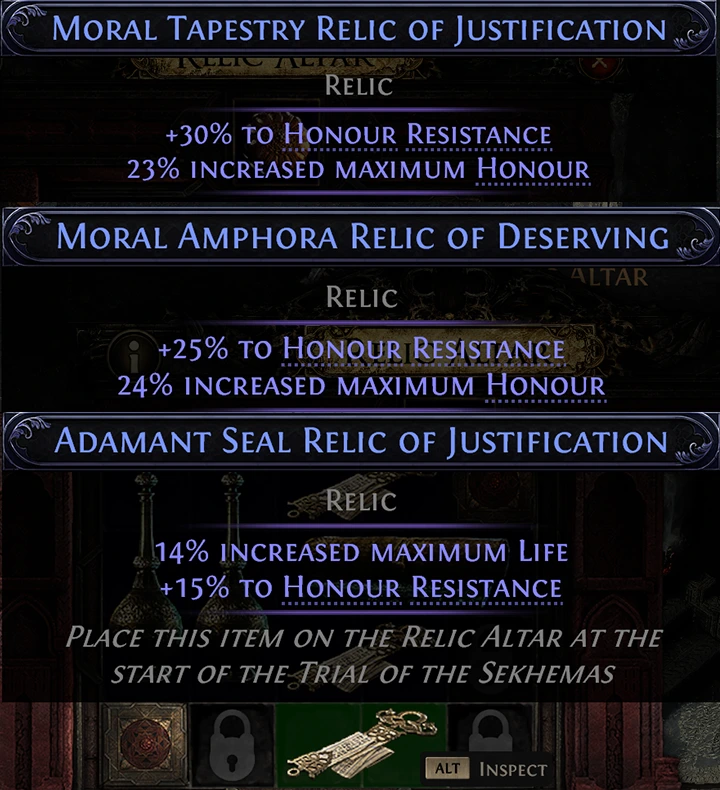
Before your first attempt at the Trial Balbala gives you a Relic. These are special gear pieces exclusively for the Trial of the Sekhemas — giving you their buffs only while you are within the Trial. Relics provide general benefits like extra health (which also gives extra Honour) and also trial-specific buffs like ways to recover Honour or obtain additional Sacred water. Relics can be crafted the same way as regular gear, so if you have a spare Orb of Augmentation you could add another affix to a single affix Magic Relic. Once satisfied you can place your relic in the Relic Altar — it remains here permanently empowering you in the Trial. You can remove, replace and rearrange your Relics here anytime you want before you begin an attempt.
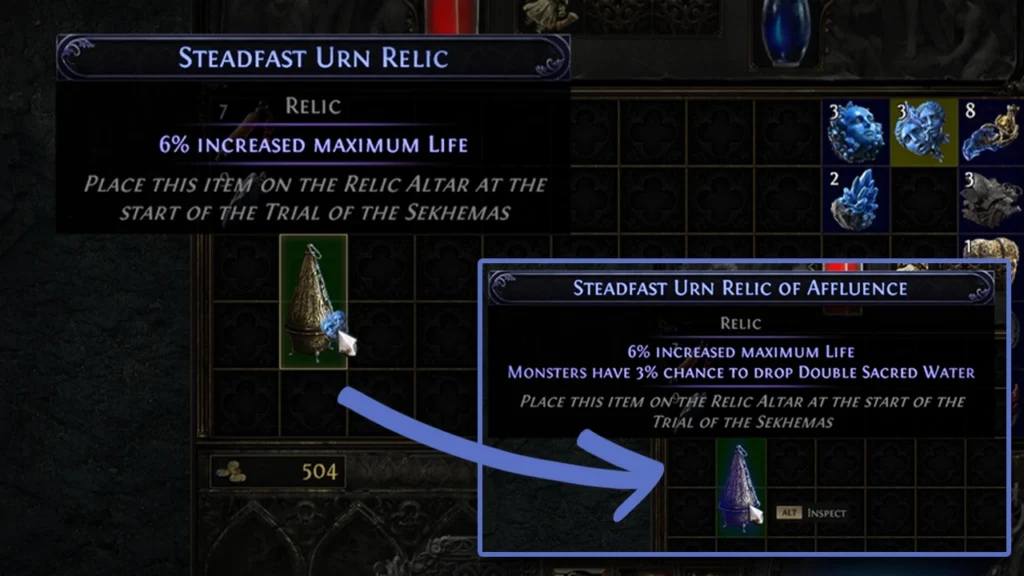
While not majorly impactful on your first attempt, Relics are an important tool for later attempts to gain additional Ascendancy passives. You are able to obtain more from Merchant encounters and drops within the Trial of the Sekhemas itself. Long-term, you want top tier Relics when farming the Trial of the Sekhemas in the endgame.
Relics Are Extremely Important!
Relics make a huge difference to how easily you complete higher level Trials of the Sekhemas with 2, 3 or 4 floors. Relics can increase the amount of Honour you have and significantly reduce the amount of Honour damage you take.
With the cap of 75% Fire Resistance and 75% Honour resistance:
- A 1000 fire damage hit is lowered by your 75% fire resistance to 250.
- That 250 damage is then lowered by your 75% Honour Resistance to only 63 damage!
Honour Resistance also works for Afflictions like "Take 103 Physical Damage Per Room". It also protects from damage effects like the Pledge to Kochai's offering of "Take 500 physical damage" in exchange for a "50% more damage dealt" Boon. This makes those options far safer to pick!
Here is the priority for your Relic affixes:
- Honour Resistance: Aim for 75% total (which is the default cap). This makes you only take 25 damage from a 100 damage hit!
- Maximum Honour Resistance: When aiming to complete the 4th floor you also want to attempt to increase the MAX Honour Resistance, but only after you have gotten more than 75% total Honour Resistance.
- Increased Maximum Honour: As much as you can get alongside Honour Resistance.
- Increased Life and Defences: Life and Energy Shield both scale the amount of base Honour you get, which makes the Maximum Honur scaling on other relics even better! Armor, Evasion, and Energy Shield are scaled by Defences. Armor and Evasion, work to protect Honour further.
- Movement Speed / Dodge Roll Distance: These make bosses and traps easier and the entire Trial faster.
- Increased Enemy Damage Taken: There are various modifiers to make enemies take increased damage, these are most notable when applied to bosses.
- Other Affixes: Once your Honour Resistance is at the 75% cap then you can start looking at other modifiers like reduced boss damage taken, increased movement speed or improved key drops.
Navigating the Map
After each room the map is used to navigate the Trial of the Sekhemas. To beat the Trial you travel from the left-most room to the right-most and defeat a boss. In higher level difficulties of the Trial there are additional floors with more rooms and bosses.
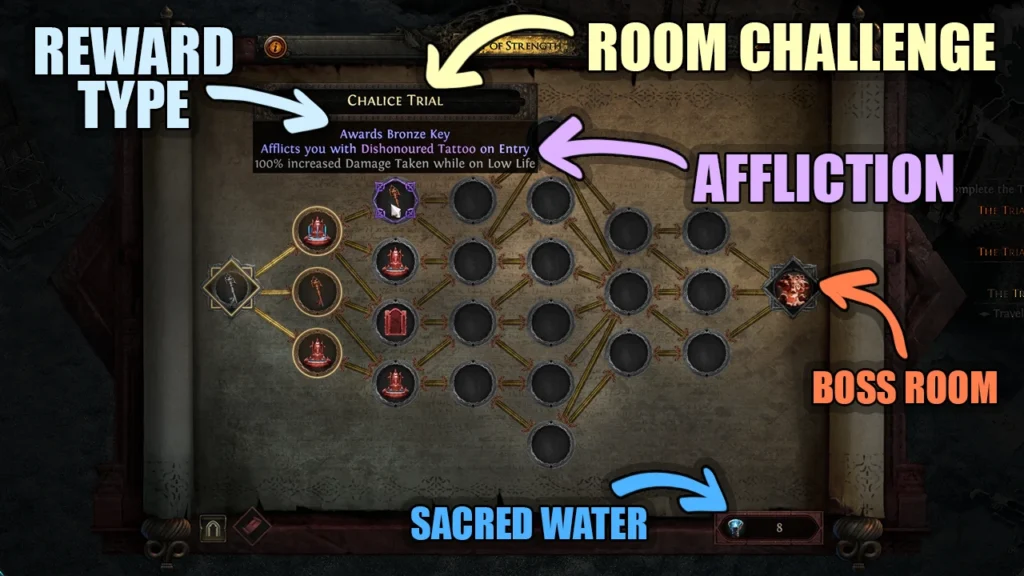
On this map you can choose your next room and can see information such as the nature of the challenge, the rewards and any potential Afflictions (Trial specific debuffs) in each room. You can see a room ahead and can note any paths between each room from left to right. The map contains critical information to your success in the Trial such as:
- The Room Type: the type of challenge you face such as traps or waves of monsters.
- The Reward Type: such as treasure keys, Honour-restoring wells or Boons.
- Afflictions: some rooms have a purple highlight that shows an Affliction you are debuffed with upon entering.
- The Next Set of Rooms: you can see one column of rooms ahead to plan a path.
- Connections Between Rooms: not all paths connect and you need to choose rooms that connect to your desired route.
Note that various Afflictions, Boons and Relic effects can change how the map functions. Afflictions that hide the next column of rooms or hide room types can make planning ahead difficult. Boons or Relics that show additional rooms can be extremely powerful for improving your chances at success and for increasing your potential loot at the end of the Trial.
Room Challenges and Rewards
The Room Types determine the nature of the challenges you face within. Learning these helps you plan a strategy and avoid rooms you are poorly suited for when you need to take less risks. Reward types also play a large role in your choices as a good Boon or Honour recovery may save a run and Treasure keys increase the rewards at the end. Check the spoilers below for information on Challenge and Reward types.
- Gauntlet: Rooms with traps and some monsters. The goal is only to reach the end and leave. You do not have to kill monsters but doing so makes it easier to focus on the traps.
- Chalice Ritual: Kill all Rare Monsters in the area to fill the chalice.
- Hourglass Trial: Survive waves of monsters until the timer ends. You do not need to kill the monsters but doing so increases your odds of survival.
- Escape Trial: Disable all of the Death Crystals before the timer runs out. Any Death Crystals left when the timer expires damage you. Each Crystal points to another with a wave of energy. There are monsters and treasure chests to distract you.
- Ritual: Disrupt the rituals by killing the enemies at each Ritual portal. These rooms are very fast and easy.
- Treasure Keys: Provides the listed Bronze, Silver, or Gold treasure key. These allow you to gain additional potentially valuable rewards at the end of the Trial of Sekhemas. Failing the Trial destroys all currently held keys.
- Sacred Water: Large or small fountains granting Sacred Water a special currency for use exclusively within your current run of the Trial of the Sekhemas.
- Merchant: You can spend your Sacred Water to purchase Boons to assist your current run or Relics to give you benefits in future runs. Relics cannot be used right away as they must be placed in the Relic Altar before a new run to work.
- Shrine to Restore Honour: Allows you to pay a small amount of Sacred Water to recover a fraction of your lost Honour.
- Boon Shrine: Restores some lost Honour and grants a random Boon. Powerful reward types to make a run more likely to succeed.
- Pledge to Kochai: Pledges are tradeoffs of Boons and Afflictions. Choose a specified Boon at the cost of an Affliction, remove a random Boon and Affliction, or gain a Random Boon and Affliction pair. Pledges can be largely run altering.
- Fickle Blessing of the Winds: A very rare room that does it all! Removes an Affliction, restores Honour, and grants you a random Boon.
Afflictions, Boons and Pledges in Trial of the Sekhemas
Afflictions are debuffs that make your current Trial of the Sekhemas run more difficult. Boons are buffs that make it easier (or more rewarding). Below is a list of some of the major Afflictions and Boons you may encounter and some notes on ones you should avoid or aim for when trying to gain your Ascendancy class in the Trial of the Sekhamas.
(Very Bad)
(Tolerable)
(Must-Haves)
Accursed Pacts
These Afflictions are either always worth avoiding or contextually devastating to your run.
- Tradition's Demand: The Merchant only offers one choice.
- This is awful on longer runs if taken on the first or second floor. Using the Merchant to stack multiple Boons per visit is a cornerstone of Sekhemas strategy. Conversely, you can take this for free towards the end of your final floor!
- Weakened Flesh: 25% less Maximum Honour.
- This is always bad and should be avoided unless it is up against some of the worst Afflictions on this list. Only take it if you are feeling very confident and can suffer the loss of Honour.
- Corrosive Concoction (Major Affliction): You have no Defences.
- Somewhat tolerable for heavily invested Armour or Evasion but devastating for Energy Shield characters. If most of your Honour is based on a high Energy Shield pool you lose all of it!
- Shattered Shield: You have no Energy Shield.
- As above, devastating to Energy Shield builds.
- Glass Shard: (Major Affliction): Converts your next Boon into a Random Minor Affliction.
- Random afflictions are very risky as you can potentially hit a run-ending option from this list. Even worse when you lose a potential Boon as well.
- Chiseled Stone: Monsters Petrify on Hit.
- As bad as it sounds, if you get hit you risk getting frozen and subsequently killed. Only acceptable if you never get hit, which isn't going to happen.
- Orb of Negation (Major Affliction): Relics have no Effect.
- Relics are you key to beating Floors 2 through 4. Losing their effects is run-ending.
- Worn Sandals: 25% Reduced Movement Speed.
- Unless you have the Boon for Increased Movement Speed this is devastating and can make the boss of Floor 4 unbeatable.
- Fiendish Wings: Monsters 25% Faster and cannot be slowed.
- Can make bosses extremely difficult. This affliction coupled with another bad boss Affliction can be run-ending.
- Forgotten Traditions: x% reduced effect of your Relics.
- Relics are essential, this is bad enough to be almost run ending — you should avoid it at all costs.
- Deceptive Mirror: You are not always taken to the room you select.
- Possibly the worst Affliction, gives you no ability to plan your run or select Afflictions. Take this and you are going to end up with other Afflictions on the list. Only take Deceptive Mirror if you're a couple rooms away from finishing and there are no major threats between you and victory.
- Unquenched Thirst (Major Affliction): You cannot gain Sacred Water.
- This means zero boons from Merchants if taken early. Only acceptable right before finishing after you have already gotten the Boons you need.
- Unassuming Brick (Major Affliction): You cannot gain any more Boons.
- Bricks your run if taken early. A freebie after you already have your Boons.
- Ghastly Scythe (Major Affliction): Losing Honours Ends the Trial, Removed after X rooms.
- Run ending unless you know exactly what you are signing up for.
- Purple Smoke: Afflictions are unknown on the Trial Map.
- Avoid at all costs early on as it stops you from making educated choices to avoid the other afflictions on this list.
- Golden Smoke: Rewards are unknown on the Trial Map.
- As above, avoid early on as it stops you from planning effectively.
- Veiled Sight (Major Affliction): Rooms are unknown on the Trial Map.
- The worst of the "Smoke" afflictions, makes it impossible to plan, which is an essential part of running the Trial of Sekhemas.
- Black Smoke: You can see one fewer room (column) ahead on the Trial Map.
- This one is listed as a Minor Affliction but should be a Major as it's just as bad as Veiled Sight for planning. Only upside is it can be countered with the Boon that allows you to see one room further.
- Branded Balbalakh: Cannot Restore Honour.
- This permanent debuff is fine if you never lose Honour but if you take this early it can really add up and cause you to have to complete your final boss in a very bad state.
- Leaking Waterskin: Lose X Sacred Water when you take damage from an Enemy hit.
- Unless you are never getting hit this very quickly deletes all of your Sacred Water, making it a bad Affliction if taken early on.
- Rapid Quicksand: Traps are faster.
- You know why this one is bad. Main upside is you can mostly avoid Gauntlet rooms if you take it.
- Dark Pit: Traps deal 100% increased Damage.
- Same as Rapid Quicksand, makes traps way more dangerous. But you can avoid Gauntlets rooms or just not get hit.
- Deadly Snare (Major Affliction): Traps deal Triple Damage.
- Even worse form of Dark Pit (and multiplies it). Traps are likely to 1-shot you if you somehow get both.
- Honed Claws: Monsters deal 30% more Damage.
- Affects bosses too, you should never take this unless you are confident in not getting hit.
These Afflictions aren't good, but sometimes you have no choice but to take something and often these are better than the alternatives.
- Blunt Sword: You and your Minions deal 40% less Damage.
- This is bad if you are struggling to defeat a boss but otherwise manageable. Avoid this if you struggle with Floor 2's boss or the final boss of Floor 4 as those become much more dangerous if you cannot kill them quickly.
- Dishonoured Tattoo: 100% increased Damage Taken while on Low Life.
- Unless you're a build that is regularly on low life this is mostly non-impactful. It will cause monsters to deal the final blow to you if you drop below 35% life, so only take if you plan to avoid getting into such a situation.
- Hungry Fangs: Monsters remove X% of your Life, Mana, and Energy Shield on Hit.
- As you are avoiding being hit in the first place to not lose Honour, this Affliction is mostly tolerable outside of a few specific situations. Be very wary of rapid, small hits though as they can cause you to die in to health loss very quickly. The walking Urn enemies, in particular, can sometimes stack many small hits with their abilities. As long as you keep the risk in mind it is a manageable affliction.
- Low Rivers: 50% Less Sacred Water Found.
- Somewhat stifling early on as it affects your ability to stack Boons from Merchant visits. Later in the Trial, though, this Affliction is effectively a free pass and a great one to take.
- Sharpened Arrowhead / Iron Manacles: You have no Armour / no Evasion.
- This one is free if you have no Armour / Evasion. Even if you do have Armour, Sharpened Arrowhead is only moderately impactful unless you have taken some "take X physical damage every room" Afflictions.
- Spiked Exit: Take X Physical Damage on Room Completion.
- Once you have Honour Resistance and increases to Maximum Honour this is very low impact. If the amount is 100 per room and you have 75% Honour Resistance then you only take 25 Damage (which can also be mitigated further by Armour.
- Spiked Shell: Monsters have 50% increased Maximum Life.
- Like Blunt Sword, this Affliction is very bad if you are struggling to defeat a specific boss, especially Floor 2 and 4. If you are confident in your boss killing it is manageable.
- Suspected Sympathiser: 50% reduced Honour restored
- Often free if taken later on in the Trial, only mildly impactful otherwise. Contextually bad if you are currently on low Honour and need to recover.
- Trade Tariff: 50% increased Merchant prices.
- Bad early on, similar to Low Rivers. A Free Affliction towards the end of your Trial.
- Untouchable: You are Cursed with Enfeeble.
- Lowers your damage but not by a huge amount. Similar to Spiked Shell and Blunt Sword, only an issue if you're struggling with a boss.
- Chains of Binding: Stacking slow when being hit.
- Annoying and a little dangerous around swarms of enemies if you make a few mistakes in a row but otherwise manageable.
- Hemorrhage: You cannot restore Honour (removed after killing the next Boss).
- Taken tactically, this one can be a freebie. If you really need to heal before the next boss then obviously avoid it.
- Tattered Blindfold: 90% reduced Light Radius and Minimap is hidden.
- Annoying and weird but manageable for the most part. Most of the time you don't need the minimap anyway.
- Red Smoke: Room types are unknown on the Trial Map.
- Not as bad as the other "Smoke" Afflictions as you should aim to be comfortable in all Room Types anyway. At worst it puts you into a Gauntlet or Hourglass trial you were not wanting to do.
- Winter Drought: Lose all Sacred Water on floor completion.
- Somewhat manageable as you can aim to spend all of your Sacred Water before fighting the boss. Do note, however, that floor completion is triggered on boss kill. So you will only have 100-300 Sacred Water for the Treasure Room Balbala, which is only enough to buy 1 to 2 Boons if you have discount relics or Boons.
These are the Boons you should aim to take every run and wherever possible. They can often be worth taking a (Tolerable) Affliction for, in many cases.
- All Major Boons: All of the Major Boons are excellent and you'll take them if the cost is acceptable. One thing to note is that some of the best Minor Boons listed below may actually be better than some of the Major Boons. It's not necessarily worth trading off Ornate Dagger or Hare Foot for a Major Boon, especially if the cost of the Major Boon is also higher.
- Lustrous Lacquer: You have 50% more Defences.
- This is god-mode for Energy Shield builds, and decent for Evasion / Armour stacking characters.
- Silver Chalice: The next minor Boon is converted to a Major Boon.
- The Major boons are nearly all amazing so this is great, but make sure you don't accidently convert a good Minor boon like Rabbit's Foot if you can help it!
- Orbala Statuette: You have 25% more Maximum Honour.
- Makes you significantly tankier to get through that tough boss fight.
- Enchanted Urn: 30% increased effect of your non-unique Relics.
- This depends one your Relics, but the effects this can give you can be very powerful. If you are already Honour Resistance capped (75%), it wont affect that. But if will give you Maxmimum Honor / Life / Defences and other great things like Movement Speed if they are on your Relics.
- Ornate Dagger: You and your minions deal 50% more Damage.
- Obviously great and a must-have for getting that troublesome boss kill.
- Sanguine Vial: Monsters have 30% less Maximum Life.
- Does the same thing as Ornate Dagger but even better against the high health of Bosses, especially the boss of floor 4!
- Viscous Ichor: Monsters have 15% reduced Action Speed.
- Not getting hit is essential, this makes it a lot easier. Affects bosses too!
- Moment's Peace: You cannot be Damaged until you complete the next room.
- Usually minor impact as you shouldn't take much damage in any one room, but, this can be taken right before a boss fight. Pure luck that can guarantee a victory. Note that the time freeze phase of the 4th Floor boss can still cause you to fail with this.
- Glowing Orb: The next time you go below 20% of Maximum Life, restore all Life, EnergyShield and 50% of Honour.
- This doesn't trigger if you don't go to 20% life and just fail due to Honour loss, which makes it far less useful. However, you can use lifetap or other life costs to intentionally lower your life to 20% to trigger it for a Honour restoration.
- Scrying Crystal: You can see an additional room ahead on the Trial Map.
- Makes planning much easier and will cause you to get less Afflictions and more Boons as a result. One of the best Boons you can take on Floor 1, less useful later. Also insulates you against the Affliction that does the opposite of this.
- Hare Foot: 40% increased Movement Speed.
- Zooom! Makes it much easier for you to dodge boss abilities and monsters attacks. Helps ensure success on the time freeze phase of the Floor 4 boss. A small downside is that it can make navigating traps with WASD or controllers a little bit more difficult as you won't be used to your movement speed.
- Fright Mask: Monsters deal 20% less Damage.
- Another great pick for ensuring a difficult boss kill to get your final Ascendancy.
All of the other Boons are okay to good under the right circumstances. Most of them are contextual such as boosting your Honour Restoration or making getting other Boons easier. Anything not on this list is likely not worth taking an Affliction for. And you should almost never take a Random Affliction, even for the boons on this list.
The Pledge to Kochai reward gives some powerful tradeoff options, some of which are unique. It's almost never worth taking a Random Affliction for a Random Boon. You can also choose to take nothing and that is often the right call.
- Pledge to the Powerful: 50% less Honour lost in Boss Rooms, 100% more Honour lost in Non-Boss Rooms.
- If you are confident about not making mistakes in most room types this can be a great choice to help take down a tough boss.
- Pledge to the Guileful: Can Open 1 Reward Chest in each Room without using a Key, take X physical damage when you do.
- This is basically a free chest if you have Honour Resistance at 75%+ (especially with Armour) as the damage will be mostly mitigated.
- Take X Physical Damage, Gain X Boon:
- These tradeoffs are generally well-worth it because you can mitigate the damage. Assess on a case-by-case basis the value of the specific Boon you are getting.
Bossfights in Trial of the Sekhemas
In the final room of each floor is a boss you must defeat to either complete the Trial or to progress to the next floor. These challenging encounters can be your biggest hurdle so ensure you plan ahead and try to enter with high Honour and Boons that help you succeed — and avoid Afflictions that might cause you to fail. See the spoiler section below for additional information on bosses.
Rattlecage, the Earthbreaker is the floor 1 boss fight — a hulking magma elemental with large slow slams and lots of Fire damage and area denial abilities. Tips for defeating Rattlecage:
- Fire Resistance: Rattlecage deals predominantly Fire damage, consider increasing your Fire Resistance with gear changes before the fight. A fire Charm is also a good idea, as these can provide some temporary buffs to Fire Resistance when you take Fire damage.
- Elemental Damage: Rattlecage is resistant to Fire and Lightning damage, but vulnerable to Cold damage.
- Physical Damage: Rattlecage has high Armour making Physical damage less effective, use Armour Break skills to counteract this.
- Crowd Control Effects: Rattlecage is slow and large, with big windups on their abilities. Crowd control effects like Stun, Freeze, Electrocute and chill are particularly effective in this situation. Vulnerability to Cold makes Freeze easier to apply.
- Large and Easy to Hit: Larger targets are easier to "shotgun", to overlap multiple area of effect skills. This increases the effectiveness of skills like Grenades with the Multiple Projectiles support.
- Fire Rain: At low life Rattlecage can use a slam to begin a rain of fire droplets from the ceiling randomly around the arena. This ability lasts for a long time (about a minute) but does eventually end. This final portion of the fight is the most dangerous: make a choice to either play it safe, dodging while waiting for the rain to end or to aggressively try to finish the kill before the fire rain and other area denial abilities become too much to handle.
The twin bosses Rafiq of the Frozen Spring and Hadi of the Flaming River are the bosses of Floor 2 in Trial of the Sekhemas. Here are some important tips for defeating these bosses:
- Kill them Together: The most crucial strategy for Hadi and Rafiq is to try to kill them at the same time. When one of the bosses dies the other heals after a 10-second delay. Additionally, the defeated boss empowers the statues around the arena, amplifying the challenge dramatically with a lot of extra damage effects. Attempt to damage them at a similar rate, and bring both bosses to low health before you dispatch one. Ensure you can finish off the second boss quickly after the first is defeated or the fight becomes significantly harder.
- Elemental Damage: Rafiq is resistant to Cold damage but vulnerable to Fire damage, while Hadi is the opposite — resistant to Fire and vulnerable to Cold. This can make killing them at the same time difficult if you deal these types of Elemental Damage. Concentrate your fire on the tougher opponent that's resistant to your damage (or use resistance-lowering effects).
- Crowd Control Effects: Both bosses are slow and large, with big windups on their abilities. Crowd control effects like Stun, Freeze, Electrocute and chill are particularly effective.
- High Damage Slam Skills: Be very wary of both boss's high-damage slams and elemental skills. Ensure your Fire and Cold Resistance are as are high as possible. Hadi's fire wave ability has gaps that you can position between for safety.
The boss of Floor 3 is Ashar, the Sand Mother. Here are some tips to help you defeat this boss:
- Chaos and Poison Damage: Ashar has a lot of poisonous attacks, which can be quite devastating to your Honour if unprepared. Use a Antidote Charm to help resist some poison damage and improve your Chaos Resistance, if possible.
- Honour Resistance: By floor 3 you should have as close to 75% Honour Resistance from your Relics, which helps immensely with the Poison damage and Poison Traps in the Ashar Fight.
- The Floor Traps and Diving Attacks: When Ashar dives underground she repeatedly tries to attack you by bursting up from below. To end this phase you can activate one of the floor traps. However, the traps (especially the Dart Traps) can be more dangerous than this attack phase. The safer approach is to run large circles around the arena and time your dodge rolls to avoid the attacks until Ashar stays above ground once more.
- Elemental Damage: Ashar is mildly resistant to Fire and Lightning Damage, but vulnerable to Cold damage. Use Cold Damage to deal significantly more damage or use Resistance-lowering effects if your build uses Fire or Lightning Damage.
- Crowd Control Effects: Both bosses are slow and large, with big windups on their abilities. Crowd control effects like Stun, Freeze, Electrocute and chill are particularly effective.
- High Damage Slam Skills: Be very wary of the large tail slam, which does huge amounts of damage.
- Poison Projectile Tail Phase: Occasionally, Ashar with flip upright and use their tail to spit projectiles in short bursts. This is a good phase to deal damage, provided you are comfortable with dodge roll timing to avoid the projectiles.
The boss of Floor 4 and the final boss of the Trial of the Sekhemas is Zarokh, the Temporal. Zarokh is a significantly harder fight than the previous three bosses. It requires an effective endgame character (likely level 70-80), a refined set of Relics and a good run with lots of Boons and very few bad Afflictions. Here are some tips to help you defeat Zarokh, the Temporal:
- Relics: In addition to 75% Honour Resistance and maximum Honour scaling your Relics should also include 1 to 2 increased movement speed Relics and as much "Increased Damage Taken" Relics as possible to help you kill the boss more quickly. Increased Dodge Roll distance and anything else that makes the boss easier can also help.
- The Time Freeze Phase: The most important phase of this boss is the time freeze. During this phase, Zarokh disappears and you must walk to the center of the Arena, which freezes time. During this, a series of glowing time orbs appear, which you must pick up (by walking over them) when time resumes. You become slower and slower as you move, and if you fail to collect all of the orbs before the time runs out you are instantly killed and fail the Trial — even if you have the "Cannot Take Honour Damage" Boon!
- Remain calm, and plan an efficient route that minimizes backtracking.
- Do not dodge roll, just walk smoothly (you can dodge roll to the very last orb).
- Relics that increase movement speed, the Movement Speed Boon "Hare Foot", and 30-35% movement speed boots are recommended! Avoid the "Worn Sandals" affliction that lowers Movement Speed when attempting Zarokh.
- Unpausable: Zarokh is the master of time and you cannot pause the game during the boss fight.
- Damage Resistance: Zarokh has 30% Resistance to each element, and has quite a lot of health. Lower Zarokh's Resistances if you deal elemental damage, and take advantage of any other damage-boosting effects.
- Remain Calm and Focus on Positioning: The majority of your DPS time is when Zarokh is throwing projectiles at you, which are all very easy to avoid. The arena and lingering projectiles reward calm, positioning-focused gameplay.
- Lightning Spin: Zarokh fills the arena with time bubbles that freeze you on contact. Avoid these at all costs and when he begins to spin around while channeling lightning you can easily avoid it by positioning in pointed corners of the arena. Wait until the lightning passes and then deal some damage before retreating to the corner for the next rotation.
Final Loot and Rewards: Time-Lost Jewels
In addition to the boss loot and any extra loot you found along the way you enter the final vault to claim your Ascendancy class or points (if you haven't already claimed them from this difficulty level). In this final reward room, you can use your Treasure Keys to open increasingly rewarding chests in either bronze, silver, or gold variants. Each key opens only one chest so to get more loot you want not only more keys but better keys (silver and gold). Each chest also has a name which indicates the type of loot they can have:
- Mysterious: Unknown (Speculative: randomized anything).
- Armour: All gear is Armour but you can also get Currency and Gold.
- Weapons: All gear is Weapons but you can also get Currency and Gold.
- Royal: Contains Jewels with a chance of Time-Lost Jewels.
- Hoarders: Currency and Gold.
- Gloves, Helmets, Boots etc: Contains the listed gear type.
- Relics: Relics.
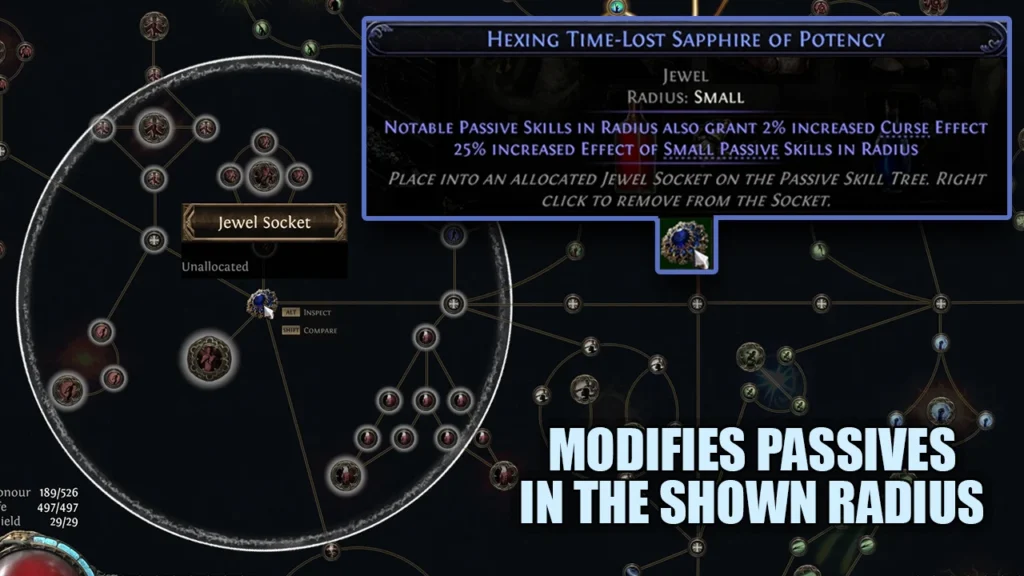
Time-Lost Jewels are the Trial of the Sekhemas' exclusive reward type. While regular Jewels can be found anywhere in the game Time-Lost Jewels can only be found here. They provide a radius around a jewel socket in which they modify passives. For example: increasing the effect of minor passives in radius or adding an extra modifier such as increased curse effect to all nodes. Like regular Jewels, these can be crafted to customize their effects and provide powerful bonuses to almost any build.
Spend Sacred Water to Gain More Treasure Keys or Relics
If you have Sacred Water remaining when you complete the Trial of Sekhemas you can spend it on new Relics or convert it to Treasure Keys in the final reward room. Speak to Balbala first to see the Relics she has for sale and buy any that are upgrades for your collection. Then click on the Keth Forge to convert all of your remaining Sacred Water into Treasure Keys. Ensure you speak to Balbala first as once you use the Keth Forge you lose all remaining Sacred Water.
Trial of Chaos
In Act 3 while exploring the Vaal Jungle you can discover Temple of Chaos. To gain access you must obtain a key from The Trialmaster. In the Trial of Chaos you overcome a series of consecutive challenges and then a randomized boss in order to reach the end and unlock an Ascendancy, gain your Ascendancy Passives and claim the other rewards.
Where is the Trial of Chaos?
The entrance to the Trial of Chaos is located in Act 3 in the Chimeral Wetlands. Stick to an outer edge of the zone and look for a narrow passage with stone stairs.
To obtain the Chimeral Inscribed Ultimatum required to access the Trial for the first time you must defeat the unique boss Xyclucian, the Chimera. See the spoiler section below for tips on defeating this challenging boss.
Once you have the Chimeral Inscribed Ultimatum you can attempt the Trial of Chaos with it as many times as needed until you succeed.
- Xyclucian has three heads that each attack with a different type of elemental damage and a tail that deals Chaos damage. They also attack with physical damage slams. As such, you need a well-rounded character defensively.
- The Cold Damage breath attack and the Fire Damage flying-breath attack are the most difficult to avoid. Prioritize Fire and Cold resistance.
- Xyclucian flies and land on the stone pillars during the fight. You can attack and destroy the pillars to drop the boss into the rubble, allowing time to do significant damage. You can use this time to build a Stagger Stun or another Ailment like Freeze to extend the safe damage period even further.
- Play defensively and let Xyclucian land on the pillars to await a safe time to deal damage.
Should You Ascend in the Trial of Chaos in Act 3?
The Act 3 Quest encounter with the Trial of Chaos is your best option for obtaining your second set of Ascendancy Passives after you unlock your Ascendancy in Act 2 through the Trial of the Sekhemas. It is possible to do a Trial of the Sekhamas with 2 floors instead, but this can only be done with a random Djinn Barya key drop that has the modifier: "Number of Trials: 2". There is no way to guarantee you get a Djinn Barya in a timely fashion, and it also poses a risk of losing the key on failure. As such, you should use the repeatable option of the Trial of Chaos Quest in Act 3 to get your 3rd and 4th Ascendancy passives, even if you prefer another Trial for Ascending.
Tribulations Within the Trial of Chaos
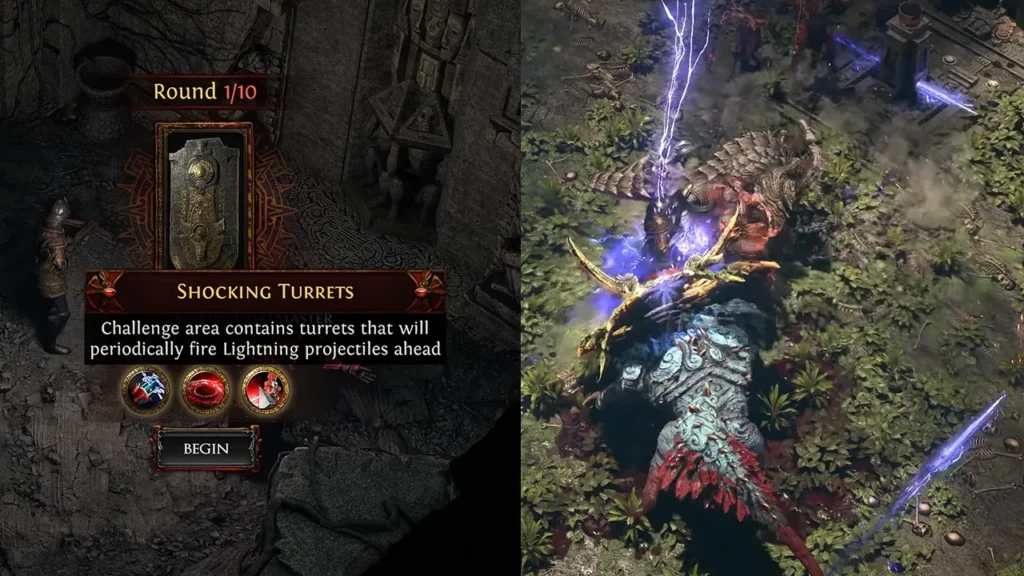
The Trial of Chaos is a combat-focused challenge where in each new encounter you have to make a difficult choice. In each Chamber you must select 1 of 3 Tribulations, negative modifiers that persist throughout the rest of the run. These can add hazards to the encounters, weaken you or empower your enemies. With each successful room you complete, another Tribulation is added to your Trial. You must carefully select those that you think you can manage and beware of powerful combinations of effects that may lead to your defeat.
Final Loot and Rewards: Vaal Orbs and Soul Cores
In addition to claiming your Ascendancy class or points (if you haven't already claimed them from this difficulty level) you also receive your Tribulation rewards. Each round you choose a Tribulation there is also a reward on the line, such as gear or currency. Each reward is added to your final winnings at the end of the Trial.
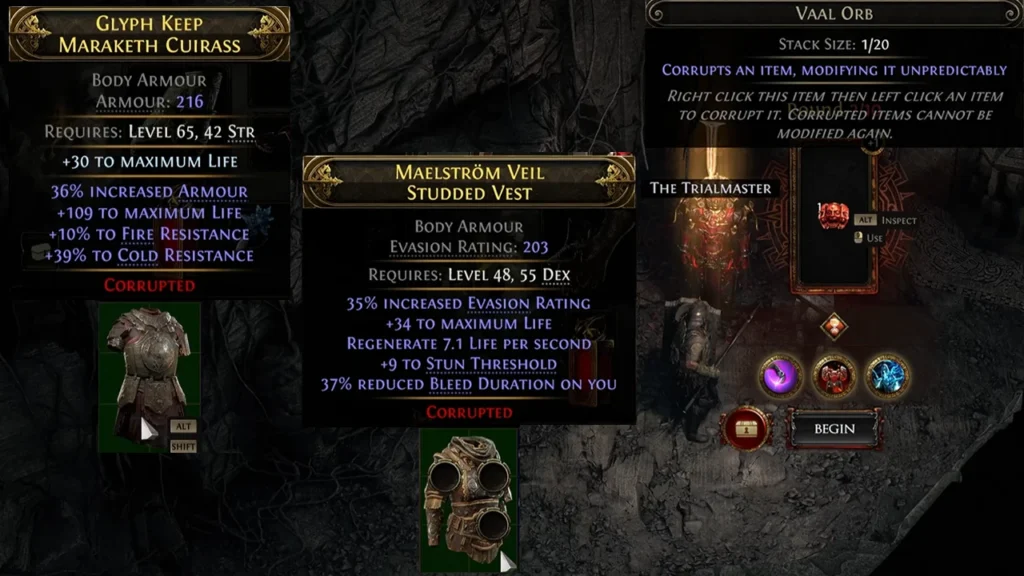
A major reward of the Trial of Chaos is the crafting currency the Vaal Orb. Following the theme of risk and reward of the Temple of Chaos the Vaal Orb allows you to corrupt an item, modifying it unpredictably in potentially powerful or destructive ways. This could add unique enhancements or extra sockets to regular and Unique items, but it could also effectively destroy it. Corruption also locks an item from being modified further so it can either be the final step in crafting something legendary, or the final nail in a beloved item's coffin.
The other reward type is Soul Cores, which are exclusive to the Trial of Chaos. These are socketable items like Runes with more specific and potentially powerful effects. For example, the Soul Core of Topotante can give weapons Elemental Penetration, a powerful damage increase in elemental damage builds.
To learn more about the Trial of Chaos in the Endgame and how to farm it for profit check out our guide here.
Unknown Trial
While it has been revealed that there will be a third Trial of Ascendancy in Act 4 it is currently not implemented and little is known about it. Early access only contains Acts 1, 2, and 3 so it is likely this third Trial will be added alongside Act 4 at an unknown point in Early Access.
VIDEO: Complete 8 Point Ascendancy Guide
Summary
- Getting Your Ascendancy: You can get your Ascendancy by completing Act 2's Trial of the Sekhemas or Act 3's Trial of Chaos but you get it earlier if you do it in Act 2.
- If You're Struggling: You can delay and become more powerful with a few levels and gear upgrades before reattempting.
- Gaining More Ascendancy Passives: To get points beyond the first 2 you must complete higher level difficulties of any Trial using keys randomly dropped as you level up. If you haven't gotten one yet you may not be high enough level for the next difficulty key to drop.
- Each Trial Has Something For You: In addition to Ascendancies and general loot the Trial of Sekhemas has Time-Lost Jewels and the Trial of Chaos has Vaal Orbs and Soul Cores to socket into your gear. These exclusive rewards are all very powerful and potentially useful in every build.
Credits
Written by: ZiggyD
Reviewed by: CoffeeBns, Tenkiei