Act 3 Boss Guide
Last Updated:April 7, 2025|Changelog
Moving on to Act 3, the bosses continue to ramp up in complexity. The most notable bosses being Mektul, Viper Napuatzi and Doryani. Each boss tests the player's ability to avoid mechanics and tests the defensive layers of their builds. If you missed them, check out the boss guides for Act 1 and Act 2 plus, a full campaign walkthrough if you need more help.
There are Storyline Spoilers ahead! Proceed at your own risk!
Path of Exile 2 is currently in early access, which means updates occur frequently, and details are subject to rapid change. Pin the post to be notified of future updates.
Rootdredge
Zone: Sandswept Marsh
Damage Types: Physical, Fire
Default Attack:
- Tosses three volatile balls at the player.
Special Abilities:
- Detonate Dead
- Slams the ground with his staff dealing AoE damage and causing roots to sprout and detonate nearby corpses.
- Raise Zombie
- Summons multiple Zombies.
- Corpse Missile
- Selects a zombie turning them into a volatile corpse that homes in on players before detonating. Once the corpse reaches the player it begins to detonate, giving players enough time to dodge roll away.
- Volatile Curse
- Marks all zombies to explode after a short period of time.
- Hindering Winds
- Spawns a tornado that slow players standing in them for a greater amount while standing in the tornado.
Mighty Silverfist
Zone: Jungle Ruins
Damage Type: Physical
Default Attack:
- Very fast default attack melee swings.
Special Abilities:
- Slam
- Quick overhead slam.
- Tumble
- Rolls toward the player and repeatedly stuns.
- Enraged Slam
- Charges a two swing combo into a slam.
The Mighty Silverfist is a hard-hitting physical damage boss that provides 2 Weapon Set Passive Skill Points if defeated. Precise Dodge Rolls are required to avoid either his swing or slam attacks. Mighty Silverfist also has a damaging Roll ability which is especially lethal if your character is low on armour. Players encountering issues killing him can over level before coming back. Having a lot of patience and waiting for openings is strongly recommended.
Ignagduk, the Bog Witch
Zone: The Azak Bog
Damage Types: Physical, Fire
- Broom Ride
- Throughout the fight Ignagduk remounts her broom and spawns more bone clusters. She rotates and charge 3 times before dismounting.
- Bone Spike
- Red runes appear throughout the arena before erupting and breaking any bone spike clusters.
- Bone Spear
- Bone shards appear around the arena before launching towards the player.
- Bone Wall
- Occasionally spawns a single black bone cluster before sundering in a line to the player.
Once below 75% she ignites the effigies around the arena and discards her broom for a new set of fire spells:
- Infernal Corridor
- Summons 2 walls of curved bones around the player before igniting the area.
- To survive, players should either position behind Ignagduk, or far away from the exit blast. The incoming infernal flame exits the corridor in a V-shaped pattern, thus extra care and quick decision making is required to survive.
- Fireball
- Throws multiple fireballs at the player.
- Flamethrower
- Charges a powerful flamethrower in front of her.
- Greater Bone Spike
- Continuously spawns red runes which erupt in bone spikes.
- Flame Wall
- Commands 2 effigies to create a flame wall moving towards the player from multiple sides of the arena.
This is a difficult fight but rewards you with +30 to spirit permanently

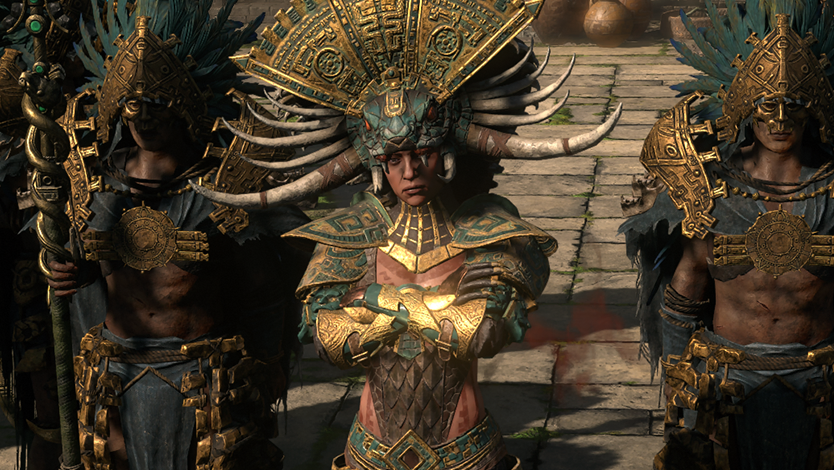
Xyclucian, The Chimera
Zone: Chimeral Wetlands
Damage Types: Physical, Lightning, Fire, Cold, Poison
Default Attack:
- Snaps its jaws at the player.
Special Abilities:
- Flamethrower
- Spews fire in a small cone from the center head.
- Spark
- Fires lightning projectiles spawned from the left head.
- Permafrost
- Freezing breath in front of him that creates a large chilled ground area.
- Frostfire Flight
- Flies into the air to create a wall of frost or track the player with a flame wall.
- Ground Slam
- Slams the ground in front of him in a large physical AoE.
- High ground
- Every 25% the boss’ health he flies to one of the stone pillars and begins to volley the player with either Fireballs or Poison needles. Break the stone platform to temporarily stun him.
Note: Players can hide behind the stone pillars to avoid damage from most of the bosses ranged abilities.
Blackjaw, The Remnant
Zone: Jiquani’s Machinarium
Damage Types: Physical, Fire
Default Attacks:
- 3 different attacks alternating between a swing, shove and overhead slam.
Special Attacks:
- Enraged Slam
- As his health drops he gains new slam combo attacks.
- Flame Imbue
- Occasionally ignites his axe and swings it at the player.
- Flamethrower
- Shoots a jet of flame from his mouth in an arc across the room.
- Molten Lacerate
- Creates a flame wall and launches fire projectiles at the player followed by a heavy strike.
Zicoatl, Warden of the Core
Zone: Jiquani’s Sanctum
Damage Types: Physical, Lightning
Default Attack:
- Strikes the ground repeatedly with snake heads.
Special Abilities:
- Lightning Wall
- Creates a horizontal lightning beam and throws it to a set distance.
- Laser Cascade
- Utilizing the snake heads creates multiple cross shaped beams expanding outward in front of Zicoatl.
- Pyramid Slam
- Charges a large triangular slam that expands outwards from each side (Note: stand outside any corner of the triangle to be safe).
- Lightning Conduit
- Shoots lightning lasers from the walls to the boss. Keep an eye out on which fonts light up before connecting to the boss.
- Arcing Surge
- Multiple fonts around the room shoot lightning between each other. Similar to Lightning Conduit, avoid standing in between the fonts that are connecting.
- Shocking Blast
- Forms a circle with lasers and drags them to the center to explode. Either dodge roll through one of the lasers to escape the explosion or run past the boss.
Mektul, the Forgemaster
Zone: The Molten Vault
Damage Types: Physical, Fire
Default Attack:
- Performs multiple quick swings or a slower swing with a hammer.
Over leveling as much as possible is recommended, this one of the toughest fights in Act 3 and it comes with a lot of fire damage. Furthermore, players have less than 4 minutes to kill the boss before the aqueduct is completely covered by molten gold. This guide explains each of his abilities in detail to help you get survive this encounter. Killing Mektul awards players with a level 10 skill gem and the The Hammer of Kamasa, which unlocks the Reforging Bench.
Ability Breakdown
Explosive Rune
Channels to create an explosive rune at his feet.
Melee players have enough time to move out of the rune before it explodes.
Queen of Filth
Zone: Apex of Filth
Damage Types: Physical, Chaos
Default Attack:
- Swings her mace at the player.
Special Abilities:
- Slam
- Performs an overhead slam.
- Cursed Ground
- Occasionally places cursed ground at the players feet; either Temporal Chains, Vulnerability or Enfeeble.
- Fungal Growth
- Spawns patches of orange mushrooms which creep along the arena. These explode in a chain reaction if a player walks over them.
- Flattening Slam
- The boss has a wind up slam usually accompanied by the voice line “Flatten!”
- Rolling Slam
- If the player is out of her melee range she may perform a rolling slam that can be dodged.
- Family Meeting
- Throughout the fight she summons swarms of flatheads that need to be dealt with before you are overwhelmed.
- Command Boulder
- Facing the pool she emerges from, begins to levitate and throw a boulder at the player.
The Queen of Filth isn't too difficult, however players can be quickly overwhelmed with adds and nowhere to stand from the fungal growth. Whenever there is an opportunity to detonate the orange mushrooms, players should run over to clear them if they are running out of space.
Ketzuli, High Priest of the Sun
Zone: Temple of Kopec
Damage Types: Fire
Default Attack:
- Ketzuli fires quick moving fireballs and he frequently fires slow moving orbs that explode in a small AoE if a player touches them.
Throughout the fight Ketzuli flies into the air, becoming invulnerable, before launching a large volley of fireballs and short lived black holes around the arena. Once he lands, he immediately begins enrage dashing.
Ketzuli is a step up in complexity for bosses in Act 3, this guide explains each of his abilities in detail to help you get survive this encounter.
Ability Breakdown
Black Hole Sun
Spawns slow moving black hole orbs. The closer you are to the orb, the slower you move.
Viper Napuatzi
Zone: Utzaal (Past)
Damage Types: Physical, Lightning, Chaos
Default Attacks:
- Swap between multiple attack pattern chains that lead into an Area of Effect slam or sweep.
At roughly 75% Napuatzi slams her spear into the ground creating a chaos degen effect. While not wielding her spear she has various chaos projectile abilities.
Default Attacks:
- Her default attacks become either a quick gatling of poison snakes or volley of multiple poison snakes in a frontal cone.
Initially you can avoid spears from one side of the shield wall by standing at the opposite side as they cannot reach you, but after the arena shrinks from 2 spear phases players can now be hit from both sides. This makes the fight a race against time as meteors are very difficult to dodge with the limited space provided by the arena. Once Napuatzi is defeated the fight isn’t over! There are stragglers of the shield wall that need to be dealt with.
Viper Napuatzi is one of the most difficult fights in Act 3, this guide explains each of her abilities in detail to help you save Alva.
Ability Breakdown
Arakaali's Fury
Leaps into the air and channels a large poison AoE slam.
Doryani, Royal Thaumaturge
Zone: The Black Chambers (Past)
Damage Types: Physical, Lightning, Cold, Fire
Default Attacks:
- Flamethrower from his right hand.
- Lightning arc from his left hand.
- Charges a Fireball from his right hand.
- Channels a continuous arc of lightning from his left hand.
After dropping below 50%, Doryani mounts the mech titled Doryani’s Triumph, which has the following moves:
Default Attacks:
- Slams the ground with either arm.
- Shoots a frost laser from the left arm in an arc.
- Fires a flamethrower from the right arm in an arc.
Once Doryani’s Triumph drops below 50%, Doryani flies into the air for a short time with a new set of abilities.
Doryani is the final boss of Act 3, this guide explains each of his multitude of abilities in detail to save Alva and the future.
Ability Breakdown
Ascension of the Vaal
Fires a barrage of lasers from its back in a fast clockwise rotation around the arena. Try to position to the right side of the lasers before it begins turning.
Summary
The Act 3 Boss Guide includes move sets and strategies to defeat the challenging encounters found at the end of Path of Exile 2's Early Access campaign. Learn tips and tricks for defeating Viper Napuatzi and Doryani with our detailed ability breakdown.
Check out these related guides:
Credits:
Written By: havoc616
Reviewed By: Jerrin, Tenkiei