The Shaper Boss Guide
Last Updated:June 13, 2025|Changelog
The Shaper is the creator of the Atlas of Worlds, the main antagonist of the Atlas of Worlds expansion and was introduced in patch 2.4.0 Essence League. He's one of the pinnacle bosses, found in The Shaper's Realm. He also occasionally appears in Maps that are influenced by him. Players can fight The Shaper using the Key to the Crucible Map Fragments set, which can be obtained by defeating the Guardians of the Void.

Guardians of the Void - Boss Guides:
- Pit of the Chimera Map - Guardian of the Chimera
- Lair of the Hydra Map - Guardian of the Hydra
- Forge of the Phoenix Map - Guardian of the Phoenix
- Maze of the Minotaur Map - Guardian of the Minotaur
The Shaper - Boss Guide:
The Shaper's real name is Valdo Caeserius, the father of Zana Caeserius. Zana assists the player during the battle with The Shaper and constantly implores him to stop fighting and join her, but he refuses.
The Shaper's abilities deal very high damage. His iconic ability, The Shaper Beam, deals 15,000 elemental damage per second using a combination of Fire, Cold and Lightning elements. The Shaper does not deal Chaos damage and does not inflict Bleeds.
The fight consists of multiple phases. Before The Shaper encounter begins, the player must defeat four Mini-Bosses at the Nexus. After that, a portal opens to The Shaper's Arena. The Shaper himself has three phases. At the end of the first and second phases, he banishes Zana and the player to a passage while he heals up. The players must traverse the passage and return to the Arena to begin the next phase. The Shaper recovers health slowly between phases.
Defeating The Shaper is guaranteed to drop a map fragment required for the Uber Elder encounter, either Fragment of Knowledge or Fragment of Shape. The other 2 fragments (Fragment of Terror and Fragment of Emptiness are dropped by The Elder.
Loot Table
In addition to regular loot, The Shaper has the following boss-specific drops:
- Dying Sun
- Shaper's Touch
- Solstice Vigil
- Voidwalker
Always drops one of the two:
- Fragment of Knowledge
- Fragment of Shape
Additional Drops:
- Orb of Dominance
- Dying Light
- Shaper Influenced Items
Skills Breakdown
The Shaper's Realm
In order to open the portals to The Shaper's Realm, you have to collect all 4 Shaper Guardian Fragments and place them into your Map Device in the right order. These Fragments include:
- Fragment of the Hydra obtained in the Lair of the Hydra Map
- Fragment of the Chimera obtained in the Pit of the Chimera Map
- Fragment of the Phoenix obtained in the Forge of the Phoenix Map
- Fragment of the Minotaur obtained in the Maze of the Minotaur Map
Phases
The Shaper Fight has 6 different Phases beginning with The Nexus.
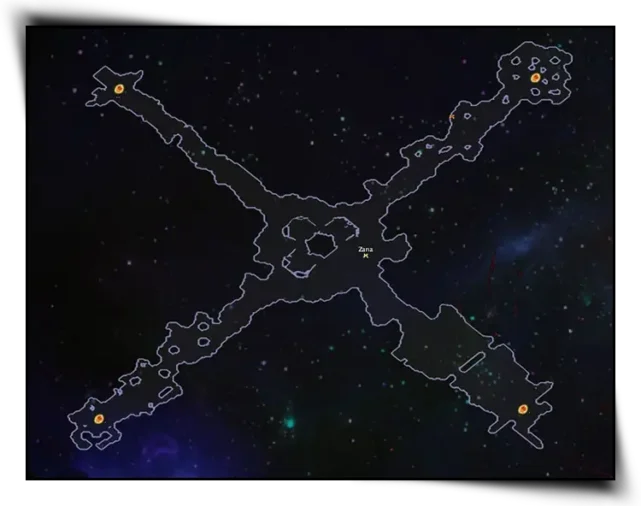
Once you entered The Shaper's Realm, you find yourself in an X shaped Area. In each of the four corners you find a portal leading to a Mini-Boss. Upon defeat, they spawn another portal leading you back to the entrance until all four encounters are completed. This allows you to enter a new central portal to engage The Shaper.

These Bosses are a selection of Map Bosses and is chosen randomly from the following:
- Ambrius, Legion Slayer (Colosseum Map)
- God's Chosen and The Hallowed Husk (Palace Map)
- Spinner of False Hope (Arachnid Nest Map)
- Shock and Horror (Mineral Pools Map)
- Tyrant (Colonnade Map)
- Penitentiary Incarcerator (Dungeon Map)
- Olof, Son of the Headsman (Pit Map)
- The Goddess (Plaza Map)
- The Cursed King (Dark Forest Map)
- Merveil, the Reflection and Merveil, the Returned (Underground Sea Map)
- Shadow of the Vaal (Maze Map)
- The Infernal King (Caldera Map)
- Piety the Empyrean (Shrine Map)
- Eater of Souls and Heart of the Beast (Core Map)
- Fire and Fury (Lava Chamber Map)
After successfully defeating all four Mini-Bosses in the Nexus, a portal opens that leads you to The Shaper. He has a total of three phases and two intermissions, during which he slowly restores his health. The faster you are in the Intermissions, the less life the Shaper has.
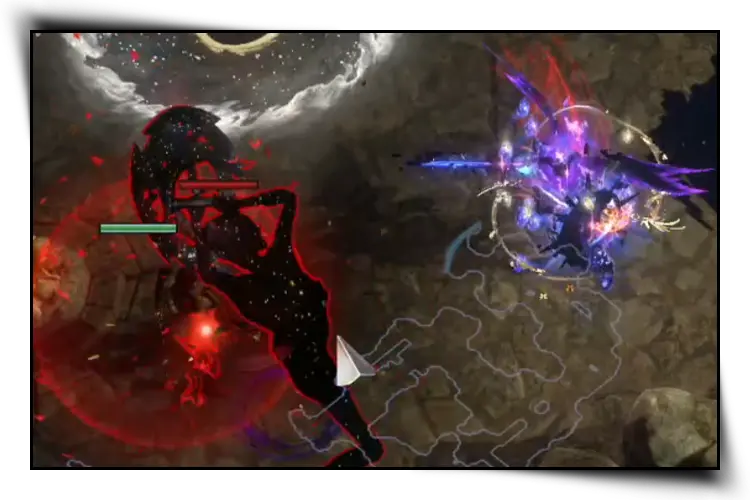
The goal is to bring The Shaper's health down to 50%. He doesn't use all of his abilities in this phase just yet, which makes this phase rather easy if you are able to dodge the lethal abilities like Teleport Slam, Shaper's Beam or his Projectiles. Make sure to check out the Skills Breakdown above to learn more about each of the abilities.
In Phase 1, the Shaper uses:
- Default Attack
- Shaper's Beam
- Projectiles
- Teleport Slam
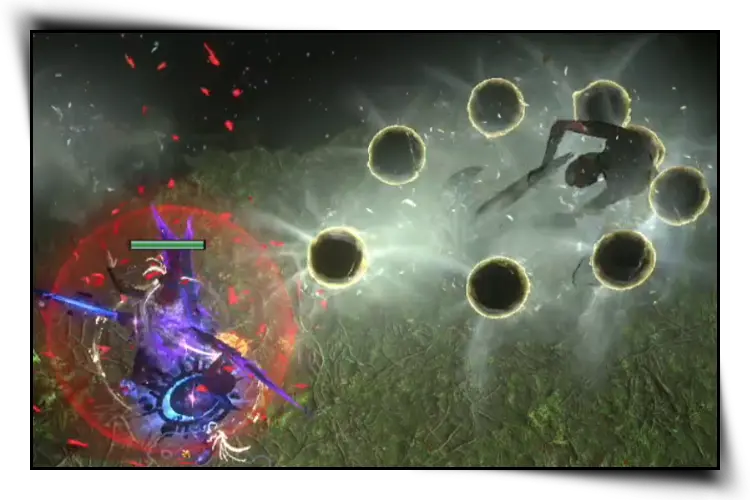
- Monster Portal
- Vortex
Once the Shaper reaches 50% health, he becomes invulnerable and teleports you out of the Boss-Arena and Intermission 1 begins.
At 50% health, Intermission 1 begins. You are teleported to a new area and have to fight your way through a Map filled with monsters to reach, The Uncreated mini-boss at the end. Upon defeat, you can return to The Shaper's Arena to interrupt his healing and begin Phase 2.
His skill set is based on the Riftwalker Boss of the Laboratory Map:
- Uses Spectral Throw
- Periodically raises hands to casts an omnidirectional slam attack.
- Casts Black-Hole Frostbolt & Vortex combo.
- Casts a Vortex with Increased Area of Effect Support.

If you successfully defeated The Uncreated. a Portal spawns that leads you back to The Shaper and Phase Two begins.
After defeating the Uncreated, a Portal spawns that leads you back to The Shaper's Arena. Similar to phase one, you have to fight The Shaper down to 25% of his total health to trigger Intermission 2. The longer it took you to pass Intermission 1, the more health The Shaper has restored. The slower you are, the harder the fight gets, so be quick, Exile!
In addition to his Phase 1 abilities, he also uses:
- Bullet Hell
- Vortex (more common than in Phase 1)
Once The Shaper reaches 25% of his Health Pool, he becomes invulnerable and teleports you out of the Boss-Arena and Intermission 2 begins.
At 25% health, Intermission 2 begins. Similar to the first, you have to fight your way to the end and defeat another mini-boss named "The Unshaped".

He has the same abilities as "The Uncreated" but additionally fires a lethal volley of Frostbolts that can easily take you out. Dodge this ability at all costs!
After defeating "The Unshaped", a new portal leads you back to the Shaper and Phase 3 begins.
This is the final part of the fight. Similar to Phase 1 and 2, you have to fight The Shaper, but now he is even more powerful!. The longer it took you to pass Intermission 2, the more health The Shaper has restored.
In addition to all his previous abilities, he now also uses:
- Clone (an invulnerable spectral clone that uses one of the Shaper's abilities and disappears afterwards)
- Vortex (more common than in Phase 1 & 2).
Once you bring the Shaper down to 0% of his health, the fight is finally over, and you can collect your well-deserved loot!
Good Luck, Exile!
Uber Shaper
In addition to the regular Shaper encounter, there is also an Uber version available by opening 5 Cosmic Fragments in your Map Device. This makes the fight much harder in several ways:
- The Shaper has vastly increased life and damage.
- He now has two clones at the start.
- The yellow balls have additional Projectiles.
- The Teleport Slam ability is faster.
- Vortex zones stay on the ground throughout the whole boss fight.
- Zana doesn't help you in the Bullet Hell phase.
In addition to the regular Shaper loot, the Uber Shaper has the following boss-specific drops:
- Sublime Vision
- Entropic Devastation
- Echoes of Creation
- Starforge
- The Tides of Time
- Cosmic Reliquary Key
Always drops one of the two:
- Fragment of Knowledge
- Fragment of Shape
Additional Drops:
- Orb of Dominance
- Dying Light
- Shaper Influenced Items
Sublime Vision variations:
- Anger - Always Scorch while affected by Anger
- Hatred - Always inflict Brittle while affected by Hatred
- Wrath - Always Sap while affected by Wrath
- Zealotry - Unaffected by Curses while affected by Zealotry
- Malevolence - You can apply an additional Curse while affected by Malevolence
- Pride - (20–40)% increased Effect of Non-Curse Auras from your Skills on Enemies & Enemies you Kill while using Pride have 25% chance to Explode, dealing a tenth of their maximum Life as Physical Damage
- Determination - +1 to Maximum Endurance Charges while affected by Determination
- Discipline - +1 to Maximum Power Charges while affected by Discipline
- Grace - +1 to Maximum Frenzy Charges while affected by Grace
- Haste - 10% increased Action Speed while affected by Haste
- Purity of Elements - +3% to all maximum Elemental Resistances while affected by Purity of Elements
- Purity of Fire - 30% of Cold and Lightning Damage taken as Fire Damage while affected by Purity of Fire
- Purity of Ice - 30% of Fire and Lightning Damage taken as Cold Damage while affected by Purity of Ice
- Purity of Lightning - 30% of Fire and Cold Damage taken as Lightning Damage while affected by Purity of Lightning
- Vitality - Regenerate 15% Life over one second when hit while affected by Vitality
- Clarity - 80% increased Effect of Arcane Surge on you while affected by Clarity
- Precision - 25% more Critical Strike chance while affected by Precision
Summary
- Most of the Shaper's abilities can be outmaneuvered, like the Shaper's Beam or his Teleport Slam.
- Keep Zana alive while he opens the monster portal. She keeps you safe in the Bullet Hell phase!
- Use moments like the Shaper's Beam to burst damage the boss, since he doesn't move before finishing the cast.
- After defeating the Unshaped or the Uncreated in the intermission, you can travel back to kill some monsters to refill your Flasks. Don't spend too much time tough, since the Shaper regenerates his health in the meantime.
- Stay in the protective shield provided by Zana to survive the Bullet Hell phase, but make sure to move out quickly after, since the Shaper most likely casts a Shaper Beam.
- Use a Culling Strike Support and link it to a Totem or any other skill that can use it to shorten the last phase by 10%.
Credits
Written by mbXtreme.
Reviewed by wudijo.