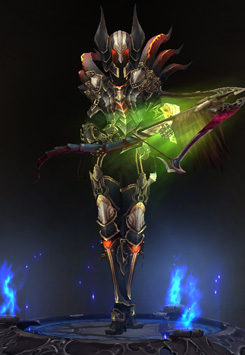
Demon Hunter Class Overview
Last Updated:April 2, 2024|Changelog
Introduction
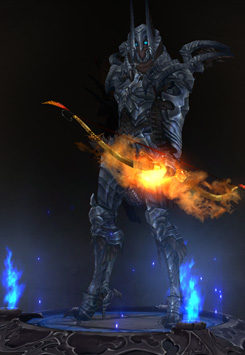
Demon Hunters are on an eternal quest to bring every walking and crawling hellspawn to justice. They employ an array of ranged attacks, devices and incredible utility skills to outmaneuver and defeat their targets. They are the archer type class in the game and finish their job quickly and efficiently - alone, if necessary. For that, they use the unique dual-resource system of Hatred & Discipline, both of which have to be carefully managed to succeed. There are some core traits recurring in almost every DH build:
- They are always on the move, dodging incoming attacks with grace while positioning themselves to deal the most damage.
- Timing abilities while managing both resources and additional cooldowns for their most effective use.
- While it's a ranged class, it's easy to build it defensively and survive lots of incoming damage.
Demon Hunters are great to start a season (or the game) with and farm lower difficulties like T16 Nephalem Rifts and Bounties extremely quickly due to their amazing mobility. They excel on their own and have a lot of unique builds to choose from, especially for Greater Rift pushing. Most builds offer their own interesting play styles and strategies despite the heavy focus on ranged attacks. Overall, the class is a fairly balanced mid-tier choice.
They are always a welcomed addition in groups, especially because of their incredible support capabilities & the strongest offensive party buffs in the game.
Lore
Those who call themselves Demon Hunters are not a people or a nation. They owe allegiance to no king. They are but a remnant – an echo – of those who’ve lost their lives to hellspawn. When their homes are burnt and their families butchered by demons, most newly scarred refugees give up on living – but a few bury their dead, band together, and swear vengeance.
Though they are small in number, hunters track and corner demons in the hopes that, if they can save even one life, their world will be better for it. At the end of a day’s hunt, most still close their eyes and have nightmares in which they see the horrors that brought them together: gore-caked claws, and men and women drowning in their own blood.
Awake, Demon Hunters see much the same. But, now, in the present, they finally have the power to retaliate.
They dare not dream of victory, or, even less likely, peace. And yet, they hunt. They can do nothing else.
Read the full story of the Demon Hunter here
Resources
Primary - Maximum Hatred: 125
- +25 from Paragon points
- +30 from Blood Vengeance
Passive Regeneration: 5 per second
- +5 from Vengeance Seethe
- +4.5 from primary rolls on gear
- +1 from Bat Companion
- +1 from Archery
- +1 from Inspire
Active Generation: 4 per attack with a Primary skill
- +3 per attack from choosing the right rune
- +4 per attack from Nightstalker
- +30 with Preparation Punishment
- +50 with Bat Companion
- +6 from casting Rain of Vengeance
Additional Hatred sources:
- Unhallowed Essence (2) Bonus
- Marked for Death Mortal Enemy
- Blood Vengeance
- Krede's Flame
- Karlei's Point
- Spines of Seething Hatred
- Kridershot
Secondary - Maximum Discipline: 30
- +36 from secondary rolls on gear
- +20 from Preparation Invigoration
- +10 from Stone of Jordan
Passive Regeneration: 1 per second
- +3 from Preparation Invigoration
Active Regeneration:
- +0.3 per attack with Bolas Bitter Pill
- +75 with Preparation
- +1 per Primary fired with Unhallowed Essence
Additional Discipline sources:
- Blood Vengeance
- Perfectionist (10% RCR)
Demon Hunters have a unique dual-resource system, using both Hatred & Discipline to power their skills. Keeping an eye on both at the same time is often crucial to success.
Hatred is the primary resource, used for offensive skills and attacks. It regenerates passively over time and is refilled through Primary skills and other effects. This resource is also the one that effects such as Aquila Cuirass or Krede's Flame are based on.
Discipline is the secondary resource, used for movement and utility skills. It regenerates very slowly and has only few other sources of replenishment. Running low on Discipline means either a huge loss in speed or defense and usually leaves you in trouble during a fight. Preserving it as much as possible but spending it in the right moment is the key to survival!
Depending on the build and stat rolls Hatred & Discipline management might be easier or more difficult. Generally it's easy to solve any issues related to Hatred with effects such as Vengeance Seethe or Blood Vengeance while Discipline is something that always needs to be watched with closer attention. The main way of recovering it is waiting for the slow passive regeneration or using Preparation.
Equipment
Demon Hunters are specialized in ranged attacks and typically use only a small variety of ranged weapons. As a bonus not available to other classes, they can equip a Quiver in their offhand slot together with a two-handed ranged weapon. Apart from that they can wield any one-handed melee weapon (Daggers, Maces, Axes, Swords, Spears) and Shields (but rarely do so).
Bows & Crossbows
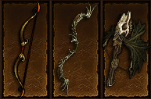
Bows and Crossbows are the bread and butter of Demon Hunters. Most builds use one of these for their powerful legendary affixes. While they can be equipped by other classes, they are mainly designed for the DH and provide the most bonuses to them. Despite being two-handed weapon types, both use the same damage range as regular one-handed melee weapons.
- Secondary rolls
- 9-12 Maximum Discipline (can only roll for DHs)
Hand-Crossbows
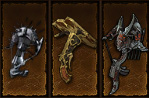
The Demon Hunter's unique weapons are Hand-Crossbows. They are very fast (1.6 base APS) and can be either dual-wielded or used with a Quiver. Combining melee and ranged weapons is impossible. Hand-Crossbows use the same reduced damage range rolls as Daggers.
- Primary rolls
- 1.35-1.5 Hatred per Second
- Secondary rolls
- 9-12 Maximum Discipline
Quivers
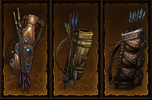
Quivers are Demon Hunter-specific offhand items that cannot be equipped by other classes and work with any of the above ranged weapons. For builds that have the option to include all of their necessary legendary affixes either dual-wielding or running with a Hand-Crossbow + Quiver, the choice is typically close enough to favor the better-rolled items.
- Primary rolls
- 15-20% Attack Speed (cannot be removed)
- 1.35-1.5 Hatred per Second
- 10-15% Damage to any Demon Hunter skill
- Secondary rolls
- 9-12 Maximum Discipline
Cloaks

Demon Hunters have access to a special body armor type called Cloaks. Some sets use a Cloak instead of a regular Chest piece.
- Primary rolls
- +1.35-1.5 Hatred per Second
- Secondary Rolls
- +9-12 Maximum Discipline
Sets and Builds
Embodiment of the Marauder
- (2) Bonus gives you a total of 7 pets. When combined with Zoey's Secret you gain 63% damage reduction. After adding The Cloak of Garwulf to this combo the damage reduction goes up to 81% for a toughness increase of 94.7% (with perfect rolls).
- (4) Bonus makes each Sentry fire certain hatred Spenders when you do, as well as automatically around once a second. The skills fired by your Sentries benefit from all the skill and generic damage multipliers, Sentry Damage on gear, and Enforcer. There is one exception to this rule: The Shadow's Mantle (2) Bonus does not increase their damage. It is possible to combine the Embodiment of the Marauder (4) Bonus with the Natalya's Vengeance (6) Bonus (the so-called N6M4 builds), but those generally turn out weaker than a full Marauder setup.
- (6) Bonus is a massive damage buff to both your and Sentry damage. It also buffs Vengeance and Companion, but their contribution to the overall damage done is next to zero. Most of the damage comes from Hatred spenders fired by Sentry, so their positioning is crucial to success.
- The attacks fired by Sentry proc Area Damage as normal but have no proc coefficient.
- Certain item effects that change the behavior of a skill (Hellcat Waistguard bounces, Holy Point Shot extra knives) don't work with Sentry attacks.
Embodiment of the Marauder is inherently a slow set, but works with many different skills. With the buffs in Season 25, both Cluster Arrow and Multishot have become strong alternatives and the Hungering Arrow playstyle lost a lot of its viability.
Also nicknamed M6, this build allows you to set up your wall of turrets to decimate your enemies using either a Cluster Arrow or Multishot setup. It's a slow-paced, very strategic build that requires careful placement of each Sentry. It makes up for that with massive damage, which is the highest the Demon Hunter class has to offer right now.

The Shadow's Mantle
- (2) Bonus requires you to wield a melee weapon to function.
- Melee weapons can't be combined with ranged weapons so that a combo between The Shadow's Mantle (2) Bonus and Natalya's Vengeance (6) Bonus is impossible.
- Unlike most other set bonuses in the game the (6) Bonus adds Weapon Damage to the first hit of your Impale, so it's not a direct damage multiplier (instead the damage done is 750% + (6) Bonus value). This allows for either an AoE-focused playstyle using Impale Overpenetration that hits further targets for 1/3 of that value or a heavy single-target DPS setup using Chemical Burn which deals double damage, but only to one target at a time as the burn effect gains the same bonus as the hit. The other runes are generally not played.
The Shadow's Mantle carries the fantasy of a melee assassin, throwing knives to seek and eliminate the right target. With the set's rework in Season 25, different playstyles became available that enabled either mobile or stationary setups both with a single-target focus or AoE focus, depending on the chosen Impale rune.
Shadow Impale - Beginner Friendly
This is the only Demon Hunter set that uses melee weapons. Karlei's Point and Holy Point Shot allow you to play a knife-throwing assassin that either focuses on one target at a time with Impale Chemical Burn or massive AoE with Impale Overpenetration.
Unhallowed Essence
- (2) Bonus gives you additional resources when using a Generator (includes Elemental Arrow with Kridershot and Chakram with Spines of Seething Hatred).
- (4) Bonus is a separate 1.6 multiplier and stacks multiplicatively with the 6-piece bonus. The timer resets regularly multiple times a second when at least 10 yards away from any enemy. This is a great way to learn how to play with Steady Aim as this passive has no UI indicator but the same requirement.
- (6) Bonus increases Multishot damage by 1700% per point of Discipline you currently have. This bonus adds up as one big multiplier - you won't get a multiplicative bonus for every point. At 86 Discipline, missing 1 point means a DPS loss of ~1.2% (increasing slightly the less you have).
Unhallowed Essence gives incredible buffs to Primary skills and Multishot depending on your current amount of Discipline, making this a very valuable stat to stack. Since there are no other mechanics in its builds, they are very straightforward to play and very mobile.
UE Multishot - Beginner Friendly
This is the signature Demon Hunter build of all time. Yang's Recurve, Dead Man's Legacy and a great combination of AoE and single target damage make it an agile, fast-paced and super fun ranger build that excels especially at farming lower difficulties. Easy to play and hard to master.
This build is a no-Strafe variant for Hungering Arrow, using Hunter's Wrath and The Ninth Cirri Satchel alongside some other bonuses to boost damage. It's essentially a slightly weaker, more clunky version of the typical Gears of Dreadlands builds.
Natalya's Vengeance
- Natalya's Vengeance (2) Bonus removes all costs and cooldowns for Spike Trap, increases its damage by 100% when combined with Caltrops and refills Discipline rapidly all the time.
- The 100% damage bonus can be triggered by other Demon Hunter's Caltrops.
- The Discipline recovery happens unconditionally at the time of each detonation.
- Natalya's Vengeance (4) Bonus allows Caltrops to pull in enemies when hit by Spike Trap and provides 75% damage reduction. Holding down Spike Traps continuously resets and increases the timer of the damage reduction buff up to a maximum of 10 seconds.
- The pulling effect only works on unsprung Caltrops, so they have to be placed at the same time as you trigger your Spike Traps if there are enemies in the area.
- Too long chain reactions detonate with too much delay which prevents the later Spike Trap explosions from pulling in enemies. The optimal way to pull enemies together is detonating small chains with 2-4 Spike Traps while setting up new Caltrops.
- The pulling effect pixelstacks enemies (ignores their collision boxes) and has around 50-60 yards range (roughly the distance from the center to the edge of the screen to the left or right).
- This pulling effect does not work for the Lightning Rod rune.
- Natalya's Vengeance (6) Bonus provides a 10,000% damage bonus to Spike Trap and increases their damage by 25% for consecutive explosions of the same chain reaction.
- The consecutive bonus is multiplicative with all other bonuses but additive with itself.
- This bonus can stack up to 9 x 25% = 225% bonus for the final tick of the chain reaction, raising the average damage of all Spike Traps in a full chain reaction by 112.5%.
- This stacking damage effect does not work for the Lightning Rod rune.
Natalya's Vengeance has been reworked in Season 28 to move away from a weak, generic set towards a new unique trap-based playstyle revolving around Spike Trap and Caltrops.
This build is all about toying with your enemies, good positioning and timing to maximize your damage output. It's relatively slow-paced but powerful with satisfying damage bursts. Core items include Chanon Bolter, The Demon's Demise and Trag'Oul Coils that combine various extra effects and damage bonuses.

Gears of Dreadlands
- (2) Bonus provides a Momentum buff lasting 4 seconds on using a Primary skill. 5 successive casts provides the maximum bonus (20 seconds). Each stack/second left adds a 10% multiplicative damage for your Primary skills. There are some bugs that sometimes prevent you from getting a Momentum stack— just cast it again. Additionally, there' a 5 second delay after the last application before the buff timer starts counting down.
- (4) Bonus also adds up to 160% Movement Speed and 60% damage reduction. Strafe fires your last used Primary skill when it hits an enemy. This effect can occur once every 9 frames (game runs at 60 FPS, max. 6.67 procs/s). Rockets from Rocket Storm can proc it when the cooldown is ready (using that rune can increase your DPS by a small amount). The ground effect from Icy Trail can not. Projectiles generated from the set gain full effects of Hatred generation, Area Damage and proc coefficients.
- (6) Bonus buffs your Primary skills but not Strafe so trying to deal damage with that skill is futile.
Gears of Dreadlands doesn't push extremely high but is a powerhouse of a farmer and one of the most well-rounded builds in the game. While theoretically other Primary skills can be used with it, the main build revolves around Hungering Arrow because it has the best legendary item support.
GoD Hungering Arrow - Beginner friendly
This build is extremely mobile through its massive Movement Speed bonus during Strafe and uses automatically generated Hungering Arrow projectiles to destroy everything around. It's very easy to play but offers many small gameplay tricks for advanced Demon Hunter enthusiasts to learn and distinguish themselves. The core damage boosts are Hunter's Wrath, The Ninth Cirri Satchel and Depth Diggers.
Legacy of Dreams/Legacy of Nightmares
For skills which don't have a dedicated Set, there's always an option of making a build around the Legacy of Dreams gem (or Legacy of Nightmares set), which provide a 97.5x damage multiplier with 13 Ancient items. Demon Hunters have fairly strong sets so generally these setups are outclassed by other choices.
While theoretically it's possible to play anything with these setups, the only really important build is Rapid Fire, which is used to get on the No-Set Leaderboard.
Support Demon Hunter is one of the best zDPS classes in the game due to its incredible damage buffs and a welcome addition to any group.
This build is the absolute opposite of what a Demon Hunter is about: you have to stand still, face-tank everything and not let go of Rapid Fire until everything around you has died because it heavily relies on Pain Enhancer to snapshot high Attack Speed values. Wojahnni Assaulter, Sin Seekers and Hellcat Waistguard boost this channeling-based setup.
Support DH - Beginner Friendly
This is the strongest damage-boosting support character in the game, in large parts thanks to Odyssey's End and various other buffs like Multishot Wind Chill and Companion Wolf Companion. There are many variations but the typical setup is very easy to play as it includes the Gears of Dreadlands (4) Bonus allowing great mobility with Strafe while supporting.
Legendaries
Apart from their class sets, Demon Hunters have 54 unique Legendary items, most of which provide various bonuses to skills. There are some more that have no effect at all.
Bows
- Cluckeye
- Etrayu
- Kridershot
- Leonine Bow of Hashir
- Odyssey's End
- The Raven's Wing
- Uskang
- Windforce
- Yang's Recurve
Crossbows
- Bakkan Caster
- Buriza Do-Kyanon
- Chanon Bolter
- Demon Machine
- Hellrack
- Manticore
- Pus Spitter
- Wojahnni Assaulter
Bracers
- Wraps of Clarity
Quivers
- Augustine's Panacea
- Bombardier's Rucksack
- Dead Man's Legacy
- Emimei's Duffel
- Fletcher's Pride
- Holy Point Shot
- The Ninth Cirri Satchel
- Sin Seekers
- Spines of Seething Hatred
Hand-Crossbows
- Balefire Caster
- Calamity
- Dawn
- The Demon's Demise
- Fortress Ballista
- Helltrapper
- K'mar Tenclip
- Lianna's Wings
- Valla's Bequest
- Danetta's Revenge
- Danetta's Spite
Rings
- Elusive Ring
Daggers & Swords
- Karlei's Point
- Lord Greenstone's Fan
- Sword of Ill Will
Cloaks
- Beckon Sail
- Blackfeather
- The Cape of the Dark Night
- Cloak of Deception
- The Cloak of Garwulf
Belts
- Chain of Shadows
- Crashing Rain
- Hellcat Waistguard
- Hunter's Wrath
- Omryn's Chain
- Zoey's Secret
Helmets
- Visage of Gunes
Below are listed select few items that have mechanics which aren't immediately obvious from their description.
- Makes your projectile attacks pierce 1-2 times.
- Has a 0.5sec internal cooldown.
- Does not increase the amount of pierces done by Hungering Arrow.
- When used with the Gears of Dreadlands set, it very slightly increases the amount of projectiles fired by the (4) Bonus (~1-2%) because Strafe may hit at a better moment for the set's internal cooldown.
- This item has been very useful in the past and heavily nerfed after Season 6 (Patch 2.4.2).
- This effect does not stack with Marked for Death anymore, instead it applies that skill (or the chosen rune from your skill bar) to any enemy hit.
- The effect can only be active on one enemy at a time.
- Essentially, the only use of this item is to boost the DPS on a single enemy (especially Rift Guardians) when you DON'T intend to have Marked for Death on your skill bar.
- For certain very fast Speed-GR setups running this weapon together with Marked for Death Valley of Death allows you to apply the effect for a split second to one enemy before you hit the next. This can help give a marginal DPS increase to your party in situations where you don't have time to cast it yourself.
- The Taunt effect focuses enemies attention towards the center of the Spike Trap that taunted them.
- Taunt is a crowd control effect that raises monsters' crowd control resistance. This directly interferes with other, more desirable effects such as the knockbacks from Natalya's Vengeance (4) Bonus or Ground Stomp Wrenching Smash from a Support Barbarian in groups, so they might not always work as expected.
- The double-hit effect can occur on the first shot if it brings the target below the 60% HP threshold.
- This item makes Ambush a better than usual DPS choice for this build. It provides 11.3% DPS increase instead of the regular 7.7%.
- The extra hits produce their own damage number and double the total number of hits.
- Gives a shield that stacks up to 10 times for a maximum of 30% of your total life.
- The shield lasts permanently and snapshots your Maximum Health at the time of application.
- Each time you attack you get at least 1 stack of the shield, however you often get more (sometimes all 10 at once), making this item significantly stronger than it appears at first glance.
- Taking damage without breaking the shield protects the buff given by Squirt's Necklace.
- Keep in mind that your shield takes more damage with this setup as long as you have the amulet's buff.
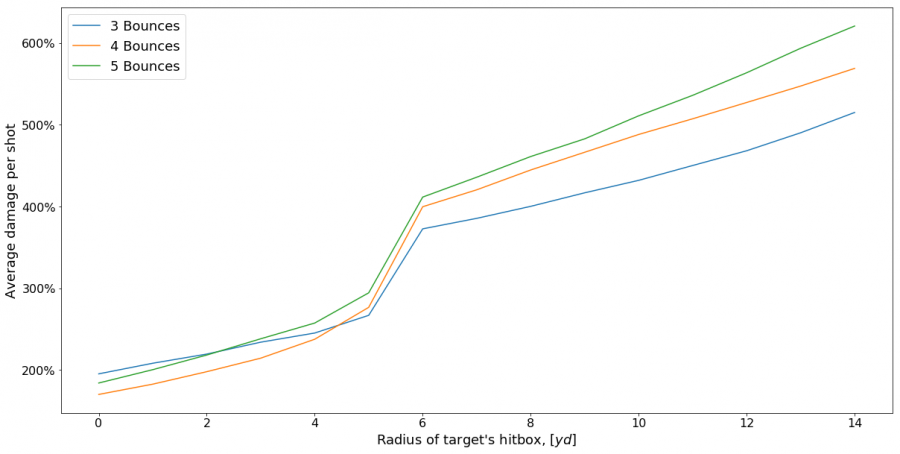
- Each grenade has a 50% chance to start bouncing X number of times the first time it hits the ground. A grenade bounces as many times as the legendary affix roll says once it has started doing so.
- A bouncing grenade deals 150% damage on the first impact, then 50% more damage on each consecutive one, finishing at 800% damage on the final one. For a 5 Bounces Belt the sequence is 150%, 200%, 250%, 300%, 800%.
- Bouncing grenades can proc Area Damage and on-hit effects and have the same proc coefficient as the original skill.
- On each bounce the grenade moves 11 yards in a random direction.
- Grenades disappear when they hit obstacles or walls.
- The randomness of bounces makes the effectiveness of Hellcat Waistguard vary depending on the size of the target and explosion radius. A bigger target is more likely to be hit by multiple bounces and the 800% final bounce. A higher number of bounces makes the average spread of grenades wider, however it almost always deals more damage on average even to the smallest targets.
- That rule is only broken when you are fighting in a tight spot and grenades are likely to stop bouncing before they reach the final 800% bounce. The graph below simulates the different legendary affix rolls on various target sizes:
- Hatred only returns starting on the second hit.
- Impale Ricochet can give you Hatred back on the first attack (due to bounces).
- Hitting any enemy in the pull slowly spreads the slow effect to more and more targets nearby (even if the target was already under the entangle effect).
- The visual effect is not always displayed properly, but you can be sure that enemies are slowed after a while or see it from the slow animation at their feet.
- Refreshing the debuff on one monster of the chain refreshes it on all of them.
- If you lose the debuff, you have to re-apply it to every single monster again.
- The damage bonus of this item is in the additive category.
- With multiple Demon Hunters in the party the effect can be stacked if different runes of Entangling Shot are chosen.
- After getting hit by Spike Trap, this weapon produces a secondary explosion emanating from the enemy hit. The timer is indicated by a small icon above an enemy's head.
- This explosion deals the same damage as the original hit that triggered it.
- Multiple explosions can stack up and occur over time if the enemy is hit frequently.
- Lightning Rod only produces one extra explosion per trap even if all 3 ticks hit an enemy, making the item significantly weaker for this rune.
- While it's a proc, this effect can trigger Area Damage.
- The "deployed twice as fast" line doubles the effective attacks per second for laying Spike Traps.
- Scatter's 1160% weapon damage is overwritten by the selected rune.
- A full chain reaction of 10x Spike Trap takes ~65 frames (~1.1 seconds) to complete.
- Valla's makes all Strafe projectiles pierce. This is useful when combined with the Gears of Dreadlands to proc its (4) Bonus more often. The item doesn't add anything to the Hungering Arrow itself.
- Piercing projectiles can proc the 4-piece bonus again as long as the Cooldown is up (9 frames).
- In big density, you almost guarantee a 4-piece proc immediately when the Cooldown is ready.
- The overall DPS gain over wearing another random weapon is between 0% (single target) to 25% (high density).
- Valla's comes with one extra primary stat and an item-specific Strafe damage roll that can be removed (Strafe damage does not affect Hungering Arrow damage).
- When used with the Demolition Rune, the effect causes grenades to bounce once if another enemy is located behind (relative to the player's position) the first enemy.
- Gives 10 stacks for each second spent channeling Rapid Fire, regardless of Attack Speed.
- Each stack gives up to 100% additive Rapid Fire damage for a total of 3000%. This makes all other rolls (helm, boots, quiver) and buffs worthless.
- All stacks are immediately lost when you stop channeling.
- The damage bonus is fully dynamic. You need to have the buff up when Rapid Fire hits enemies.
Passives
The Demon Hunter has a great variety of both strong overall and impactful situational passives. Only very few of them are terrible and essentially never used, especially Brooding and Night Stalker. Below you will find more details for each of them.
Mechanics
This passive provides a 40% multiplicative damage boost for targets above 75% hp. In the hypothetical scenario that you do very small hits without overkilling at the threshold, the overall damage gain is around 7.7% DPS, increasing the bigger your hit is compared to the monster's remaining HP.
The value of this passive can also increase by a lot depending on other effects that scale with enemy HP. In scenarios of infinitely small hits, the DPS changes by these values:
- 11.4% with Dead Man's Legacy
- 8.6% with The Executioner
- 9.2% with Frailty
- 9.5% with Frailty Early Grave
Best use
Core offensive passive, extremely strong for high damage nukes and low-end content
Ambush is a solid option that fits into almost any Demon Hunter build. Especially strong for lower end content such as Torment farming or for big nuke builds like those using Fan of Knives with Lord Greenstone's Fan, as you apply the 40% bonus damage to the full hit when you oneshot the enemy.
Mechanics
- Bows: 8% damage, which is additive. Very useless.
- Crossbows: 50% Critical Hit Damage is too weak to be useful due to lack of passives on typical Crossbow-wielding builds (especially Embodiment of the Marauder).
- Hand-Crossbows: 5% Critical Hit Chance is quite useful and fits into some builds that use them.
Best use
Niche offensive passive
This passive is only really used in one-handed (or dual-wielding) builds because the other bonuses are rather weak. It's pretty much last in line when you really want to squeeze out some more DPS at all costs.
Mechanics
When you die, you are instead saved and turn invisible for 2 seconds, gaining 15% Movement Speed, 50% Life and the Illusory Boots effect (no collision).
Best use
Core defensive passive
Fits into almost any Demon Hunter build and protects you from oneshots or just getting cornered. Definitely recommended in most situations as some builds can be quite squishy. Can also be an offensive tool, for example to use Oculus Ring effects when you otherwise couldn't.
Mechanics
100% multiplicative damage bonus for your rockets. Insanely strong if it applies to your build!
Best use
Necessary passive for Rocket-focused builds
Must have if you use Multishot Arsenal or Cluster Arrow Maelstrom / Shooting Stars.
Mechanics
Every health globe restores resources, even when picked up by your nearby group members. One of the only very few ways to generate Discipline for Demon Hunters.
Best use
Torment and low GR farming
Very useful to fuel your skills when you kill lots of enemies (especially elites) quickly, as they produce a lot of health globes. Top tier passive for farming.
Mechanics
Stand still for a while, get a stacking Life Regen buff that disappears when you move again.
Best use
Absolutely useless besides some fluff
Never take this passive for serious builds. There is, however, a funny interaction you can abuse to have some fun in creating a big shield with it by following these steps:
- 1. Go in town and put all paragon points into Vitality, equip gear with Life % and Vitality
- 2. Stand still and stack up Brooding
- 3. Insert Molten Wildebeest's Gizzard into one of your sockets
- 4. Remove Vitality, equip your normal gear and enjoy your 1m+ shield
- 5. The shield stays with you until it's broken, the gem is unequipped or you enter a Greater Rift
Note that the shield also resets if you got hit and stopped being hit in the last 4 seconds, as it reactivates the gem's shielding mechanic with your current character values.
Mechanics
20% multiplicative damage boost, very strong and the highest DPS passive that Demon Hunters have to offer. Usually paired with an easy way of applying a slow such as Bane of the Trapped or Thrill of the Hunt.
Best use
Top-tier DPS passive
Included in every high-tier GR build. Not necessarily used in every farming build however, due to the CC-requirement.
Mechanics
Improves your devices and traps, mainly useful for the additional Sentry it allows you to add. All durations of the mentioned skills are exactly doubled.
Best use
Goes with the Marauder set, otherwise very niche
One of the best passives for any build using the Embodiment of the Marauder set. Adding a 5th Sentry is equivalent to around 40% extra DPS.
Mechanics
Increases size and damage of your Grenades by a significant margin. The larger explosions are more impactful, as you can cover more area or just hit the same target with more grenades. You typically combine it with randomized bounces coming from Hellcat Waistguard.
Both the radius gain and the damage bonuses are multiplicative, making it essentially a default choice for any build revolving around Grenades. The only bad part about it is the on-death mechanic: It knocks back most monsters far away, potentially even off-screen and destroys your prepared pull. Avoid dying at all costs when playing a build with this passive chosen.
Best use
Must-have for any Grenade build
If Grenade, Rapid Fire Bombardment or Cluster Arrow Cluster Bombs are your main damage source, use this passive!
Mechanics
20% extra Movement Speed, stacks additively with all other sources of MS.
Best use
Rather niche speedfarming passive
Use this only for the really low-end content, when you are absolutely sure you will not suffer time losses from lack of DPS. It's the last piece of the puzzle when adding more Movement Speed to your build.
Mechanics
Straight up increases your Life per Hit stat, and can be boosted by your item rolls.
Best use
Useful defense for semi-tanky builds
If you manage to acquire a lot of Life per Kill secondary rolls on your items, you really feel the impact of this passive, as you can restore large chunks of your total life pool in a single hit. Good to add for builds that don't risk dying to oneshots and want another bit of survivability.
Mechanics
Increases your Hatred gain per primary cast by a flat amount.
Best use
Generally weak offensive choice
There is almost no scenario where adding this passive would be better than any offensive passive.
Mechanics
It is applied by almost all sources of slow, for example including things like the Bane of the Trapped aura, Multishot Wind Chill or by simply hitting with the mentioned skills. It also works with every single Cold damage skill the Demon Hunter class has to offer, making it a solid choice and easy to apply whenever you use that element.
The effect produces a small visual cue above the enemy's head. Elite affixes that have a duration (e.g. Plagued, Orbiter) are usually snapshot from damage reduction mechanics such as Numbing Traps, so it needs to be applied before their cast.
This passive stacks multiplicatively with multiple Demon Hunters in a party.
Best use
Very strong defensive passive and support choice
If you need defense for your solo push, this is typically the go-to passive. And just in general, you can bring it for strong group utility even if your role is DPS, as it benefits everyone.
Mechanics
Adds the equivalent of 10% Resource Cost Reduction for Discipline skills. The bonuses to All Resistance and Armor are additive. Keep in mind that the passive's value diminishes by a good margin in case you are using Stone Gauntlets.
Best use
Typically mediocre defensive choice
There are better defensive passives, but for builds that also make use of the Discipline bonuses, it can be quite effective.
Mechanics
Adds 4% Crit Chance to your character every second until you reach 100%. You can watch your sheet DPS increase as a result. The bonus can never be lower than 4%, even when you are permanently in combat.
This bonus is not consumed when your Companions hit enemies, as long as you don't attack yourself.
Best use
Weak offensive choice
Usually the worst of the offensive passives, only used if you really want to squeeze out the last bit. Currently there are no real builds that benefit from the waiting mechanic, so it's just marginally better than a 4% Crit Chance buff in most situations.
Mechanics
Gives a hidden 25% Crit Chance buff that can bring you to 100% in combination with other effects. Usually worth around 20-30% DPS when active.
Best use
Extremely strong Rift Guardian Killer passive
If you ever find yourself in a RGK role, use this passive. It works well for a lot of bosses and gives you a big damage boost when it's active.
Mechanics
20% multiplicative damage boost when no enemies are nearby. The best way to learn the 10 yards radius is to equip 4 pieces of the Unhallowed Essence set and watch your buff bar as you approach enemies, as the bonus has the same distance requirement. Typically, almost anything just a bit outside of melee range is fine.
Best use
Strong offensive choice for ranged builds
Very useful passive, especially for farming builds that also include Zei's Stone of Vengeance.
Mechanics
Short burst of speed after using the mentioned skills. The 60% Movement Speed stacks additively with any other source of MS.
Best use
Top-tier utility passive
Use this for anything that resembles speedfarming, such as Torment rifts, Bounties, low GRs. Can even be useful in pushing scenarios, as the extra mobility helps you dodge or gather enemies.
Mechanics
The slow is applied after the enemy was hit, so your first attack will not be buffed by effects that require Crowd Control on the enemy. This works with any skill that spends Hatred (even if they otherwise wouldn't, e.g. Fan of Knives Knives Expert) or would usually spend Hatred despite not doing so due (e.g. Sin Seekers, Kridershot, Spines of Seething Hatred).
Best use
Used only as a combo
This passive naturally always goes along with Cull the Weak and Bane of the Trapped. On its own, the slow is rather useless, but it's an enabler for powerful damage buffs.
Skills
Primary Skills
Hungering Arrow
Entangling Shot
Bolas
Evasive Fire
Grenade
Most of the time, the main reason for using a Primary skill is to activate legendary effects such as Bastions of Will and Wraps of Clarity. In cases where no specific Primary is required for any other purpose, Evasive Fire Focus is the way to go due to its simplicity. There are also some generator DPS builds focusing on Hungering Arrow Devouring Arrow or Bolas Imminent Doom as their main source of damage, and support builds or variants including Entangling Shot for the Odyssey's End effect. Most other skills and runes see little use. Unlike other classes' Primary skills, all of these generate Hatred even when no enemy gets hit, so they can be used together with "Force Stand Still" to shoot into nowhere.
Hatred Spenders and Damage Skills
Impale
Rapid Fire
Chakram
Elemental Arrow
Fan of Knives
Multishot
Cluster Arrow
Chakram and Elemental Arrow are lacking legendary item support and while you can make a build around them, they will be very weak.
Multishot is both a great AoE damage ability and used by supports with Wind Chill.
Cluster Arrow allows massive nuke damage at a high resource cost.
Fan of Knives with Pinpoint Accuracy has a special playstyle that releases a single big explosion once every 32 seconds.
Impale and Rapid Fire each have their own distinct builds but usually revolve around standing still and tanking monsters.
Core Defensive and Mobility Skills
Demon Hunters fuel their defenses and utility with Discipline. Being resourceful with this valuable resource is crucial for efficiency and survival. To tap into this potential, almost every single Demon Hunter build in the game uses one out of these two:
- Smoke Screen
- Vault
Generally, channeling builds (Rapid Fire, Strafe) use Smoke Screen while most regular attack builds go with Vault. Staying mobile and dodging incoming attacks is how you play a Demon Hunter the right way. While Smoke Screen outright makes you invincible for its duration, Vault also provides a short immunity period during its animation, allowing skillful maneuvers to prevent incoming damage.
There is also one important way to recover Discipline besides the passive generation:
- Preparation (usually Focused Mind or Invigoration)
Including this ability into a build allows more uses of Discipline skills to enhance mobility and survivability. This way, both Resource Cost Reduction and Cooldown Reduction become valuable stats for many Demon Hunter builds to scale their usability. Another way to increase Discipline generation is Blood Vengeance.
Utility Skills and Buffs
The remaining skills on Demon Hunter are either buffs for yourself or party members, debuffs you can apply to your enemies or trigger various effects to deal damage.
- Companion is frequently included for resources (Bat Companion), defensive bonuses (Boar Companion) or a damage buff (Wolf Companion). When playing with Embodiment of the Marauder, you get them all and more!
- Shadow Power is used for its defensive (Gloom) or speed bonuses (Shadow Glide) or part of the core setup when playing with The Shadow's Mantle.
- Marked for Death Contagion or Valley of Death is typically used by supports.
- Caltrops don't have much of a purpose outside of very niche cases in the early game and rarely as a damage buff with Bait the Trap.
- Sentry is the centerpiece of any Embodiment of the Marauder-based setup. They are required to activate set bonuses and fire your Hatred Spenders. With Guardian Turret they also see use in Support DH builds.
- Strafe is most prominently used in GoD DH and Natalya FoK builds but doesn't deal significant damage by itself. Instead, it provides mobility, buffs and triggers set bonuses.
- Rain of Vengeance is used mainly to activate the Natalya's Vengeance set bonus. While it's possible to make DPS setups around it, they are generally very weak due to lacking legendary item support.
- Spike Trap is technically not a utility skill but has no reason to be included in any build due to lacking legendary item support. The only situation where it makes sense to deal damage with it is on the journey from 1 to 70 when no buffs to other skills are available.
Ultimate Ability
Demon Hunters have one prominent long cooldown self-buff ability that sees use in almost every single build:
- Vengeance
It provides crowd-control immunity, a 40% multiplicative damage increase and is usually combined with Dawn to achieve permanent uptime together with 37% Cooldown Reduction on a perfect affix roll. Two runes in particular stand out as the most common choices:
- Seethe - Adds 10 Hatred per Second
- Dark Heart - Adds 50% Damage Reduction
Other runes see little play but Side Cannons has a niche for being one of the most powerful life recovery effects in the game, especially for tanky builds such as Rapid Fire. From the Shadows can be used to immediately freeze enemies when engaging them.
Below are listed select few build-relevant skills with their mechanics explained in detail.
- This skill launches a big grenade in an arc that flies over enemies and drops an additional 4 grenades along its path 0-18 yards away. The big grenade lands 32 yards away.
- The initial shot deals damage exactly like the smaller grenades.
- An enemy can be hit by multiple grenades if they are large enough, resulting in big monster types taking disproportionately more damage compared to others.
- Applying Entangling Shot to an enemy also entangles nearby targets that weren't hit.
- The application works even when the main target is already part of the chain (adding one at a time, three with Chain Gang).
- The visual effect of the debuff is not always properly displayed, but the effects are active as long as you see it on some enemies.
- If the debuff runs out, it disappears and has to be reapplied on all targets again.
- With multiple Odyssey's End in the group: only different runes allow the effect to stack.
- Due to The Ninth Cirri Satchel this skill pierces up to 4 times, but is not guaranteed to do so when no enemies are in its path.
- The maximum travel distance is 120 yards total or 90 yards distance from the starting point.
- The arrow periodically turns around and seeks out a new nearby target.
- The Devouring Arrow rune adds a 70% damage increase stacking additively with itself that is multiplicative to the base damage (First hit = 100%, second hit = 170%, third hit = 240%, fourth hit = 310%, fifth hit = 380%).
- Devouring Arrow momentarily Chills the enemy hit with no duration, applying the Numbing Traps debuff. This Chill happens after the damage and does not activate Cull the Weak or Bane of the Trapped.
- Fires grenades dealing 181.6667% weapon damage each.
- Has a maximum range of 50 yards.
- Has an Attack Speed Coefficient of 3.0. The highest possible breakpoint (4 Frames Per Attack) is achieved at 4.0001 sheet APS.
- Attack Speed is snapshotted at the start of the channel. Meaning that if you make a large pull giving you a lot of Pain Enhancer stacks and then start a 4 FPA Rapid Fire, it continues firing 15 grenades per second even if you reach 100% progression and all mobs despawn.
- With Embodiment of the Marauder equipped, Sentries fire a Hatred Spender when you do. Sentry typically shoots towards the closest enemy within line of sight, regardless of the distance.
- Sentry Damage on your items and Sentry Damage from the (4) Bonus are both their own separate damage multiplier for Sentries and Hatred Spenders they shoot.
- Hatred Spenders fired by Sentries can proc Area Damage, but they cannot proc other effects such as Life on Hit or Hellcat Waistguard.
- Hatred Spenders fired by Sentries benefit from Pet Damage like Enforcer.
- The damage multiplier from Zei's Stone of Vengeance depends on the distance between the player and the monster at the moment of impact, the position of the Sentry is irrelevant.
- Life per Kill from Bottomless Potion of Mutilation can be snapshot during its effect, as long as you don't use Shadow Power again without it. This increases your healing overall and is very useful, especially for pushing.
- This snapshot lasts permanently with The Shadow's Mantle equipped (same as all other effects besides the Slow from Night Bane).
- Fires two piercing shots (lasers) every time you perform an attack.
- This effect has 0.9s/APS internal cooldown.
- Each laser heals you for 3% max HP per enemy hit.
- With high Attack Speed thanks to Pain Enhancer and each of your lasers hitting about 10 enemies, you can restore upwards of 200% max HP per second.
Summary
I hope you enjoyed this Demon Hunter class overview! Since the release of the game in May 2012 it has been by far my favorite and most played class. No one can confront hordes of demons in style like us! Its great mobility and flow of combat makes the class feel agile and super fun. With their easy to play, hard to master builds, the class is equally suited for beginners and veterans. (Just avoid anything with Rapid Fire if you want to enjoy yourself!)
Credits
Written by wudijo
Contributions by Northwar
Review by Northwar & Raxxanterax