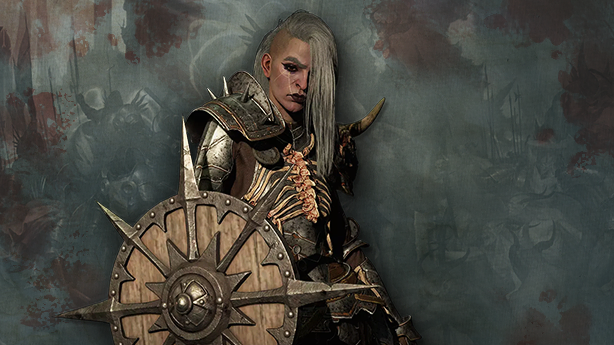
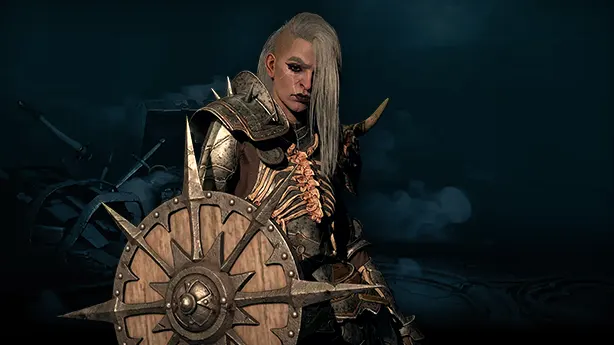
The Bone Spirit Necromancer has the strongest burst damage potential, in a single attack! Able to output over 1 Billion damage without BIS (Best in Slot) gear! Bone Spirit has the largest Skill damage multiplier native to any Skill in Diablo 4. When you prioritize reaching 100% Critical Strike Chance, the damage from a single Bone Spirit can one-shot most enemies in the game!
Since Bone Spirit deals its damage in a small radius around it on impact, the entire build is leveraged to pull everything together for one big KA-BOOM! Corpse Tendrils applying Vulnerable, Stunning and pulling everything to one location makes picking off entire groups of enemies, a breeze!
If you assemble Exodia in the form of Banished Lord's Talisman you can tap into Overpower to drastically increase your one shot potential. By respecing into powerful new multipliers, Maximum Life with Fortify and Uniques including Blood Moon Breeches, the automatic Overpower Critical Strikes damage gets truly ridiculous!
This build guide assumes you have a Level 50 Character and finished the Campaign. Level up with our Bone Spear Necromancer Leveling Guide. If you are looking for a different Necromancer play style, check out all of our Necromancer Guides.
Season 4 - Loot Reborn
Skill Tree & Gameplay
- Reap allows you to generate Corpses on demand and increase your Damage reduction when needed, on the Starter setup.
- Decrepify applies a powerful CC effect that also causes Lucky Hit procs to reduce Cooldowns on your Skills.
- Blood Mist is the cornerstone of the build. This gives you full Immunity, makes Corpses and increases your movement speed.
- Corpse Tendrils is an amazing CC tool and one your Vulnerable applicator.
- Bone Prison is your second on demand Vulnerable. It physically stops monsters from closing the gap and endangering you. It also applies Blight for a 1.2x multiplier when you add on Plunging Darkness.
- Bone Storm: Damage, Survivability and Critical Strike Chance. Just an amazing skill on any build.
- And when everything lines up: Bone Spirit to wipe every enemy off the screen!
- Ossified Essence is very straight forward. The more Essence you have when you cast Bone Spirit, the more damage it does!
- Memento Mori is important for increasing some of the biggest damage scalers you have available to, which are your Skeletal Sacrifices.
- Serration should have 3 Skill Points if you need the additional Critical Strike Chance to reach 100% consistently. Once you no longer need them, you can remove points to put elsewhere.
Necromancer Specialization - Book of the Dead
The Bone Spirit Necromancer has many options for sacrifices and what's best for your build depends on a few different circumstances:
- Skeletal Warriors - If you need Critical Strike Chance to reach 100%, use Skeletal Warriors - Skirmishers. OR Skeletal Warriors - Defenders to reach 70% Elemental resistance.
- Skeletal Mages - If you have less than 140 Maximum Essence, use Skeletal Mages - Shadow. If you have more than 140, use Skeletal Mages - Cold.
Learn more details and how to unlock this class specialization in our full Book of the Dead Guide.
Resource & Cooldown Management
Managing your Resources and Cooldowns is crucial to the success of the Bone Spirit Necromancer.
Reap
Reap is a fantastic tool for quickly generating Essence against large packs of enemies, since it triggers on every target inside its cleave. It performs much worse against single targets and should only be used as a last resort in those circumstances.
Essence per Second / Casting Macabre Skills Restores xx Primary Resource
These Affix and Temper options help to passively generate Essence so that the build continues to function without stopping or relying on manual Essence generation options. Using source of +xx% Resource Generation (e.g. Harlequin Crest) push these even further to effectively replace your entire Essence globe, everytime you cast Bone Spirit.
Resource Aspect of the Umbral
Each Crowd Control effect that you inflict upon enemies triggers this aspect. This means that you can stack multiple Crowd Control Effects in order to get incredible Essence generation. You need to find a 4 Resource version of it from a drop. Try to gamble rings at the Purveyor of Curiosities to get this item. Important effects that can trigger the Resource Aspect of the Umbral include:
- Corpse Tendrils Slow, Stun, Pull
- Decrepify Slow
Aspect of Torment
This Aspect helps to dramatically increase your passive Essence regen every time you cast Bone Spirit and Critically Strike. In addition to the skill's base Dreadful Bone Spirit modifier that adds another Essence regen rate, you quickly regain a large portion of the spent Essence. Both of these sources rely on the player reaching 100% Critical Strike Chance as soon as possible.
Abhorrent Decrepify
With Plunging Darkness applying Blight's DoT effect, Decrepify quickly lowers all active Cooldowns by one second and rewards aggressive gameplay. Get close to a group of CC'ed enemies so your Bone Storm has the most opportunities to trigger this proc.
Paragon Board
Carefully check your Paragon Boards to ensure correct board rotation. Glyphs go from a radius of 3 to 4 when they reach level 15!
Level the Paragon Board by scrolling. Each step optimizes progression.
Glyphs
We need to level up our Glyphs to increase their power and activate their Additional Bonus with surrounding nodes. Glyphs have a radius of 3 by default, this increases to 4 at Glyph level 15. Complete Nightmare Dungeons to obtain Glyph experience.
Note that there are some Glyph position swaps and a few adjustments to surrounding Paragon nodes once they reach level 15. The setup displayed by default is the final version of the build.
Glyph Leveling Priorities
Level 15
- Amplify
- Essence
- Sacrificial
- Corporeal
- Control
- Territorial
Level 21
- Essence
- Control
- Territorial
- Corporeal
- Sacrificial
- Amplify
Also check out our dedicated in-depth guides to learn more about Paragon Boards and Glyphs.
Endgame Progression & Variants
When you start diving into the Endgame Bone Spirit Necromancer build, you don't have all the tools available to achieve the final build versions. Let us guide you through different progression points to give you a smooth transition from our Leveling Guides to the final build version.
Progression Goals
Some of your Skill Tree choices depend on what Legendary Aspects and Unique items are available to you. These are listed in priority order:
- Unlock the following Aspects from Dungeons:
- Swelling Curse - Hive (Scosglen)
- Grasping Veins - Corrupted Grotto (Kehjistan)
- Torment - Black Asylum (Fractured Peaks)
- Umbral - Champion's Demise (Dry Steppes)
- Might - Dark Ravine (Dry Steppes)
- Disobedience - Halls of the Damned (Kehjistan)
- Edgemaster’s - Oldstones (Scosglen)
- Ghostwalker - Broken Bulwark (Scosglen)
- Plunging Darkness - Rimescar Cavern (Fractured Peaks)
- Find the following Legendary Aspects either as a random drop or by gambling with Obols:
- Serration - Gamble Focus
- Hardened Bones - Gamble Helm
- Shielding Storm - Gamble Helm
- Void - Gamble Helm
- Shattered Spirit's - Gamble Focus
- Slaughter - Gamble Boots
- Acquire the following Unique items either as a random drop or by farming specific Boss drops.
Note: You cannot gamble Unique items with obols!- Deathless Visage offers the highest damage helmet option before acquiring an Uber Unique. Only use this if your survivability is maxed out without a good defensive Helmet.
- Lidless Wall sacrifices Damage output for suvivability and potential speedfarming potential in easier content.
- Tibault's Will adds an additional damage multiplier for "free" since you are Unstoppable once you enter Blood Mist. Great for Speed Farming and Bossing. Also helps with Resource management.
- If you're lucky enough to obtain the following Uber Uniques, they're useful for the build.
- Harlequin Crest is easily the BIS helmet for Bone Spirit Necromancer. Replaces Aspect of Might.
- The Grandfather is an incredibly strong damage multiplier for the build that also adds on a good amount of survivability. Requires your build to have very high Critical Strike Chance without Aspect of Grasping Veins on a Two-Handed Weapon.
- Melted Heart of Selig offers an interesting alternative if you don't have a BIS Amulet currently. This is not typically recommended on the build since Amulet Tempers are so pivotal to the build's functionality.
Learn more details and how to farm Legendary Aspects and Uniques in our General Farming Guide.
Progression Steps
Follow the build's gearing progression from level 50 to 100, including the changes that need to be made as you obtain Legendary Aspects and Uniques.
to 100
& The Pit
Once you have completed the leveling process to 50, only the Codex of Power Aspects are guaranteed. With this setup, the Bone Spirit Necromancer can farm the Legendary Aspects and Unique items you need for the next progression point.
Gear
- The Codex of Power has many damage multipliers available to fill out your imprinted gear, while focusing on Essence Management and Crowd Control leads to the best success in the early game.
- Your primary concern is being able to generate Essence on demand to always be able to cast Bone Spirit on demand.
- This becomes significantly easier once you have Shattered Spirit's, but before that, Torment on an amulet grants a massive boost to your passive Essence generation.
- A Two-Handed weapon with Grasping Veins helps to bridge the gap to 100% Critical Strike Chance which is pivotal for the build to function properly.
Skills
- Acolyte's Reap allows you to initiate every fight with Corpse Tendrils to maximize the number of targets hit as well as trigger Grasping Veins.
- You don't have enough tools to benefit from the Blight + Bone Prison tech while leveling.
- Iron Maiden works as a great tool to regain Essence between casts of Bone Spirit.
In this setup, your Bone Spirit Necromancer has access to all Legendary Aspects, allowing you to pilot a much stronger version of this build. Additional Legendary Aspects are used to fill slots that may be replaced with Unique items later on.
Gear
- Progressing to this Gear and Skill setup still relies on Essence management Aspects. If you hit a tipping point were the Corpse Generation and Essence Gen is handled, you can swap Aspects over to benefit from more Damage and Cooldown Reduction.
- DON'T SWAP EARLY! A smooth gameplay experience is better than a clunky endgame setup without the right tools.
- Shielding Storm adds on much needed survivability, but if your build is lacking Armor needed to hit 9,230 then you should replace it with Juggernaut's until you have the right affixes on gear.
Skills
- At this point you should no longer require Iron Maiden for Essence generation and can swap over to the strictly stronger tool of Decrepify. If you find your gameplay experience becoming too clunky, swap back until you gear gets better.
In this setup, the Bone Spirit Necromancer has access to all Unique items and Legendary Aspects. This allows you to pilot this build at its peak efficiency. Let's take a look at the changes you need to make to implement them. This setup is also used for Speed farming which is efficient in, Helltide zones, Tree of Whispers, regular Dungeons, and lower tier Nightmare Dungeons.
Gear
- Now your build is fully online, with Essence management no longer being a concern. You can add on substantial damage as well as utility to bring your build to the next level.
- Bone Prison in this setup brings so much to the table, which is discussed in the Skills section, but the substantial Aspect investment is well worth the cost.
- Always recheck your total Critical Strike Chance with Grasping Veins and Bone Storm active so you're never overcapping this stat and wasting potential Damage/Survivability slots.
- Adding a Harlequin Crest replaces Void and adding The Grandfather replaces Plunging Darkness to make room for Hardened Bones and Serration, respectively.
Skills
Welcome to the Bone Prison break down:
- Bone Prison adds much needed Cooldown Reduction to the build to help with Bone Spirit and Bone Storm cooldowns.
- This recursively helps with Bone Prison CDR since spending Essence through Rapid Ossification then reduces all three Skill's CDR.
- Plunging Darkness not only gains you an on demand 1.2x multiplier, but also brings a DoT Lucky Hit proccing machine to help empower Abhorrent Decrepify, to speed up your Cooldowns even further.
- Since you have Blight AoE on the ground, Void makes your Bone Prison casts into an instantaneous Corpse Tendrils-like effect.
The Speedfarming setup for the Bone Spirit Necromancer assumes you're able to swap survivability for higher damage output, to increase the rate of farming lower difficulty content. Low tier Pit Runs for materials, Helltide for Boss summoning materials and all openworld content to name a few.
Gear
- Replace Royal Ruby with Royal Topaz in your armor for higher damage scaling from your Intelligence multiplier.
- Add a Movement Speed affix to your Amulet to hit the 200% total Movement Speed cap.
Skills
- If needed to reach the 200% total movement speed cap, you can remove points from Serration (as long as you still reach 100% Critical Strike Chance) and put them into Reaper's Pursuit which is triggered from Plunging Darkness.
The Bossing setup for the Bone Spirit Necromancer contains every change you should make to quickly farm the Uber Boss ladder as well as the Level 200 Tormented versions.
Gear
- This setup assumes you are ONLY clearing Bosses with this gear (Regular and Tormented Ladder Bosses)! This is because it employs Banished Lord's Talisman to tap into Overpower bonuses that your build normally cannot benefit from.
- If you want to just use the Endgame and The Pit setup to do your bossing, that's completely fine, but this setup has the potential to one shot most things in the game. Because of that, it's not engineered for normal open world and Pit running.
- Pay special attention to the changes in the Book of the Dead, Gems for Overpower, as well as the increase in Maximum Life rolls on gear.
Skills
- This setup assumes needs to generate Fortify to get the biggest benefit out of Overpower. The inclusion of Harlequin Crest allows you to remove points from Decrepify but keep it on your Skillbar.
- The three points from Decrepify are invested in Necrotic Carapace which is triggered from Corpse Generation on Blood Mist.
Paragon
Hardcore Adjustments
Hardcore requires you to build into more defenses. Here are some tips to successful in this game mode:
- Focus more on your Chest & Pants while gearing up. Make sure to have only defensive stats on these two slots as they provide a ton of survivability.
- Always reach Armor and Resistance cap and prioritzie Maximum Life instead of damage nodes on your Paragon Boards.
- Swap to a Shield with Juggernaut's to make space for more Intelligence and Maximum Life Affixes on your gear. Intelligence increases your Elemental Resistances up to the cap of 70%. Shields also have a unique Damage Reduction stat in the form of Block and can have the Damage Reduction affix roll.
Build Scaling & Stat Priorities
Learn about the important build scaling mechanics and stat weights.
- Essence: This build relies heavily on fast Essence generation as well as Maximum Essence to scale Bone Spirit's damage. We should always be close to full Resource when it comes back off cooldown.
- Critical Strike Chance: Bone Skills in general have high Chance to Critically Strike and the Skill Tree empowers this further with Serration. Stacking xx% Critical Strike Damage allows for massive damage dumps when successful. Prioritizing 100% Chance to Critically Strike is priority number one.
- Vulnerable: You get Vulnerable procs from the Corpse Tendrils and Bone Prison. While you don't target Vulnerable Damage specifically, it is not a bad Affix to have on your gear.
- Crowd Controls: Since all of our damage occurs in an area, pixel pulls and grouping of monsters becomes a direct damage scaler. This also allows us to benefit from every "Damage to CC'ed Enemies" affix in the game when Corpse Tendrils procs.
- Attack Speed: Increased Attack Speed increases the rate we generate Essence, by reducing the animation length on our generators. It decreases the length of time before Tendrils is on the field and how quickly Bone Spirit spawns from our Necro. While less important on this build, its efficiency gain adds up over time.
- Don't Get Hit: Make use of your range advantage and CC enemies from afar before re-engaging. By stutter stepping on the edge of your range, you can avoid most projectiles that come your way.
- Maximum Life: Life has become more important than ever with the reduction in options for Damage Reduction. In the overall equation of "Effective Life", scaling Life itself is the easiest option to avoid one-shots.
- Armor: The armor cap of 9,230 reduces incoming Physical Damage. Always make sure to reach this cap even if it means sacrificng a bit of Damage or Maximum Life.
- Unstoppable/Immune: Blood Mist provides both of these effects. Cooldown Reduction helps to "scale" this defensive mechanic by making it available more often.
- Damage Reduction: In all of its forms, this stat is important to stack after Armor. Since we maintain the "Close" distance most of the time, Damage Reduction from Close Targets is a very strong survivability stat on top of all other forms of Damage Reduction.
- Resistances: Prioritize reaching the 70% cap in World Tier 4 at a minimum for most content. Use Max Resistance effects from Elixirs and gear to reach 85% when farming certain bosses and endgame content.
Our Damage Explained article explains how to scale your Offense.
Learn all you need to know to scale Defense with our Defense Explained Article.
Stat Priorities
To enable your build to perform optimally, you need to reach certain Stat "Breakpoints". Some examples are reaching 100% to Critically Strike, or 20 Resource per second. Since there are many values of these stats on different pieces of gear, read the checklist below and refer to the recommended Tempered Affixes and Masterwork Crits ↑. Desirable Greater Affixes will always be the top three recommended Affixes.
Damage Scaling
- 100% Critically Strike Chance
- +4 to Macabre Skills, +4 to Core Skills, >4 Ranks to Bone Spirit
- >1000% Bone Spirit Damage
- >1,500 Intelligence
- >50% Bone Storm Duration (Bone Spirit Radius isn't valuable)
Defense and Utility
- >25,000 Maximum Life
- Armor Capped: 9,230
- Resistance Capped: 70%
- 100% Corpse Tendrils Size
- 100% Decrepify Size
- >50 Casting Macabre Skills Restores +xx Primary Resource
- ~10 Essence per Second (More While Leveling)
- 100% Bonus Movement Speed
- Helm: Void
- Maximum Resource ↑
- Cooldown Reduction ↑
- Intelligence ↑
- Maximum Life
- Essence per Second
- ⚒️Maximum Life
- ⚒️Decrepify/Corpse Tendrils Size
- Chest: Hardened Bones
- Maximum Life ↑
- +x to Macabre Skills ↑
- Intelligence ↑
- Armor
- Essence per Second
- ⚒️Maximum Life
- ⚒️Decrepify/Corpse Tendrils Size
- Gloves: Swelling Curse
- +x Ranks to Core Skills ↑
- Critical Strike Chance ↑
- Intelligence ↑
- Attack Speed
- Maximum Life
- ⚒️Bone Spirit Damage
- ⚒️Decrepify/Corpse Tendrils Size
- Pants: Shielding Storm
- Armor ↑
- Maximum Life
- Intelligence ↑
- Dodge Chance
- ⚒️Total Armor ↑
- ⚒️Decrepify/Corpse Tendrils Size
- Boots: Slaughter
- Movement Speed ↑
- +x to Bone Spirit ↑
- Essence Per Second ↑
- Intelligence
- Maximum Life
- ⚒️Movement Speed
- ⚒️Decrepify/Corpse Tendrils Size
- Amulet: Grasping Veins
- +x to Imperfectly Balanced ↑
- +x to Evulsion
- Maximum Resource ↑
- Cooldown Reduction
- Movement Speed
- ⚒️Casting Macabre Skills Restores +xx Primary Resource ↑
- ⚒️Bone Spirit Damage
- Ring 1: Shattered Spirit's
- Critical Strike Chance ↑
- Intelligence ↑
- Critical Strike Damage
- Maximum Life
- ⚒️Casting Macabre Skills Restores +xx Primary Resource ↑
- ⚒️Bone Spirit Damage
- Ring 2: Plunging Darkness
- Critical Strike Chance ↑
- Intelligence ↑
- Critical Strike Damage
- Maximum Life
- ⚒️Casting Macabre Skills Restores +xx Primary Resource ↑
- ⚒️Bone Spirit Damage
- Main Hand: Serration (Two-Handed Scythe)
- Intelligence ↑
- Attack Speed
- Maximum Life
- Critical Strike / Vulnerable Damage
- ⚒️Bone Storm Duration ↑
- ⚒️Bone Spirit Damage ↑
Put in the following Gems into your gear:
- Helmet / Body Armor / Pants: Royal Ruby
- Weapon / Off-Hand: Royal Sapphire
- Jewelry: Royal Diamond OR Royal Skull (Which ever is needed to hit either Cap)
This build benefits the most from the following consumables:
- Elixirs: UPDATE TO SEASON 4 ELIXIRS
- Incenses: Song of the Mountain, Reddamine Buzz & Chorus of War
FAQ & Mechanics
Once a guide is released, many players have questions on why and how we are approaching certain choices. In this section you can find the answers to the questions that have been asked the most.
Abhorrent Decrepify
Blood Artisan's Cuirass
Video Guide
Summary
The Bone Spirit Necromancer is the true height of damage potential from the class. The tons of Crowd Control, survivability and MASSIVE nuke damage make for explosive finale fights against enemies! You cast Bone Spirit and they go boom. It's wonderfully satisfying every time it happens!
- The playstyle is very "all-in". We know we need to Crit to win and when that doesn't happen, you may struggle. Prioritize the affixes you need to reach 100% Critical Strike Chance above all else.
- Practice makes perfect! Don't be afraid to run slightly easier content of Nightmare Dungeons to get the flow of the gameplay loop.
- In bocca al lupo!
Credits
Written by MacroBioBoi
Reviewed by Chronikz