Ivory Tower Gate 2
Introduction
Ivory Tower is the new Abyssal Dungeon introduced in Voldis. It acts as a Legion Raid clear so you can replace it with an existing raid for 3/3. You can drop in and out of the gates just like Legion Raids. Learn how to get past the Sages who are guarding your rewards! Rewards include the all powerful elixirs to help boost your powers and more!
Enemy Information
| Normal Mode | Hard Mode | Monster Type | Weakness |
| 1600 Item Level | 1610 Item Level | Beast | None |
- HP Potion of your choice
- Traps
- Destruction Bomb (Bound)
- Atropine Potion or Marching Flag
Rewards
| Gold | Material | Box Material | Box Cost | Auction Material | |
| Normal | |||||
| Gate 1 | 1500 | 2x | 2x | 500 | |
| Gate 2 | 2000 | 2x | 2x | 550 | |
| Gate 3 | 3000 | 4x 1x | 4x 1x | 900 | 1x |
| Total | 6500 | ||||
| Hard | |||||
| Gate 1 | 3000 | 4x | 4x | 750 | |
| Gate 2 | 4000 | 4x | 4x | 900 | |
| Gate 3 | 6000 | 8x 2x | 8x 2x | 1,350 | 2x |
| Total | 13000 | ||||
Learn about Voldis Abyssal Raid Gate: 1 / 3
Cheatsheets
Before Raid
Traps
PICK UP BATTLE ITEM
To understand this sequence, please read the detailed explanations first!
PreMechs
Standard Party
Trap @ raid start
Stagger Check x3 (fail)
Counter/Stagger
Trap
Stagger x2
Trap
Destruction
PreMechs
Strong Party

Trap @ raid start
Stagger Check x2
Trap
Destruction
x95
Clones
Support Center
3x+1 Clock Positions and Adjust
Counters/Kill
x30
Marathon/Stagger

Gather Center
Go Opposite of Boss
Wait for Flame Breath
Run to Boss/Stagger
Final Phase
Traps at Start
Destruction
Kill
Before Raid
Traps
PICK UP BATTLE ITEM
To understand this sequence, please read the detailed explanations below first!
PreMechs
Normal Damage
Trap @ raid start
Stagger Check x3 (fail)
Counter/Stagger
Trap
Stagger x2
Trap
Destruction
(Repeat after x95 mech)
PreMechs
High Damage
Trap @ raid start
Stagger Check x2
Trap
Destruction
(Repeat after x95 mech)
x95
Clone
Go to the Clone
Counter it
x30
Marathon/Stagger

Go to Center
Go Opposite of Boss
Wait for Flame Breath
Run to Boss
Stagger
Final Phase
Traps at Start
Stagger Check x2
Trap
Destruction
Main Mechanics
Main mechanics occur at certain HP intervals or Phases.
Description
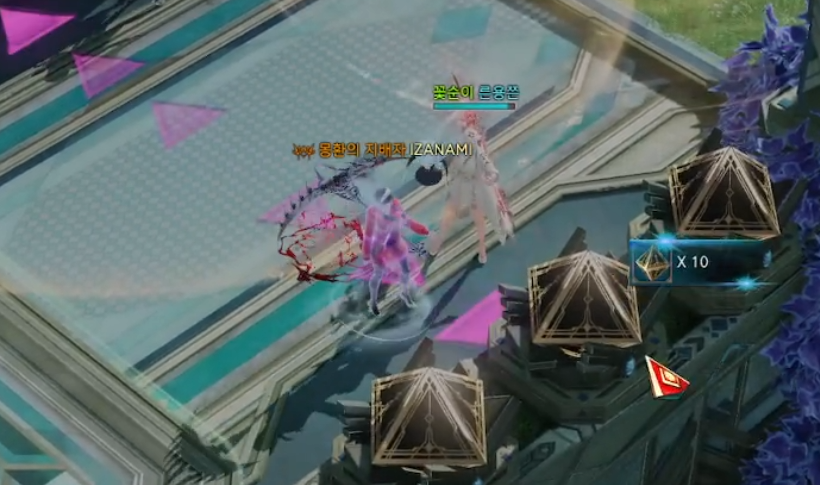
- Before the ready zone, there will be a new battle item you can pick up for this gate only.
- This item will be important in getting past the mechanics for this boss.
What To Do
- The best time to throw the traps is either at the start of the raid or after a stagger check.
- Boss will also perform backjumps when nearby traps. Another player can prepare by throwing another trap where he lands.
- Boss will generally perform a counter/stagger pattern ~9:30, 8:30, 7:00, 5:30. So you can save your traps then.
Description
- Boss will randomly mark a player with 2 red eyes. That player will take boss aggro.
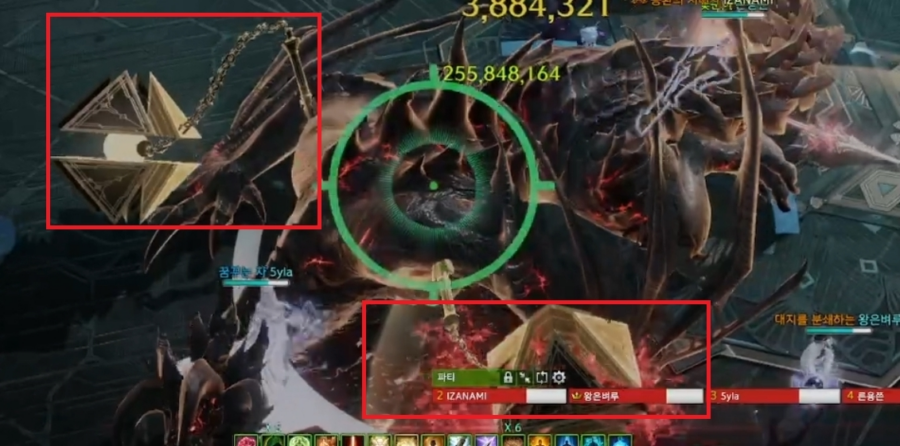
Description
- Over time, the boss will gain "Armor Parts" that stack up to 5 different icons.
- If the boss reaches 5 armor, the raid will wipe.
- After Destruction, Boss will be immune to Traps for ~40 seconds.
What To Do
- It will take 2 traps to get to his Destruction phase where you can break off his Armor.
- Generally you want to destroy the Armor when the boss is around 3-4 stacks.


Description
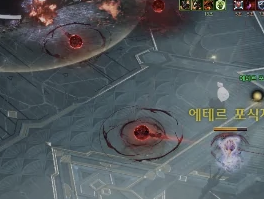
- Around ~155x, blood orbs will spawn around the boss.
- Picking up these blood orbs will grant massive buffs for 15 sec (CDR, Regen, Speed).
- Getting hit during this buff will cause you to bleed to 10% HP and drop red orbs.
- Do not pot before your HP reaches 10% or you will keep bleeding till 10%.
- Pick up orbs after reaching 10% or use HP pots.
- Not picking up orbs will heal the boss when it touches. They will also blow up periodically if not taken.
What To Do
- Optimize Blood Orb buff with optimal skill build/armor set.
- Nightmare set effect will be hard to achieve Boundless or Salvation set in general.

Goal
- Keep Boss Armor Stacks in Check.
- Generally, you will need to remove armor when at 3-4 stacks.
- Destruction Phase needs 2 traps on the boss (you will notice his arms being trapped)
- You can also use 2 traps at once to go right into the Destruction Phase.
- 5 stacks of "Armor" = Raid Wipe, so keep it checked.
- You want to prolong the initial trap on the boss to make his patterns a lot safer/predictable.
- When trapped, the side with the trap is the safe spot for most attacks.
- More stagger DPS uptime when the boss is trapped.
Optimal Times to Use Traps
- The beginning of the raid right after roar.
- After stagger checks.
- NOTE: It's important to toss the trap right after the stagger happens.
- Tossing it early will cause the trap to be destroyed from his red AoE roar.
- Tossing it late will cause him to do a backflip, avoiding the trap.
- NOTE: It's important to toss the trap right after the stagger happens.
- After counter checks (every ~1.5mins)
Description
- After landing a trap, the boss will periodically perform stagger checks.
- Each stagger check will get harder.
- Generally, by the 3rd stagger, you will fail it, and a scripted event will happen:
- He will do a fire AoE around him, avoid it.
- Boss will also perform a Counter Pattern every ~1.5min into the fight, that's when the party will usually throw another trap.
- NOTE: if your party is strong (Boss HP ~110HP after 2nd stagger) throw a trap to go right into Destruction Phase. You can even do it after the first stagger if stronger.


What To Do
- One player will throw a trap on the boss right after the roar at the start of the fight.
- If you do it too early or too late, the trap will be ineffective and the boss will either remove it or jump away.
- If you miss the trap at the start, throw another one after he backsteps and lands. (The party should assign who throws and who backup throws).
- Follow the rotation guidelines above depending on your party DPS.
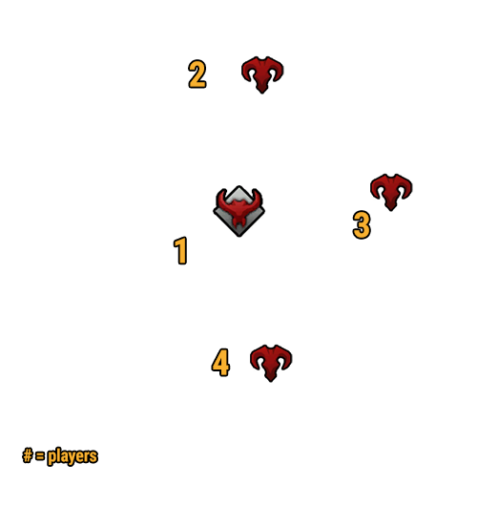
Description
- Boss jumps to the center and rotates.
- Player closest to the center will get Double Eyes.
- 3 other clones will spawn at different clock positions around the boss.
What To Do
- Support player will usually take aggro with center position.
- This player will simply rotate around the boss and avoid aggroing the boss on other players.
- Other players will go to assigned clock positions and will either have to counter or receive Single Eye debuff.
- 3x+1 (aside from support center) and adjust.
- Counter Players: Counter clone and go to Single Eye player and help kill clone.
- Single Eye Player: Do not attack, rotate clone around and do not get spotted. Being spotted = raid wipe.
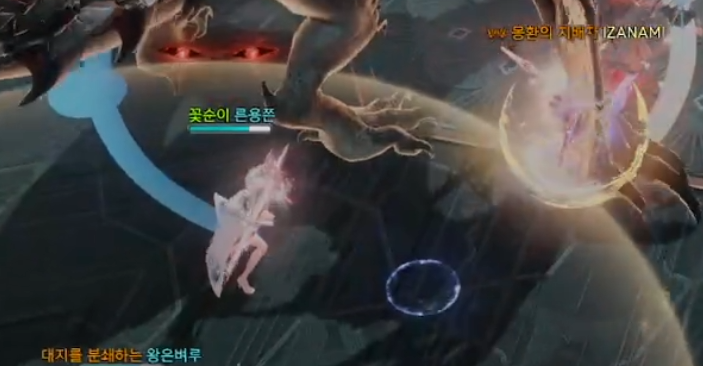
Description
- Boss runs to the edge of the map and climbs a tower.
- Boss will then land on a side of the map and AoEs.
- Players will need to get to the boss after the AoE ends and Stagger check.
What To Do
- Players will need to group up in the middle of the map to avoid AoE.
- After he lands, move to the opposite side to avoid the AoE.
- The boss will lock battle items after he lands, so supports can use Marching Flag here.
- The boss will breathe fire one last time as red orbs come towards you.
- Avoid the fire breathe before moving forward.
- Dodge the red orbs as you make your way towards the boss. Getting hit will CC you and take massive damage.
- After the Stagger check, dodge the AoEs around him.
Description
- Boss will set outer map on fire.
- Boss will continue to charge until you Destruction phase him.
What To Do
- As soon as your battle items are unlocked, throw your traps in the center of map.
- The player with Double Eyes will need to guide the boss into traps.
- If you only connect with one trap, it will proceed with a Stagger check. Throw another trap right after the Stagger check to get into the Destruction phase.
- From here on, the boss will do more damage and your goal will be to kill it.
Notable Patterns
Telegraph
- Boss will kick behind and slam tail, creating AoEs around it.
What To Do
- Go out or stay near his trapped leg side/head.
Telegraph
- Boss readies it's tail and swipes in an arc.
What To Do
- Go out, stay near trapped leg, or use your dash across the boss's body.
Telegraph
- Flames the front.
What To Do
- Stay behind.
Telegraph
- Boss breathes fire into the ground and creates AoE and tremors that follow you.
What To Do
- Dodge
Telegraph
- Boss will pound the ground, generating cross AoEs. This can also happen up to 3 times.
What To Do
- Dodge
Telegraph
- Boss will fly and perform AoEs
What To Do
- Dodge
Telegraph
- Boss charges and performs AoE at end.
What To Do
- Stay backside/away.
Telegraph
- Boss bites in front, dealing massive damage.
What To Do
- Stay away from his front.
Telegraph
- Boss charges forward and swipes behind.
What To Do
- Stay away
Telegraph
- Boss backsteps and creates flame tremors following players.
What To Do
- Dodge
Telegraph
- Boss slams hand into ground and creates tremors that follow players.
What To Do
- Dodge AoEs and bring tremors out.
Telegraph
- Boss sticks tail into ground, creating AoEs.
What To Do
- Dodge
Telegraph
- Boss can roar and spawn orbs that target players.
What To Do
- Dodge, run around orbs.
Telegraph
- Boss will slam and spawn tremors that follow players.
What To Do
- Step over tremors and get out, if left too long, it will perform a shotgun pattern at end.
Solo Mode Main Mechanics
Description
- Pick up traps before starting the battle and move it to your combat item slot.
- The best time to throw the traps is either at the start of the raid or after a successful stagger check.
- NOTE: It's important to toss the trap right after the stagger happens.
- Tossing it early will cause the trap to be destroyed from his red AoE roar.
- Tossing it late will cause him to do a backflip, avoiding the trap.
- NOTE: It's important to toss the trap right after the stagger happens.
- Boss will generally perform a counter/stagger pattern ~9:30, 8:30, 7:00, 5:30. So you can save your traps then.
Description
- Over time, the boss will gain "Armor Parts" that stack up to 5 different icons.
- If the boss reaches 5 armor, the raid will wipe.
- After Destruction, Boss will be immune to Traps for ~40 seconds.
- It will take 2 traps to get to his Destruction phase where you can break off his Armor.
- Use Destruction Bomb (Bound) and skills with Weak Point affix to succeed the destruction check.
- Generally you want to destroy the Armor when the boss is around 3-4 stacks.
Description
- Around ~155x, blood orbs will spawn around the boss.
- Picking up these blood orbs will grant massive buffs for 15 sec (CDR, Regen, Speed).
- Getting hit during this buff will cause you to bleed to 10% HP and drop red orbs.
- Do not pot before your HP reaches 10% or you will keep bleeding till 10%.
- Pick up orbs after reaching 10% or use HP pots.
- Not picking up orbs will heal the boss when it touches. They will also blow up periodically if not taken.
Description
- After landing a trap, the boss will periodically perform stagger checks.
- Each stagger check will get harder.
- Generally, by the 3rd stagger, you will fail it, and a scripted event will happen:
- He will do a fire AoE around him, avoid it.
- Boss will also perform a Counter Pattern every ~1.5min into the fight, that's when the party will usually throw another trap.
- NOTE: if your damage is high (Boss HP ~110HP after 2nd stagger) throw a trap to go right into Destruction Phase. You can even do it after the first stagger if stronger.
Example
What To Do
- Go to the clone.
- Go to its front and use a counter skill.
What To Do
- Go to center.
- After he lands, move to the opposite side to avoid the AoE.
- Wait to avoid fire breath.
- Move towards boss, while dodging red orbs.
- After the Stagger check, dodge the AoEs around him while moving towards the center
What To Do
- Move to center and throw a trap on top of you as soon as it gets unlocked.
- Dodge away as soon as the boss moves/jumps towards you.
- If you fail to trap the boss, repeat step 1 & 2 once the boss moves goes to the edge of the arena.
- Throw another trap right after the 2nd Stagger check to get into the Destruction phase.
- From here on, the boss will do more damage and your goal will be to kill it.
Credits
Written by Starlast
Videos by Saintone