Alchemist Potions & Elixirs
Last Updated:April 24, 2025|Changelog
The Alchemist allows you to create Potions, Elixirs, Incenses, and Crafting Materials for your character. Whether it's empowering your Healing Potion to help top off your Life pool, or crafting a powerful Elixir to increase your Attack Speed and Experience gain, the Alchemist is your one-stop shop for min-maxing your potential with consumables.
Finding the Alchemist
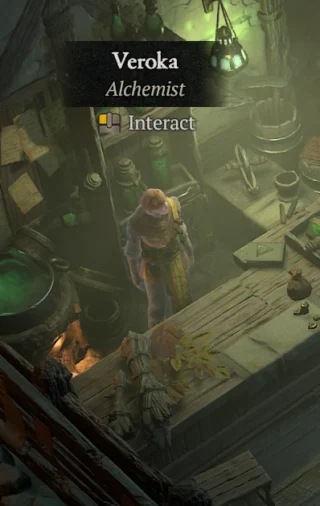
When your character reaches Level 10, you receive a Priority Quest objective to go and see the Alchemist in Kyovashad. Here you are given the task of upgrading your base Weak Healing Potion to a Tiny Healing Potion! At the low cost of 10 Bundled Herbs, your Healing Vial increases its efficiency by 6 additional Life.
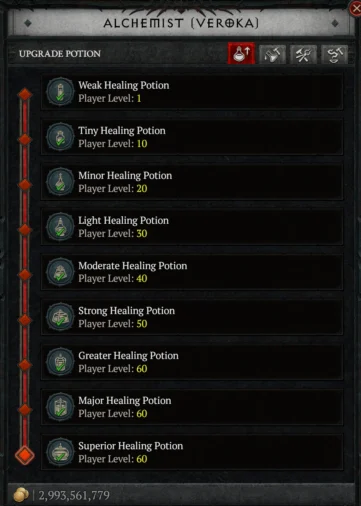
From here you can see the level progression and materials required to further upgrade your Potion, and the other options the Alchemist has available. Once you have the Alchemist fully unlocked you can see the different consumables that can be crafted, including Elixirs and Incense. These two crafting options unlock at level 10 and level 50 respectively.
Upgrade Potion
As your character's level increases, you are able to increase the base Life granted on use by your Healing Potion. The cost to do so includes Gold as well as Resources found by picking flowers and completing side-quests. The cost and resource intensity are fairly linear all the way to Character Level 60.
Upgrading the Healing Potion is an effective way to recover your Life at lower levels. However, when you reach the endgame in Diablo 4, the flat life you recover from the potion can be lacking compared to the health pool certain builds have when optimized. At that point, consider finding additional sources of recovery to sustain your life together with a fully upgraded potion.
| Recipe | Resource Cost | Upgraded Effect |
| Tiny Healing Potion Player Level: 10 | Bundled Herbs x10 5,000 Gold | Heals 6 Life Instantly and 35% Life over 3 seconds. |
| Minor Healing Potion Player Level: 20 | Bundled Herbs x30 10,000 Gold | Heals 12 Life Instantly and 35% Life over 3 seconds. |
| Light Healing Potion Player Level: 30 | Bundled Herbs x50 Angelbreath x10 50,000 Gold | Heals 24 Life Instantly and 35% Life over 3 seconds. |
| Moderate Healing Potion Player Level: 40 | Bundled Herbs x80 Angelbreath x20 150,000 Gold | Heals 48 Life Instantly and 35% Life over 3 seconds. |
| Strong Healing Potion Player Level: 50 | Bundled Herbs x130 Angelbreath x50 500,000 Gold | Heals 96 Life Instantly and 35% Life over 3 seconds. |
| Greater Healing Potion Player Level: 60 | Bundled Herbs x200 Angelbreath x80 1,000,000 Gold | Heals 200 Life Instantly and 35% Life over 3 seconds. |
| Major Healing Potion Player Level: 60 | Bundled Herbs x300 Angelbreath x90 3,000,000 Gold | Heals 400 Life Instantly and 35% Life over 3 seconds. |
| Superior Healing Potion Player Level: 60 | Bundled Herbs x500 Angelbreath x100 5,000,000 Gold | Heals 800 Life Instantly and 35% Life over 3 seconds. |
Craft Elixirs
Elixirs are consumable items that give your Character specific buffs for a 30-minute duration. These can include different Resistances to increasing your Attack Speed. Common Elixir increases your Experience gain by 5% for the entire duration, while Magic Elixirs increase your experience gain by 8%. Keeping a steady supply of Elixirs in your "Consumables" tab is a surefire way to blast through the leveling progression and min-max your Character for difficult content. You may only have one Elixir active at a time and they don't expire on Character death.
| Elixir | Basic Details |
| Elixir of Cold Resistance Elixir of Cold Resistance II | Cold Resist, Experience Gain. |
| Elixir of Fire Resistance Elixir of Fire Resistance II | Fire Resist, Experience Gain. |
| Elixir of Lightning Resistance Elixir of Lightning Resistance II | Lightning Resist, Experience Gain. |
| Elixir of Poison Resistance Elixir of Poison Resistance II | Poison Resist, Experience Gain. |
| Elixir of Shadow Resistance Elixir of Shadow Resistance II | Shadow Resist, Experience Gain. |
| Elixir of Iron Barbs Elixir of Iron Barbs II | Armor, Thorns, Experience Gain. |
| Elixir of Fortitude Elixir of Fortitude II | Maximum Health, Experience Gain. |
| Elixir of Resourcefulness Elixir of Resourcefulness II | Maximum Resource and Resource Cost Reduction, Experience Gain. |
| Elixir of Destruction Elixir of Destruction II | Overpower and Vulnerable Damage, Experience Gain. |
| Elixir of Advantage Elixir of Advantage II | Attack Speed and Lucky Hit Chance, Experience Gain. |
| Elixir of Precision Elixir of Precision II | Critical Strike Chance + Damage, Experience Gain. |
Transmutation
The Alchemist allows you to take some of the hard fought over resources you have found and transmute them into others or items alike. This is a great boon to the player as you may have one of a particular material and can essentially convert it to your needs. Study what can be done to help you be as efficient as possible while playing.
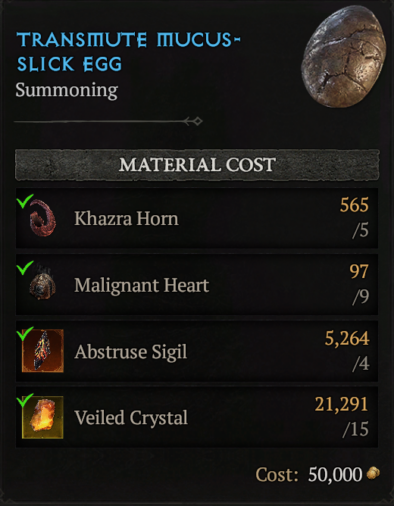
Summoning Item
You can now use a new item called Khazra Horn to skip the process of killing a boss that you do not need loot from to get the summoning materials needed to summon Duriel or Andariel. Normally, a boss requires 12 summoning materials to challenge, but Varshan is an outlier that costs 4 to summon.
In other words, Mucus-Slick Egg is inefficient to transmute this way as it requires more than double the materials to skip killing him compared to the material you get from the transmute. Meanwhile, the other material is more efficient to transmute if you do not need loot from them as it costs more to summon the boss than it does to transmute the materials.
Craft Incense
Incense applies a buff to all players within a decent-sized range around the user for 20 minutes. Players can only benefit from one of each buff at any given time. Incense grants an experience buff and persists through death. You can only use one Incense of each type (Defensive, Resistance, Core Stat) at a time.
Core Stat Incenses:
- Ancient Times
- Blessed Guide
- Sage's Whisper
- Spiral Morning
- Queen's Supreme
Defensive Incenses:
- Reddamine Buzz
- Scents of the Desert Afternoon
- Spirit Dance
- Song of the Mountain
Resistance Incenses:
- Desert Escape
- Storm of the Wilds
- Soothing Spices
Video
Summary
- The Alchemist can empower your Healing Potion, brew powerful Elixirs to boost your Stats and Experience gain, and transmute your Resources into others for a small cost.
- Your Healing Potion can be upgraded at major level milestones up to Level 60! Make sure to keep the necessary resources on hand when you hit these milestones to always have the strongest Potion on your belt!
- Transmutation lets you swap your resources on the fly! Allow your hoarding mindset to take over...you may need to convert those resources later!
- Incense allows you to provide a buff to all players around you, or your team members while in a dungeon. You can only benefit from one of each type of Incense at a given time.
Credits
Maintained by Avarilyn
Written by Macrobioboi