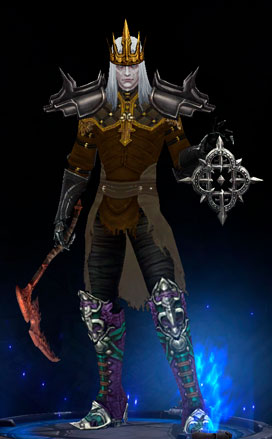
Necromancer Class Overview
Last Updated:April 2, 2024|Changelog
Introduction
Necromancers are ruthless commanders, and masters of life and death. These dark spellcasters reanimate the dead as skeletal remains, curse their enemies with deadly magics, and further torment them with the carcasses of their defeated fellows. Actual necromancer builds fulfill this fantasy fairly well but there's two important things to point out:
- They are not very reliant on their pets and summons. Only one necromancer build uses pets as a main source of damage and those pets are very short-lived, which makes them not too different from a regular damage spell. If you want to just summon an army and watch them do all the dirty work, Witch Doctor is much better at that than Necromancer.
- Many Necromancer pushing builds rely on Land of the Dead - a skill with a very long cooldown. This results in a gameplay loop where you are extremely powerful during the 10 seconds while Land is active, and then almost completely useless during the next 20 to 60 seconds while Land is on cooldown.
Lore
The Priests of Rathma—also known as Necromancers—live and die by a simple philosophy: that the eternal struggle between light and darkness is never-ending, and that Sanctuary is threatened by both sides of that war. Only by preserving the balance and keeping those opposing forces at bay, one can hope to make the world a better place.
Members of this order are unique , and often reviled for their use of death magic. Though such power is often abused in Sanctuary, the Priests of Rathma strive to use it to preserve the Balance they hold sacred.
When they venture out from their home deep within the jungles of Kehjistan, roving Priests of Rathma do whatever it takes to safeguard their world from ruin.
Read the full story of the Necromancer here
Resources
Maximum Essence: 200
- +50 from Paragon points
- +40 from secondary rolls on gear
- +40 from Overwhelming Essence
- +18 from Stone of Jordan
- +100% from Simulacrum Reservoir
Passive Regeneration: none
Active Generation:
- 24 per attack with Bone Spikes
- 15 per tick with Siphon Blood
- 12 per enemy hit with Grim Scythe
- 10 per corpse consumed with Devour
- +1 from Devouring Aura
Additional Essence sources:
- Requiem Cereplate
- Reilena's Shadowhook
- Dark Reaping
- Frailty Harvest Essence
- Inspire
Necromancers use Essence to cast their most powerful skills. Essence doesn't regenerate or decay by itself, Necromancers must harvest it from their enemies.
On top of Essence some of the Necromancer skills cost a portion of their health. These health costs are static and can be reduced by neither damage reduction nor resource cost reduction. Only Blood for Blood and Simulacrum Blood Debt can modify these costs.
Some pushing builds use Grim Scythe to instantly refill the Essence globe by hitting a large number of enemies, while speedfarming builds usually go with Devour (sometimes together with Land of the Dead) to regain Essence without needing to stop.
Equipment
Necromancers can use all non class-specific weapons: two-handed and one handed, melee and ranged. Although two-handed weapons are almost never used due to the lost stat rolls from the off-hand item. They can also equip a shield in their off-hand but in most cases a Phylactery takes its place.
Phylacteries
Necromancer exclusive Off-Hands are Phylacteries. They come with a big chunk of damage (up to 485-600) as an extra primary stat. They can also roll some class-specific stats:
- Primary rolls
- +10-15% Damage to any Necromancer Skill
- Secondary rolls
- +18-20 Maximum Essence
Scythes

Necromancer's unique weapons are Scythes. They come in one-handed or two-handed form and have the same base attack speed (1.3 APS for 1h and 1.1 APS for 2h) and animations as Axes. The only different stat they can roll is Maximum Essence secondary (18-20 on 1h, 36-40 on 2h). Both types of Scythes can activate Dark Reaping passive.
*all the values given are for ancient legendary items
Sets and Builds
Bones of Rathma
- (2) Bonus makes Revive minions count as permanent. Combined with Command Skeletons you have 17 minions that can reset Army of the Dead within seconds.
- (4) Bonus provides up to 75% damage reduction.
- (6) Bonus is a damage multiplier for Army of the Dead. Using the two aforementioned skills provides a total bonus of
17 * 500 = 8,500%. Adding Command Golem on top of that, increases the bonus to 9,000% (a 5.8% relative increase).
Bones of Rathma set was reworked in season 23 patch and became a dedicated Army of the Dead set instead of a pet set. While you are still forced to include multiple pet skills into your build, these pets deal no damage and are only here to activate the set bonuses.
This build uses Army of the Dead as its main damage skill. Despite it having a 2 minute cooldown you can spam it all over the place thanks to the (2) Bonus. The skill is excellent at dealing AoE damage and the combination of Fate's Vow and Bonds of C'Lena also make it incredible at killing isolated enemies. The build is quite good for both farming and pushing but it can be very squishy.
Pestilence Master's Shroud
- (2) Bonus fires a Corpse Lance with your equipped rune each time you consume a corpse. Corpse Lances fired by the (2) Bonus have the same proc coefficient as the base skill and can apply all kinds of on-hit effects, including Iceblink, Knockback on Hit or Gogok of Swiftness. These automatic lances consume The Johnstone stacks.
- With Land of the Dead active (or enough natural corpses around), Devour can consume 20 corpses per second. Since Devour doesn't have an animation, you can also cast Corpse Lance (or Corpse Explosion) at the same time for another 10-12 (depending on your Attack Speed) corpses consumed each second. In total this amounts to over 400 Corpse Lances fired during a single Land of the Dead. Since The Johnstone can only buff 50 of them, its overall damage bonus is diminished by the factor of 8, making Squirt's Necklace a better choice for Pestilence builds.
- (6) Bonus grants a 6,000% separate damage multiplier to Bone Spear, Corpse Explosion and Corpse Lance, however the former is extremely clunky and outclassed by Masquerade of the Burning Carnival.
Pestilence Master's Shroud buffs three different skills, but since the (2) Bonus fires exorbitant amounts of Corpse Lances for free, you must stack Corpse Lance multipliers to take advantage of that.
This build is completely reliant on Land of the Dead to spam Devour and Corpse Lance. This means you have to deal with lengthy downtimes while pushing. It's also pretty weak and squishy, but it can be very good at speedfarming low difficulty content where just your autocast Corpse Lances are strong enough to kill everything.
Trag'Oul's Avatar
- (2) Bonus grants Blood Rush every rune. Choosing any rune or no rune has no effect.
- (4) Bonus lets you stack a bonus granting you up to 300% Maximum Life, as a separate multiplier to Life %.
- (6) Bonus provides 10,000% increased damage (x101) to Life-spending abilities and doubles your healing from skills.
Tragoul's Avatar works with almost all Necromancer skills but forces you to use a specific rune on them. For nearly every Necro build out there you can also make a Trag'Oul version of it.
With Season 27 patch this build has suddenly risen to the very top thanks to Iron Rose and Funerary Pick buffs. Fairly simple and very powerful build, it excels at destroying large hordes of monsters and can be used as a Trash Killer in 4-man groups.
Grace of Inarius
- (2) Bonus is effectively useless for any endgame build.
- (4) Bonus increases the damage reduction of Bone Armor from 3% to 6% per stack with a maximum of 10 stacks (75% toughness increase with a total of 60% damage reduction).
- When combined with Wisdom of Kalan this bonus can be increased to
15 * 6 = 90%damage reduction (x4 toughness over not having the item). - (6) Bonus activates a Bone Storm around the player while Bone Armor is active. While its own damage is meaningless, it massively boosts the damage done to enemies hit for 3 seconds. This also applies to damage done by Pets and Simulacrum.

Grace of Inarius provides a generic damage buff, meaning you can make an Inarius build based on almost any skill. But since the (6) Bonus forces you to go melee, the best Inarius builds focus on melee skills such as Corpse Explosion or Grim Scythe.
With Season 28 patch this build is surprisingly just about as good as the other variations of Death Nova. If you wish to push the Inarius Leaderboard this is the strongest build the set has and it will compete with other Death Nova builds for the top necromancer spot..
Masquerade of the Burning Carnival
- (2) Bonus grants the following runes for Simulacrum:
- Cursed Form
- Reservoir
- Self Sacrifice
- Blood Debt
- Blood and Bone
- Furthermore, they become invincible unless you take a hit that would kill you otherwise. If that happens, you will become extremely squishy due to the toughness loss granted by the (4) Bonus, so (re)activating them as fast as possible is crucial.
- (4) Bonus grants you 50% damage reduction while also splitting all damage taken with Simulacrums, which sums up to an incredible total of 83.33% damage reduction (x6 toughness).
- (6) Bonus is a 5,500% separate damage multiplier for Bone Spear but with a twist: almost all of the damage done (~91%) comes from your Simulacrum due to the build's reliance on Gelmindor's Marrow Guards, so focusing on their positioning is the key to success.

Masquerade of the Burning Carnival only buffs Bone Spear so only one build for this set exists.
Masquerade Bone Spear - Beginner friendly
This build uses Maltorius' Petrified Spike, Scythe of the Cycle and Gelmindor's Marrow Guards to greatly buff the damage Bone Spears cast by your Simulacrums. This build is decent at both pushing and farming, but you need to be careful with positioning of your Simulacrums to make sure they don't shoot into walls.
Legacy of Dreams/Legacy of Nightmares
For skills which don't have a dedicated Set, there's always an option of making a build around the Legacy of Dreams gem or Legacy of Nightmares set, which provide a 97.5x damage multiplier at 13 Ancient items. Since most Necro sets are quite weak, the LoD versions of the builds are usually better.
LoD Skeletal Mage build is the heart and soul of Rat Runs, which tend to sit on the top of XP META season after season. LoD Grim Scythe is a decently strong Trash Killer, and finally, LoD Corpse Explosion is the strongest solo Necro build.
Support
Support Necromancer can be fairly useful to the party, giving curses, crit chance bonus from Brittle Touch and some damage and toughness buffs. It also has a unique ability to freeze everything on the screen and spawn lots of health globes which make it an irreplaceable part of Rat Runs. Most other teams don't use zNec because zDH and zBarb are generally better but it's sometimes included in triple support teams.
This build is completely reliant on Land of the Dead to spam Corpse Explosion. This means you have to deal with lengthy downtimes while pushing. It's stronger than the set versions of the same build but still it's only good for solo pushing.
This build uses Haunted Visions and Leger's Disdain to make your Simulacrums deal tremendous damage when they mimic your Grim Scythe swings. You have excellent AoE damage but the bossfight is painfully slow. You also need to carefully position your Simulacrums so that they can hit as many enemies as possible while staying out of the harm's way. This build is weaker than Corpse Explosion in solo but it can be used as a Trash Killer in 4-man groups.
Very similar build to Grim Scythe but using Death Nova with Bloodtide Blade as its main damage skill. Still has the same problem of low single target damage but Simulacrum positioning is a lot easier because of Death Nova's large AoE. After buffs in Patch 2.7.4 this build became the top choice for solo push and group trash killer.
This build is really bad in solo pushing because it's super squishy and reliant on Land of the Dead. It excels in speedfarming: T16, Bounties or Greater Rifts in 4-man teams, this build can do it all. It can even be your starter build despite using LoD, because Necromancer's set builds are pretty bad at speedfarming.
This build uses 2-piece of Pestilence Master's Shroud and permanent Land of the Dead to spam Corpse Lance Brittle Touch everywhere giving your teammates tons of Crit Chance. It also provides Frailty to reduce enemies HP and can include Briggs' Wrath for powerful pixelpulls. In Rat Runs Frozen Lands rune is crucial to activate other Necro's Krysbin's Sentence and to prevent enemies from attacking.
Legendaries
Apart from 6-piece sets, Necromancers have 35 unique Legendary and Set items, providing bonuses to various skills and in some cases even altering their behavior.
Two-handed Scythes
- Bloodtide Blade
- Maltorius' Petrified Spike
- Nayr's Black Death
- Reilena's Shadowhook
Scythes
- Funerary Pick
- Scythe of the Cycle
- Trag'Oul's Corroded Fang
- Jesseth Skullscythe
Shields
- Jesseth Skullshield
Phylacteries
- Bone Ringer
- Iron Rose
- Leger's Disdain
- Lost Time
Spears
- Spear of Jairo
Rings
- Briggs' Wrath
- Circle of Nailuj's Evol
- Krysbin's Sentence
- Lornelle's Sunstone
Amulets
- Haunted Visions
- The Johnstone
- Wisdom of Kalan
Chest Armors
- Requiem Cereplate
Gloves
- Grasps of Essence
- Moribund Gauntlets
Boots
- Bryner's Journey
- Steuart's Greaves
Belts
- Dayntee's Binding
Bracers
- Bond's of C'Lena
- Gelmindor's Marrow Guards
Shoulders
- Corpsewhisper Pauldrons
- Razeth's Volition
Helmets
- Fate's Vow
- Mask of Scarlet Death
Pants
- Defiler Cuisses
- Golemskin Breeches
Below are listed select few items that have mechanics which aren't immediately obvious from their description.
- Jesseth Arms grants you a 400% global separate damage multiplier as long as your Skeletons from Command Skeletons are commanded to attack a target.
- As long as enemies are nearby when the target dies, the skeletons will switch to another and keep up the buff.
- Especially in speed runs it's very likely to drop the buff so it may have to be reapplied periodically.
- Using the Kill Command rune is a bad idea.
- Pulls monsters to the center of the curse as long as there is enough empty space. Each individual affected monster checks for available space independently, which lets you pull multiple monsters into the same space achieving pixelpull.
- When there is not enough space in the center of the curse for the monsters to land, they are instead knocked up in place.
- Enemies lose all curses if they leave combat (even with Eternal Torment equipped). This always happens if you go to town, and depending on monster type and rarity can also happen if you go to a different floor or just move far enough away (2-3 screens for most enemies). This can be used to repixel the mobs without waiting 30 seconds for the curse to time out.
- When used in groups, this item only works with your own Curses.
- Since an enemy cannot be affected by the same Curse twice, it is possible to steal the Damage Reduction from your ally by re-cursing the enemies they already cursed.
- The 250% damage bonus from Fate's Vow is an additive bonus rather than a separate damage multiplier to Army of the Dead. This means most personal or group buffs (such as Spreading Malediction) have a rather small effect on this skill.
- With another rune on your skill bar and Fate's Vow equipped, you receive both effects at the same time. The Unconventional Warfare effect lasts 4 seconds, so casting your main nuke at the start of your Convention of Elements cycle is crucial to getting the most out of it.
- Unconventional Warfare deals the same elemental damage type as the chosen rune.
- used to remove Skeletal Mages from the Simulacrum only if the player had Grim Scythe on their action bar, now it will remove Skeletal Mages regardless.
- Skills used by Simulacrum can proc Area Damage.
- Essence generated through their Grim Scythe also transfers to the Necromancer.
- While channeling Siphon Blood, you automatically cast Death Nova regularly.
- These Death Novas also consume Bone Armor duration (through Scythe of the Cycle) and only then get the damage benefit the same way.
- As these free casts are considered procs, they do not benefit from Area Damage at all. This doesn't matter on single targets and very small pulls, but in high density manual casts could provide a lot more value. Simulacrums procs Area Damage, however!
- Siphon Blood ticks every 21 / (Attacks per Second * Swift Harvesting) frames.
- Iron Rose has an internal cooldown of 18 frames.
- Typical one-handed setups range between 10-11 frames tick rate, meaning you can get a Blood Nova on every other tick (20 or 22 frames // 3.0 or 2.72 times per second).
- With a perfect roll (100%), this item exactly doubles your damage done (100% base + 100% ring = 200%) if the enemy is at least slowed or chilled.
- The triple damage effect doubles your damage again from that point of view (100% + 300% ring = 400%) only during the effect of a Hard Crowd Control.
- Because any serious Necromancer build relies on this ring, fighting Juggernaut Elites is almost always a no-go for Necromancers.
- Simulacrum ignores how much current and maximum Essence you have. This means they always get the full benefit of Leger's Disdain. That's why it's better to simply swing again at full essence (having 2 Simulacrums attacking at full power) than to waste time trying to dump essence to increase your own damage.
- All three swings happen at the same time and deal full damage even if one swing is enough to kill some of the monsters.
- The minimum bonus is 0% damage reduction at full health all the way up to 95% damage reduction when on the brink of death.
- Due to the item's toughness scaling it becomes extremely potent in builds that are already tanky enough to survive some hits and stay in the fray without escaping to heal up. As your health drops lower your recovery (from Life per Second / Life per Hit) becomes more effective, making it easier to outheal incoming damage as long as no large hits are taken that could kill you.
- Gives you up to 50% Movement Speed above the 25% Movement Speed cap from Paragon and Gear.
- Some Necromancer builds do not require a specific Off-Hand and can use this one instead of a random one.
- If your build has no source of Cold damage, you can give a Weapon with a Cold damage roll to your follower which will then proc it for you.
- Each stack of this item has its own duration (15 seconds).
- As this is just slightly longer than the Necromancer's Convention of Elements rotation of 12 seconds, you want to make sure to activate all of your Poison skills at least once every cycle.
- The stacks add up as one combined multiplier (100% per Poison skill used).
Passives
Necromancer builds share a lot of the same passives because nothing beats general survivability and damage for them. Occasionally you'll find a niche build that needs a unique passive, but it's not common. Let's look through them in greater detail.
Mechanics
Your Skeletal Mage, Command Golem and Command Skeletons gain 200% of your Thorns. This bonus is a straight 3x multiplier.
Best use
This passive is only used when playing the Thorns Rift Guardian Killer to give your Command Skeletons Thorns to kill the bosses.
Mechanics
Picking up a Health Globes removes the health cost of the next Blood spell. This effect lasts forever and stacks up to 10 times.
Best use
This passive is rarely used as blood builds are not popular in Diablo III, and for the builds that do exist there are better methods of staying alive besides taking this passive. A niche use for this passive is with Mask of Scarlet Death and Oblation to prevent "self-oneshot".
Mechanics
After losing 100% of your maximum Life, all ability cooldowns are reduced by 20% multiplicatively. This effect cannot reduce an ability's cooldown more than once for each time that ability is used. The already spent amount of Life is remembered until the next cast and is tracked separately for each ability.
Best use
This passive is incredible for all Necromancer builds that use giant cooldowns like Land of the Dead. We can take damage from enemies as well as life-spending skills like Blood Rush and Death Nova Blood Nova to reset our abilities.
Mechanics
Bone Spear, Bone Spikes, and Bone Spirit have a 30% chance to trap enemies in a Bone Prison for 3 seconds. Monsters will be Stunned and unable to attack or move.
Best uses
This passive is taken with the Masquerade Bone Spear build to trap enemies at range and activate Krysbin's Sentence.
Mechanics
The Essence cost of Command Skeletons and the cooldown of Command Golem are reduced by 30% multiplicatively.
Best use
This passive is rarely taken as the cost of Command Skeletons is never an issue. This passive has been used in solo pushing in conjunction with Command Golem Bone Golem to gather monsters better / more often.
Mechanics
While using a scythe, gain 2% of your total maximum Essence and 2% of your maximum Life per kill. This has nothing to do with the Life per Kill in your character stats, nor with the secondary stat Life after Kill on items.
Best use
This passive is useful in builds that kill a lot of monsters and are resource starved, like the LoD Skeletal Mage "Rat" Necromancer.
Mechanics
Increases your life regeneration by 10% for each enemy within 20 yards. This effect is capped to 50 and hugely benefits Molten Wildebeest's Gizzard in combination with Squirt's Necklace. It also increases the physical damage done by the Death's Bargain aura.
Best use
If you stack Life Regeneration and toughness, this passive can sustain you through heavy damage. Not used often but can be very powerful when combined with effects such as Leech Cursed Ground or Molten Wildebeest's Gizzard.
Mechanics
Your curses cost 50% less Essence multiplicatively and last forever. Enemies still lose the curses if they leave combat.
Best use
This passive is mostly useful for the "last forever" portion. It's especially useful on builds using Aura of Frailty, as it lets you walk away from mobs without having your curse drop.
Mechanics
Increases the duration of your Skeletal Mage and Revive minions by 25%. This effect only scales with the skill's base duration and does not increase the additional duration that is granted by items like Circle of Nailuj's Evol.
Best use
This passive is useful for mage builds like the LoD Skeletal Mage "Rat" Necromancer. It allows us more time to max our essence to release fully powered Singularity mages.
Mechanics
When you take lethal damage, you are sustained, preventing all damage for 4 seconds. In addition, you heal for 10% of your Life per minion. This effect cannot occur more than once every 60 seconds.
Best use
This is one of the best passives for the Necromancer as it allows you to cheat death and stay alive. In Patch 2.6.9 it was changed to no longer consume pets, and it activates before Simulacrum Self Sacrifice.
Mechanics
Consuming a corpse increases your Movement Speed by 3% for 5 seconds. This effect can stack up to 10 times and exceeds the 25% Movement Speed cap.
Best use
This is an extremely popular passive for any Necromancer speed build as it provides 30% Movement Speed after you consume 10 corpses (commonly done by spamming Devour).
Mechanics
You are healed for 10% of your Life on Hit when one of your minions hits an enemy. This passive takes the Life on Hit displayed in your character stats.
Best use
Sometimes used for recovery in pet-heavy builds such as Rathma AotD Necromancer.
Mechanics
- Consuming a corpse has a 20% chance to spawn a Health Globe.
- The Health Globe can only spawn if the consumed corpse was on the pathable surface.
- After spawning 10 Health Globes the passive goes on a 5 second internal cooldown.
- Activating Land of the Dead resets this cooldown, even if Land of the Dead is already running.
Best use
This passive is very useful on a support Necromancer to spawn health globes for our party. Besides the healing, Health Globes can give other bonuses like increased resource generation from Reaper's Wraps, or increase a Witch Doctor's damage from Gruesome Feast.
Mechanics
Increases your maximum Essence by 40.
Best use
This passive is incredible for any build needing more Essence and/or using Reilena's Shadowhook. This passive provides a total of 8.2% damage increase to builds with Shadowhook, 10.3% to ones with Shadowhook and Reservoir, and about 25.6% to Rats using Singularity.
Mechanics
You cannot lose Life for 4 seconds after using Land of the Dead, Army of the Dead, or Simulacrum.
Best use
Completely useless due to 60 second cooldown.
Mechanics
Poison abilities also slow enemies by 30% and reduce their attack speed by 30% for 5 seconds.
Best use
This defensive passive is not taken often, but it can be used in groups by the zNec in higher Greater Rifts to reduce incoming damage. Some ranged builds can use the slow to activate Bane of the Trapped and Krysbin's Sentence.
Mechanics
Bone Spikes, Bone Spear, and Bone Spirit deal 1% increased damage for every 1.5 yards from you, up to a maximum of 20%. This damage increase is a multiplier to other sources and behaves similar to Zei's Stone of Vengeance.
Best use
This passive has found a use with the new Masquerade Bone Spear Necromancer. Since we're trying to attack at range, we can usually get the full 20% value at 30 yards (which is roughly 1/3rd of a screen away).
Mechanics
Receive a 1% additive damage bonus for each enemy afflicted by one of your curses. The effect is gone if you go to another floor.
Best use
This is one of the best offensive passives for most Necromancer builds, as long as the build takes a curse and relies on gathering up large groups of enemies... which is essentially every build in the game.
Mechanics
Increase armor by 100% additively, reduced by 10% for each active minion. Simulacrum and your Follower are not considered as minions for this passive.
Best use
This is the best defensive passive the Necromancer has as long as you aren't using a skill with a lot of minions like Command Skeletons. Since Necromancers are an Intelligence class who naturally gain All Resistance from Paragon levels, this Armor boost is a tremendous (about 60%) toughness increase.
Mechanics
Increase the attack speed of Bone Spikes, Siphon Blood, and Grim Scythe by 15% multiplicatively.
Best use
This is a nice offensive passive for any build using these 3 skills, like the Poison Scythe Necromancer and for Rift Guardian Killer builds to stack Bane of the Stricken faster.
Skills
Primary Skills
Bone Spikes
Grim Scythe
Siphon Blood
Primary skills deal little damage and generate Essence when they hit an enemy. Most builds use Grim Scythe Cursed Scythe because generates the most Essence by far and gives free curses. The other two skills are only used in some ranged builds or as an extra Nayr's Black Death stack.
Damage Dealing Skills
Bone Spear
Death Nova
Skeletal Mage
Army of the Dead
Bone Spirit
These are the main build-defining skills. Pick one of these, a Set that buffs it, 2-3 supporting Legendaries and you got yourself a build.
Army of the Dead can only be a viable DPS skill in Bones of Rathma build where its cooldown is massively reduced. It's still included in some other builds with the Death Valley rune to pull monsters together.
Corpse Skills
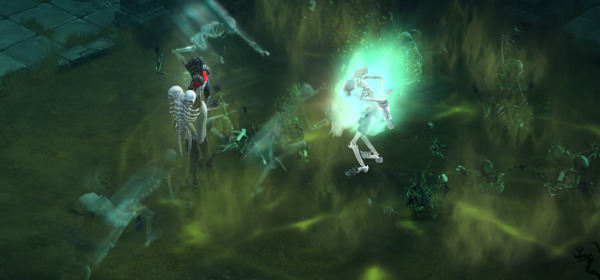
Four of the Necromancer's skills require a special resource - corpses. Corpses are left on the ground when an enemy dies. They are only visible to the Necromancer and there can be no more than 16 corpses for each player out at any given time. Apart from killing enemies, Necromancers have several other ways to produce corpses: Command Golem Flesh Golem, Moribund Gauntlets, Gift of Death, Molting and Land of the Dead.
- Devour is used in many builds that need a lot of Essence, especially in speedfarming. In pushing it's only used together with Land of the Dead in rotation-based builds.
- Corpse Explosion and Corpse Lance are powerful damage skills that can be built around, but they always require Land of the Dead even for speedfarming. Additionally, Corpse Lance Brittle Touch is used by supports to provide Crit Chance.
- Revive is mainly used by Bones of Rathma build to proc the set bonuses. Sometimes it's also included in some thorns-based Necro builds but they are very weak.
Land of the Dead
This skill is a must-have for every build that relies on Corpse Skills, because without it they straight up can not attack. Because of its long cooldown and short duration, these builds are forced into rotation-based playstyle, where they deal huge burst damage when Land of the Dead is up and then do no damage at all while they wait for cooldown.
Solo builds always use Frozen Lands rune for safety and also to fully activate Krysbin's Sentence. In groups where somebody else provides the CC, other runes sometimes see play: Shallow Graves for more uptime or Plaguelands for an extra Nayr's Black Death stack.
Curses
Necromancers have access to curses - powerful long-lasting debuffs that can be applied to any monster. A monster can be affected by each curse only once so multiple Necromancers with the same curse overwrite each other.
- Frailty is the most commonly used curse because it acts as a generic damage multiplier that can also affect normally unbuffable damage (e.g. Conduit Pylon). Aura of Frailty is handy in speedruns, while the more powerful version of the curse - Early Grave - is used in pushes.
- Decrepify is used mostly when you have Frailty from some other source (Cursed Scythe or Cursed Form). In that case this skill is sometimes included, most commonly with the Wither rune to remove the slow or with Enfeeblement to make it stronger (which is very useful to keep monsters stacked after pulling them with Briggs' Wrath). Some squishy rotation-based builds take Decrepify Borrowed Time over frailty for defense and CDR.
- Leech is a very powerful source of healing that works for your entire party, but it's almost never used by itself, instead it comes from Cursed Scythe or Cursed Form.
Utility Skills
All the other Necromancer skills can be grouped together. They are used to round up the builds with extra defensive, offensive and mobility buffs, or to proc certain Sets or Legendaries.
| Skill | Usage | |||
| Simulacrum | Effectively acts as a separate multiplier in Bone Spear, Skeletal Mage, Death Nova and Grim Scythe builds. Usually used with Blood and Bone rune except for Skeletal Mage Singularity builds which go with Reservoir. | |||
| Bone Armor | An excellent defensive skill. Dislocation rune is the most commonly used rune because it can proc both Krysbin's Sentence and Nayr's Black Death. | |||
| Blood Rush | The only mobility skill Necromancer's have. Included in every build that can fit it in, with either Potency for defense or Metabolism for more mobility. | |||
| Command Skeletons | Fairly useless skill on its own but it's frequently included into builds to proc various effects such as Bones of Rathma, Jesseth Arms or Obsidian Ring of the Zodiac. Also used in Thorns builds to deal damage. | |||
| Command Golem | Almost never used. Bone Golem is good to move enemies around but it's very slow and most builds have better uses for a skill slot. | |||
Below are listed select few build-relevant skills and their mechanics are explained in detail.
- The amount of hits done by this skill depends on the chosen rune. Unconventional Warfare's 50,000% weapon damage is the total of all hits combined, meaning it's especially strong on single targets and very weak in AoE pulls. All other runes deal their total damage to all enemies in the area.
- The total amount of hits and damage done per rune is:
- Blighted Grasp: 10x 1,400% weapon damage (per target)
- Death Valley: 7x 1,714% weapon damage (per target)
- Unconventional Warfare: 40x 1,250% weapon damage (total)
- Frozen Army: 5x 2,400% weapon damage (per target)
- Dead Storm: 10x 1,550% weapon damage (per target)
- This rune increases Bone Spear damage by 15% for each target hit. The bonus is additive with itself and multiplicative with all other damage bonuses.
- The increased damage is calculated for each enemy separately, meaning that the furthest away from you enemies take the most damage.
- The damage bonus is applied before the damage, meaning you get the 15% bonus when fighting a single enemy.
- Corpse Explosion costs no essence and does not have any sort of internal cooldown. As long as you have corpses at your disposal, you can keep firing it.
- Each cast of Corpse Explosion triggers 5 corpses in a quick chain reaction over 45 frames, one corpse every 9 frames. This means a single cast of Corpse Explosion is enough to fully stack Grasps of Essence after 45 frames.
- Pulses twice a second, applying a 10 second freeze to all enemies in line of sight within 60 yards range. This means that when you teleport forward, monsters can have up to 0.5 seconds to attack or use an ability.
- Since Frozen Lands applies a 10 seconds freeze, frozen enemies instantly cap out at 95% crowd control resistance and become completely immune to all other forms of Crowd Control, making it impossible to pull them after they have already been frozen.
- Simulacrums can proc area Damage but do not benefit from Pet Damage.
- Haunted Visions makes this skill drain 1% of your maximum life every second. If you are unable to pay this cost, the Simulacrums will despawn.
- Simulacrums move with you after you've traveled a short distance.
- If you're using Blood Rush the sims follow you to your location.
- Simulacrum cast their Bone Spear and Grim Scythe in the direction of your mouse cursor, so positioning is critical!
- Skeletal Mages cast by Simulacrum are affected by Circle of Nailuj's Evol.
- You gain Essence for enemies hit by Simulacrum's Grim Scythe.
- Casting Simulacrum Reservoir doubles your current as well as maximum Essence.
- When Simulacrums mimic one of your attacks, they must always complete the entire animation before they can run after you or teleport on you. If you keep constantly casting Bone Spear while stutter-stepping and teleporting forward, your Simulacrums may stay very far behind!
- Your Simulacrums scale with your character's toughness and can die from monster damage when it's too low. Especially large bursts of damage (e.g. Grotesque explosions) can rip them apart easily even when you could survive that damage yourself, so be mindful about such situations as the cooldown to resummon them is very long.
Summary
Necromancer is the only paid class in Diablo 3. They have lots of very strong generic multipliers but relatively weak sets. Many of the Necromancer builds are very powerful but depend on long Land of the Dead cooldown to deal damage. Still, Necromancer is a powerful and fun to play class. Raise an army of the dead to preserve the Balance in Sanctuary!
Credits
Written by Northwar
Reviewed by wudijo, Raxxanterax