Tax Delivery Guide
Last Updated:April 17, 2025|Changelog
Tax Delivery is a major event in Throne and Liberty. The guild that owns the castle chooses one player to transform into a Tax Delivery Golem that travels from Vienta Village to Stonegard Castle. The Castle Alliance has to defend the Golem against the rest of the server. The winning side receives a large amount of Sollant and Lucent for their participation and the Tax Delivery Reward: Commander's Logistics Chest. To win the event, you must protect the Tax Delivery Golem as the defending alliance or destroy one of them if you're an attacking guild.

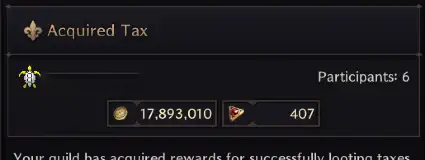
Event Rewards
The Sollant and Lucent rewarded at the end of the event are accumulated based on the amount in the Castle Tax Chest. View the specific amount by opening up your Map, selecting the Timetable, then Daily, and clicking the Vienta Tax Delivery icon. You also acquire a Tax Delivery Reward: Commander's Logistics Chest.
Schedule
The guild schedules the Tax Delivery event which can only take place between 2 PM and 1 AM.
Scheduling the Tax Delivery fails if Castle Siege is set to begin within 1 hour. The event's timing can not conflict with an Excavator-9 and Chernobog spawn or the Hidden Brown Mica event. Make sure to finalize scheduling well in advance. You can cancel a set Tax Delivery event at any time as long as it's 12 hours before the Castle Siege begins.
To check when the Tax Delivery event is scheduled, open up your Map and check the Timetable under Daily. You can check through your Legion Base if your guild owns the castle.

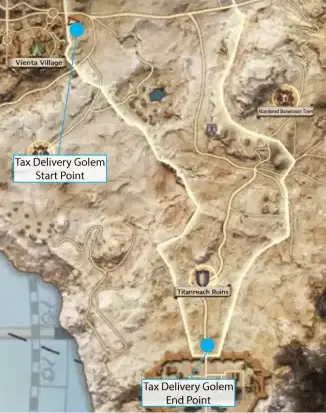
Tax Delivery Event Area
When the Tax Delivery event begins, a large area between Vienta Village and Stonegard Castle lights up on the map. A guild member with a Guardian rank or higher in the castle-owning guild must operate the Tax Golem, remain within the highlighted area, and travel from the start to end points as indicated in the Tax Delivery event map image.
The castle-owning alliance's main goal is to protect the Tax Golem as it moves towards the Tax Manager waiting in front of the Stonegard Castle gates. By accomplishing this, they receive rewards distributed between all players who participated in the guild and the alliance. However, if they fail and the Tax Golem is destroyed, the Sollant and Lucent rewards are distributed to all participating guilds not a part of the alliance owning the castle.
The taxes are returned to Vienta Village if the event timer expires before either side achieves victory.
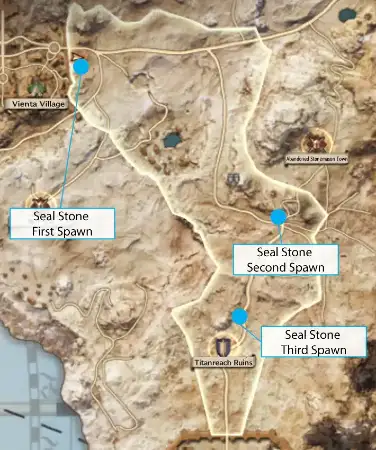
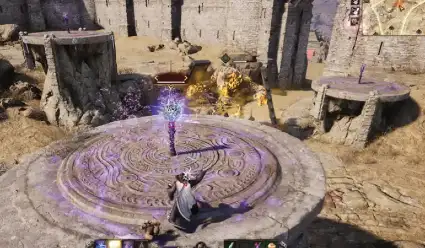
Golem and Seal Stones
Seal Stones are what you interact with to turn into the Tax Golem. Once someone from the Castle-Owning guild turns into the Tax Golem, the Seal Stone will disappear.
If the Tax Golem leaves the event area or the player disconnects from the server, the Golem transformation is canceled and returned to the Seal Stone. Depending on how far your guild has advanced, one of the three Seal Stones will spawn on the map.
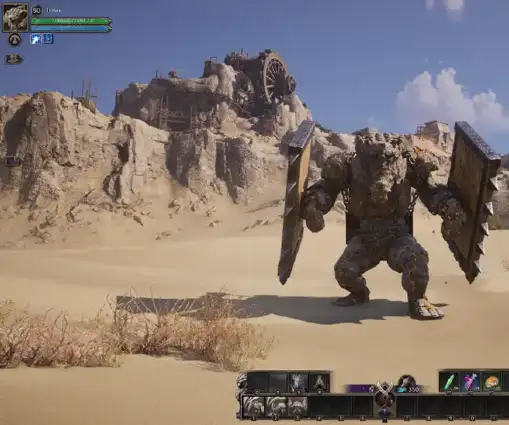
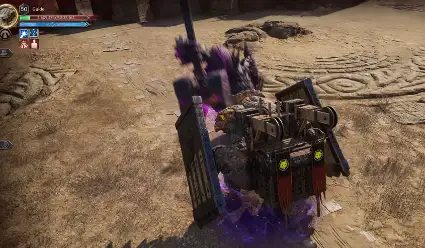
Golem
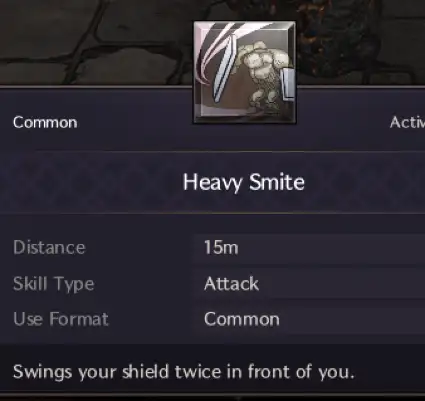
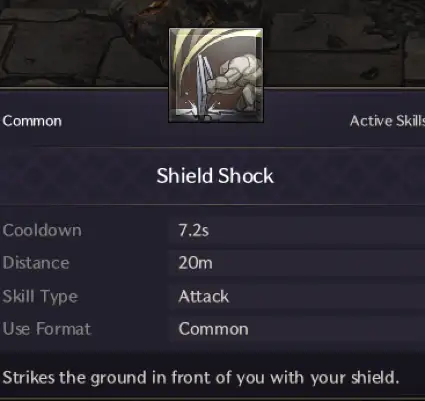
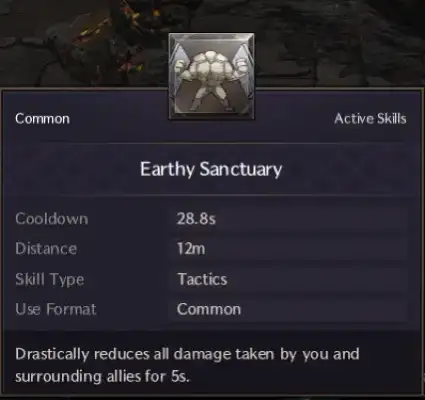
The Tax Delivery Golem has about 9.8 million Health and three abilities that the controlling player can use.
If the Tax Golem leaves the event area or the player disconnects from the server, the Golem transformation is canceled and returned to one of three Seal Stones.
The following are the Tax Golem's abilities. The Golem's abilities are similar to those you experienced during one of the early main story quests where you transform and fight another Golem.
Tax Delivery Mechanics
Whether you're part of the attacking or defending guild, you need to prepare for all 5 mechanics that occur throughout the event's duration to secure a win.
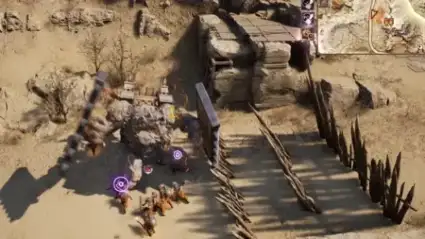
Wooden Barrier and Sandfire Bandits
As you come up the hill just before the Excavator-9 Field Boss spawn, all guilds encounter the first two mechanics. These include a large Wooden Barrier that blocks the Tax Golem's path and Sandfire Bandit Bombers that inflict significant damage by self-destructing on the Tax Golem. The castle-owning alliance must work together to destroy the Wooden Barrier and Bandits. At the same time, the attacking guilds must delay the destruction of the barrier as long as possible while continuing to DPS the Golem and the Seal Stone.
This area has a lot of surrounding elevations for ranged DPS to take advantage of. There is no other way past the Wooden Barrier other than destroying it.
Electric Spokes
The third mechanic occurs as the Tax Golem passes the outermost castle wall in Titanreach Ruins, just southwest of the Abandoned Stonemason Town Waypoint.
For this mechanic, three Electric Spokes spawn and restrain the Tax Golem preventing it from moving. The castle-owning alliance must work together to destroy these Spokes while preventing attacking players from damaging the Tax Golem. The Electric Spokes are tanky and won't be quick to destroy.
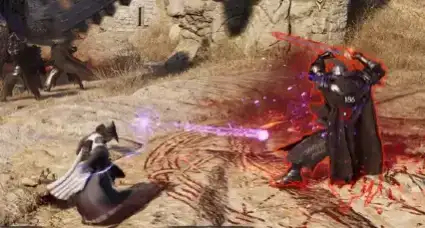
Arkeum Knight
During the Electric Spokes mechanic, the fourth mechanic occurs simultaneously. This mechanic involves an Arkeum Knight mini-boss that spawns and significantly damages the Tax Golem. The castle-owning alliance must kill the mini-boss or assign tanks to generate aggro on it to pull it away from the Golem. Like the Bandits, the Archeum Knight deals and receives damage from all players regardless of which group they belong to.
Chaos Golem
Congratulations if you've ever reached the final mechanic as the castle-owning alliance. This mechanic is also the most fun as it's a face-off between the Tax Golem and a Chaos Golem that spawns in as a last attempt to prevent the delivery.
The castle-owning alliance must destroy or get past the Chaos Golem and reach the Tax Manager while simultaneously protecting the third Seal Stone at the final spawn.
You need to defeat the Chaos Golem as the castle-owning alliance to speak to the Tax Manager. Every hit from the Chaos Golem applies a damage Debuff that stacks up to ten times. The Debuff also has a double effect and when the Chaos Golem uses its Debuff Explosion skill you receive more damage based on the number of stacks you have. Luckily, you can remove the debuff by using cleanse abilities such as Purifying Touch or running out of range of the Chaos Golem's Debuff Explosion AoE.
Summary
- Make sure the player controlling the Tax Delivery Golem has a good internet connection so they do not disconnect and reset your progress.
- Range DPS players on the attacking side have the most advantage during the event. The castle-owning alliance should strategize a way to counter their ability to freely cast as much as possible.
- Ensure you have a solid strategy to defend the Tax Golem.
- Make sure to take advantage of as much height elevation as possible along the Tax Golem's path. It's a good idea to explore the path the Tax Golem takes ahead of the event.
- The Chaos Golem does not need to be destroyed to speak to the Tax Manager.
Credits
Written by EliEli
Reviewed by Tenkiei and Yaen