Tyrant’s Isle Dungeon Guide
Last Updated:April 17, 2025|Changelog
Welcome to Tyrant's Isle. According to research, the color green promotes peacefulness and calmness and promotes various health benefits. Thus, the green backdrop of this dungeon helps balance out any frustration you feel when you party with certain kinds of players. Also, reading this Tyrant's Isle Dungeon guide helps, I guess. The final boss, Toublek, is one of the few bosses that resemble bosses from Lost Ark, having meaningful mechanics all party members must successfully complete to stay alive.
To 1st Boss
Besides killing certain mobs that the 1st boss calls over anyway to reach 6 mobs, there's not really a speed run route.
To 2nd Boss
Only one of two doors open when your team completes the prior objective. Both routes allow you to knock over the Oil Towers. With a Staff, you can use Serial Fire Bombs to ignite the oil, damaging any enemy standing in it. This is the most efficient way to clear mobs for the objective. After running it multiple times, you learn which mobs you should prioritize for the objective and which to skip.
To 3rd Boss
Pull the lever to keep the gate open if anyone is straggling behind. Like the route to the 2nd boss, the route to the 3rd boss also has Oil Towers. Aggro mobs to towards them to complete the objective quickly.
To 4th Boss
You must use the geyser and glide across the bridge. If some players cannot make it over the bridge, they can die and wait for another player to activate the Resurrection Orb near the boss.
A violent chieftain named Toublek of Saurodoma Island possesses the Reptilian gift of infinite regeneration and can even use sorcery, and thus cannot be killed by even the harshest of critical attacks. Once an elf wizard, Toublek turned into a reptilian due to an accident during an experiment. After entering Saurodoma Island, he kidnaps people to perform experiments so that he can return to his original form.
Boss - Toublek
Toublek is the final boss of this dungeon. His mechanic rotation is set and does not change. Make sure to set up your rat positions before starting the fight. Read the rat mechanic to know what this means.
Attack Pattern
Fury Attack ➔ Meteor ➔ Fury Attack ➔ Geysers ➔ Rat
Be aware that this attack also damages Toublek. This is especially important information if you enrage the boss. Toublek destroys himself with his own skill.
Telegraph
- Occurs right after the 1st Fury Attack in his mechanic rotation.
- A voice line occurs: "I'll fry you!"
Description
- He calls down a meteor that falls on three different players, one by one.
- Once the meteor falls, it explodes outward from the center of the location. Taking damage causes burn damage to you over time. Your health decreases at a significant rate if you take all hits.
Strategy
- When the meteor drops, the shape of the damage area resembles a "+" (plus) sign. Simply move to the corner of the "+" sign to avoid all subsequent explosions. The initial proc of the meteor does not do too much damage.
- If you want to be ultra-safe, consider morphing and running right, as he says in the voice line. This ensures you dodge all falling meteors.
Telegraph
- Occurs after the 2nd Fury Attack in his rotation.
- A voice line occurs: "Try to dodge this!"
Description
- Of the 4 geysers in the arena, 2 geysers start to bubble.
- You and your party members must stand on top of one of these bubbling geysers.
- The geyser subsequently erupts, sending you flying into the air to dodge the AoE from Toublek.
Telegraph
- Occurs shortly after the Geysers mechanic. He pulls all party members toward him and turns everyone into a rat.
Description
- Toublek does an AoE a few seconds after turning your party into rats.
- You must use your 1st skill slot and burrow to avoid the AoE.
- After dodging the AoE, you must unburrow and then touch the flower to transform back into a human.
Strategy
- Set up flower positions before the fight begins. Most people stand in front of their flowers or locations. Once a flower is used, another spawns in the nearby area. You and your party must improvise if a flower doesn't respawn in the expected place.
- Run in the direction of your chosen flower after turning into a rat.
- If your flower is close, burrow before it, but don't touch it; otherwise, you die to the AoE.
- If your flower is far away, you can run up to 15 meters away from the boss before you are required to burrow.
- After the AoE occurs, all rats must unburrow. Otherwise, the boss casts another AoE that stuns everyone in the arena.
- Do not burrow too close to the boss, lest he run up to you and eat you before you reach a flower.
Tyrant's Isle Mini-Bosses
Butcher
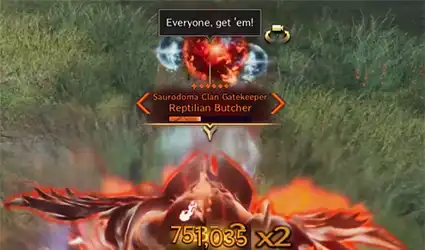
The 1st miniboss you encounter is the Berserk Reptilian Butcher.
Telegraph
- A voice line occurs: "I'll cut you down!"
- This mechanic continues regularly if the boss is not killed in time.
Description
- He teleports to the furthest party member for the first part.
- He does a second teleport, again to the furthest party member.
- He stealths and then shadowsteps to each party member to try interrupting the channel on the flower.
Strategy
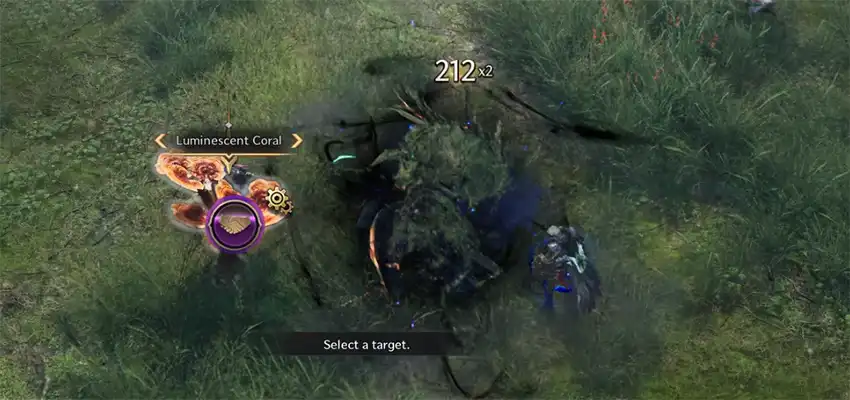
- You and your party members must interact with one of the three "Luminescent Corals" around the boss. After activating, the "flower" stuns all nearby enemies.
- Multiple players can interact with the "flower" at the same time to speed up activation.
- The effect has an incredibly short range. Thus, the mini-boss must be next to the "flower."
- If you take too long, the miniboss eventually unstealths.
Telegraph
- At 40% health and 10% health, a voice line occurs: "Everyone, get 'em!"
Description
- At 40%, he calls over the pair of mobs nearby, the Enchanted Reptilian Fighter and Reptilian Soldier.
- At 10%, he calls over the Enchanted Reptilian Lancer and the Reptilian Soldier.
Strategy
- In a low Gear Score party, you should clear these pairs of mobs before the fight begins. It helps progress the dungeon quest anyway.
Executioner
The 2nd miniboss you encounter is the Berserk Reptilian Executioner.
Telegraph
- At regular intervals, the boss jumps to his original location. A voice line then occurs: "Grr! I'll sweep you!".
Description
- A wave of fire spawns behind the miniboss. The wave moves forward.
Strategy
- You must jump to dodge the wave.
- You can also stand in the cheese spot to avoid the wave entirely.
Telegraph
- The miniboss hops a few times.
Description
- The miniboss slams his axe down, and a domino of small explosions occurs forward.
- This attack deals a chunk of damage and stuns anyone caught in the line.
Description
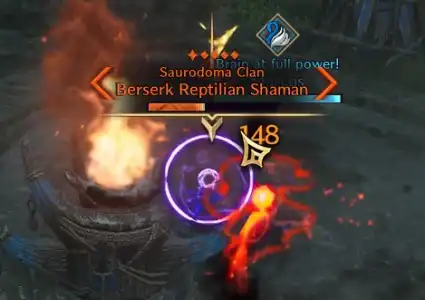
- The miniboss spawns a Berserk Reptilian Shaman periodically.
- These shamans have reduced health, spawning with around 8k health.
- If left alive, the Shaman uses a Fury Attack that can stun you and your party members.
- Killing these counts towards the dungeon objective, so be sure to kill them to efficiently speed-run your dungeon!
Gladiator
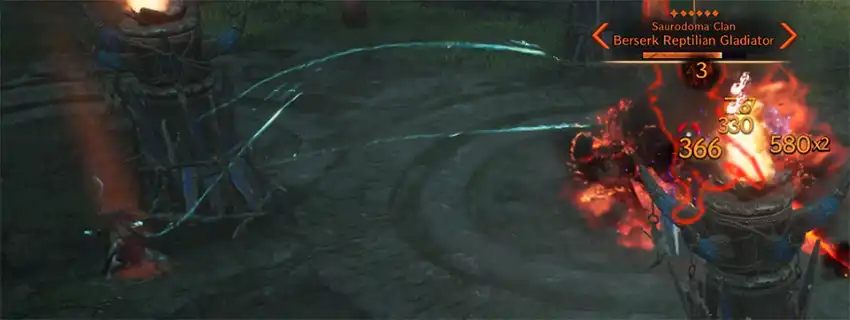
The 3rd miniboss you encounter is the Berserk Reptilian Gladiator.
Telegraph
- A voice line occurs: "I'll crush you!"
Description
- The boss goes towards the center and targets whoever is the furthest from the boss. You know when you are targeted because a red aura appears around your character.
- Whoever is targeted must stand behind one of the four pillars. The miniboss does this four times, and each time he collides with a totem, the totem is destroyed.
- You suffer significant damage if you do not stand behind the totem.
- After four pillars are broken, he does an AoE dealing a decent amount of damage.
Description
- The miniboss spawns a Berserk Reptilian Shaman periodically.
- These shamans have reduced health, spawning with around 8k health.
- If left alive, the Shaman uses a Fury Attack that can stun you and your party members.
- Killing these counts towards the dungeon objective, so be sure to kill them to efficiently speed-run your dungeon!
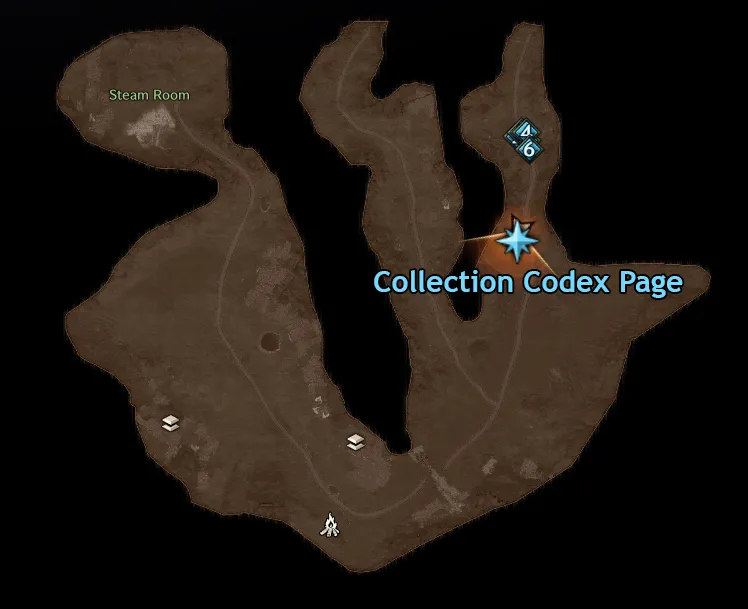
Collection Codex
Jungle Ecosystem
Credits
Written by Yaen
Reviewed by Nymphellas