Al-Hezmin, the Hunter Boss Guide
Last Updated:June 9, 2024|Changelog
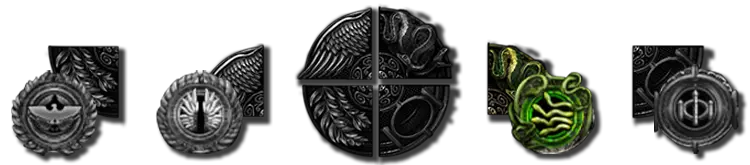
Al-Hezmin is - along with Drox, Veritania and Baran - one of the Conquerors of the Atlas of Worlds. In order to fight him, you have to open a Hunter influenced Map. Conqueror Influenced Maps have a special border on top of the typical Map Icon. Defeating a Conqueror for the first time unlocks a Favorite Map slot for your Atlas.
Each of the Conquerors drop a specific Map Fragment that is required to face Sirus, Awakener of Worlds.
Conquerors - Boss Guides:
- Drox, the Warlord - Drox's Crest
- Veritania, the Redeemer - Veritania's Crest
- Al-Hezmin, the Hunter - Al-Hezmin's Crest
- Baran, the Crusader - Baran's Crest
Sirus, Awakener of Worlds - Boss Guide:
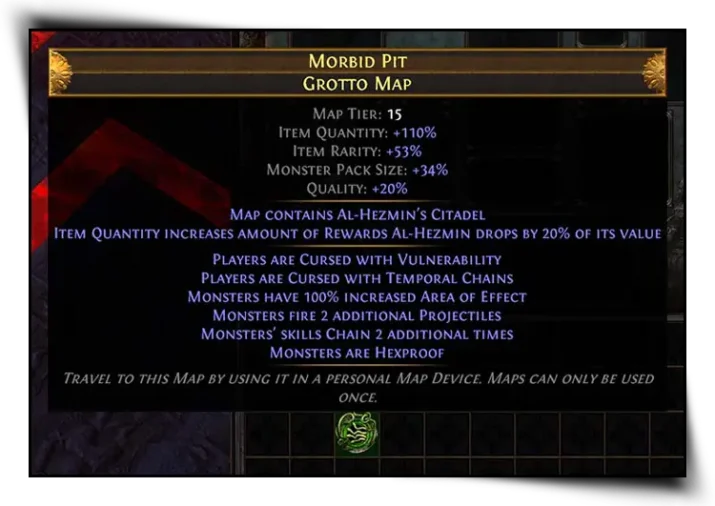
Conqueror Maps can be dropped upon killing any regular T14+ Map Boss on the Atlas and have 2 implicit modifiers:
Map contains Al-Hezmin's Citadel
Item Quantity increases amount of Rewards Al-Hezmin drops by 20% of its value
Map contains Al-Hezmin's Citadel
This implicit modifier adds the Hunter influence to the Map, adding Hunter monster packs. It also adds Al-Hezmin as an additional Encounter after defeating the default Map Boss.
Item Quantity increases amount of Rewards Al-Hezmin drops by 20% of its value
This implicit modifier determines how much Loot Al-Hezmin drops upon death.
You can increase the drop rate of these Maps with the Atlas Passive skill Conquered Conquerors and Martial Forces. You can also access Conqueror Maps from Kirac or encounter a Conqueror as part of his Atlas missions. These Maps can also be acquired by getting Map rewards in other League Mechanics such as Tujen from Expedition, Delirium or the Ritual Altar.
A Conqueror Map can be converted into another Map via an Orb of Horizon and even upgraded in Tier with a Harbinger's Orb. If you do so, a Tier 14 / Tier 15 Conqueror influenced Map can result in a corrupted The Beachhead Map. However, you cannot change the Conqueror that is influencing the Map itself.
Defeating a Conqueror counts as clearing the Map in terms of Master Missions and unlocking them for your Atlas. It is possible to have multiple influences on a single Map, making it more rewarding, but also increasing the difficulty.
Loot Table
In addition to regular loot, Al-Hezmin has the following boss-specific drops:
- Al-Hezmin's Crest (100%)
- Hunter's Exalted Orb
- Council of Cats
- Dementophobia
- The Eternal War
- The Price of Prescience
- Justified Ambition
- A Fate Worse Than Death
- Hunter influenced Items
Skills Breakdown
Boss Mechanics
Once you have defeated the default Map boss in an influenced Map, a Portal to the Conqueror's Citadel appears. Make your way through the portal and encounter the Conqueror in his Citadel.
Make sure to check out the Skills Breakdown above to learn more about each of the abilities.
Al-Hezmin's arena is a triangular area with an acid pool in the center. Depending on the phase, you either have to fight him inside the pool or on the border. His damage output is a mix of Physical and Chaos Damage, so it is highly recommended to get some Chaos Resistance alongside Armour. An Amethyst Flask can certainly help!
Based on your Damage output, this fight can get a bit messy. Make sure to bring a Movement Skill to be able to follow Al-Hezmin through the Arena while he kites you. Constant Movement is the key to success.
Outer Triangle Phase (Acid Pool)
After a certain duration, the inner triangle pool fills with poison. Make sure to move out quickly, as the incoming Damage is lethal to most common Builds. Al-Hezmin starts to dash away on the outer triangle of the arena, while Viper's spit poison on your location. It is important to keep moving to dodge the Viper's Projectile Attacks. Builds that are ranged and/or based on Damage over Time to deal damage have an easier time dealing with Al-Hezmin's movement.
Inner Triangle Phase
Once the Acid Pool fades away, it is time to fight Al-Hezmin in the inner triangle. While in the inside triangle, If you get too close to the outside border, Viper's spawn and start spitting Projectiles on to your location. It is important to note that the Viper's won't disappear, but only bite if you get too close to them.
These two phases will rinse and repeat until Al-Hezmin is defeated.
Map Modifiers
Like any other Map, a Conqueror Map can be modified with Currency. But be careful! Some Map modifiers can make it very difficult.
Below is an example of Map modifiers you might want to avoid based on your build.
Boss Specific Modifiers
- Monsters fire 2 additional Projectiles
Global Map Modifiers that can disable your Build
- Monsters reflect X% of Elemental Damage
- Monsters reflect X% of Physical Damage
- Players cannot Regenerate Life, Mana or Energy Shield
- Monsters have X% chance to Avoid Elemental Ailments
Boss Modifiers
- Unique Boss has X% increased Life
Unique Boss has X% increased Area of Effect
Monster Modifiers (also counts for Bosses)
- Monsters have X% increased Critical Strike Chance
- X% increased Monster Damage
- X% increased Monster Movement Speed
X% increased Monster Attack Speed
X% increased Monster Cast Speed - Monsters have X% increased Area of Effect
- X% more Monster Life
- Monsters gain X% of Maximum Life as Extra Maximum Energy Shield
Atlas Passive Tree
The newly revamped Atlas Passive Tree provides us with additional ways to enhance the Pack Size and drop chances of Conqueror influenced Maps:
Notables
- Conquered Conquerors
Nodes
- Conqueror Influenced Pack Size

Summary
- Al-Hezmin, the Hunter, deals Physical and Chaos Damage.
- Every 30 seconds, the phase swaps between the Acid Pool and the Inner Triangle Phase.
- Run to the outer triangle once the acid pool fills.
- Stay mobile to dodge Al-Hezmin's and his Viper's abilities.
- Once the Acid Pool fades away, move to the inside triangle and continue fighting the Hunter.
- While in the inner triangle Phase, stay away from the outer Triangle to avoid Viper's and their bites.
Good Luck, Exile!
Credits
Written by mbXtreme
Reviewed by Crouching_Tuna