Argos Phase 2 Abyss Raid Guide
Argos Phase 2 Introduction
Argos Phase 2 is a TIER 3 Abyss Raid. The recommended Item Level to enter this Raid is 1385. This dungeon drops Tier 3 Accessories, Ability Stones, Engraving Books, Cards and materials to craft the sets Harsh Oath Launcher and Preordained Diligence Launcher. After clearing the dungeon, you can pay gold to get additional loot. The recommended Combat Items are HP Potion, Destruction Bomb(party 1) or Whirlwind Grenade(Party 2) and Time Stop Potion/Adrophine Potion.
The second phase of Argos is very dynamic and coop heavy. It consists of 5 sub phases and multiple wipe mechanics. The survival of one party depends on the communication and action of the other. During sub phase 1,3 and 5, you'll face Argos as a raid. Sub phase 2 and 4 splits the raid in half. One half keeps fighting Argos, the other half faces a mini boss with unique mechanics. For the mini boss phases, place classes with Weak Point affix on their skills into party 1(sun party) and classes with Stagger Damage affix focus into party 2(moon party). Additionally, slot the Battle Item Destruction Bomb if you are in the sun party and Whirlwind Grenade if you are in the moon party.
Disclaimer: In this guide, we will only focus on the important core mechanics and attacks of the Guardian which weren't explained in the previous phase. Basic attacks of the Guardian, which are easy to predict or deal low damage, won't be explained in detail. The missing video clips will be added soon.
Starting from this point, it is important to make sure that everyone in the raid group is aware of the boss and coop mechanics. Additionally, item level is not as significant as having good Engravings and Combat Stat distribution as these provide the most damage increase which shorten the duration of the battle. A shorter battle leads to less damage taken and less consumable used.
This guide assumes that you are familiar with the recommended Raid Build for your class.
Main Boss Argos
You fight Argos during sub phase 1,3 and 5 as a raid but during sub phase 2 and 4, only half of the raid has to battle Argos. The other half has to slay a mini boss. During these 2 sub phases, communication is important to prevent a wipe. Below you can find the new patterns added to Argos in Phase 2.
Special Interactions & Patterns
The Signal 1
During sub phase 2, about 1 min 30 seconds after party 1(Sun Party) teleports to a separate area, Argos sits down and shoots a laser into the sky and a message appears on your screen indicating the start of this mechanic. As the moon party, you need to let the sun party know about this. A sun party member has to check the pattern only visible for them and need to report it back to the moon party (top right of the map for the Sun Party, look over the cliff). Depending on which pattern is visible, a different kind of action is required to prevent a party wipe. The patterns and the resulting actions are explained in the nested tabs.
Shortly after the start of this mechanic, a dial similar to the one from phase 1 Tranquility pattern appears below Argos. The dial indicates the time left to fulfill the condition needed to prevent the party wipe.
The Arrow
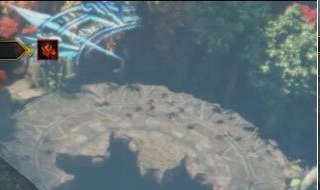
The moon party needs to move and stay at the location pointed by the arrow. In this case, they need to stay in the top left corner of the battle area to survive the AoE which appears once the dial below Argos disappears.
Image source: Inven.co.kr
Sun Safe Spot
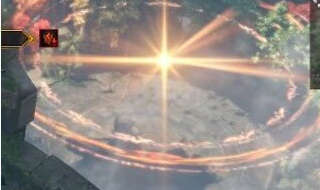
This is the only pattern, where the sun party needs to react instead of the moon party. The sun party needs to stay in the center when the dial below Argos depletes fully to survive a wipe mechanic. Moon party should give a warning shortly before the dial reaches the last segment.
Image source: Inven.co.kr
Collecting Orbs
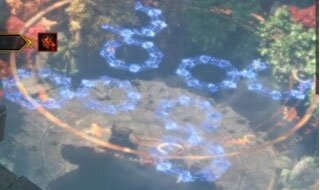
Orbs spawn frequently around Argos. The moon party needs to collect as many orbs as possible to prevent a wipe before the dial below the boss depletes.
Image source: Inven.co.kr
Collecting Stacks
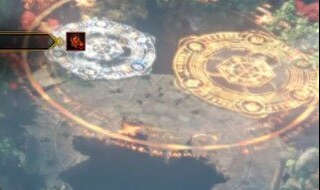
A small circle appears at 11, 1,5 and 7 o'clock at the Argos battle area. The moon party member's should spread out and keep an eye on the circle. Once a circle turns from sun affix to moon affix, the players need to step into it to collect stacks. These stacks are displayed on the buff bar and can stack up to 10 times. Once you have max stack, you need to hit Argos to transfer the stacks over. The wipe can be prevented by repeating this process and transferring enough stacks over to Argos.
Image source: Inven.co.kr
Safe Inside
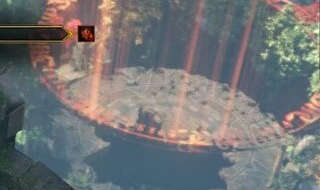
The moon party members need to be at the center of the battle area at the end of this mechanic to avoid death.
Image source: Inven.co.kr
Safe Outside
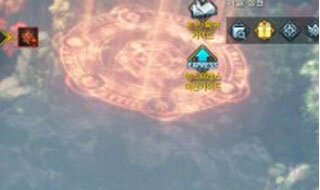
The moon party members need to be at the edge of the battle area at the end of this mechanic to avoid death.
Image source: Inven.co.kr
General Patterns
Jump Shockwave
The normal Jump attack Argos used in Phase 1 causes in Phase 2 a shock wave shortly after the impact. Dodge either towards or far away from Argos to avoid getting hit.
Huge Ground Slam
Argos lifts his front feet briefly to slam back to the ground, causing a huge shock wave. This sock wave deals either damage to everyone close or far away from the boss. Similar to the Recovery Attack, it depends on the glow/affix of Argos. In sub phase 2, where the moon party faces the boss alone, the shockwave deals damage to players nearby. In sub phase 4, where the sun party faces the boss alone, the shockwave deals damage to players further away from the boss.
However, if the 8-man raid is fighting together against the boss, it gets more difficult. The area affected by the shockwave changes from inside to outside and vice versa after each use of the attack. This is also bound to the affix. Which means, the first time Argos uses this attack with the sun affix, the shockwave hits nearby players. But the second time he casts this attack with the sun affix, it deals damage to players further away from him. The third time will hit once again players nearby. So you have to keep track of the attack count for sun and moon affix ground slam separately. Incapacitating Argos with Stagger damage resets the order.
Current
The boss shoots a moving current towards each cardinal direction. These travel a short distance before rotating clockwise and returning to the boss from the ordinal directions. Avoid staying too close to the boss, as this increases the chance of getting hit twice by the currents. Additionally, Argos unleashes a shockwave at the end, similar to the Jump Shockwave attack.
Tracing Laser
The boss slams 3 times in a row on the ground and summons with each slam on some players a laser. The lasers trigger after a short delay and deal damage to everyone in a straight line. This attack can be easily dodged by keep moving.
Wind Circles
Argos summons multiple wind circles around him, which explode after a short delay and deal damage. Make sure to move out of the circles in time.
Falling Rocks
A thick line which gets gradually thinner appears above the head of some players. Once the line disappears, huge rocks drop on the player 4 times. To avoid getting hit, keep moving. Try to avoid running towards other players.
Sun Party Boss
Once the 2nd sub phase starts, Argos teleports the sun party to the sun party mini boss. This boss has a mandatory Weak Point mechanic, which needs to be done in time to prevent enrage. Additionally, the communication heavy mechanic The Signal 2 is part of this boss fight. This mechanic decides about the fate of the raid and can lead to a wipe if it isn't executed properly.
Special Interactions & Patterns
The Signal 2
Check The Signal 1 for more information.
Weak Point
After dealing a certain amount of Stagger Damage, the boss is incapacitated and reveals his weak point. Use Combat items and skills with Weak Point Damage affix to destroy an armored part of the boss. You need to destroy a total of 3 parts. With each destruction, you delay the start of the Enrage phase of the boss.
Enrage
If the Weak Point mechanic is done properly in time, the boss enrages upon reaching 15-20% HP, otherwise, he enrages sooner. Once enraged, his damage, attack speed and Area of Effect(AoE) are amplified, which makes the fight way more difficult.
Fireflies
The stage is covered in groups of green fireflies, which pulsate and send out a green wave before exploding. If you get hit by the explosion, you get a debuff stack. Upon getting the second debuff stack, you will be stunned.
Moon Party Boss
Once the 4th sub phase starts, Argos teleports the moon party to the moon party mini boss. This boss has a mandatory Damage Check mechanic, which needs to be done in time to prevent a wipe of the party fighting Argos. But overall, the moon boss fight is easier than the sun boss fight.
Special Interactions & Patterns
Damage Check
Upon starting this boss fight, you need to start immediately dealing as much damage as possible. If you can't deal around 30% of his HP bar as damage within 1 min 30 secs, the sun party will be wiped. As a member of the moon party, you should have your Awakening Skill ready to use for this encounter. Once enough damage is dealt, the main body of the boss disappears and summons The Core.
The Core
The core of the boss doesn't take much damage until you deplete it's purple stagger bar by using Stagger Damage Combat Items and Skills. Once depleted, the core can be killed within seconds. Shortly after killing the core, the main body of the boss reappears incapacitated, which gives you time to deal uninterrupted damage. This process usually needs to be repeated at least 2 times in total to kill the moon party boss.
The Totems
The boss summons 2 Totems around him, which send out small lines of shockwaves after a short delay. Getting hit by the shockwave imprisons the player and makes it difficult to dodge any follow-up attacks. You can free your imprisoned teammates by attacking them.
The Stone Fall
The boss spawns 4 safe spots around him. Each spot needs to be occupied by one player within 3 seconds. Otherwise, the entire party is hit by a shockwave and takes high damage.
Guide Video
Gameplay with Shot Calls
Credits
Written by Perciculum
Reviewed by Starlast