Majasa Chapter 9 Boss Guide
Last Updated:March 5, 2024|Changelog
Majasa is a two phase fight that gets progressively more difficult. She serves as a defense check for your character and is currently the hardest Campaign Boss. Players need to understand how to properly position and build their character defense in order to defeat this Boss. In this guide, we cover Boss mechanics, and provide a strategy for defeating this Boss.
Want a comprehensive guide for the campaign? Check out our Campaign Walkthrough.
Start the Fight
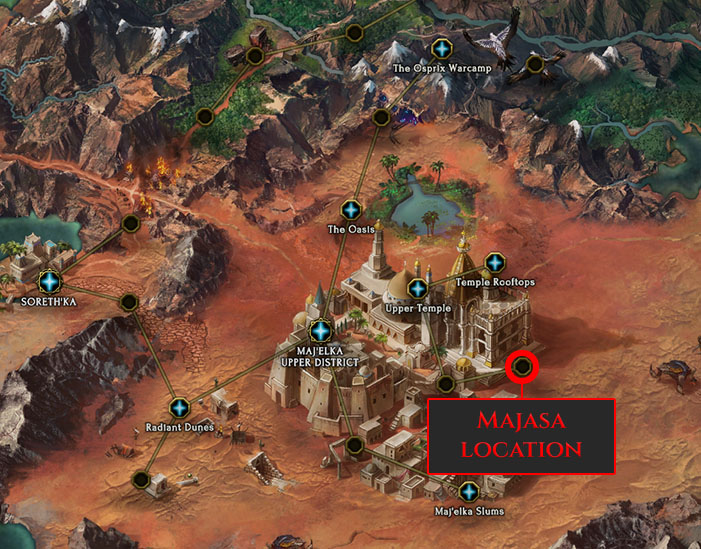
To reach Majasa you need to head to The Chamber of Vessels. To get there:
- Follow the main quest through The Upper Temple and The Lower Temple.
- Before you can enter the boss arena, you need to defeat waves of monsters to unlock the path.
- Once the waves are defeated, head northeast to access the arena.
Boos Mechanics
Like Lagon, Majasa is a mechanically intensive Boss fight that requires adequate defenses and sustain in order to defeat. She has two phases, with the first one requiring good positioning and quick reaction time, while the second phase can catch people off-guard as she gets progressively more aggressive. Below we have listed all the skills with descriptions and videos showcasing that Majasa can use throughout the fight, along with recommended stats to defeat her. Learning the skills and strategies ensures your success against Majasa.
Majasa Boss Strategy
Majasa is a two phase fight. In Phases 1 you mostly dodge her abilities and at 66% and 33% she goes underground and spawns 3 adds that shoot projectiles at you. At 0% Health, she transitions to Phase 2. Her behavior completely changes to be more aggressive, and she starts reducing your Armor with each hit. Phase 1 damage is diverse with Fire, Lightning and Poison while Phase 2 is only Physical. It is important to cap all four of these Resistances, Physical being the highest priority. There are several one shot mechanics in this fight, so knowing how to deal with these mechanics is vital to defeating this Boss.
Recommended Stats
While Phase 1 can be done without too many defensive stats if you are skilled enough, Phase 2 requires enough defense and recovery to not get destroyed by Majasa. Here are the recommend stats depending on your playstyle:
- At least 700 Health.
- 75% Physical, Fire, Lightning and Poison resistance. Prioritize Physical Resistance, as Phase 2 damage is unavoidable.
- Have a way to cleanse yourself. The easiest one is with Ward and Ailment Cleansing on Potion Use on your belt, tier 1 is enough to guarantee the cleanse.
- At least 200 Armor which is easily attainable through implicits alone. Equip a Plated Belt and the best Body Armor for your level to reach it.
- If you play a rogue, you have access to a lot of Dodge through your passive tree and Glancing Blows, so try to get 200 dodge.
- Endurance also helps a lot, Engraved Gauntlets is an easy source of it. Don't focus on it before the other defensive stats. Don't invest into endurance threshold.
- Enough recovery to sustain your Health pool over 3 seconds. The easiest way for builds that deal damage themselves is through Leech, which you generally have access to in your passive or skill tree. For minion builds, you can scale health regeneration with Health Regen Per Second and Health Regeneration on the Primalist. On the Acolyte, you have access to big recovery sources on skills and their trees, like Rip Blood or Necromantic Fervor on Summon Volatile Zombie. On the Marksman, you also have Health gained on bow hit through his passive tree and for melee builds, you can use Health On Melee Hit as a secondary recovery mechanic.
Phase 1
In the first phase Majasa has a lot of exclusive abilities, including the most dangerous ones so you'll need to be on your toes from the start. She also becomes invulnerable for a short duration at 66% and 33% Health. Here are some general strategies:
- Stand at the top or bottom of the arena. It makes it easier for you to dodge poison pools from Stalactite Falling as they can't spawn there.
- After positioning yourself in the arena, don't stand too far from Majasa. She starts casting ranged abilities if you do.
- Avoid Flamethrower at any cost and use a cleanse to remove the remaining Stone Stare stacks.
- Do not get hit by Siege Bolt, a huge red AoE. If it crits, it can kill most builds at this point in the campaign.
- When she cast Stomp, a big ice block with lightning sparks appears above your head. Move away from it in a circular motion to avoid both the ice block and the spikes coming from it.
- At 66% and 33% Health, she spawns 3 adds, each having its own element. Kill the fire one first.
Phase 2
Once Majasa reaches 0% Health she violently tears off a part of herself and gets back to full Health. In this phase she has entirely different abilities from Phase 1 and her behavior becomes super aggressive. She also has two instances where she heals to full at 50% Health.
- Majasa behavior changes drastically. She literally hunts you down, so don't bother dodging her melee attacks.
- Her Flamethrower is the only ability she keeps from Phase 1. Avoid it at any cost and use a cleanse to remove the remaining Stone Stare stacks.
- Don't stand in the Blood Pools, they apply Armour Shred at a fast rate.
- After some time, she calls back the Blood Pools and cast Corrupting Bomb. Move away from her when it happens.
- At 50% Health, she rushes to a closed sarcophagus to heal back to full. Take advantage of this to damage her.
- After both sarcophagi are used, she can no longer heal, and you can finish her off. Continue to follow the strategy of the Phase 2 mechanics until she is defeated!
Summary
- Majasa is a two Phase fight.
- Phase 2 has the highest unavoidable damage of the campaign.
- Cap Lightning, Cold, Fire and Physical Resistance.
- Get enough Health, Armor and recovery to survive Phase 2.
- Avoid her Flamethrower to avoid getting turned to stone.
- In Phase 1, avoid at all cost the huge red AoE from Siege Bolt.
- In Phase 2, avoid the Blood Pools and Corrupting Bomb when she calls them back.
Credits
Written by Terek.
Reviewed by Dredscythe, Mcfluffin.