Harton’s Husk – Fall of the Empire Boss Guide
Last Updated:February 15, 2024|Changelog
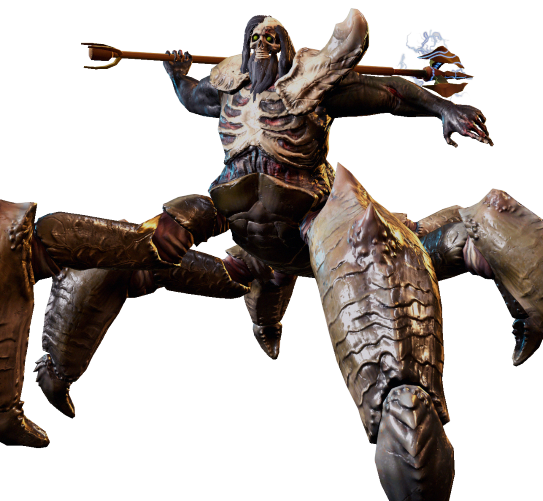
Harton's Husk is a single phase boss fight with minions. This fight tries to overwhelm the player with overlapping mechanics instead of relying on one shots. Unlike most fights, the minions have a very large health pool which forces players to deal with them through the entire fight instead of trying to dispatch them.
In this guide, we cover the rewards, boss mechanics, and provide a strategy for defeating this boss.
For more information on the Timeline this boss is found in check out our Fall of the Empire Timeline Guide.
Rewards
All timeline bosses have a pool of exclusive Uniques that can drop. They also provide the player with a Blessing, which is a permanent buff to either power or farming/leveling efficiency. Just like Uniques, each boss has their own exclusive Blessing pool.
Uniques
Harton's Husk can drop 4 different Uniques:
- Bulwark of the Last Abyss has a 50% chance to drop. It is mutually exclusive to Trident of the Last Abyss, meaning you always get one or the other, but not both. It can drop from both normal and empowered versions. The drop rate is not affected by corruption.
- Trident of the Last Abyss has a 50% chance to drop. It is mutually exclusive to Bulwark of the Last Abyss, meaning you always get one or the other, but not both. It can drop from both regular and Empowered versions. The drop rate is not affected by corruption.
- Nightbringer is a rare drop. The drop rate is increased by higher Corruption. We recommend farming this on Empowered.
- Anchor of Oblivion is a rare drop that can only be found in Empowered. Increases in Corruption improves the drop rate of this item.
See the Monolith Beginner Guide for more info on Corruption.
Blessings
The Blessings of this Timeline are focused around increasing drop rates of certain items. Which one you should choose is dependent upon what kind of items you want to farm.
Normal
- Boon of the Scarab
- Despair of the Empire
- Hope of the Beginning
- Inevitability of the Void
- Remnants of the Living
- Rot of the World
- Safety of the Labyrinth
- Shadows of Infinity
- Visions of Death
Empowered
- Grand Boon of the Scarab
- Grand Despair of the Empire
- Grand Hope of the Beginning
- Grand Inevitability of the Void
- Grand Remnants of the Living
- Grand Rot of the World
- Grand Safety of the Labyrinth
- Grand Shadows of Infinity
- Grand Visions of Death
Boss Mechanics
Modifiers
When you go into a timeline boss fight, you carry any modifiers that are active from running echoes. Some of these modifiers can be especially dangerous, while some can actually bring value with little or no downside.
- Critical Strike Avoidance - If you're a Crit based build and have sufficient Crit to be noticeable.
- Enemies have +X Critical Strike Chance - Avoid these if you don't have capped Critical Strike Avoidance.
- Enemies have a chance to Dodge - Any builds that rely on Hitting the enemy (including DoT builds that apply Ailments on Hit) should avoid this modifier (except for Rogues with Focus Fire).
- Enemies heal if they have not been damaged recently - Only take this if you're confident you'll never go 4 or more seconds without damaging the boss (after phase 1).
- Frenzy and Haste + Berserk - Individually these are manageable (although you may still want to avoid them if you can). Together they can make a boss very difficult to deal with as they significantly speed up the mechanics of the fight. Don't take these unless you're comfortable with the mechanics and confident that the additional speed of the fight won't be a problem.
- Anything that affects Rare enemies - Bosses are not considered Rare enemies, so those modifiers do not apply to the encounter. However, the rewards do. This is an easy way to boost the value of a fight for any build without increasing difficulty.
- Enemies have +X Critical Strike Chance when Crit capped - If you're Crit capped, then this modifier provides no extra difficulty.
- Critical Strike Avoidance on a DoT build - DoTs can't Crit, so this won't matter.
- Enemies have a X% chance to receive a Glancing Blow when hit on a DoT build - Similar to Crits, Glancing Blows only apply to Hits.
- Enemies have a chance to Dodge on a build that uses a DoT skill - Ailments generally need to Hit to be applied, so don't take this if you're relying on Hits to stack your DoTs. However, some skills have the DoT tag, meaning they don't Hit. DoTs can't be Dodged, so your damage is unaffected.
- Void enemies deal X% increased damage - This scales almost all of the damage in the fight and scales higher than other damage modifiers. The damage can get out of control quickly, especially at higher Corruption.
Boss Strategy
Harton is a single phase fight. He has access to nearly all of his skills from the beginning and the ones he gains later on are not threatening, meaning this fight stays at about the same level of difficulty throughout. The most unique aspect of this fight comes from the two Idols of Ruin who use their own skills in conjunction with Harton. This is a chaotic fight that attempts to overwhelm the player instead of focusing on highly punishing individual attacks. Damage is mostly Void with some Physical so make sure to both Resistances. Here are some general strategies:
- Don't stand in Oblivion Spike - It deals more damage over the skill's duration which gives you time to move out after Harton casts it, but if you wait too long it becomes painful quickly.
- Avoid Barrage of Ruin from the Idols of Ruin - Like Oblivion Spike its damage increases over the duration of the skill.
- Keep moving - There's a lot going on, but most of it can be avoided simply by not standing still.
- Don't kill the Idols of Ruin - While killing them removes several mechanics, they have almost as much HP as Harton. Focusing on them just prolongs the fight instead of making it easier.
The fight may seem overwhelming at first but the low damage output of most of the skills grants a lot of room for error, making this one of the easier Timeline boss fights. Don't get stuck in Oblivion Spike or Barrage of Ruin while staying on the move and Harton will fall.
Video
Summary
- The Blessings for this timeline are all focused around increasing drop rates of certain items.
- Harton tries to overwhelm the player with multiple attacks from different directions all happening at once. However, the damage output of each skill is generally low so there is a lot of room for error.
- Damage is mostly Void with some Physical so makes sure to cap both Resistances.
- Avoid Oblivion Spike and Barrage of Ruin.
- Stay on the move so you don't get hit by too many mechanics.
- Don't waste your time trying to kill the Idols of Ruin.
Credits
Written by McFluffin.
Reviewed by Facefoot, Lizard_IRL, Raxxanterax.