Monk Class Overview
Last Updated:April 11, 2024|Changelog
Introduction
Monks are sacred warriors who channel divine power through sheer force of will. Healing waves, mantras of protection and attacks empowered with holy might are all within their purview. One thing that sets Monks apart from other classes is their unparalleled mobility. Nobody outruns a Monk. Between Dashing Strike, Epiphany, Fists of Thunder, Inner Sanctuary Intervene and Seven-Sided Strike Sudden Assault every single Monk build is able to teleport. Depending on the build, Monks can use these teleports anywhere between a lot and infinitely. On top of that Monks' teleports are incredibly fast, taking up just a fraction of a second regardless of the distance traveled.
Lore
Monks of the Sahptev faith train their bodies and minds so that they may become the foremost holy warriors of the land of Ivgorod. Within the cloisters of the Patriarchs, the monks endure harsh trials both physical and spiritual, proving their devotion and attaining unmatched focus.
Daily ritualistic cleansings help Monks purify their spirits and overcome the corruption that gnaws at the hearts of all men. In the pursuit of martial perfection, they also hone their legendary balance and clarity, skills that allow them to master both unarmed combat and a diverse array of weapons.
After a lifetime of preparation, anointed monks are permitted to leave their monasteries' halls to serve the decrees of the Patriarchs. The emblem on their foreheads marks them as survivors, achievers, and pillars of their society.
Monks embody the will of Ivgorod’s one thousand and one gods in every step and every strike.
Read the full story of the Monk here
Resources
Maximum Spirit: 250
- +50 from Paragon points
- +45 from secondary rolls on gear
- +50 from Exalted Soul
- +14 from Stone of Jordan
Passive Regeneration: none
- +20 from Epiphany
- +25 from Insight
- +8 from Sweeping Wind Inner Storm
- +4 from Mystic Ally Air Ally
- +3 from Mantra of Healing Circular Breathing
- +4 from Exalted Soul
- +4 from Chant of Resonance
- +15 from The Mind's Eye
- +50 from Patterns of Justice (4) Bonus
- +9 from primary rolls on gear
Active Generation: 12 per attack with a Primary skill
- +2 from Fists of Thunder
- +6 from Quickening
- +14 from Breath of Heaven Infused with Light
- 2.5 per enemy hit with Crippling Wave Rising Tide
- 10 per enemy hit with Blinding Flash Replenishing Light
- 15 per enemy hit with Exploding Palm Strong Spirit
- 100 from Air Ally
Additional Spirit sources:
- The Laws of Seph
- The Guardian's Path
- Inspire
Monks use Spirit to cast their most powerful skills. Spirit doesn't regenerate or decay by itself, but it's possible to get Spirit Regeneration from certain skills or items. On top of that, Spirit can be gained from hitting with a Primary skill or via some other effects.
Many of the Monk builds rely heavily on Spirit spenders and thus invest quite a lot into Spirit generation. The most commonly used source of Spirit is Epiphany, but it's often not enough. In these cases Monks use Resource Cost Reduction and/or skills like Air Ally or Inner Storm.
Equipment
Monks are proficient with all melee weapons and shields and they can also dual wield any combination of two one-handed weapons. Like most other classes, Monks almost never use two-handed weapons, with the exception of some Inna build variants that need Inna's Reach to complete the set.
Spirit Stones
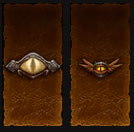
Spirit Stones are unique Monk headgear that have the same base stats as regular Helmets, but also can roll certain class-specific stats:
- Primary rolls
- 2.17-3.00 Spirit per Second
- 456-540 Life per Spirit Spent
- Secondary rolls
- 13-15 Maximum Spirit
Fist Weapons
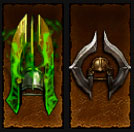
Monk's unique one-handed weapons are Fist Weapons. They are fairly fast (1.4 APS), have unique attack animations, and use all the normal weapon affixes plus some class-specific stats:
- Primary rolls
- 2.17-3.00 Spirit per Second
- 456-540 Life per Spirit Spent
- Secondary rolls
- 13-15 Maximum Spirit
Daibos
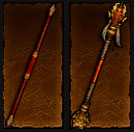
Daibos are Monk-specific two-handed weapons. They are among the fastest two handers with 1.15 base APS and on top of normal weapon stats they can roll following affixes:
- Primary rolls
- 4.33-6.00 Spirit per Second
- 912-1080 Life per Spirit Spent
- 10-15% Damage to any Monk Skill
- Secondary rolls
- 26-30 Maximum Spirit
*all the values given are for ancient legendary items
Sets and Builds
Inna's Mantra
- (4) and (6) Bonuses give you passive effects of all Mantras and all Mystic Allies, which are doubled by the (2) Bonus and the Mystic Ally buffs are further doubled by The Crudest Boots. In total you get:
- 56% additive damage (40% buff from Fire Ally and 16% debuff from Mantra of Conviction)
- 40% All Resistance from Mantra of Salvation
- 80% Life from Earth Ally
- 63,368 (+42% of your LPS) Life per Second from Mantra of Healing and Enduring Ally
- 16 Spirit per Second from Air Ally

- (6) Bonus provides a 900% Mystic Ally damage for each active Mystic Ally.
- Damage bonus stacks additively with itself for a total multiplier of x91 at 10 Allies.
- Extra Allies are summoned per attack per enemy (or object) hit.
- Extra Allies are summoned in their passive form.
- Extra Allies don't provide their passive bonuses.
- Activating Mystic Ally gives you 100 Spirit (200 with The Crudest Boots) even if Air Ally rune is not selected, but it does not increase Mystic Ally damage even if no rune is selected.
Inna's Mantra was reworked in season 24 patch and became a dedicated Mystic Ally set, buffing their damage and letting you have 10 allies at once.
Inna Mystic Ally - Beginner friendly
This build comes in two flavors: Fire and Cold. The Cold version uses Water Ally rune and excels at all T16 content, whereas the more powerful (but also more clunky) Fire Ally absolutely destroys Greater Rifts. The only downfalls of this build are it's reliance on pet AI and lack of UI indicators for Mystic Ally and Flying Dragon.
Raiment of a Thousand Storms
- (2) Bonus provides 25% multiplicative Attack Speed and 400% damage multiplier (x5) for your Spirit Generators.
- (4) Bonus makes your Dashing Striketest cost 25 Spirit instead of a charge. This makes Dashing Strike a Spirit Spender letting it proc Obsidian Ring of the Zodiac and Bastions of Will.
- (6) Bonus provides a 141x damage to your Spirit Generators and modifies the Weapon Damage of Dashing Strike from 370% to 60,000%, effectively being a x162 damage buff. This only buffs the damage of the Dash itself, the extra strikes from Barrage are unaffected.

Raiment of a Thousand Storms buffs all Spirit Generators and Dashing Strike. However, it's impossible to make Dashing Strike strong enough to beat even T16 content so only one build with this set exists.
This build uses Shenlong's Spirit, Flying Dragon and all-class generator bonuses - Depth Diggers and Simplicity's Strength to punch monsters really fast. It is, however, weak, squishy and not very interesting, not to mention reliant on Flying Dragon RNG.
Monkey King's Garb
- (4) and (6) Bonuses' magnitude can be increased by the Vengeful Wind for a total of 13,000% Weapon damage explosion and x196 damage multiplier for Wave of Light, Lashing Tail Kick and Tempest Rush at 13 Sweeping Wind stacks.
Monkey King's Garb buffs three different skills: Wave of Light, Tempest Rush and Lashing Tail Kick. Surprisingly enough, each of these skills can be used in a Sunwuko build and the resulting builds are pretty close in power too! Another valuable feature of Sunwuko set is its nonstandard piece - Sunwuko's Shines, which lets you equip Cain's Destiny even when playing in groups.

Sunwuko Tempest Rush - Beginner friendly
This build uses Won Khim Lau, Balance and Cesar's Memento to buff the damage of Tempest Rush Flurry beyond any reason and unleash devastating explosions on every Cold cycle of Convention of Elements. The build excels in solo pushing and is pretty good for speedfarming, but the PoJ version beats it there.
Sunwuko Wave of Light - Beginner friendly
This build uses Incense Torch of the Grand Temple, Pinto's Pride and a combination of Rabid Strike, The Crudest Boots and Bindings of the Lesser Gods to buff the damage of Wave of Light. Once again, the build is pretty good for solo pushing and for speedfarming but the LoD version beats it in both.
Uliana's Stratagem
- (2) Bonus applies an Exploding Palm to all enemies hit by the 3rd hit of your Spirit Generators. These palms use your equipped rune and can proc Area Damage, but are not buffed by Mythic Rhythm.
- Hitting an enemy that already has an Exploding Palm on it refreshes its duration.
- (4) Bonus gives 54.4x Seven Sided Strike damage multiplier. The Lion's Claw doubles the number of hits of Seven Sided Strike and increases this bonus to x108.8.
- (6) Bonus gives a x126 Exploding Palm damage bonus and lets your Seven Sided Strike detonate your Exploding Palms. Normally this would remove Exploding Palms from enemies but when used in combination with Gungdo Gear, the palms are immediately reapplied to the original target as well as all surrounding enemies.

Uliana's Stratagem buffs the damage of Exploding Palm and Seven Sided Strike, but since the latter is lacking when supporting legendaries, it's only used as a tool to detonate Exploding Palms.
This build uses The Fist of Az'Turrasq, Gungdo Gear and Shenlong's Spirit to buff the damage of Exploding Palms and then detonates them with Seven Sided Strike. While it's not a very strong build, it has a unique playstyle and it is very satisfying visually. It can also be used reasonably well for Nephalem Rift or Greater Rift speedfarming.
Patterns of Justice
- (2) Bonus provides 5% Movement Speed per stack of Sweeping Wind for a total of 15%. Vengeful Wind can increase that bonus to 65% at 13 Sweeping Wind stacks.
- (4) Bonus provides damage reduction and Spirit Regeneration while Tempest Rush is active and for 0.2 seconds after.
- (6) Bonus gives a x201 global damage multiplier and a Sweeping Wind size buff for 2 seconds, which is refreshed each time Tempest Rush hits an enemy.
Patterns of Justice provides a generic damage buff and can technically be used with any skill. But since (4) and (6) Bonus both require you to channel Tempest Rush it becomes incredibly clunky outside of TR builds.

PoJ Tempest Rush - Beginner friendly
This build uses Won Khim Lau, Balance and Cesar's Memento to buff the damage of Tempest Rush Flurry beyond any reason and unleash devastating explosions on every Cold cycle of Convention of Elements. This build is very fun and pleasant to play, and it can be used in both pushing and speedfarming.
Legacy of Dreams/Legacy of Nightmares
For skills which don't have a dedicated Set, there's always an option of making a build around the Legacy of Dreams gem or Legacy of Nightmares set, which provide a 97.5x damage multiplier at 13 Ancient items. Since the Monk's generic damage set, Patterns of Justice, is nearly impossible to use in non-Tempest Rush builds, some builds use LoD instead.
LoD Wave of Light build actually beats it's Sunwuko counterpart because WoL just has too many different multipliers and a set build simply cannot include them all.
Support

Monk is the best support when it comes to keeping your party alive, but it's not very strong offensively. As a result, it's mostly used at low levels, in triple support teams, or on Hardcore.
This is the strongest Wave of Light build due to its ability to use a veritable mountain of different WoL multipliers: Incense Torch of the Grand Temple, Kyoshiro's Blade, Pinto's Pride, Tzo-Krin's Gaze, Rabid Strike, The Crudest Boots and Bindings of the Lesser Gods. The build is also very powerful for speedfarming solo or in groups, albeit the Rabid Strike bug makes it a bit annoying to play.
This build uses 4-piece of Inna's Mantra to give your teammates the effects of all 4 mantras and further helps the party with different skills: Mantra of Healing for shields (which are especially useful for protecting Squirt's Necklace), Inner Sanctuary Temple of Protection for damage reduction and CC-immunity. In speedfarming groups a zMonk can be very mobile with Dashing Strike and In-geom, which lets them lead the party discovering the map and grouping up mobs with Cyclone Strike.
Legendaries
Apart from 6-piece sets, Monks have 45 unique Legendary and Set items, providing bonuses to various skills and in some cases even altering their behavior.
Fist Weapons
- Crystal Fist
- Fleshrake
- Jawbreaker
- Kyoshiro's Blade
- Lion's Claw
- Logan's Claw
- Rabid Strike
- Scarbringer
- Sledge Fist
- The Fist of Az'Turrasq
- Vengeful Wind
- Won Khim Lau
- Shenlong's Fist of Legend
- Shenlong's Relentless Assault
Rings
- Band of Rue Chambers
Amulets
- Holy Beacon
Daibos
- Balance
- Flying Dragon
- Incense Torch of the Grand Temple
- Staff of Kyro
- The Flow of Eternity
- The Paddle
- Warstaff of General Quang
Spirit Stones
- Bezoar Stone
- Erlang Shen
- Eye of Peshkov
- Gyana Na Kashu
- Kekegi's Unbreakable Spirit
- Madstone
- See No Evil
- The Eye of the Storm
- The Laws of Seph
- The Mind's Eye
- Tzo Krin's Gaze
Boots
- The Crudest Boots
- Rivera Dancers
Belts
- Binding of the Lost
- Kyoshiro's Soul
Bracers
- Bindings of the Lesser Gods
- Cesar's Memento
- Gungdo Gear
- Pinto's Pride
- Spirit Guards
Shoulders
- Lefebvre's Soliloquy
Polearms
- Vigilance
Below are listed select few items that have mechanics which aren't immediately obvious from their description.
- Provides 2% Spirit Generator damage for each point of Spirit you currently have. With Maximum Spirit rolls on both Weapons, Spirit Stone, Paragon Points and Exalted Soul it provides a maximum x8.9 damage multiplier.
- When reaching full spirit, provides a separate x4.5 generic damage multiplier and forcibly sets your passive Spirit Regeneration to negative 65. While the buff is active you can only gain spirit by hitting enemies with Spirit Generators, basic attacks and Blinding Flash Replenishing Light or by using Air Ally and Blinding Flash with The Laws of Seph.
- Applies the debuff to all enemies damaged by Cyclone Strike, i.e. all enemies within 15 yard radius around the monk.
- Cyclone Strikes cast by Won Khim Lau can apply the debuff.
- Cyclone Strikes cast by Rabid Strike clones cannot apply the debuff.
- 4% chance to proc on any action, including hitting air or even talking to an NPC.
- The Double Attack Speed buff lasts for 7 seconds.
- Upon activation, the item goes on Internal Cooldown (ICD) for 5 seconds, meaning there is a 2 second window when it can be re-procced before you lose it. With 5 APS and Alacrity, you have roughly 44% chance to re-proc it by attacking with a Generator.
- Exploding Palm is applied after the damage is dealt, meaning that palms can only create a chain reaction when the enemies can survive at least one explosion, unless Essence Burn is selected.
- The applied Palms are the exact copies of the original detonated one and retain Mythic Rhythm bonus.
- Exploding Palm is applied before damage is dealt, which lets you instantly apply and detonate palms when combined with Uliana's Stratagem (6) Bonus.
- The extra ally also provides their passive effect, doubling its magnitude.
- The passive effects granted by Inna's Mantra (6) Bonus are doubled in the same way.
- Also doubles the number of allies you summon with Inna's Mantra (6) Bonus. Effectively, that means you need to hit 4 enemies one time or one enemy 4 times to summon the maximum number of Allies.
- Increases the duration of Water Ally, Earth Ally and unruned Mystic Ally active effects to 30 seconds.
- Epiphany needs to be active to get the clone.
- The clone is considered a Mystic Ally. It gets buffed by Enforcer, The Crudest Boots and Bindings of the Lesser Gods, but not Mystic Ally damage.
- Instead of picking a random value between the Minimum and Maximum Damage from your Weapon, the clone always uses the average of their sum.
- When dual wielding, the clone alternates between your Main-Hand and Off-Hand Weapons to calculate its damage.
- Uses the equipped rune of Cyclone Strike.
- Can proc every time Tempest Rush damages an enemy, including the Electric Field aura and Flurry explosion.
- The frequency of Cyclone Strike casts is based on your Attack Speed. For most setups it procs on every other Tempest Rush tick for a total of 2.5 casts per second. Some high APS builds with Flying Dragon can proc it twice as often - on every Tempest Rush tick.
Passives
Monks have more flexibility in their passive choices than most classes because a lot of them give similar benefits. Oftentimes you can switch them out based upon your gear, paragon level or familiarity with the game. You also have the choice to select tons of defense or straight offensive with most of the build choices. Let's analyze each passive and see what they're all about.
Mechanics
Increase the attack speed of Spirit Generators by 15% multiplicatively.
Best use
This passive is amazing for Raiment Gen Monk, providing a straight 15% DPS and recovery boost. For all other builds it's very underwhelming. For zMonk in particular it's no good at all, because healing from Soothing Mist has an ICD based on your general APS rather than skill APS and this passive can actually reduce your healing in some cases.
Mechanics
Reduce all cooldowns by 20% multiplicatively.
Best use
This is one of the best passives a Monk has and is taken in most builds to keep up Epiphany and to synergize with Captain Crimson's Trimmings set.
Mechanics
The Spirit costs of Mantra activation effects are reduced by 50% and you gain 4 Spirit every second when you have a Mantra equipped.
Best use
This is a popular passive to take with the support zMonk as it lets you spam Mantra of Healing to shield and heal your teammates.
Mechanics
- When you hit an enemy with a Spirit Generator you get a 3 second buff giving you 10% additive damage
- Hitting an enemy with a different Spirit Generator adds another stack to the buff up to a maximum of 4 stacks
- Hitting an enemy with any Spirit Generator at any time resets the timer on the buff
Best use
This is not a popular passive because multiple spirit generators are rarely used, the only exception to that is the RGK version or Raiment Gen Monk, which uses 3 different Generators!
Mechanics
Each enemy within 12 yards increases your damage by 4%, up to a maximum of 20% additively.
Best use
This is a nice offensive passive as we only need 5 enemies to be near us to get the full 20% value, but it's usually outclassed by other Monk Passives due to it being very weak vs Rift Guardians.
Mechanics
Increase Maximum Spirit by 50 and increase Spirit Regeneration by 4 per second.
Best use
This passive is only used while leveling or in Generator-based builds with Shenlong's Spirit set, where it provides approximately 13% DPS.
Mechanics
Increase movement speed by 10%.
Best use
This is a decent passive to take in speed content. This can go beyond the normal 25% cap for a player, meaning you can take the full paragon points for 25% and this passive for a combined total of 35% increased movement. Movement Speed is not so great on Monks because most of the movement is done via Dashing Strike spam.
Mechanics
Your secondary single elemental Resistance secondary rolls on gear also increase Resistance to all other elements by 40% of its value. One item can provide up to 210 Resistance to a single element, with this passive it also gives 84 Resistance to all other elements.
Note that All Resistance primary roll and Single Resistance secondary roll are mutually exclusive. For that reason builds using Harmony usually place less value on All Resistance rolls if a similarly powerful alternative is available (e.g. Elite Damage Reduction on Chest)
Best use
This is a fantastic defensive passive if your gear has a lot of secondary resistances. If you're missing those rolls, there are better defensive options like Sixth Sense or The Guardian's Path. With secondary resist rolls on everything this passive provides about 35% extra toughness.
Mechanics
Moving 25 yards gives you 20% additive damage for 6 seconds.
Best use
This is a great offensive passive especially for speed content, where you don't have to do anything special to proc the bonus as you are constantly running forward. In push it's usually not used because you need to waste your Dashing Strike charges to activate it and because there are better options available.
Mechanics
After hitting an enemy with the 3rd strike of a Generator combo you get a buff that increases the damage of your next Spirit Spender by 40% multiplicatively. This buff lasts forever. If you use Tempest Rush its damage will stay increased for as long as you keep channeling.
Best use
This passive can be used with the Uliana's Stratagem Exploding Palm Monk in order to get +40% damage throughout the rift. Precise play and understanding are needed with how this interacts with that set which is explained in that build guide.
It can also be used by Tempest Rush monks, but it costs those builds a lot of toughness so it's only done at high Paragon.
Mechanics
When receiving fatal damage, you instead restore 35% Life and 35% Spirit and are immune to damage and control impairing effects for 2 seconds. This effect may occur once every 60 seconds. When this effect procs you also knockback all surrounding enemies.
Best use
This is the standard cheat death passive and is extremely popular for the Monk, although the knockback effect can be very annoying especially on zMonk in 4-man group who tends to sit right in the middle of all enemies.
Mechanics
You deal 20% more damage to enemies that are Blind, Frozen or Stunned. The damage bonus is multiplicative.
Best use
This is one of the best offensive Monk passives, but the CC requirement makes it more suited to builds using burst damage skills such as Tempest Rush Flurry or Exploding Palm.
Mechanics
Damage you deal reduces enemy damage by 20% for 4 seconds. The debuff from different Monks doesn't stack.
Best use
This is an excellent passive to take in groups because it helps keep everyone alive.
Mechanics
Dealing damage to enemies above 75% Life increases your attack speed by 30% for 4 seconds.
Best use
This is a very popular offensive passive for any build not starved for spirit as 30% attack speed is very hard to come by.
Mechanics
Reduce all non-Physical damage taken by 25%.
Best use
This is a popular defensive passive to boost your elemental toughness. Usually outclassed by The Guardian's Path and Harmony.
Mechanics
While dual-wielding, you gain a 35% chance to dodge incoming attacks. While using a two-handed weapon, all Spirit generation is increased by 15%.
Best use
This is a popular passive for dual-wielding specs as 35% chance to dodge is a tremendous toughness boost. This passive is very strong on paper, providing about 50% extra toughness, but it comes from dodge and that makes it unstable. Monks can easily have very high dodge chances from skills like Mantra of Salvation Agility and Dashing Strike Blinding Speed. While adding The Guardian's Path on top of that still gives you 50% more toughness, it's not good to have too much of your toughness coming from dodge. When that happens you can get randomly oneshot when dodge doesn't proc, and you are also very vulnerable to ground effects which ignore dodge.
Mechanics
Every point of Spirit spent heals you for 429 Life. Heal amount is increased by 0.4% of your Health Globe Healing Bonus.
Best use
This passive is usually pretty weak but if you happen to have a couple of Health Globe rolls on your pushing gear and are playing a Spirit-heavy build like PoJ Tempest Rush Monk, then it can be a decent defensive passive.
Mechanics
You get 5% additive damage for each ally affected by your mantra. Allies include your Follower, your Mystic Ally, other players and their pet. When using Inna's Mantra (4) Bonus you get 3 stacks for each affected ally, one stack per mantra (Mantra of Conviction doesn't affect allies). This bonus can stack up to 4 times for a 20% damage increase.
Additionally all allies affected by one of your mantras get their damage increased by 5% additively.
Best use
This passive is mainly used in groups to boost our teammates' damage by 5%. The increased damage bonus we get can be better attained through other passives like Momentum. Note that if you're playing in the 4 Player party, you only get +15% increased damage (3 allies x 5) out of the maximum 20% increase. In order to get the full 20% someone in the party needs a pet or minion that's impacted by our mantra.
Skills
Primary Skills
Fists of Thunder
Deadly reach
Crippling Wave
Way of the Hundred Fists
Primary skills deal little damage and generate Spirit when they hit an enemy. Raiment of a Thousand Storms build uses Primary Skills as a main source of damage. Most other builds only take them to proc associated bonuses such as Bastions of Will or Spirit Guards and to get the damage buff from Way of the Hundred Fists Assimilation.
Damage Dealing Skills
Lashing Tail Kick
Wave of Light
Tempest Rush
Exploding Palm
Seven-Sided Strike
Mystic Ally
These are the main build-defining skills. Pick one of these, a Set that buffs it, 2-3 supporting Legendaries and you got yourself a build.
Seven-Sided Strike is only used in Uliana's Stratagem builds to proc Exploding Palms because it doesn't deal enough damage by itself.
Mystic Ally is only used as a DPS skill in Inna's Mantra builds. In some cases Air Ally or Fire Ally is included in other builds just for the passive bonuses.
Mantras
Monks can choose to have one of four Mantra skills: Mantra of Salvation, Mantra of Retribution, Mantra of Healing and Mantra of Conviction. Mantras provide a small persistent buff or debuff in an area around the Monk. Mantras can be activated up to two times per second to provide another bonus or empower the existing aura for a short time.
Most solo builds use Mantra of Salvation Agility for its huge defensive boost. Mantra of Healing is used by support monks to generate a lot of shielding for the party, or in T16 builds to protect Squirt's Necklace stacks. Mantra of Conviction is used in some speed builds for Movement Speed from Annihilation rune. Mantra of Retribution Transgression is sometimes included for a little bit of extra Attack Speed.
Utility Skills
All the other Monk skills can be grouped together. They are used to round up the builds with extra defensive, offensive and mobility buffs, or to proc certain Sets or Legendaries.
| Skill | Usage | |||
| Epiphany | This skill is included in many builds for mobility, CC-immunity, Spirit generation and damage reduction from Desert Shroud rune. Some T16 builds use Insight for even more Spirit, while support monks go Soothing Mist to provide extra healing to the party. | |||
| Dashing Strike | This is the best mobility skill in the game: it has long range, short cooldown, multiple charges, can go through walls and the animation is nearly instant. Almost every build uses Dashing Strike with either Blinding Speed for defense, Radiance for damage or Quicksilver for more mobility. | |||
| Cyclone Strike | Often included in pushing builds to group up or move monsters and kill them more efficiently. Implosion is the most commonly used rune, although all the other runes except Sunburst also see some play. | |||
| Serenity | An excellent defensive skill, which also has great synergy with Squirt's Necklace. DPS builds use Ascension rune, while supports go with Tranquility for party-wide shields. | |||
| Inner Sanctuary | This is primarily a support monk skill which is used to provide a massive 55% damage reduction to your party members. High GR runs usually go with Temple of Protection for the CC-immunity, while in speeds Intervene is often included to better protect Squirt's Necklace. | |||
| Sweeping Wind | Used in Patterns of Justice and Monkey King's Garb builds to activate the set bonuses. Inner Storm is sometimes used in other builds purely for the Spirit regen. | |||
| Blinding Flash | This skill is often included into rotation-based DPS builds with Faith in the Light rune for extra damage and to proc effects such as Relentless Assault or Cesar's Memento. Support monks sometimes use Crippling Light for more survivability. | |||
| Breath of Heaven | This skill sees very little play. Infused with Light is used in the Raiment of a Thousand Storms build to maintain Shenlong's Spirit buff. Support Monks and some T16 builds use Zephyr for more Movement Speed. | |||
Below are listed select few build-relevant skills and their mechanics are explained in detail.
- Allows you to teleport to monsters when you punch them from at least 7 yards away with any melee attack. If you want to avoid the teleport there's two ways to do it. Hover over a monster that is within 7 yards of you or hover over nothing and hold down the Force Stand Still button.
- Can teleport through walls, but you need a vision of a monster behind the wall (either from a teammate or if the wall in question has a window).
- Maximum teleport range is 100 yards, although it can be extended if either the monk or the mob is moved during the animation (Wormhole, Rage Flip).
- Casting any ability heals yourself and your allies within 30 yards.
- Healing effect has an ICD equal to 1/APS.
- This ICD uses sheet APS instead of skill APS so using skills with Attack Speed coefficient greater than one results in desync (the ICD of Soothing Mist will not be ready when you hit with your generator).
- When attacking with any generator, you proc the heal every 2 out of 3 attacks, but adding either Alacrity or Raiment of a Thousand Storms (2) Bonus changes that to every other attack, resulting in less healing per second despite higher Attack Speed!
- The visual effect has a static 0.5 second cooldown, but it has no effect on your actual healing output.
- The value of the healing is a base of 16,093 HP in addition to 4% of your Health Globe Bonus. You can get up to 270,375 Health Globe Bonus (7 * 38,625), which means that you can buff the base healing of Soothing Mist by up to 10,815 HP, for a grand total of 26,908 HP per heal. In other words, the difference between having no globe bonus and having perfect globe bonus results in ~67% more healing. Missing Health Globe Bonus in one slot loses ~6% healing.
- Uses your own Attack Speed as a separate damage multiplier for both basic attack damage and active ability damage.
- Basic Attack rate is based on player Attack Speed and can be increased by Tasker and Theo.
- Mystic Ally damage on gear acts as a separate damage multiplier.
- Gains 5 stacks per second, with a cap of 100 stacks. This takes 20 seconds which is a full Convention of Elements rotation, which is why you must start channeling immediately after you detonate.
- If you stop channeling Tempest Rush for any reason, your Flurry stacks reset to 0. This includes being: knocked back, frozen, stunned, wormholed, jailed, or even unwanted teleports from Epiphany, which are usually caused when you approach monsters with a very large hitbox.
- The explosion scales with Attack Speed as a separate multiplier.
- Mythic Rhythm buffs the channeling damage and the final explosion regardless of how long you choose to channel.
- You lose all stacks if you try to Tempest Rush in place by moving your cursor close to the screen's center. The radius of the "dead zone" in the middle of your screen is proportional to your Movement Speed times your latency. If you have just 25% from Paragon and less than 100ms ping, then this zone will be just a few pixels wide and it's nearly impossible to hit it without specifically trying. But if you stack some Movement Speed (e.g. Warzechian Armguards, Speed Pylon) and/or play not in your home region, the "dead zone" can become quite large and force you to consciously avoid it.
Summary
Regardless of its strength and place in the META Monk is always extremely fun to play. After trying out Dashing Strike once, every other mobility skill in the game feels sluggish. Flying through the maps and destroying everything in your way is what Monks do best! Bury your enemies under an avalanche of fists and bring glory to Ytar!
Credits
Written by Northwar.
Reviewed by wudijo and Raxxanterax.