Crusader Class Overview
Last Updated:April 11, 2024|Changelog
Introduction
Crusaders are unwavering champions of faith and law. These living fortresses use impenetrable plate and towering shields to wade through scores of foes, leaving demonic bodies smoldering in their wake... Or at least, that's how it's supposed to be. Currently most Crusader builds share two main traits:
- They attack really fast to the point that it looks like the Crusader is having a seizure.
- They constantly fight to stay alive being the only class in the game without any damage reduction items.
Lore
The leaders of the harmonious Zakarum religion once strove to imprison Mephisto, Lord of Hatred, beneath Travincal temple, preventing him from ever twisting the hearts of humanity again.
They failed.
It was not the first time Zakarum had lapsed; 200 years prior, the cleric Akkhan noticed corruption at the heart of his faith, and sent his acolytes on a far-ranging quest to cleanse it. Akkhan’s “crusaders” were young recruits, chosen for honor and goodness, trained in weaponry and flesh-scouring magics, though their most important quality was unwavering devotion to duty.
Today, the Crusaders’ focused quest for purity has broadened. Flimsy “containment” gives evil many opportunities to thrive, and wandering crusaders – often master and apprentice pairs – regularly strike down Sanctuary’s demons. Some fight out of righteousness; others in the hopes that their victories may make corrupt Zakarum whole again. When a Crusader's master dies, their student takes up their weapons and their identity…and the crusade continues, even beyond death.
Read the full story of the Crusader here
Resources
Maximum Wrath: 100
- +25 from Paragon points
- +30 from secondary rolls on gear
- +30 from Righteousness
- +8 from Stone of Jordan
Passive Regeneration: 2.5 per second
- +5 from Akarat's Champion
- +5 from Embodiment of Power
- +6 from primary rolls on gear
- +1.1 from Inspire
Active Generation: 5 per attack with a Primary skill
- +3 from Righteousness
- 30 + 5 per enemy hit with Provoke
- 9 per enemy hit with Shield Glare Zealous Glare
Additional Wrath sources:
- Aegis of Valor (4) Bonus
- Golden Flense
- Insurmountable
Crusaders use Wrath to cast their most powerful skills. Wrath regenerates slowly over time and can also be gained by using Primary skills and from a handful of other effects.
Most Crusader builds don't care about Wrath too much; they either don't use Wrath at all or have some combination of Akarat's Champion, Laws of Valor Unstoppable Force and Provoke to take care of that.
Equipment
Crusaders are proficient with all melee weapons except Staves, but can not dual wield. Instead they equip a shield, which in the Crusader's hands becomes a second weapon. Similar to Demon Hunters, Crusaders can equip their offhand item even when using a two-handed weapon, thanks to Heavenly Strength passive.
Crusader Shields
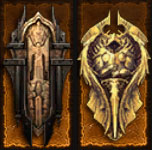
Crusader Shields are unique Crusader items that have the same base stats as regular Shields, but also can roll certain offensive and class-specific stats:
- Primary rolls
- 10-20% Area Damage
- 10-15% Damage to any Crusader Skill
- 1.85-2.00 Wrath per Second
- 1408-1660 Life per Wrath Spent
- Secondary rolls
- 8-10 Maximum Wrath
Flails and Two-Handed Flails
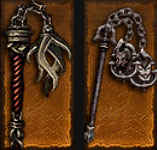
Crusader's unique weapons are Flails. They are fairly fast weapons (1.4 APS) with unique attack animations, which use all the normal weapon affixes plus some class-specific stats:
- Primary rolls
- 1.85-2.00 Wrath per Second
- 1408-1660 Life per Wrath Spent
- Secondary rolls
- 8-10 Maximum Wrath
Two-Handed Flails are the bigger version of One-Handed Flails, they come with 1.15 base APS and can roll all the same unique stats but with double the amount.
*all the values given are for ancient legendary items
Sets and Builds
Armor of Akkhan
- (4) Bonus lets your Phalanx reduce the cooldown of Akarat's Champion and trigger Condemn on enemies affected by Judgment.
- Enemies are considered "affected by Judgment" for 6 seconds after you cast it, even if they are completely CC-immune.
- Phalanx Shield Bearers procs both effects each time the avatars push enemies away despite dealing no damage.
- Condemns triggered by Phalanx use your equipped rune and can't proc Area Damage or any other on-hit effects, except Blade of Prophecy.
- The damage of these Condemns benefits from Phalanx Damage rolls on gear and Enforcer but not from Warhelm of Kassar.
Armor of Akkhan is the most versatile Crusader set as it provides bonus to all damage and thus can be used with any skill. However, since this bonus is very weak compared to other sets, Akkhan builds only make sense when they use skills that aren't supported by any other sets.
Reworked in Season 27 Akkhan Condemn is poised to take #1 spot on Crusader leaderboards thanks to Phalanx avatars triggering hundreds of Condemn explosions at no cost! The build is not amazing outside of solo pushing, but it's not terrible at GR speedfarming and second best Crusader build for T16.
Roland's Legacy
- (2) Bonus reduces the remaining cooldown of all Defensive and Law skills with each cast of Shield Bash or Sweep Attack.
- (4) Bonus provides an unconditional 40,000% separate multiplier (x176) to Shield Bash and Sweep Attack.
- Attack Speed provided by the (6) Bonus stacks additively for a total of 375%, which together with 10% from Paragon leaves you just 15% away from Attack Speed cap of 5.0 while using the slowest Weapon type - a Two-Handed Mace.
- Damage reduction provided by the (6) Bonus is the only stacking buff in the game that stacks multiplicatively with itself providing a total of 55.6% damage reduction at 5 stacks.
- After reaching 5 stacks, every use of Shield Bash or Sweep Attack refreshes the duration of all stacks.
Roland's Legacy buffs two skills: Sweep Attack and Shield Bash, but supporting legendaries for the latter (Drakon's Lesson, Piro Marella and Flail of the Ascended) are incredibly weak so the build is not even worth mentioning.
This build uses Denial and Golden Flense together with Attack Speed from the (6) Bonus to slap enemies really hard and really fast with your giant mace. Unlike many other Crusader builds, this one is very tanky and quite fun to play thanks to all the tools at your disposal (Vacuum, Draw and Quarter). It is however, quite weak and has no use outside of Roland's Legacy leaderboards.
Seeker of the Light
- (2) Bonus reduces the remaining cooldown of Provoke and Falling Sword each time Blessed Hammer hits an enemy. This effect has an internal cooldown equal to 0.9s/Blessed Hammer APS.
- (6) Bonus provides a x151 multiplier to Blessed Hammer and x11 multiplier to Falling Sword. Since Falling Sword has no other supporting legendaries its damage is never relevant and this bonus is purely cosmetic.
Seeker of the Light only buffs one skill and only has one build. The set also forces you to use Falling Sword - the worst skill in the game. Just imagine a teleport skill with an animation so slow that just walking is usually faster.

This build uses Johanna's Argument, Guard of Johanna, Faithful Memory and Hammer Jammers to launch hundreds of Blessed Hammers spinning through the air, letting you relive that Hammerdin experience from the previous installment in the series. Power-wise this build is not doing very well, and doesn't really exist outside of Seeker of the Light leaderboards.
Thorns of the Invoker
- Increased Thorns Damage, provided by the (2) Bonus, stacks with itself up to 10 times for a total of x10 increased Thorns.
- Each stack of the buff has a separate 2 second timer.
- The Thorns bonus stacks additively with Iron Skin Reflective Skin.
- Damage reduction from the (4) Bonus can be activated by Bombardments cast by Belt of the Trove. Mines from Mine Field can't proc this buff.
- Attack Speed from Thorns of the Invoker (6) Bonus stacks multiplicatively with Weapon Attack Speed, Attack Speed Increase from gear and skills, and Fanaticism.
- Thorns of the Invoker (6) Bonus makes your Punish deal 67,500% Thorns damage to the first target hit. If you click Punish while hovering over a monster, that monster is always considered "the first target hit", even if you don't hit it at all. However, Thorns Damage is only applied to that "first target" if your Punish actually hits something.
- The above interaction lets you deal damage at range. You need to have an enemy directly in front of you and then you use Force Stand Still + Punish while hovering over your intended target. However, using this technique in solo push is not recommended because you will be applying Bane of the Stricken stacks to the wrong target.
Thorns of the Invoker doesn't directly buff any skills. Instead, its (6) Bonus provides a powerful thorns-based proc, which can be activated with Punish or Slash.
This build uses the (6) Bonus to deal damage in small AoE. The build is not very strong and mostly contained within Thorns of the Invoker leaderboard. It can, however, make a passable RGK when fully optimized for a single target.
Aegis of Valor
- (2) Bonus increases the damage of Heaven's Fury by 125% per stack stacking additively for a total of 375% increase.
- (4) Bonus gives 5 Wrath with every instance of Fist of the Heavens damage including zaps from Divine Well and fissure/lightning arc ticks from Fissure. Fiery storm from Heaven's Tempest is the exception and doesn't return any Wrath.
- (6) Bonus provides an unconditional x151 multiplier to Heaven's Fury and Fist of the Heavens.
Aegis of Valor buffs two skills: Heaven's Fury and Fist of the Heavens. The two resulting builds are both great in different ways. Heaven's Fury is very strong, but slow and clunky, while Fist of the Heavens is weaker, but is very fast and easy to use.
This build uses Fate of the Fell, Bracer of Fury and Norvald's Fervor (or Shield of Fury) to utterly devastate enemies with holy power. The damage output of this build is insane, although high-end variations of it are often very squishy. This build is not very good at speedfarming due to the clunkiness of Heaven's Fury legendaries.
AoV Fist of the Heavens - Beginner friendly
This build uses Darklight, Khassett's Cord of Righteousness and Norvald's Fervor to smite the enemies with holy lightning. Unlike Heaven's Fury there's no hoops to jump through before you can deal damage: all your multipliers are active at all times, you just need to blast. While the damage output of Fist of the Heavens is not nearly as high, this build excels at speedfarming Nephalem Rifts, Bounties and low Greater Rifts. Essentially, the build can do it all. It's not a push build so it doesn't have a place on the solo tier list.
Legacy of Dreams/Legacy of Nightmares
For skills that don't have a dedicated Set, you can always make a build around the Legacy of Dreams gem or Legacy of Nightmares set, which provide a 97.5x damage multiplier at 13 Ancient items. Since the Crusader's generic damage set, Armor of Akkhan, only provides a 21x multiplier, this battle is often won by LoD.
For Blessed Shield, Legacy of Dreams is by far the better choice, whereas for Bombardment, LoD loses to Akkhan in damage but has more flexibility in skill and item choices.
The Support Crusader is too weak after its nerf in Season 4 and has no chance of making it into any META team.

With The Mortal Drama and Belt of the Trove this build lets you call down incredibly powerful Bombardments. Unlike its Set counterpart, this build can include various speedfarming items such as In-Geom, Squirt's Necklace and St. Archew's Gage, making it one of the best Greater Rift farmers in the game.
This build uses Gyrfalcon's Foote, Akkhan's Leniency, Jekangbord and Akkhan's Manacles to send your shield ricocheting all over the place. Apart from pushing it can also farm Greater or Nephalem rifts, but it's mediocre at it all. Currently it's only useful for people who want to roleplay as Captain America and don't really care about META and tier lists.
Legendaries
Apart from 6-piece sets, Crusaders have 52 unique Legendary and Set items, providing bonuses to various skills and in some cases even altering their behavior. Curiously enough, Crusaders are the only class in the game to have 0 defensive items, despite all that "immovable tank" fantasy going on.
Flails
- Darklight
- Golden Scourge
- Gyrfalcon's Foote
- Inviolable Faith
- Johanna's Argument
- Justinian's Mercy
- Kassar's Retribution
- Swiftmount
Maces
- Jace's Hammer of Vigilance
Two-Handed Flails
- Akkhan's Addendum
- Akkhan's Leniency
- Baleful Remnant
- Fate of the Fell
- Flail of the Ascended
- Golden Flense
- The Mortal Drama
- Flail of the Charge
Two-Handed Maces
- Skywarden
Two-Handed Swords
- Blade of Prophecy
- Cam's Rebuttal
- Faithful Memory
Shields
- Denial
- Eberli Charo
- Ivory Tower
- Vo'toyias Spiker
Crusader Shields
- Akarat's Awakening
- Frydehr's Wrath
- Guard of Johanna
- Hallowed Bulwark
- Hellskull
- Jekangbord
- Piro Marella
- Salvation
- Shield of Fury
- Sublime Conviction
- The Final Witness
- Unrelenting Phalanx
- Shield of the Steed
Pants
- Hammer Jammers
Belts
- Angel Hair Braid
- Belt of the Trove
- Blessed of Haull
- Khassett's Cord of Righteousness
- Omnislash
- Sacred Harness
- Vigilante Belt
Chest Armors
- Armor of the Kind Regent
Helmets
- Warhelm of Kassar
Bracers
- Akkhan's Manacles
- Bracer of Fury
- Drakon's Lesson
- Gabriel's Vambraces
Rings
- Eternal Union
Below are listed select few items that have mechanics, which aren't immediately obvious from their description.
- Bombardment cast by the item uses the equipped rune.
- Can proc Area Damage and stack Bane of the Stricken.
- Cannot proc Life per Hit.
- Casts Bombardment only when there are enemies nearby.
- The item's cooldown is reset upon drinking a Health Potion or switching area. This allows us to easily synchronize it with Convention of Elements.
- Produces up to one extra explosions with 0.1-0.3 second delay.
- Extra explosion inherit the damage type and proc coefficient of the equipped Condemn rune.
- Extra explosion can proc Area Damage and Holy Cause.
- The damage bonus is only active while the target is crowd controlled. All the normal CC-related considerations apply.
- Some Rift Guardians can ignore your crowd controls, reducing your damage by a factor of 5 (Vesalius is immune to blinds, Erethon breaks Judgment whenever it dashes).
- Check out this post by Chewingnom for more information about Crowd Control!
- The stored damage is exactly equal to the sum of the 5 damage instances produced by your Shield Bash down to Weapon Damage Range and Critical Hit Chance RNG.
- The Shield Glare damage cannot be modified by any buffs or debuffs, you need to apply those buffs when you are hitting with Shield Bash.
- The Shield Glare damage cannot proc Area Damage.
- Applies a 10 second debuff to each monster hit by Blind, Immobilize, Stun or Knockback (although the tooltip does not state it).
- The debuff is applied independently from Crowd Control Resistance, even on CC-immune targets.
- The damage bonus from the debuff doesn't interact with Area Damage in any way. Area Damage procs from debuffed targets deal unbuffed damage, same for AD procs against debuffed targets.
- Fires of Heaven are shot in the direction your character is facing.
- Fires of Heaven shot by this item have no proc coefficient, they don't proc Area Damage, don't heal with Holy Cause and don't apply Shield of Fury stacks.
- Can only fire a shot once every 12 frames (5 times per second). If 2 attacks are blocked in the same 12 frame interval, then the next proc will deal double damage. If 3 or more attacks are blocked, the damage is increased to 250% of the base. Blocking more attacks will not increase the damage further.
- Blocking an attack with Punish Fury active immediately consumes the Critical Chance buff.
- Fire Chains Champions Packs will be your best friends when playing Ivory Tower builds as Fire Chains have a tickrate of 10 times per second. Also, the Rift Guardian Orlash with its Lightning Breath throwing 20 projectiles in quick succession as a beam is the best Rift Guardian for Ivory Tower.
- Applies a stack every time Heaven's Fury deals damage. Cannot apply stacks to the same target more often than once every 0.9/APS seconds.
- Stacks are lost when the target leaves combat. Normal mobs and elites lose stacks when you move too far away or change zones. Bosses never lose stacks. Additionally, some mobs can dispel stacks even when you are fighting them: Terror Demons lose stacks when entering invisibility, Morlu Legionnaires lose stacks when they enter their stone form.
- Damage bonus from stacks doesn't interact with Area Damage in any way. Area Damage procs from debuffed targets deal unbuffed damage, same for Area Damage procs versus debuffed targets.
- Casts Fist of the Heavens every ⌊60 / APS⌋ frames.
- Fist of the Heavens uses the equipped rune and can proc Area Damage.
- The damage multiplier is equal to your total Movement Speed, including the baseline 150% from Steed Charge.
Passives
Crusaders have some of the best passives in Diablo 3 that are suitable for every single build. Virtually every single Crusader build will use either Fervor or Heavenly Strength, depending on which type of weapon you need to wear (and allowing the Crusader to wield a two-handed weapon with a shield as the only class in the game). Other strong passives are Finery, which is simply a solid mix of offense and defense that fits into any build, and arguably the best cheat death in the game: Indestructible. To learn more about details about all the passives, check below:
Mechanics
20% additive damage boost to your Justice and Blessed Hammer.
Best use
Okay choice for Hammerdins
Nothing crazy, nothing bad. Works when you are using the Seeker of the Light set, but typically outclassed by other passives regardless.
Mechanics
1% Block Chance on your shield equals 1% Armor, stacking additively with other sources of % Armor (Paragons, Akarat's Champion Prophet, Stone Gauntlets).
Best use
Decent choice if you need extra defense badly
Shields roll up to 20% Block Chance naturally, which can be increased by 11% from a primary affix, giving you up to 31% Armor.
Mechanics
15% multiplicative Attack Speed bonus to your primary skills.
Best use
Important passive for primary-skill builds
Especially good for Thorns-based builds around Thorns of the Invoker, where it can be useful for extra stacks and single target damage.
Mechanics
Straight up adds extra stats to your character as if wearing an item with 15% of both Attack Speed and Cooldown Reduction, but inactive with a two-handed weapon.
Best use
Must-have passive when wielding a one-handed weapon
Extremely strong through the Cooldown Reduction alone, since many Crusader builds rely on Akarat’s Champion, the added 15% Attack Speed is a nice bonus.
Mechanics
Multiplies your total Strength by (typically) 1.15 (with 10 gems), giving you a 15% damage bonus on top of extra damage reduction from the Armor, which usually translates into 10-12% Toughness increase.
Best use
Top-tier passive for any Crusader build
Unless you need a very specific combination of passives for your build to work (or absolutely have to use Indestructible on Hardcore), this should always be included as the #1 option if you have a leftover slot. Due to the extra stats gained from any additional gem, you want to make sure to have the maximum amount on every single item (1x weapon, 1x helm, 2x ring, 1x amulet, 3x chest, 2x pants). Offhand is typically not really worth it, but also not as terrible as on other classes without the passive. You can’t go wrong with this one, if you can fit it in.
Mechanics
Allows you to wear a shield with your two-handed weapon. The damage penalty is 20% additive, which means you won’t feel it very much in most cases. This also means that other sources of additive damage bonuses become slightly more valuable, for example from support players or your item rolls.
Best use
Must-have passive when wielding a two-handed weapon
Playing a Crusader without wearing a shield is not an option. This passive is bread and butter for the class, use it when you have a big weapon in your hand.
Mechanics
Sets your character’s Dodge chance to 0%. Naturally, Crusaders don’t have any dodge, but it can be acquired through buffs like Gogok of Swiftness (which is one of the core Crusader gems), Mantra of Salvation Agility or War Cry Veteran’s Warning. Additionally, Dodge comes first in the defense layers of your character, and a dodged attack cannot be blocked as well, so you can increase your overall number of blocks greatly.
Best use
Use only if you really need to block stuff
Losing a good chunk of your defense from not being able to dodge is a huge hit that needs to be compensated in another big way. Typically this applies only to builds using Ivory Tower, Justice Lantern, Akarat’s Awakening or wearing the Thorns of the Invoker set.
Mechanics
Provides 10% additive damage bonus. The healing scales with proc coefficient, meaning that the more targets you hit, the more you are healed, depending on which skill you use.
Best use
Very strong healing passive with small damage perk
For builds using the Holy element damage type, this passive is a huge boon. Especially in heavy AoE situations, this can passive alone can outscale any other source of recovery, potentially healing you for your entire life pool every second (such as in Heaven’s Fury pushing setups.
Proc coefficients of a few select skills:
Heaven’s Fury Fires of Heaven: 1 (x3 with Fate of the Fell)
Heaven’s Fury: 0.05 per tick (5 times/sec)
Blessed Ground: 0
Fist of the Heavens Divine Well: 0.1 on main attack, little bolts and zaps
Blessed Hammer Limitless: 0.1
Condemn Vacuum: 0.83
Mechanics
Instead of dying, you are protected for 5 seconds with extra damage done and life per kill. Keep in mind that you don’t heal automatically during the effect, so you might still die if you’re not careful. If Akarat’s Champion Prophet is active, that proc will be consumed to save you before the passive is.
Best use
Best cheat-death passive in the game
Very solid choice for any Crusader build, if you have enough slots for another passive. Due to it’s long duration and the damage buff, it can also be used offensively for heavy nuking on a Convention of Elements rotation once every minute. (However, keep in mind that Iron Skin Flash which normally allows you to move through enemies could get you trapped during the effect, as you are invulnerable to damage.)
Mechanics
Each block restores a flat amount of Wrath.
Best use
Extremely niche resource passive
Can be useful for very lazy builds, but typically Crusader is not resource-starved at all.
Mechanics
Multiplies your Thorns by 1.5.
Best use
Must-have for any Thorns build
Simply the biggest DPS gain you can get for Thorns-focused builds. Should always be included.
Mechanics
Effectively doubles the active duration of your Laws.
Best use
Decent supporting option
The best combo of this passive is going along with Laws of Valor Unstoppable Force paired with Captain Crimson’s Trimmings, giving you a solid 50% damage reduction for a long amount of time. Typically, with high Cooldown Reduction values or Obsidian Ring of the Zodiac, you will be able to keep up any law permanently (or even at least close to when your character is still unoptimized).
A second solid option is Laws of Hope Wings of Angels for speedfarming setups, where extra damage might not be needed, for example in Torment Rifts or Bounties.
Mechanics
The damage increase for Phalanx is 20% additive, the Cooldown Reduction for Steed Charge and Bombardment is multiplicative.
Best use
Situational movement passive
Mostly useful for builds that really need some extra mobility and can’t fit in better options such as Swiftmount or the Flail of the Charge + Shield of the Steed combo. Otherwise useful for Bombardment Barrels of Spikes builds to allow you to nuke on every single rotation of Convention of Elements.
Mechanics
Heals you by a flat amount when you block.
Best use
Insanely strong when heavily optimized, otherwise very weak
To really get most of out this passive, you need to have very high Block Chance, All Resistance and Armor (preferably with a lot of paragons), and eventually you will become immortal as you approach the breakpoint where most attacks don’t deal enough damage to you anymore to go through the healing. Without all of these factors combined on one character, this passive can be discarded.
Mechanics
Adds a flat bonus to your generated Wrath and Maximum Wrath.
Best use
Pretty useless passive
Crusader is typically not in trouble with resources, as most builds self-sustain pretty well.
Mechanics
The damage bonus to the mentioned skills is 20% additive, the Cooldown Reduction multiplicative.
Best use
Useful for specialized builds
Can be useful for using Shield Bash builds using Roland’s Legacy (and perhaps Flail of the Ascended), LoN / LoD Blessed Shield or support Crusaders.
Mechanics
Multiplies damage taken by elemental attacks by 0.8, and adds a marginal amount of Life Regen.
Best use
Useful if you’re really struggling against elites
Not really a great passive, but if you want to go all in on defense, it’s an option worth considering. Typically you want to fill your passive slots with more useful things however.
Mechanics
Heals you when you spend Wrath, just like the stat you can roll on items.
Best use
Rather weak healing passive unless heavily optimized
Typically not used because there are better options for healing and defense, but if you find yourself with lots of Health Globe bonus rolls on your items, it could be a great addition.
Skills
Primary Skills
Punish
Slash
Smite
Justice
Primary skills deal a little damage and generate Wrath with every attack. However, most builds can solve their resource issues with other means, and Primary skills are only used to proc Bastions of Will and Thorns of the Invoker bonuses or for the stat boosts they provide: Punish Celerity or Fury, Slash Guard, and Justice Sword of Justice are typical choices. Hammer of Pursuit is also used sometimes as it's the easiest Primary skill to hit with.
Damage Dealing Skills
Shield Bash
Sweep Attack
Blessed Hammer
Blessed Shield
Fist of the Heavens
Phalanx
Condemn
Heaven's Fury
Bombardment
These are the main build-defining skills. Pick one of these, a Set that buffs it, 2-3 supporting Legendaries and you got yourself a build.
Phalanx and Shield Bash are lacking supporting legendaries and while you can make a build around them, they are very weak.
Condemn Vacuum is the only skill on this list that is used outside of its own build to pixelpull the mobs. In Condemn builds it becomes a spammable Wrath spender thanks to Frydehr's Wrath.
Heaven's Fury is another cooldown skill, but it can still be circumvented by using Fires of Heaven rune or Ivory Tower.
Bombardment has a very long cooldown but it's strong enough that just casting it once per Convention of Elements cycle (with loads of Cooldown Reduction and Lord Commander) is enough to compete with other builds that can spam their skill multiple times per second.
Laws
Crusaders can choose to have one of three Law skills: Laws of Hope, Laws of Valor and Laws of Justice. Every Law provides an aura that gives small stat bonuses to all allies within 60 yards. Law can be activated to empower the aura for a short time.
90% of the time your Law is either Laws of Valor Unstoppable Force for defense that you get when combining it with Captain Crimson's Trimmings (3) Bonus, or Laws of Hope Wings of Angels when you need mobility rather than toughness. In the rare cases when those two don't work for you, Laws of Valor Critical or Laws of Justice Decaying Strength is used for either offense or defense.
Utility Skills
All the other Crusader skills can be grouped together. They are used to round up the builds with extra defensive, offensive and mobility buffs, or to proc certain Sets or Legendaries.
| Skill | Usage | |||
| Akarat's Champion | The ubiquitous skill that's included in every build for it's 35% multiplicative damage, CC-immunity and huge defensive bonuses from the Prophet rune. In rare cases where you don't need toughness (mostly in 4-man parties), Hasteful can provide some extra DPS. In some Bombardment builds Rally is used to cast more Bombardments. | |||
| Iron Skin | Widely used defensive skill, provides 50% damage reduction and immunity to Crowd Control effects. Most builds choose Flash rune for mobility, but in some cases Steel Skin is used for higher uptime. Thorns-based builds go with Reflective Skin for extra damage. | |||
| Steed Charge | The only good Crusader mobility skill. Grants 150% Movement Speed and ability to move through monsters. This skill is included in every build that has space for it, and is mandatory for Norvald's Fervor builds. Endurance is usually used for extra duration, but in push builds Draw and Quarter can be very helpful. | |||
| Provoke | This skill is mostly used by the builds that need Wrath. Too Scared to Run or Cleanse runes are typically used for defensive bonuses. Some block-based builds use Hit Me just for the extra Block Chance. | |||
| Shield Glare | Used in Heaven's Fury builds to proc Bracer of Fury. Divine Verdict rune provides 20% additive damage. | |||
| Judgment | Again used in Heaven's Fury builds, usually in Ivory Tower variations, where blinding monsters is ill-advised. Debilitate is the most common rune choice, but Resolved can be sometimes included for more damage. | |||
| Consecration | Virtually never used. Bed of Nails can be included for its ability to proc Pain Enhancer. | |||
| Falling Sword | Deals no damage and only used to activate Seeker of the Light and Faithful Memory bonuses. This is the other Crusader mobility skill with long range that can go over walls, but the teleport animation is so slow that walking/riding the horse is usually faster. | |||
Below are listed select few build-relevant skills and their mechanics are explained in detail.
- The Block Chance portion of the damage scales with your total Block Chance rather than just Shield's Block Chance (in-game tooltip is wrong).
- With 100% Block Chance (the 75% cap in the tooltip is also a lie) you can get up to 680% Weapon Damage.
- Blessed Shield can hit a total of 4 targets: initial target + 3 bounces. Jekangbord increases that number to 10.
- Drops 5 barrels over 2 seconds.
- The Mortal Drama doubles both the number of barrels and the skill's duration.
- The first barrel drops 1 seconds after the skill is activated.
- When used manually, there's also an animation delay between starting the attack and skill actually activating.
- The first barrel drops at the cast location, the rest drop on nearby enemies.
- Each barrel deals 200% Thorns + 570% Weapon damage.
- Your Thorns are snapshot at the time of cast.
- Cannot crit, including the weapon damage part.
- Can proc Area Damage.
- Only procs Life per Hit once per cast.
- Only pulls in enemies that are at least 15 yards away.
- Pulls in every 0.5 seconds for 6 pulls over 3 seconds in total.
- Maximum pull range is increased by 2.5 yards with every pull, up to 30 yards.
- Each pull can suck in a maximum of 10 enemies.
- Enemies caught within the same pull ignore hitbox collision, however, they still need a space to be pulled into.
- Provides a Movement Speed buff every time you take damage while Iron Skin is active.
- Duration of the buff is refreshed by every new damage instance.
- Buff is provided even if all the damage is shielded.
- Buff is not provided if damage is negated e.g. by dodge, Indestructible or Shield Pylon.
- Covers half a circle with 18 yard radius.
- Sweep Attack goes from right to left (relative to character), the rightmost target hit gets Bane of the Stricken stack.
- Blazing Sweep's DoT stacks with itself.
- Blazing Sweep's DoT scales with Attack Speed; it's total damage is equal to 120% * APS. For Roland's Legacy builds that equals to 600% weapon damage.
Summary
Crusaders are the most expectation-defying class in the game. For a guy with a shield wearing heavy plate armor having low toughness but very high attack speed is very unusual to say the least. Still there's something oddly satisfying about just riding your horse through hordes of demons and smiting then with holy power. Launch your own Crusade against the forces of Hell and show them the true meaning of righteous fury! Deus vult.
Credits
Written by Northwar.
Reviewed by wudijo and Raxxanterax.