Defenses Explained
Last Updated:July 9, 2024|Changelog
Building damage may be considered more exciting, but defense is the real star when it comes to pushing your build. Without good defense, you'll suffer more one shot deaths, get stunned more often, and struggle to recover your HP when getting hit. The room for error in a build with poor defenses is much smaller than one that has been properly built, so understanding defense is crucial to your success in Last Epoch
In this guide we'll cover the basics of defense, including the large number of options you have, as well as fundamental equations that ultimately limit the damage you'll take and allow you to restore the health you do lose. If you understand the concepts presented here, you'll be much better prepared to make decisions about how to make the most of the defensive options at your disposal.
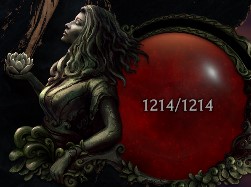
HP (Hit Points)
Hit Points, or better known as HP, is the most basic defense in Last Epoch. Simply put, the more HP you have, the more damage you can take before you die. For example, if you have 200 HP, and you get hit by an attack that does 300, your character will die. But if you have 1000 HP and you get hit with the same attack, you'll only lose 300 while still being left with 700 HP.
HP is effective against all damage, meaning there isn't a source of damage that can negate it or make it less valuable, so stacking HP is generally a good strategy. However, high amounts of HP can negatively impact sustain (Leech, Regen, Healing) if your sustain isn't high enough.
There are generally three kinds of stats for building HP: Added, Increased, and Hybrid.
Added Health will always be a flat amount (never a percentage). Multiple sources of Added Health are added together. You'll find sources of Added Health on gear, in passives, and you'll get a small amount every time you level. Each point of the primary attribute Vitality also provides 10 HP.
It's very easy to calculate multiple sources of Added Health, since it's simply adding them together. For example, if you have 100 Added Health, and you acquire an item with 50 Added Health, you now have 150 Added Health.

Increased Health is a multiplier of your Added Health. You can find sources of Increased Health on gear and in passives.
Combining your Added Health and Increased Health gives you your exact amount of HP. For example, if you have 150 Added Health, with 50% Increased Health, then you have 150 * (1 + 0.5) for a total of 225 HP
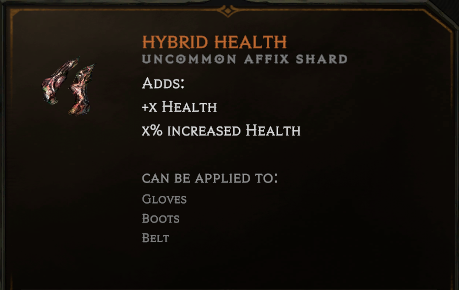
Hybrid Health is found solely through the Hybrid Health Shard, which provides both Added and Increased Health. It can only be found on or applied to Gloves, Boots, and Belts.
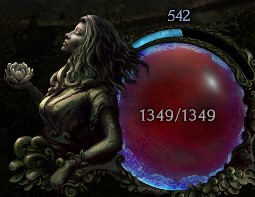
Ward
Ward is very similar to HP, insofar as it increases the amount of damage you can take before your character dies. In fact, Ward actually goes on top of HP and acts like a 'shield' to your HP. That means that any damage you take is taken from your ward before your HP. As long as you still have Ward, your HP won't be touched until you hit 0 Ward. Unlike Energy Shield in Path of Exile, *nothing can surpass Ward and damage your HP directly.
There is currently one mechanic that exists in only a few places which can surpass Ward, and it comes from certain DoT ground effects. The blood pools in the Emperor of Corpses boss fight is the most obvious example of this. However it does X% damage to current health, meaning a player cannot die directly from the damage (since it is always some fraction of the player's current HP, it can never reach 0). This means even on low life Ward builds the mechanic does not invalidate the build.
Generating Ward
You can generate Ward through multiple sources. Here are some Examples:
- Ward Per Second, like the Spellblade node Prodigy
- Ward on Hit, like the Mana Strike node Ward Strike
- Ward on Use, like the burst gained from Flame Ward
- Ward on Kill, like the Drain Life node Death's Barrier
This is not an exhaustive list. There are many interesting ways to generate Ward in Last Epoch. However, these are the most common ways and represent the general feel of how Ward generation works.
Every class in Last Epoch has some Ward generation capability. However, Mage and Acolyte have the most natural support for Ward. So if you're looking for an intuitive option to make a Ward build, you should check out those two classes first.
Ward Decay
Ward decays over time. This occurs even if you're standing still. Furthermore, the more ward you have, the faster your ward decays. This puts an upward barrier and how much Ward you can accumulate at any given time. It is possible to slow Ward decay through Ward Retention. This stat can be acquired through:
- Passives
- Gear
- Skills
- Intelligence (4% Ward Retention per point)
If you're a build that heavily relies on Ward, you're going to want to invest in enough Ward Retention to be able to maintain a sufficient level of Ward.
It isn't necessary to know this formula in order to make a Ward build. However for theorycrafters, Ward decays at a rate of:

Sustain
Sustain encompasses any mechanics that replenish HP after damage has been taken. There are four types of sustain in Last Epoch:
Leech takes a % of Damage the player deals to enemies (after any defenses/mitigation the enemy might have) and returns it as Health to the player. For example, you have 5% Leech and you do 100 Damage to an enemy. Your Leech amount is:
100 * 0.5 = 5The amount of Leech a player receives is not instant. Instead, it is restored over a 3 second period.

Leech is a very strong source of sustain, especially on high damage builds or builds with a high percentage of Leech. There are sources of leech for all damage types, including DoTs. However, it is important to be aware of the specific leech type you're using, since not all sources of leech work for all damage types. For example, many leech sources are 'On Hit', which means they won't work for DoTs at all. There are also many sources which are exclusive to Melee, making them ineffective for Spells and Ranged Attacks. Here are some easy sources of Leech for various build types:
- The Unique Amulet Bleeding Heart for non Spell builds
- Melee Health Leech Shard on Melee weapons and Gloves
- Passives and Skills for all classes. For example, the Sorcerer Passive Node Lavamancer
- Blessings from The Black Sun Timeline: Hunger of the Void and Wrath of Rahyeh
You can also increase your Leech Rate from sources like Thirst of the Sun. Note that this does not actually increase the overall amount of Leech you receive, it just shortens the 3 second timer on Leech, giving you the full amount faster.
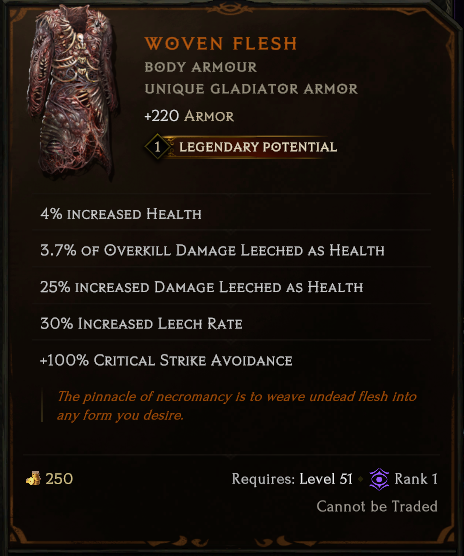
Overkill Damage (when your Damage is higher than the enemy's HP) does not count for Leech purposes unless you're using an item like Woven Flesh, which specifically provides Overkill Damage.
HP Regeneration provides the player with a flat amount of HP per second. All characters start with 6 Regen, but there are two stats that can improve how much Regen you have: Added Health Regeneration and Increased Health Regeneration. Added Regen is a specific number, with all sources being added to your Base Regen and then multiplied by the total amount of % Increased Regen you have. For example, let's say you have 10 Added Health Regen and 20% Increased Health Regen. Your total Health Regen comes to:
(6 + 10) * 1.2 = 19.2Like most stats, you can acquire both Added and Increased Health Regen through various sources, with the most common being Gear and Passives. You can also obtain the Blessing Rhythm of the Tide from the Ending the Storm Timeline.
Healing in Last Epoch works similarly to other games. Generally, a skill, subskill, or some other event will proc a heal, which will restore a certain amount of HP to the player. The HP can be restored instantly, or over time (HoT). There are many sources of Healing, but the primary source is through skills.
You can scale your Healing through Healing Effectiveness. All sources of Healing Effectiveness are added together, and then multiplied against the Base Healing amount. For example, let's say we're using Eterra's Blessing, which has a base Heal of 100. We also have 7 points in Blessed Springs, which gives us 49% Healing Effectiveness. Eterra's Blessing now Heals for:
100 * 1.49 = 149Note that there are currently no stats that can increase the Base Healing of a source. This makes the value of healing largely dependent on the source itself. Some sources will significantly outperform others simply because their Base Healing is better.
This category can best be described as "When I do X, I gain Health". These Actions are often mechanically similar to Healing, but are not considered Heals and are therefore not scaled with Healing Effectiveness. Here are some notable examples:
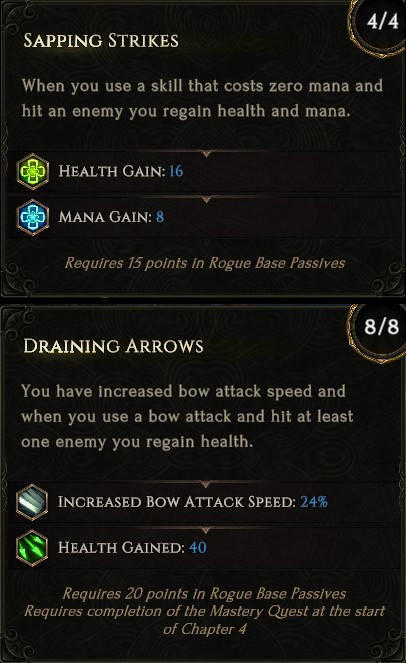
- For Rogue: Sapping Strikes and Draining Arrows. With high enough Attack Speed, these can be a Marksman's primary Sustain
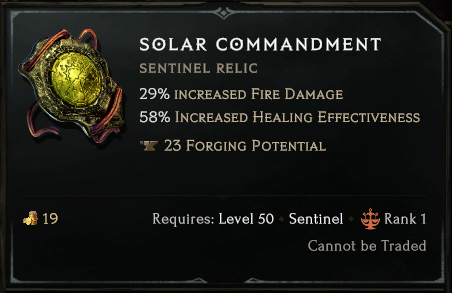
- For Sentinel: Time and Faith
- General sources: Health On Melee Hit Shard and Health On Kill Shard
Resistances

Resistances are considered the most basic kind of defense in the game. They provide protection against the damage type that corresponds with the Resistance. For example, if you have Necrotic Resistance, you'll take less Necrotic Damage. The full list of Resistances are:
- Physical
- Cold
- Fire
- Lightning
- Poison
- Necrotic
- Void
Resistances protect against both Hits and DoTs, including Damaging Ailments. So Physical Resistance protects against Bleed and Fire Resistance protects against Ignite, etc.
Capping Resistances
All Resistances cap at 75%, and there is no way to increase the cap. Any Resistance over the cap does not provide any mitigation, but it can help to prevent Shred from reducing your Resistances to below the cap.
As a general rule of thumb, we recommend getting Resistance capped by early-mid mono. Before that, focus on the Resistance(s) that protect against the most common Damage types in the content you are doing. For example, chapter 1 is Void and Physical, while Chapter 9 is largely Poison.
Enemy Resistance Penetration
All enemies get Penetration to all resistances starting at level 1 and it goes up by 1% every level, eventually capping at 75% at level 75 (this is enemy level, not your level). Penetration subtracts from resistance, which means in a level 75 area, if you have 75% resistances, you actually have 0%. Your resistances can also go negative, so if you're in a level 75 area and have no resistances, you're actually at -75% resistances. Now you're taking 75% increased damage!
Resistance capping is considered mandatory in PoE because the closer a player gets to cap the more valuable each percent of resistances becomes. Going from 0% to 1% results in a gain of 1% damage reduction, but going from 50% to 51% is a 2% damage reduction. Going from 74% to 75% is a 3.8% reduction.
Enemy Resistance Penetration changes the value of Resistances in LE. Against level 75 or higher enemies, going from 74% to 75% Resistance is only 1% damage reduction. The overall reduction is also lower, with 75% resistances meaning 75% reduction in PoE, but only 42.8% in LE. Overall, this means that while resistances are still important in LE, capping them is not as necessary as PoE.
Armor
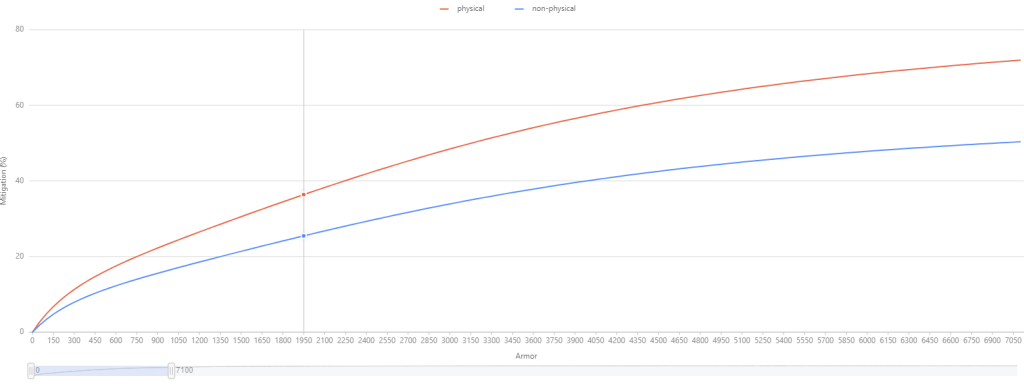
Armor provides damage reduction for hits. It provides no benefit against DoTs. Armor also provides more reduction for Physical Damage than other Damage Types, capping at 85% for Physical and 59.5% for all other damage types. The exact amount of reduction you receive is determined by two things:
- The amount of Armor you have (scaled through sources of 'added and 'increased')
- The enemy's level
Armor can be scaled from all of the typical sources, including Gear, Blessings, Skills, and Passives. Sentinel has the most natural support, but every class has at least some.
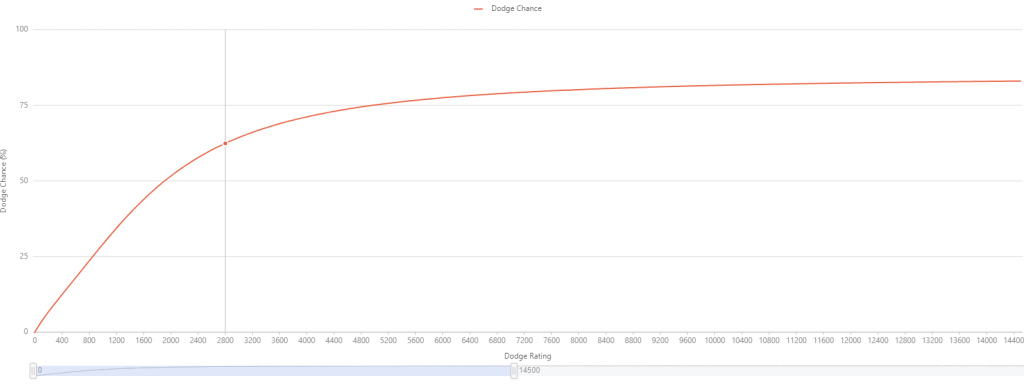
Dodge
Dodge has a chance to completely avoid a hit, negating any damage it would do and any ailments it would apply. DoTs cannot be dodged.
Dodge chance caps at 85%. Diminishing returns make it impossible to reach the cap (although you can get close). There are some effects that can surpass this cap momentarily (i.e. Silver Shroud), but these effects fall outside of the normal Dodge calculation. The exact amount of reduction you receive is determined by two things:
- The amount of Dodge you have (scaled through sources of 'added and 'increased')
- The enemy's level
Dodge can be scaled from all of the typical sources, including Gear, Blessings, Skills, and Passives. Rogue has the most Dodge support. Primalist also has good support.
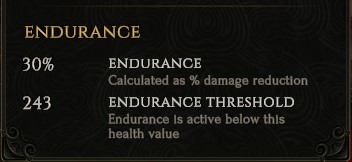
Endurance
Endurance is a unique defensive layer that provides substantial 'one-shot' protection. It kicks in after a player reaches a certain HP threshold and then provides Damage Reduction to all types, including DoTs. Damage can be partially mitigated if a single attack starts above the threshold but then drops it below. The damage that occurred below the threshold receives mitigation, while the part above does not. Scaling Endurance is accomplished through two stats:
- Endurance: This increases the amount of Damage Reduction a player will receive, up to a maximum of 60%. It has a baseline of 20%.
- Endurance Threshold: This is the amount your HP must be below in order to receive the Endurance Damage Reduction. It has a baseline of 20% of the player's total HP, which means this number will scale with increases to HP along with increases to the stat itself.
Endurance can be scaled from all of the typical sources, including Gear, Blessings, Skills, and Passives. Primalist has the most support while Acolyte has some through class specific gear.
Block
Block offers a chance to reduce a portion of Hit Damage. Similar to Armor, it does not apply to DoTs. Blocking does not require a shield, but it is much less effective without one. It has two parts:
- Block Chance: Determines the likelihood that any hit against you is blocked.
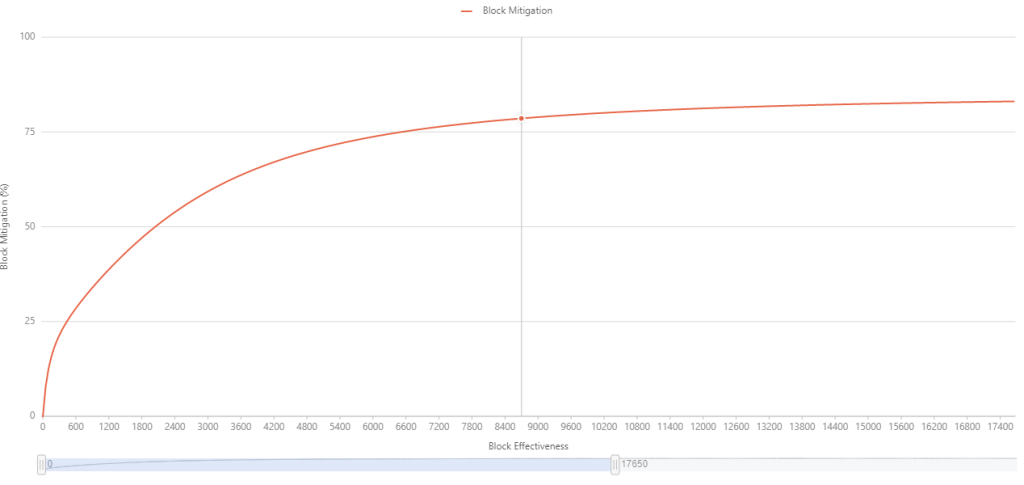
- Block Effectiveness: The amount of Damage Reduction you receive from a Block.
Block Chance is pretty straightforward, with any increases to block chance being additive. Example: We have 30% Block Chance and add a source of 10% Block Chance. We now have 40% Block Chance.
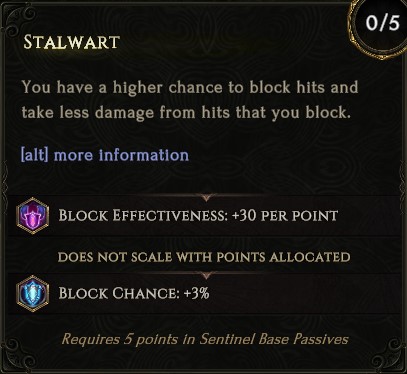
Block Effectiveness works similarly to Armor. There is a formula that is determined by both the amount of Block Effectiveness you have and Area Level. Block Effectiveness caps at 85% Damage Reduction.
One other thing: There is also a stat called Less Damage Taken From Block. This is an additional Damage Reduction on Block. It is therefore multiplicative with Block Effectiveness.
Critical Strike Avoidance
Critical Strikes from enemies deal double damage, which makes them especially deadly. Critical Strike Avoidance lowers the likelihood that an enemy crits, with 100% Avoidance meaning you can never be crit. We recommend capping Crit Avoidance as soon as you can, especially on Hardcore!
Critical Strike Avoidance can be found through gear, the Blessing Survival of Might, some class passives, and Primalist Idols. You can also cap your Crit Avoidance instantly through Woven Flesh, which has a 50% chance to drop off of the Abomination in The Fall of the Outcasts Timeline.
An alternative to Crit Avoidance is Less Bonus Damage Taken From Critical Strikes, which reduces the amount of damage taken by a crit. At 100%, crits deal no additional damage.
Glancing Blow
A Rogue exclusive defense, Glancing Blows reduce the damage taken from Hits by 35% (DoTs cannot be Glancing Blows). Like Critical Strike Avoidance, Glancing Blow chance caps at 100%. Scaling sources come mostly through Rogue Passives and the Rogue buff Dusk Shroud.
Stun Avoidance
Stuns prevent the player from moving or using skills. Scaling Stun Avoidance reduces the chance of being stunned from hits (DoTs cannot stun). You can find sources of Stun Avoidance from gear, skills and passives.
While it's beneficial to avoid being stunned, Stun Avoidance does not scale well and the chance to be stunned can also be lowered by reducing the damage you take or increasing your HP/Ward Pool. Since these options also improve your survivability we recommend avoiding Stun Avoiding and choosing them instead.
It isn't necessary to know this formula in order to scale Stun Avoidance. However for theorycrafters, the Stun Avoidance formula is:

Damage Reduction From Classes
While the above are (mostly) general defensive layers that any class can build into, there are also sources of Damage Reduction that apply to only one class. These are typically found in Passive and Skill trees, but can also be found on some class specific gear.
The list of options is too large to cover every single one here, but we provide a few examples for every class that are good representations of the overall options at your disposal.
Acolyte
- Elixir of Death gives Damage Reduction to Physical and Necrotic Damage on Potion Use.
- Aura Of Decay reduces Poison Damage taken while active. The node Inoculation further reduces Poison Damage. Note: This skill also continuously Poisons the player, so the benefit is relative to the Poison stacks you receive.
- Death Seal reduces the damage you take based on your missing health.
Mage
- Flame Ward provides a burst of Hit Damage Reduction on use. The skill can be further augmented to provide more Hit Damage Reduction through Barrier and can even offer more diverse Damage Reduction through Prismatic Buffer and Mental Aegis.
- Arcane Shielding gives global Damage Reduction per stack.
- Fractured Crown converts a percentage of damage dealt to mana instead of health as long as the player has mana. The conversion is 1 mana for every 5 health, making it a very powerful source of Damage Reduction. This stat can also be found through the prefix Damage Dealt to Mana Before Health and the previously mentioned Flame Ward node Mental Aegis.
Primalist
- The Berserker passive provides global Damage Reduction while at low health.
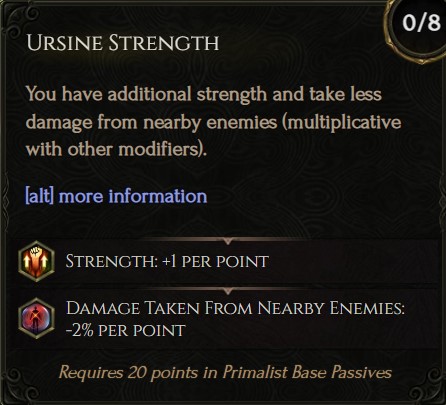
- Ursine Strength reduces all damage taken from nearby enemies.
- Aspect of the Boar is a buff granted by Boar Heart or Boar Heart that provides global Damage Reduction when active. The amount of reduction, duration of the buff, and activation method can be altered through passives and Primalist specific prefixes.
Rogue
- Evasion gives global Damage Reduction while moving.
- Prolonged Demise reduces damage from DoTs while wielding a Bow.
- Crimson Shroud is a buff that reduces damage from DoTs.
Sentinel
- Hammer and Anvil provides global Damage Reduction while not using a Throwing Attack, but you also deal less damage.
- Rebuke reduces damage taken by 80% while channeling the skill.
- Osprixbane reduces the Fire Damage Taken from a Hit that is Blocked.
Combining Sources of Damage Reduction
Now you know about the different types of Damage Reduction available to you, but what happens when you have multiple layers working together? Example: You're a Rogue and have 50% reduction from Block, 35% from Glancing Blow, and another 25% While Moving. All of this together amounts to more than 100% Reduction, so does that mean if you Block and score a Glancing Blow while moving that you take no damage? No, because layers of Damage Reduction are Multiplicative, not Additive.
You are hit by an attack from a level 100 enemy that does 100 Physical Damage before any Damage Reduction is accounted for. You also block the attack and score a Glancing Blow. You're also moving when the attack Hits. You have:
- 75% Physical Resistance
- 50% Block Effectiveness
- 35% Damage Reduction from Glancing Blow
- 25% Reduction While Moving
We need to account for all of these layers to get our actual damage taken. The order that we do it in doesn't matter, because they're all multiplicative (Order of Operations) so let's start from the top and work our way down.
Note: We're ignoring the fact that you would also very likely have some armor to account for as well in order to keep things simpler.
The Physical Resistance is easy since we're capped and we're fighting an enemy with 75% Resistance Penetration. We take no more or less damage so damage taken remains at 100.
Next up is Block Effectiveness, which reduces the damage by 50%:
100 * 0.5 = 50Glancing Blow then reduces it by another 35%. We need to calculate what's left, not what's removed, so we take the inverse of 35% which is 65% (We didn't need this step for Block because the inverse of 0.5 is also 0.5):B
50 * (1 - 0.35) = 32.5Finally we include Damage Reduction While Moving. We'll also need to use the inverse:
32.5 * (1 - 0.25) = 24.375There are no further layers of Damage Reduction to account for, so the damage we will actually take is 24.375.
Debuffs
While not technically a defensive layer in the traditional sense, some debuffs make enemies deal less damage and therefore belong in any discussion about defenses. There are three debuffs in particular that have a direct impact on the amount of damage you take:
Frailty
When applied, this debuff reduces all damage dealt from the enemy by 6% and can stack up to 3 times. The main sources of frailty are found on Gear, Skills and the Curse of Sulphur Blessing. This is a great overall debuff for every build.
Chill
Reduces the Attack, Cast, and Move Speed of the enemy by 12% and can stack up to 3 times. Chill is a double benefit for players since:
- Attack and Cast Speed reduction makes enemies deal less DPS.
- Lower Movement speed allows players to avoid enemies more easily.
Sources of Chill are found in Gear, Skills, Passives, and the Heart of Ice Blessing. Like Frailty, this is a great debuff for every build.
Blind
Halves Critical Strike Chance and affects ranged enemy's ability to aim, resulting in erratic projectiles. While this debuff sounds powerful, the erratic behavior of ranged enemies can actually make it more difficult to avoid their attacks, especially in large packs. If you have Critical Strike Avoidance capped you won't need this debuff and it will often do more harm than good.
Crowd Control Debuffs
Chill and Blind fall into this category, but they have an additional component that provides direct Damage Reduction. These are debuffs that only provide Crowd Control. The very nature of how they work prevents enemy's from dealing damage, so they must be considered when planning defenses:
- Stun: Prevents movement or any use of skills for the duration of the stun.
- Freeze: Like stun, it prevents movement or any use of skills for the duration. Freeze has a base duration that is 3 times longer than stun (0.4 vs 1.2 seconds)
- Fear: Causes enemies to flee for 0.5 to 0.9 seconds. During this time they cannot use skills. Enemies can only be Feared once.
- Slow: Lowers enemy move speed by 20% and can stack up to 3 times. Enemies can be Slowed and Chilled at the same time
Summary
- HP is your most vital stat. Reach 0 and you're dead.
- You'll need sources of Added and Increased to properly scale your HP.
- Ward works like additional HP but it decays over time and damage is taken from Ward before HP.
- Resistances are very important. You'll want to cap them, but it isn't quite as necessary as some other games (like PoE) due to enemy Resistance Penetration.
- The other major defensive layers are: Armor, Dodge, Endurance, Block, Critical Strike Avoidance, and Glancing Blow
- Instead of investing in Stun Avoidance invest in HP and defenses since they'll also reduce the chance of being stunned
- Each class also has specific ways of reducing damage that are exclusive to the class.
- Debuffs are an important defensive layer; especially Frailty and Chill.
Video
Credits
Written by McFluffin.
Reviewed by Lizard_IRL, Aristotelian.