Beginner Crafting Guide
Last Updated:April 12, 2025|Changelog
Crafting is a major part of gearing in Last Epoch. Early game crafting can make the game significantly easier while late game crafting is necessary to make the most powerful items in the game. The system is relatively straightforward yet still offers plenty of flexibility and variety.
In this guide we cover all of the major aspects of crafting including how to craft, crafting items and some basic strategies to get the most out of your crafting.
How to Craft
In order to start your craft you need to open the Forge by pressing 'F'. Once open you can add an item to craft on by either pressing 'shift + right click' or dragging and dropping the item into the center slot on the Forge. From here you have several options. You can:
- Upgrade an existing affix that's below tier 5 by clicking on the up arrow next to the affix.
- Add an affix to an open affix slot by pressing the plus sign in the empty affix slot or the large plus sign in the bottom center.
- Add a Glyph to the center slot which looks like a scroll with a plus sign.
- Add a Rune to the slot that looks like a hexagon with a plus sign. It's located just to the right of the large plus sign in the bottom center.
Which options you choose will be determined by the type of craft you want to accomplish and the strategy you want to use. Once you've chosen one or more options, the large rectangular button on the bottom will light up in purple, meaning you can now craft on the item by pressing that button.
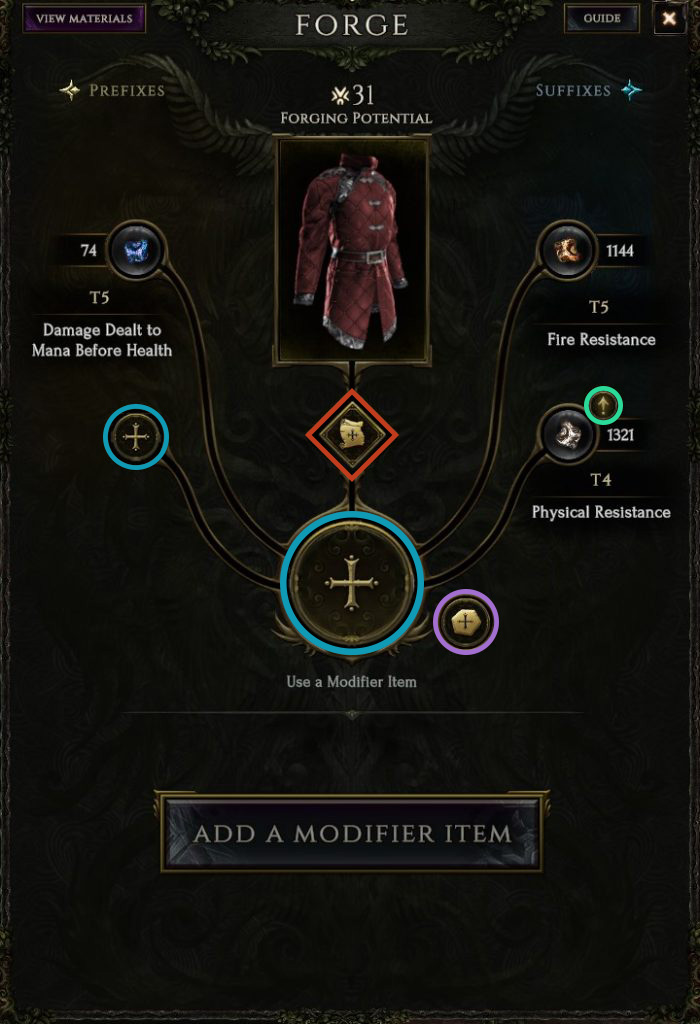
Forging Potential
Forging potential is what allows an item to be crafted on. If an item reaches 0 Forging Potential, then no more crafting can be done to the item. Nearly every kind of craft has the chance to cost some Forging Potential, and some can be more expensive than others. The cost of a craft is determined by:
- The tier of the affix being added/upgraded or the cost of the Rune being used.
- Whether adding/upgrading an affix results in a Critical Success.
- Whether a Glyph of Hope was used and procced.
- If neither a Glyph of Hope proc or a Critical Success, then how the craft rolls within the Forging Potential Range of craft.
Example: You have a ring with Tier 3 Minion Damage. The cost of upgrading to tier 4 is a range from 1 to 18 Forging Potential. If the craft ends in either a Critical Success or a Glyph of Hope is procced then it will cost 0 Forging Potential. If not, then the costs will be somewhere between 1 and 18.
Items do not have a fixed amount of Forging Potential, meaning some will drop with more Forging Potential than others. How much Forging Potential will be on an item is determined by:
- The area level it dropped in (lower level areas tend to have lower potential).
- The rarity of the item (higher rarity is better, so Exalted items will almost always have more Potential than Rare items, Rare more than Magic, and Magic more than Common).
- A random roll within its rarity and area level range.
Higher Forging Potential means more potential crafts before running out. This makes Rare and Exalted items substantially better crafting bases to work from than Magic and Common.
For more information on item rarity check out our Gear Walkthrough.
Crafting Materials
There are a lot of materials to choose from when choosing your craft but they all fall into three categories: Shards, Runes and Glyphs.
Shards
These are the most basic crafting materials and are used in most of your crafts. Shards are the affixes that you put onto gear, whether by upgrading existing affixes or creating new ones. In order to craft an affix or upgrade the tier of an existing affix you must have at least one shard of the corresponding stat.
- Example: You have tier 2 Health on your body armor and you want to upgrade it to tier 3. You must have at least one Added Health Shard in your crafting inventory or you won't be able to craft it. If you want to upgrade to tier 4 after upgrading from tier 3, you'll need another Added Health Shard.
- Example 2: You have an open prefix slot on your gloves and want to add Strength. You will need at least one Strength Shard. You'll also need 1 additional Strength Shard for every upgrade tier.
Glyphs
There are five glyphs in the game. All of them directly affect affixes:
- Glyph of Hope - This is a core crafting component that is used when upgrading an affix tier. It provides a 25% chance for the craft to consume no Forging Potential.
- Glyph of Chaos - When upgrading an affix tier this changes the affix to something different. The affix tier will still be upgraded in the process. Example: You have a Tier 2 Strength Prefix and use a glyph of Chaos on it. It rerolls the Prefix to Dexterity and upgrades it to tier 3. Note: You need a shard of the affix that you're changing in order to complete this craft. So in our previous example you need a Strength Shard
- Glyph of Order - When upgrading an Affix to a higher tier this maintains the roll range. Example: You have a tier 4 Health affix with 55 HP, the highest possible for that tier. You use a Glyph of Order on it which upgrades it to tier 5 with a roll of 75 HP, the highest possible for that tier.
- Glyph of Despair - A rare glyph that has a chance to seal an affix of your choosing instead of upgrading it. Sealing an affix moves it to a 5th affix slot, opening up the affix slot it had previously occupied. Sealed affixes cannot be crafted on. Example: You have tier 2 Intelligence on your gloves. You successfully use a Glyph of Despair, sealing the tier 2 Intelligence on a 5th affix slot where it can no longer be crafted on and opening up a prefix slot for crafting.
- Glyph of Envy - Allows you to keep and upgrade a single affix while changing all of the other properties of the item, including the implicits. However, it's primary purpose is to speed up the leveling process for additional characters by adding stability to timelines.
Runes
There are ten Runes in the game with a wide range of effects:
- Rune of Shattering - Destroys an item and in the process turns some of the affixes from that item into shards of the same type. The number of shards received can be anywhere from 1 to the total number of affixes on the item.
- Rune of Refinement - Rerolls the value of all affixes on the item within their tiers. Example: You have a ring with tier 5 Void Resistance. Using a Rune of Refinement will change the roll to something ranging between 30-45%. Any other affixes on the ring will be similarly affected.
- Rune of Removal - Randomly removes one affix on an item and returns the number of tiers of that affix to you as shards. Example: You use a Removal on the previous ring and it removes the tier 5 Void Resistance. The Void Resistance is removed from your ring and you are given 5 Void Resistance Shards.
- Rune of Discovery - Adds tier 1 affixes to all open affix slots with an increased chance of adding rare affixes. Does not cost forging potential to use. Example: You have an item with only 1 prefix. Using a Discovery adds 1 prefix and 2 suffixes to the item and uses none of the item's Forging Potential.
- Rune of Shaping - Rerolls any implicits that have a roll range. Example: Using a Shaping on a Hollow Blade will reroll the Melee Void Damage and Void Penetration, but the Melee Physical Damage is a static number so it will not be rerolled.
- Rune of Ascendance - Takes a Common, Magic, or Rare item with at least 1 Forging Potential and changes it to a unique item of the same type. Example: You use Ascendance on a Hollow Blade, turning it into a Volcanus. Note: The kind of two handed sword you use does not affect the outcome of the craft. This is why your Hollow Blade was able to make a Volcanus, despite Volcanus having a Flamberge as its base.
- Rune of Creation - Creates a duplicate copy of the item. In doing so, it lowers the Forging Potential of both the original and copy to 0.
- Rune of Weaving - Takes an item that has Weaver's Will or Weaver's Touch and immediately uses a random amount of it to create an equivalent number of affixes/tiers on the item. This is effectively a shortcut to needing to wear the item and slay monsters to determine the outcome of the Weaver's Will/Touch. There is no downside to using this method.
- Rune of Havoc - Takes an item with at least one Exalted affix and four affixes (Sealed affixes don't count) and shuffles the tiers of those affixes. Example: An item with one Tier 7 affixes and 3 Tier 2 affixes is shuffled. One of the tier 2 affixes becomes Tier 7, while the original Tier 7 is now Tier 2. This can be used with any combination of tiers as long as there's one or more Exalted affixes on the item.
- Rune of Redemption - This works similar to Glyph of Chaos, but only for Exalted plus the tier and roll of the affix doesn't change. Example: You have tier 6 Strength with a max roll on a ring. You use a Rune of Redemption and it replaces the Strength with Intelligence. It remains tier 6 and max rolled.
Critical Success
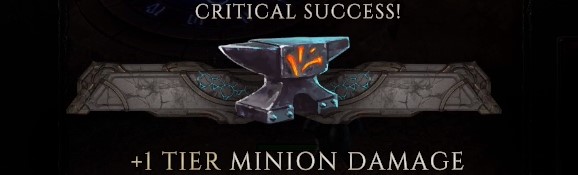
Every time you add an affix or upgrade the tier of an affix there's a chance that it will result in a Critical Success. When this happens, you will receive the craft for free (including shard cost) and also another tier from any affix that is below tier 5 will be randomly upgraded as well. This means you'll get two free crafts instead of one, but you won't have any control over where the second craft occurs. Here are a few tips to deal with this potential problem and even turn it in your favor:
- If you're planning on using Glyph of Chaos to change an affix, do it early in the craft before upgrading other affixes. If you crit success on the affix you want to change, it will give you fewer shots at getting the right affix or even block you from changing it at all if the crit success results in a tier 5.
- Upgrading lower tier affixes first could result in some free crafts on higher tier affixes if they happen to land a crit success. Higher tier affixes cost more, so you can avoid some potentially expensive crafts this way.
- If you're low on shards for a particular affix, upgrading the other affixes on the item could result in a critical success on that affix which doesn't cost you any shards.
- A critical success can't upgrade an affix that doesn't exist. If you have an open affix slot with at least one low tier and high tier affix you can upgrade the low tier affix(es) first before adding an affix to the open slot. This increases your chance of getting a critical success on the high tier affix(es).
Crafting Strategies
While crafting in Last Epoch is relatively straightforward, there are some strategies that can help you get the most out of your crafting sessions. Here are a few we find particularly valuable, even for new players:
- Always use Glyph of Hope when adding/upgrading an affix if you have one. If you don't have any, it's often better to wait for one to drop before crafting. Hope are pretty common items, especially in endgame so you'll eventually have plenty to work with.
- Rune of Discovery can be a valuable way to upgrade items on the cheap in the campaign. If one drops, use it on a piece of gear that's missing some affixes to get some free stats!
- If you're targeting shards for a certain affix, use Rune of Removal instead of Rune of Shattering. If it removes the affix you want, you'll be guaranteed to get a number of shards that is equivalent to the tier of that affix. Example: You have body armor with tier 4 Health. A successful Removal will give you 4 Increased Health Shard. If you Shattered the item instead you could end up with only 1 shard or even 0 if there are other affixes on the item.
- Related to the last point: When targeting shards with Rune of Removal you can keep using Removals until you get the affix you want or reach 0 Forging Potential. You can combine Removal with Glyph of Hope to decrease your chances of running out of Potential. If you still end up running out of Potential before removing the affix you want, you can still use a Rune of Shattering on the item and there will be fewer overall affixes, increasing your chances of getting at least one shard of the affix you're looking for.
- If you have an item that has the potential to be really great but it has one bad affix, instead of risking ruining the item with a Glyph of Chaos or Rune of Removal try using a Glyph of Despair. If successful, the affix will be sealed into a 5th slot which opens up the slot it was in to craft a new affix. This strategy is more likely to succeed on affixes with low tiers, 4 total affixes, and/or affixes on an exalted item. Example: Tier 1 affixes on an exalted item with 4 affixes are guaranteed to seal while tier 4 affixes on a rare item are very unlikely to succeed.
- Use Rune of Weaving to avoid having to remove a Weaver's Will item that has already been identified and has useful stats. This also avoids the wait and allows you to identify multiple Weaver's Will items quickly if you have enough Runes of Weaving.
- Rune of Havoc is great if you have an item with good affixes but the Exalted is in the wrong place. It's also valuable if you have the affix you ultimately want to be Exalted but it or another fix is low tier and the Exalted affix isn't good. If you're successful in moving the Exalted tiers to the preferred affix and the low tier to the poor affix, you can then attempt to Seal or Chaos the poor affix away.
- Rune of Redemption is great when you have three good affixes on an item, but you're missing the best affix and there's a poor quality Exalted affix in its place (Example: your best affix is a prefix and you have a poor Exalted prefix). By using Rune of Redemption, you might get lucky and roll into your preferred affix while maintaining the other three good affixes.
Summary
- Crafting is done in the Forge. The Forge is accessed by pressing 'F'.
- Forging potential is necessary to craft on an item. As you craft, you risk losing Forging Potential. When the Potential of an item reaches 0 it can no longer be crafted on.
- Shards are the most basic crafting material and required to add or upgrade an affix. Runes and Glyphs serve many different functions.
- Critical Successes make a craft free while also adding an additional random tier to the item.
- Always use Glyph of Hope when adding/upgrading affixes.
- Use Rune of Removal to target specific shards.
Video
Credits
Written by McFluffin.
Reviewed by Aristotelian, Terek.