Chapter 4 Secret Area, Purple Cloud Mountain Guide
Last Updated:October 1, 2024|Changelog
Enter Purple Cloud Mountain and defeat The Duskveil to obtain the Weaver's Needle Vessel. This is a secret area located in Chapter 4, to gain entrance you need to locate and defeat the Venom Daoist first at the Pool of Shattered Jade and then again near the Temple of Yellow Flowers. There are 3 bosses within Purple Cloud Mountain, the Scorpionlord, Daoist Mi, and The Duskveil. Defeat all 3 to obtain unique rewards.
You can skip the Scorpionlord fight, if you do he joins you in battle on your first attempt against the Duskveil. However, this means you miss out on his Gourd.
Venom Daoist Locations
First up you need to find and defeat the Venom Daoist before you can access Purple Cloud Mountain. This fight is not particularly challenging but locating him takes some work. He needs to be defeated 3 times. The second fight has two phases but luckily he has low health making him easy to burn down using spells like A Pluck of Many.
First Venom Daoist Location
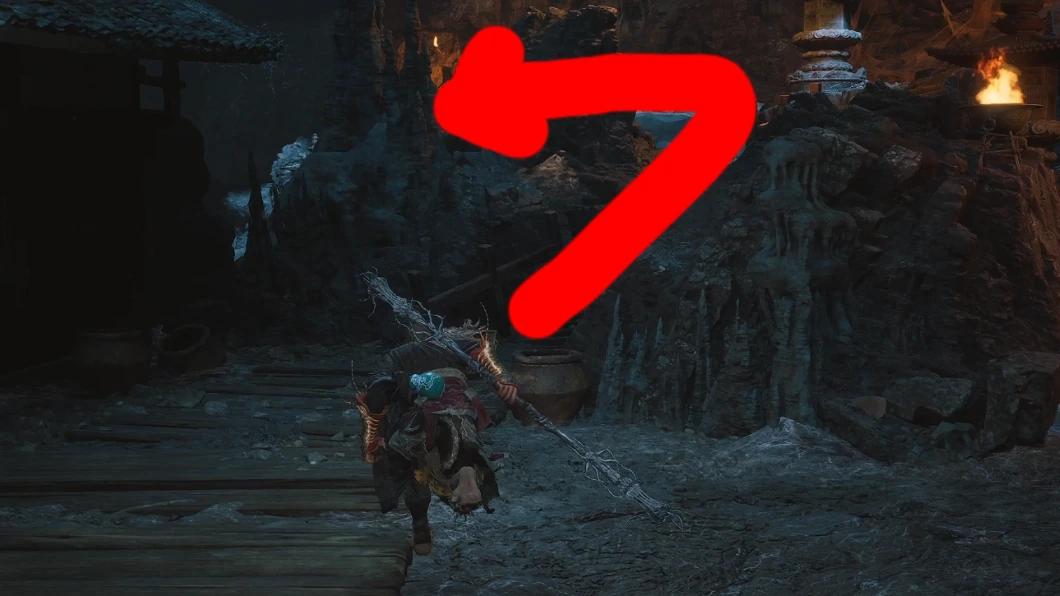
- Start from the Upper Hollow Shrine and take an immediate left following the path covered in webs.
- Proceed to the large platform and jump down near the brazier.
- Continue down the passage through the hanging sacks, beware some are going to come alive and attack you.
- Defeat them or run past them.
- You come across a path spiraling up with various enemies hanging from the ceiling, this means you're close to the Pool of Shattered Jade!
- Head into the corridor behind the Shrine until you encounter the large hanging sack.
- Attack it, at 50% health the Venom Daoist pops out!
Second Venom Daoist Location
The Venom Daoist's second location is a bit of a journey, continue to progress until you reach the Temple of Yellow Flowers near the end of the Chapter. Start from the Temple Entrance Shrine in the Temple of Yellow Flowers.

- Go up the stairs and pass through the gateway, take a left, defeat enemies as you come across them, or simply run past.
- When you encounter a Snake Guai, take a right and continue up the path.
- After reaching the top of that path you can turn left, or right.
- Left (1) leads to the Venom Daoist fight and Purple Cloud Mountain.
- Right (2) leads to the optional Fungiwoman fight and a new Drink.
Venom Daoist Boss Tips

- The Venom Daoist is quite agile but doesn't have a lot of health. This makes him particularly susceptible to burst damage from 3-4 Focus Heavy Attacks and A Pluck of Many. You can use the Immobilize Spell to get him to hold still or Freeze him with Umbral Abyss and the Apramana Bat Spirit making it easier to deliver a fully charged Heavy Attack.
- For the first Venom Daoist encounter, use your resources freely.
- The second time you fight him, save your Mana because he heals to full and begins his final phase at ~33% health. Use rechargeable effects like your Spirit and Transformation to push him through this phase.
- Finally, when he gets to ~60% Health use your Mana to burst him down.
- When he chains multiple attacks together, focus on dodging.
- His Aerial attacks have a longer recovery time, giving you a good window of opportunity to deal damage.
- After defeating him for the second time, the entrance to Purple Cloud Mountain appears!
From here, explore the area as you please, there are 3 bosses to encounter within Purple Cloud Mountain. Before you do, grab some poison resistance and Anti-Miasma Powder as many of the enemies have significant poison buildup. Using the Gall Gem Soak to increase your poison resistance after drinking from your Gourd also helps manage the poison buildup.
Scorpionlord
When you first encounter the Scorpionlord, he's relaxing and drinking. You can run past the boss and continue on with your journey. If you do, Scorpionlord joins you as an ally when you first encounter The Duskveil at the end of the zone. However, if you do then you won't gain access to the Deathstinger or the Stained Jade Gourd. If you want to fight him, simply smash the pots of booze to enrage him and start the fight! This is a very challenging encounter, one of the most difficult in Purple Cloud Mountain, if not all of Chapter 4.
Scorpionlord Boss Tips
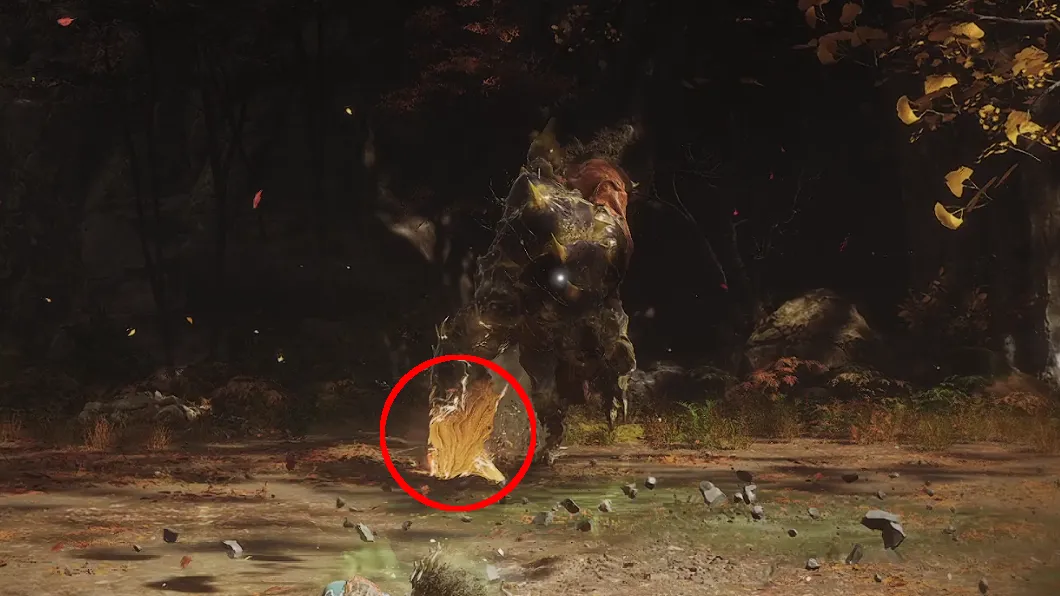
The Scorpionlord is an extremely aggressive and challenging foe. He alternates between rapidly striking with his claws, or using his tail to inflict lethal poisons. It is difficult to find a spare moment to heal, never mind using additional medicines, so you may end up having to tank the poison DoT for a bit while you dodge. The Non-Void Spirit is particularly useful here as he gives you a backstep to get out of danger.
- When Scorpionlord's claw glows yellow he is about to use it to attack you. His 2 most common claw attacks are a flurry of strikes or a long charge. Build distance to avoid damage.
- When you see his claw gets stuck in the ground, there's a window of opportunity you can use to get some damage in on the boss.
- On the other hand, when his tail glows green he is about to use that instead. Scorpionlord's most common Tail attacks are 2-3 hit combos with either a long "thrust" or a sweeping "slash." They often leave poison puddles behind which explode after a short duration.
- Avoid the Thrusts by dodging left or right.
- Dodge the slashes with precise timing.
- Sometimes he uses a combo that combines both Claw and Tail attacks, watch his body closely to see what glows so you know what he's doing next in the sequence.
- Scorpionlord also has a dig attack, he buries himself underground and then jumps out to attack the Destined One. Avoid this by timing your dodge, or use Cloud Step to negate the mechanic and create a window of opportunity where you can ambush the boss after.
Check out our dedicated Scorpionlord Boss Guide for more information on how to defeat the boss!
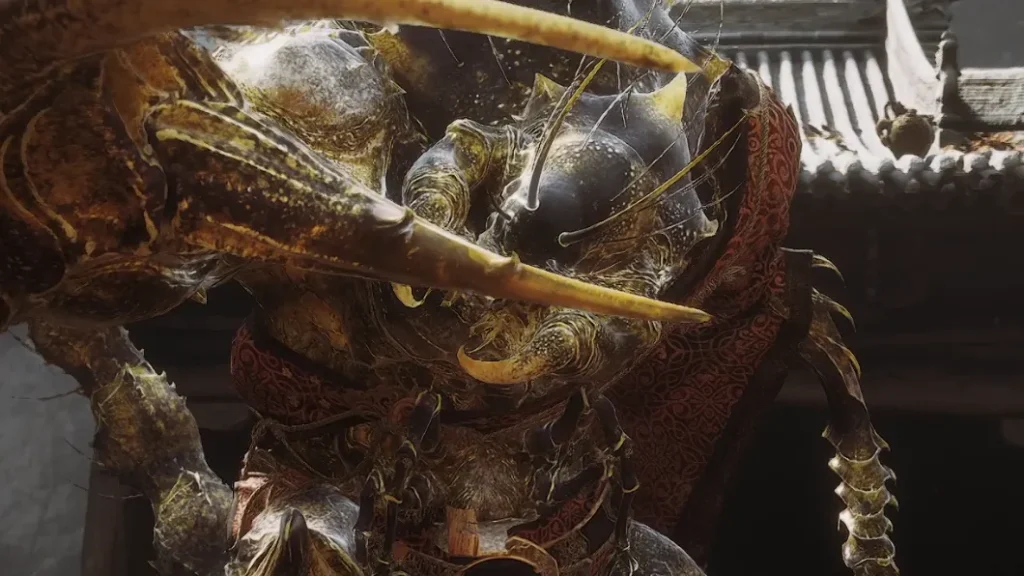
Daoist Mi
The next enemy you encounter is Daoist Mi, he sends you on a quest to collect Violet Hail from one of the nearby monks. After you obtain the Violet Hail he attacks you leading to a two-phase fight. The second phase starts when the boss initially reaches 0 Health and is much more dangerous, so save your Mana for that.
You need to complete Daoist Mi's quest before beating The Duskveil, as defeating that boss locks you out of finishing the quest!
Daoist Mi Boss Tips
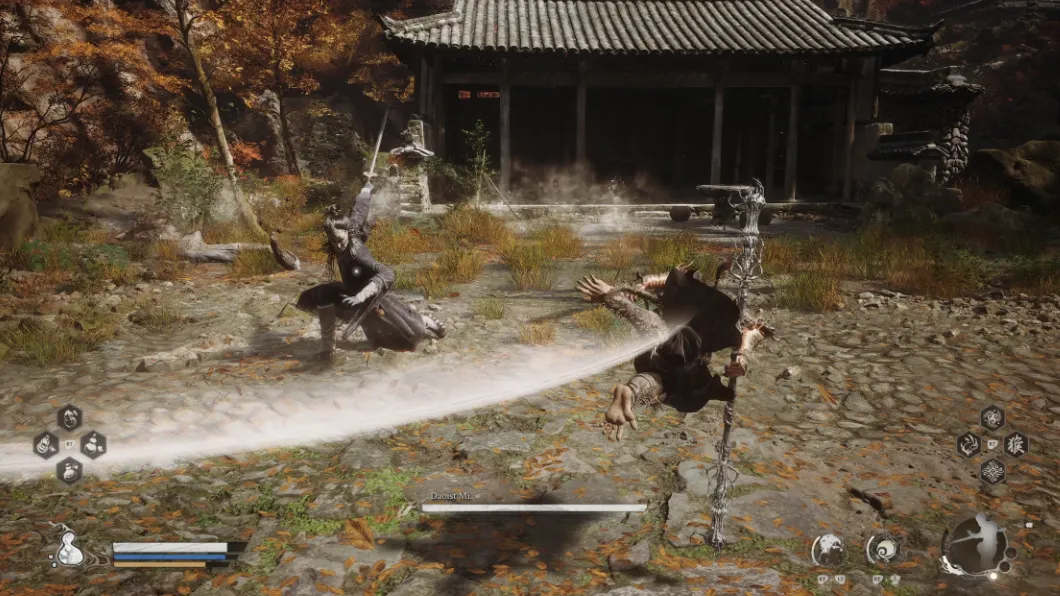
- Initially, Daoist Mi attacks you with a mix of martial arts and his sword. Most of his attacks aren't particularly damaging but they're fast and he can chain them together. Use a Transformation to keep the pressure up, but save your Mana for Phase 2.
- Daoist Mi is easy to interrupt, disrupt his combos using your Light Finisher and Heavy Attack.
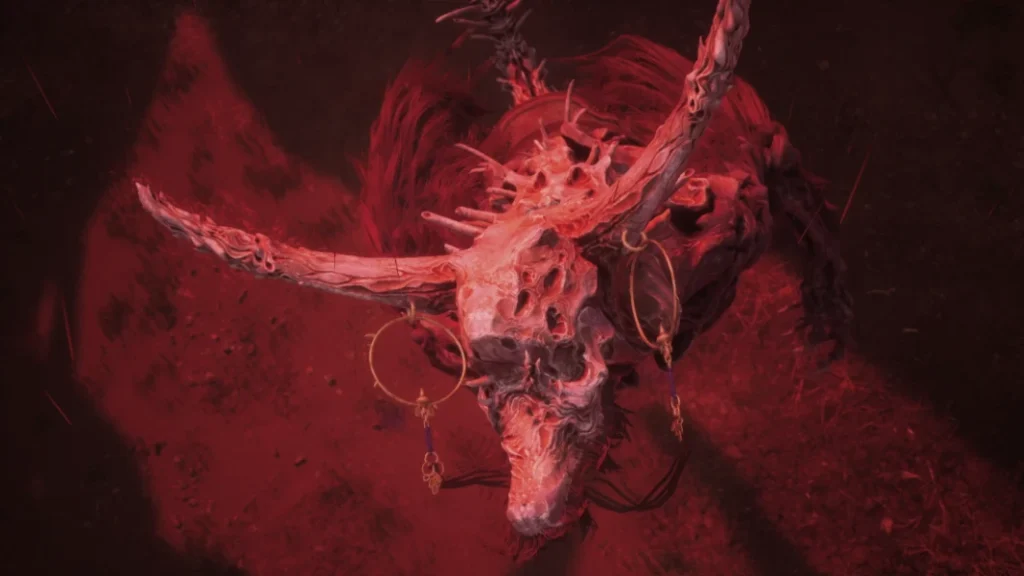
- Upon reaching 0 Health, he ingests the Violet Hail transforming himself into an Armorworm monstrosity with poison attacks.
- Much like the Armorworm Monk enemies found throughout the latter half of Chapter 4, he flops around a lot making it difficult to predict his movements. Use your Mana to cast spells like Immobilize and A Pluck of Many to rapidly burn through his Health.
- Many of his attacks leave behind poison clouds, this makes Thrust Stance or Pillar Stance particularly useful as you can use either to attack from a distance while standing out of the poison.
After you defeat Daoist Mi, the serpent from earlier approaches you and gives you a new Transformation Spell, Violet Hail. Take the form of an Armorworm with poisonous attacks!
The Duskveil
Purple Cloud Mountain ends with a battle against The Duskveil, this is another two-phase fight with the last phase beginning when the boss reaches 0 Health. The Duskveil uses many similar mechanics between both phases but adds in new sequences utilizing a sword and some breath attacks during phase 2. He has a lot of health, and you want to conserve your Mana for later so focus on reading his slow methodical attacks and dodging to conserve your resources in phase 1. After you defeat The Duskveil, you obtain the Weaver's Needle Vessel which is highly effective against Chapter 4's final boss the Hundred-Eye Daoist.
Duskveil Boss Tips
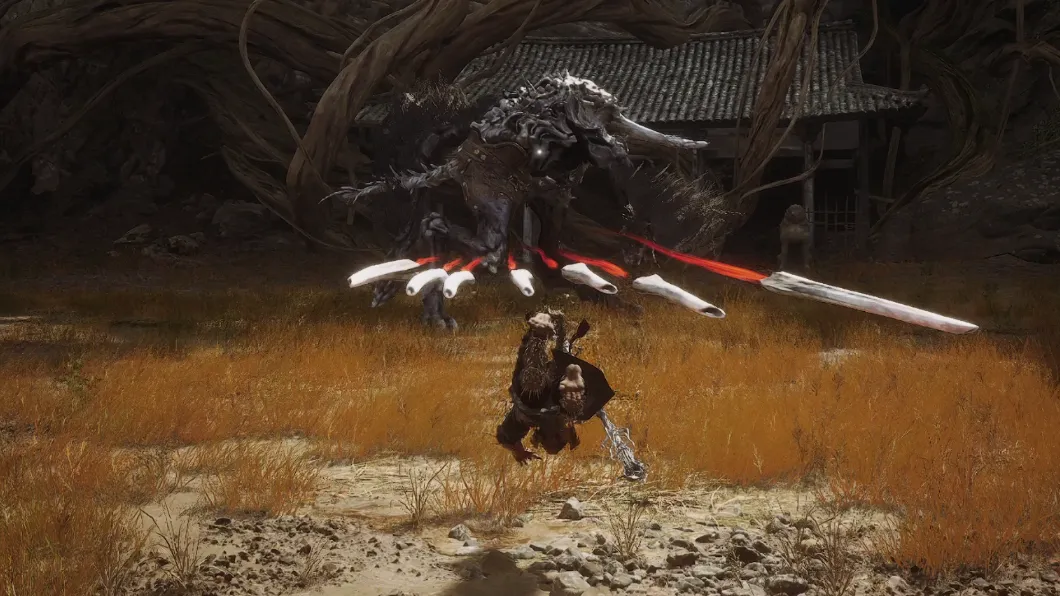
- The Duskveil uses several basic attacks where he rakes at you with his claws, slams his head down to deal damage, and attempts to stomp on the Destined One. Dodge these and pay close attention to his other moves, use your Transformation or Spirit for additional damage but save your Mana for phase 2.
- The fight frequently opens with a projectile volley, dodge forward through the attack to close distance on the boss and avoid damage. Alternatively, use Staff Spin to deflect them.
- As you approach The Duskveil he often uses a fast punch. This attack is difficult to avoid because of the short animation but isn't particularly damaging.
- Another attack that's difficult to avoid is his spinning jump strike. He leaps into the air, spinning and dealing damage rapidly before crashing down. Due to the camera angle, this is difficult to avoid entirely but the attack isn't particularly damaging so dodge the best you can and avoid the end of the sequence.
Phase 2
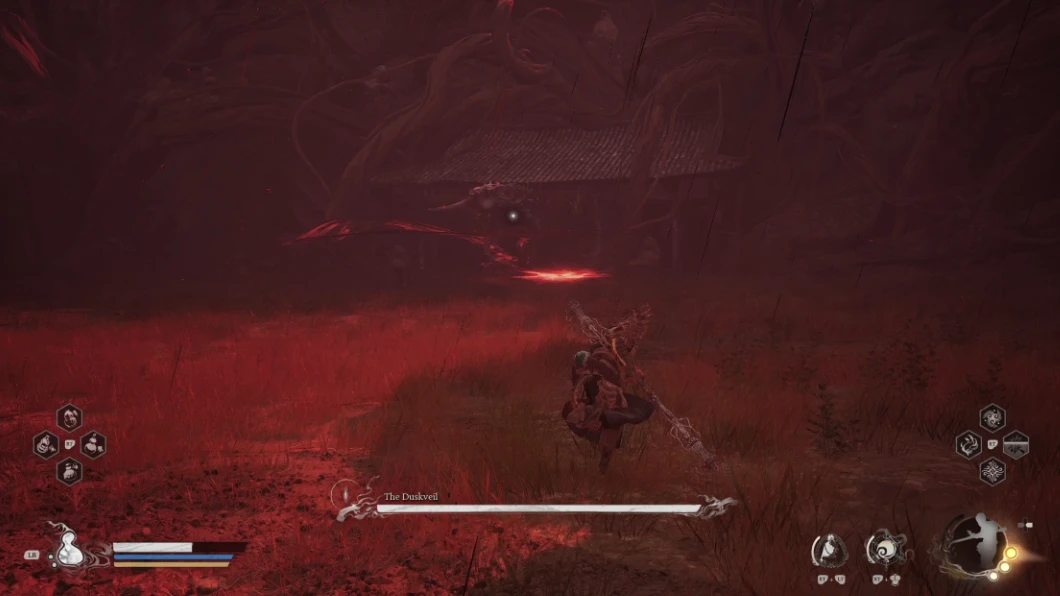
- During Phase 2, The Duskveil sometimes surrounds himself with a red mist. This slowly eats away at your Health the longer you stand in it. It's fine to stand in the mist for a short duration but be mindful of your remaining Gourd charges.
- At the start of the phase, the boss opens with his sword, throwing several blades of energy at you. Avoid these by timing your dodges correctly as most of the strikes are horizontal which makes it difficult to avoid them by sprinting or covering distance.
- The Duskveil uses a breath attack which spreads red mist in front of himself, dodge through to continue damaging the boss.
- In Phase 2 The Duskveil enhances his projectile volley, now firing a larger wave, then leaps into the air releasing several more volleys before crashing back down. Staff Spin is particularly useful for deflecting the projectiles here, just beware of the boss landing on your head. If you're struggling with this, use Cloud Step to create a decoy for the boss to target.
- Throughout this phase, the boss attacks you using his sword. His most dangerous sword combo begins with several sweeping slashes, then The Duskveil leaps into the air before slamming his sword into the ground. Shortly after he lands, the sword explodes. Run away from the boss after he lands to avoid the explosion.
- Use A Pluck of Many and Immobilize to deal burst damage, just don't Immobilize the boss in midair where you can't reach him with your attacks.
Learn more about the other Vessels available in Black Myth Wukong with our Vessel Guide.
Video Guide
Check out this video guide by Tenkiei to learn more about where to find the Venom Daoist, enter Purple Cloud Mountain, and beat the bosses residing within.
Summary
Our Purple Cloud Mountain quest walkthrough has the location of the Venom Daoist, along with some tips and tricks to defeat the Scorpionlord, Daoist Mi, and The Duskveil.
- Locate the Venom Daoist at the Pool of Shattered Jade then defeat him.
- Find the Venom Daoist again at the Temple of Yellow Flowers, beat him, and enter Purple Cloud Mountain.
- Anger Scorpionlord and defeat him or run past him if you're not interested in the rewards.
- Daoist Mi sends you on a quest to obtain Violet Hail, return the item to him then defeat him to obtain a new Transformation Spell of the same name.
- You end this secret area with an epic battle against The Duskveil, defeat him to obtain the Weaver's Needle Vessel.
Written by: Tenkiei