Power Up Guide for Beginners
Last Updated:June 12, 2025|Changelog
During your Campaign Playthrough, there will be times when you feel weak. This is completely normal for inexperienced players, but it is annoying and disrupts your gameplay flow and ruins your fun.
This article helps you solve that problem by POWER UP!
Make sure you pick up a build guide out of our catalog, since it solves many problems you might encounter!
Vendor Recipes
These allow you to sell specific item combinations to the Vendor for a certain outcome. They are an incredible tool to get stronger in the early game and will make it easier for you to progress throughout the acts!
Physical Damage Weapon
While spells mostly rely on Gem Levels as their damage source, attack based builds get most of their power from their weapon. This means instead of getting upgrades passively, you have to actively upgrade your weapon throughout your playthrough.
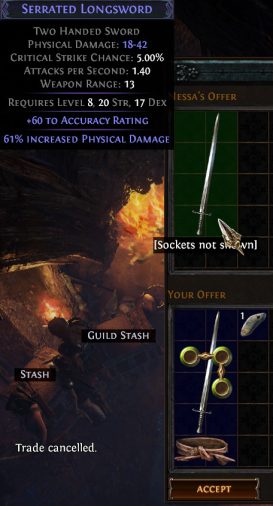
- Any Weapon
The % Physical Damage is not global and multiplies whatever Base Physical Damage you have on your weapon. This means that choosing the right base-weapon is INCREDIBLY important. If you are following a build guide, which weapons to choose should be outlined. Otherwise, it's usually true that the higher the item requirement, the higher the damage. - A Magic or Rare Rustic Sash
Magic = (40-49% increased Physical Damage)
Rare = (50-64% increased Physical Damage)
You should be using a Rare Rustic Sash whenever you can. Using any Essences helps you achieve that. - A Blacksmith's Whetstone
Flask Upgrades
Life & Mana Flasks have different types depending on level, ranging from a Small Life Flask to a Eternal Life Flask. Keeping your Flasks adjusted to the content you are running can give you a huge advantage in terms of Life Recovery.
You can use 3x of the same Life/Mana Flask to upgrade it one tier higher, for example:
3x Small Life Flask results in a Medium Life Flask.
Always check the jewelry vendor as well if you are having trouble keeping your flasks up to date!
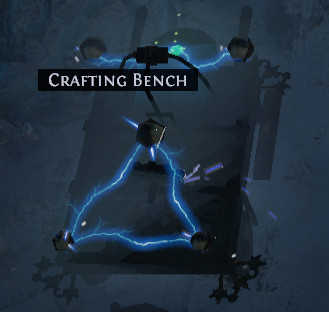
Crafting Bench
The Crafting Bench allows you to add a modifier to an item that has at least one open Prefix or Suffix.
This can't give you more than the maximum 6 mods on a rare item and it also can't give you a mod that the item already has!
The Crafting Bench is often used to "finish" an item, but during the leveling process, it is a vital source of Attributes, Resistances and Damage.
Unlocking the Crafting Bench
You unlock the Crafting Bench with your first Hideout after completing the Safe and Sound quest in Act 2.
It initially comes with basic Life, Mana, Resistance and Attribute crafts and you can unlock additional crafts by finding Recipe Altars within the game.
These are listed within our Campaign Guide to make sure that you won't miss any! If you missed some, check their location at the bottom of the Crafting Bench Modifier List.
Using the Crafting Bench
Using the Crafting Bench is simple, just put the item into the designated slot, choose a modifier and press craft.
The requirements to add a craft are:
- The modifier isn't already present on the item.
- There's space for a modifier.
- You have the required currency for the craft.
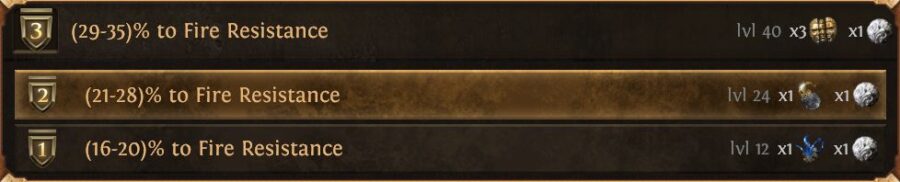
Some crafts have multiple tiers that give you access to better modifier values at higher levels, but also cost more currency. If the item already has a craft, it can be replaced with your desired craft at the additional cost of an Orb of Scouring.
What to Craft?
The Crafting Bench is extremely usefufor gaining extra power. Some of the most used examples are:
- Giving you extra elemental resistances to keep up with the game's difficulty curve
- Giving you Attributes to equip your gear and level your Gems
- Improving your Damage with crafts on weapons and jewelry
You change your gear quite often during the campaign, so DO NOT OVERCOMMIT TO AN ITEM since every craft costs you currency that you might need later on. This means that choosing lower-tiers of a craft is a great strategy, even if you already unlocked a higher tier!
Essences
These are Crafting Materials that come in 7 different tiers.
When you apply an Essence to an item, it is rerolled with a guaranteed mod depending on the Essence and Item Type used. Here is an example of a Tier 2 Essence: Muttering Essence of Greed
No matter what Essence you use, the biggest advantage they give you while leveling is turning your item into a rare.
This is strong because you are often unable to use rares you find from killing monsters, since they don't have the right sockets/links/colours you need to equip your Gems.
With an Essence, you can simply look for a normal item with the right sockets/links/colours, while disregarding it's stats and still turn it rare, giving you the best of both worlds.
Leveling Uniques
Trading is the undisputed best tool to gain power in Path of Exile.
While you might be discouraged from using it when you're new, trading will quickly become the bottleneck to how strong your build can be late game.
The term "Leveling Uniques" is used for Unique Items with low Level Requirements, making them extremely potent early game, where they usually outclass normal gear. During the Campaign, you won't have much currency to buy those, but should you drop your first Chaos Orb, some of these might become available for purchase:
- Goldrim: This helmet gives you an absurd amount of Elemental Resistances, making your gearing process way easier.
- Karui Ward: A great Amulet for any projectile build, be it attack or spell based.
- Wanderlust: Boots with high Movement Speed that also make you immune to Freeze, what's more to like?
- Meginord's Girdle/Prismweave: Strong Belt option for Physical or Elemental Attack Builds.
- Physical Weapons like: The Screaming Eagle, Limbsplit or Geofri's Baptism: Weapon based builds often struggle to upgrade the powerlevel of their weapon, these Uniques can help out with that.
- Quill Rain/Storm Cloud: Extremely strong early game Bows that make your leveling easier!
After you leveled your first character and accumulated some currency, there are a lot more expensive and powerful leveling items to make your 2nd/3rd playthrough even easier. To see some of those, check out the Twink Leveling Section!
If you want to know more about the basics of Trading, read our article here.
Summary
There are ways to make your first playthrough smoother:
- Vendor Recipes can get you specific Items for your builds, starting at level 8.
- The Crafting Bench gives you great flexibility by helping you cap Attribute Requirements and Resistances.
- Essences allow for an easy transformation of Normal Items into Rare Items.
- Leveling Uniques give you huge power spikes.
If you need more guidance, the leveling sections of our build guides also provide a ton of extra information.
Credits
Written by Palsteron
Reviewed by Raxxanterax