Ranger Leveling Build Guide
This Lightning Arrow Ranger Leveling Build Guide teaches you the most efficient way to complete the Path of Exile Campaign; with All Skill Points and All Labs. Lightning Arrow's ranged playstyle and fast farming capabilities make it a great League Start Leveling Build for Beginners, Speedrunners & Experienced Players alike.
This Leveling Guide has been tested and verified without Ascending. Thus in practice, your in-game power level will exceed that of the showcased video.
Class Leveling Guides
Ascendancy Overview
This leveling guide is Class agnostic, however, Ascendancies offer a crucial early-game power spike. Use the tabs below for more information on which Ascendancy nodes to specialize in for a smoother leveling experience. Note that if you plan on respeccing in endgame you need a bunch of Gold or 5 Orbs of Regret per node.
Passive Tree Progression
Leveling Progression
Gem Swaps
Use the Skill Embed on the right for Step-by-Step Skill Gem Progression.
For a more in-depth Step-by-Step explanation of when each gem is acquired and socketed refer to the leveling progression section below.
Playstyle
Lightning Arrow is both your primary clear and single target ability. Supplemental Damage is provided by Manaforged Arrows Support, Shrapnel Ballista, and Tornado.
Haste is used while clearing for faster progression and is swapped to Anger on Bosses. For even more single target damage enemies are debuffed with Sniper's Mark.
A regex is a code that can be copied to a vendor's search bar in Path of Exile to filter the results. It highlights specific bases with links, and colours appropriate to this build: Make sure to use it at the vendors whenever you are in town.
-[rgb]-.-|g-g-|-g-g|g-.-g|g-g|nne|rint|serratRanger Leveling Build Act Progression
Act 1
- Level 2: After Hillock
- Galvanic Arrow - Momentum
- Level 4: After Hailrake
- Galvanic Arrow - Mirage Archer
- Shrapnel Ballista - Momentum (Shrapnel Ballista is Optional)
- Sniper's Mark
- Dash
- Level 8: After Lower Prison & Completing Dweller
- Galvanic Arrow - Mirage Archer - Momentum (Optional if 3G)
- Burning Arrow - Manaforged Arrows
- Shrapnel Ballista - Arrow Nova (Shrapnel Ballista & Arrow Nova are Optional)
- Sniper's Mark
- Frostblink
- Level 10: After Brutus
- Add Blink Arrow to the above setup
- Level 12: After Reaching Cavern of Wrath and Completing Fairgraves
- Lightning Arrow - Mirage Archer - LMP (Momentum Single Target Swap)
- Burning Arrow - Manaforged Arrows - Galvanic Arrow
- Shrapnel Ballista - Arrow Nova (Shrapnel Ballista & Arrow Nova are Optional)
- Sniper's Mark
- Blink Arrow
- Frostblink
Act 2
- Level 16: After Fidelitas
- Add Herald of Ice
- Add Frenzy to a Manaforged Arrows setup (Replace Galvanic or Burning Arrow ideally)
- Optional: Purchase Herald of Thunder (Requires a Lapis Amulet or Intelligence Item)
- Optional: Purchase Arctic Armour to swap with Herald of Ice in A5 or Onward
- Level 18: After Weaver
- Free Trinity or Elemental Damage with Attacks -- Purchase the Other One
- Optional: You can delay this step until you have a 4L (Usually in Act 3)
- Bandits: Help Alira
- After The Way Forward - Travel back to Act 1
- Optional: Purchase an Extra Manaforged Arrows, LMP (If you didn't buy one earlier)
Act 3
- Level 24: After Tolman
- Purchase Anger
- Free Grace from Maramoa (Level in offhand)
- Optional: Buy Haste and use Haste when traveling between zones, aura swap to Anger on Bosses
- Optional: Buy a Heavy Belt
- Solaris 2
- Rare Lapis Amulet
- Important: Acquire the Fire Damage Craft in the Room beside Lady Dialla
- Lunaris 2
- Important: Acquire the Lightning Damage Craft in the Upper Left of Piety's Arena
- Level 28: After Gravicius
- Free Storm Rain --> Add to a Manaforged Setup
- Optional: Purchase Blast Rain --> Add to a Manaforged Setup
- Optional: Purchase Artillery Ballista --> To Switch with Shrapnel Ballista
- Example Setup at this Point (Colours and Link Dependent)
- Lightning Arrow - Mirage Archer - LMP - Trinity
- Manaforged Arrows - Storm Rain - Blast Rain
- Manaforged Arrows - Frenzy
- Sniper's Mark, Blink Arrow, Frostblink
- Anger, Herald of Ice or Haste
- Optional: Complete Library
- Purchase Flame Dash -- Swap with Frostblink
- Optional: Purchase Lifetap -- Add to the Storm Rain / Blast Rain Manaforged Arrows Setup
- Optional: Purchase Arctic Armour
- Optional: Purchase Focused Ballista Support -- To Link with a Ballista
Act 4
- Level 38: After Malachai
- Free Returning Projectiles from Lady Dialla
- Free Tornado from Oyun
- Optional: Purchase Barrage Support (1 Alchemy) --> Gem Swap with LMP or Returning Projectiles during Boss Fights
- Note: You can drop LMP after allocating +2 Arrows on Tree (Master Fletcher, Multishot)
Act 5
- After completing The Key to Freedom
- Free Jade Flask
Act 6
- After Lily Roth if you did not complete Library earlier
- Purchase Flame Dash -- Swap with Frostblink
- Optional: Purchase Lifetap -- Add to the Storm Rain / Blast Rain Manaforged Arrows Setup
- Optional: Purchase Arctic Armour
- Optional: Purchase Focused Ballista Support -- To Link with a Ballista
- Major Pantheon: Brine King
- Minor Pantheon: Ryslatha
Act 7
- After completing The Silver Locket
- Diamond Flask
Act 8
- Run Grace in The High Gardens when Completing the Defeat Yugul Quest
- Run Arctic Armour for Freeze Immunity in zones with Cold Damage
Act 9
- After completing The Storm Blade
- Free Rare Spike-Point Arrow Quiver
Act 10
- After completing Safe Passage
- Silver Flask
- After completing Death and Rebirth
- Free Rare Zodiac Leather or Rare Blood Raiment Base
Important Leveling Tips
With experience, the Leveling Progression outlined above is all you need. However, if you're looking for additional guidance, then review the Important Leveling Tips listed below.
General Progression Tips
Bow & Quiver Progression
- Level 2 Crude Bow
- This is your starting bow!
- In most scenarios, it's not worth crafting whatsoever.
- Level 4 Serrated Arrow Quiver
- Level 5 Short Bow
- Act 1 High Flat Ele Bow
- Any Magic or Rare Crude Bow, Short Bow, or Long Bow
- Item Level: 11 to 13+ for the next tier of Flat Elemental to Attacks modifiers.
- Act 2 High Flat Ele Bow
- Any Magic or Rare Composite Bow
- Act 3 High Flat Ele Bow & Pierce Quiver
- Any Magic or Rare Royal Bow
- Any Magic or Rare Penetrating Arrow Quiver
- Act 4 to Act 5+ High Flat Ele Bow
- Any Magic or Rare Grove Bow, Reflex Bow, Compound Bow
- Act 6 to Act 10+ High Flat Ele Bow
- Non-Crit: Any Magic or Rare Ivory Bow, Highborn Bow, Thicket Bow, Spine Bow, Imperial Bow
- Crit: Any Magic or Rare Sniper Bow, Ivory Bow, Assassin Bow, Spine Bow
Listed above are the ideal Bow base breakpoints. That said, the general rule of thumb is to equip the Bow with the Highest amount of Flat Elemental Damage to Attacks. Meaning in some scenarios, a Bow from a previous Act with tons of Flat Elemental Damage to Attacks might be better than a Bow from the current Act, that lacks good rolls.

There are two main methods for acquiring Bow bases: Checking Vendors & Monster Drops. However, a special mention needs to be made for the Rogue Exiles in the Broken Bridge. Rogue Exiles drop a full set of gear, ranging from Normal to Magic to Rare; making them a consistent method for acquiring bases, gear upgrades, or items to vendor.
Flat Damage, Essences & Crafts
If it's not apparent already, Flat Elemental Damage to Attacks is extremely important & crucial to acquire to continuously scale your damage throughout progression.
Flat Elemental Damage to Attacks can roll or be crafted onto the following slots:
- Bow - The largest source of Flat Elemental Damage
- Quiver - The second largest source of Flat Elemental Damage
- Rings
- Amulet
- Gloves
The above items are listed in order of offensive mod priority. Meaning, on Bows or Quivers, it's ideal to equip items with many offensive modifiers. Whereas on Gloves, it's better to equip items with more defensive modifiers. There are other sources of Flat Damage, such as Searching Eye Jewel's, but they aren't consistently available to consider for campaign progression.
In addition to Checking Vendors & Identifying Monster Drops; you can use the following currency orbs to modify Bows you find:
- Essences
- Orb of Alchemy, Orb of Binding, Chaos Orb
- Orb of Transmutation, Orb of Augmentation, Orb of Alteration
Essences are of particular interest, since they allow you to force a Flat Elemental Damage Modifier. See the list below for more information:
- 2 Handed Weapons:
- Cold: Whispering Essence of Hatred, Muttering Essence of Hatred, Weeping Essence of Hatred, Wailing Essence of Hatred, Screaming Essence of Hatred
- Fire: Muttering Essence of Anger, Weeping Essence of Anger, Wailing Essence of Anger, Screaming Essence of Anger
- Lightning: Weeping Essence of Wrath, Wailing Essence of Wrath, Screaming Essence of Wrath
- Quiver, Amulets, Rings & Gloves:
- Cold: Weeping Essence of Suffering, Wailing Essence of Suffering, Screaming Essence of Suffering
- Fire: Wailing Essence of Anguish, Screaming Essence of Anguish
- Lightning: Muttering Essence of Torment, Weeping Essence of Torment, Wailing Essence of Torment, Screaming Essence of Torment
- Note: Only Essences that naturally spawn during the Campaign are listed. There are two additional tiers of Essences available after Screaming, that can be found in Maps or from special league mechanics.
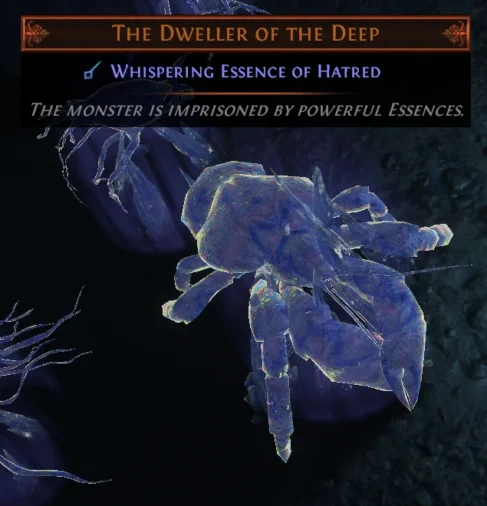
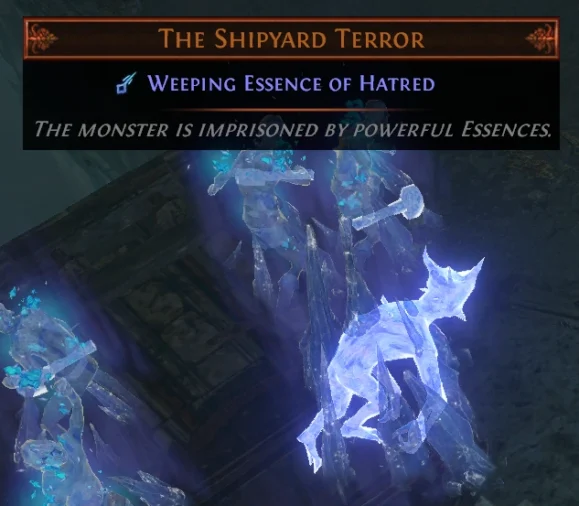
Keep an eye out for Unique enemies that drop specific Essences. They only drop Essences the first time you click them; so consider resetting the zone until you spawn an Essence you desire. Resetting a zone, is only recommended in Act 3 Docks, if you are simultaneously farming XP.
The last method for acquiring Flat Damage on Gear is the Crafting Bench. However, Crafts have to be unlocked by finding them in various zones, refer to the table below for their location.
| Zone | Modifier Tier | Cost | Notes |
| Act 3: Solaris Temple Level 2 | Fire T1 | 4 Transmutes | Found in the Room beside Lady Dialla |
| Act 3: Lunaris Temple Level 2 | Lightning T1 | 4 Transmutes | Found in the Upper Left of Piety's Arena |
| Act 4: Crystal Veins | Cold T1 | 4 Transmutes | Found near the Crystal Veins Waypoint |
| Act 7: Chamber of Sins Level 1 | Lightning T2 | 2 Alchemy | Found near the Chamber of Sins L1 Waypoint |
| Act 7: Causeway | Cold T2 | 2 Alchemy | Found near the Causeway Waypoint |
| Act 7: Dread Thicket | Fire T2 | 2 Alchemy | Found near Dreadstone |
Important: Note the 4 Transmute cost for T1 Flat Ele crafts. This means during campaign progression, you should loot and vendor as many Magic & Rare items as necessary.
Furthermore, note that the Flat Damage range on Bows & Quivers is higher than other slots. So in a limited currency situation, prioritise your crafts appropriately.


Trinity Support
Trinity Support provides a large damage bonus when at 50 Resonance of each Element. There are 3 types of Elemental Resonance. When you hit an enemy with a Supported Skill, where the highest damage type is Elemental, you gain Resonance of the other 2 Elements.
Practically this means:
- A large Lightning Damage range
- Accompanied by Fire or Cold Damage that fits into that range
For Example:
- If you have a Lightning Damage Range of 1 to 100
- Then a Cold or Fire Damage Range of 40 to 60 is ideal
The most common error is over-investing into a single damage type without gaining an adequate amount of other elements. For example:
- Using a Bow with lots of Flat Fire Damage and no other elemental damage rolls
- Running Anger
- & Wearing Rings with Flat Fire Damage to Attacks to Crafts
Most likely causes a Resonance gain issue.
Movement Speed Boots & Movement Speed Vendor Recipe
Movement Speed is critical for Bow Builds to progress quickly.
Thus, if you don't already have a pair, it's strongly recommended to Check Vendors or to Alchemy or Essence bases with appropriate links. Note: If you are also lacking a High Flat Ele Bow, that takes Alchemy & Essence priority over MS Boots.
Additionally, you can create Movement Speed boots with the Vendor Recipe tabled below. In Act 1 Upper Prison you can find a Chemist's Strongbox that may drop multiple Quicksilvers. In Act 2, you can complete the Great White Beast Quest for a guaranteed Quicksilver from Yeena.
| Input | Output |
|---|---|
| Normal Boots Quicksilver Flask Orb of Augmentation | 10% Movement Speed Magic Boots |
| Magic or Rare Boots with X% Movement speed Quicksilver Flask Orb of Augmentation | (X+5%) Movement Speed Magic Boots |
Furthermore, note the level requirement of different movement speed tiers.
| % Increased Movement Speed | Level Requirement |
|---|---|
| 10% | 1 |
| 15% | 12 |
| 20% | 24 |
| 25% | 32 |
| 30% | 44 |
Act-by-Act Progression Tips
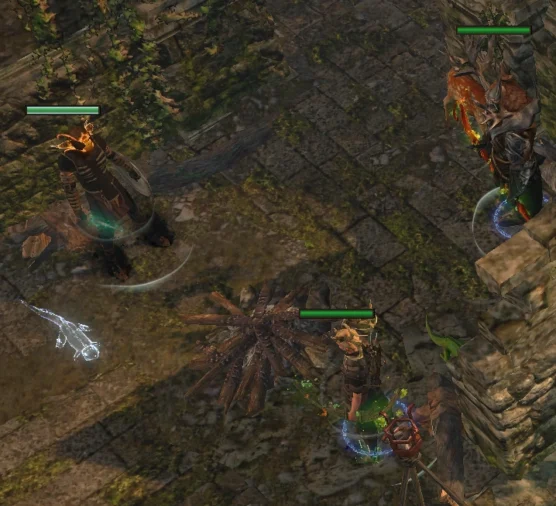
Act 1
- In the Submerged Passageway, place a Portal at the Bridge, to more quickly enter Flooded Depths Later.
- In the Upper Prison, search for a Chemist's Strongbox, to potentially acquire Quicksilvers.
Act 2
- In the Old Fields, place a Portal outside of the Den Entrance. Then travel to Crossroads, take the Waypoint to town, and back through your Portal to enter the Den. Complete the Great White Beast Quest to acquire a Quicksilver.
- In the Broken Bridge, search for and defeat the 3 Exiles beside the waypoint. Keep an eye out for item upgrades, jewellery, and gear to vendor.
- There are many Breaches in Act 2. The Breach in Riverways is often found on the way and can be a great source of extra experience and items while progressing.
Act 3
- Solaris 2
- Important: Acquire the Fire Damage Craft in the Room beside Lady Dialla
- Lunaris 2
- Important: Acquire the Lightning Damage Craft in the Upper Left of Piety's Arena
- In Docks you can find a Unique enemy that drops a guaranteed Essence. They will only drop Essences the first time you click them; so consider resetting the zone until you spawn an Essence you desire.
- Library
- If you complete the Library to purchase extra support gems earlier, you can skip Act 6 Twilight Strand quest later.
Act 4
- Get Level 32 before entering Kaom's Stronghold to avoid severe XP Penalties.
- Crystal Veins
- Acquire the Cold Damage craft beside the waypoint.
Act 5
- The Chamber of Innocence has many guaranteed Magic Monster packs. It's strongly recommended to go out of your way to farm them.
- Before entering the Reliquary to complete the Passive Skill Point quest, place a portal outside of the Cathedral Rooftop entrance, to progress faster.
Act 6
- Lily Roth
- If you completed the Library quest earlier and already purchased your extra support gems. You can skip the quest to full clear Twilight Strand.
- In the Beacon, while progressing the fuel pylons, consider placing a Safety Portal as the enemies that spawn can occasionally be very dangerous.
Act 7
- Chamber of Sins 1
- Acquire the T2 Lightning Damage Craft beside the waypoint.
- After defeating Gruest, and progressing forward to the Causeway; consider placing a portal near the Dread Thicket entrance if you see it, to progress faster.
- Causeway
- Acquire the T2 Cold Damage Craft beside the waypoint.
- Dread Thicket
- Acquire the T2 Fire Damage Craft near Dreadstone.
Act 8
- Upon returning to the Harbour Bridge to complete the act, reset the zone by Ctrl + Clicking the entrance for more experience along the way.
Act 9
- Consider farming Blood Aqueduct for more experience and gear before progressing to maps.
- Consider rolling a Bleed Removal Flask and using Grace in the Belly of the Beast.
Act 10
- Upon entering the Ravaged Square, place a portal near the entrance, before travelling to the Ravaged Square waypoint. Then take the waypoint back to town, and go through your portal and head south, in search of the The Control Blocks to defeat Vilenta.
Video
The video below goes over all the leveling steps while also showing gameplay and playstyle tips.
FAQ
Yes
Rain of Arrows is:
- Faster than other bow skills during leveling but requires an intentional effort to kill more monsters
- Does not require Extra Projectiles (No LMP!)
Lightning Arrow is:
- At most 10 minutes slower than Rain of Arrows
- But kills significantly more monsters.
- Resulting in much more XP, gear & currency.
Thus
- Lightning Arrow is better for runs that progress to maps or for newer players who require stronger characters.
- Rain of Arrows is potentially better for experienced speedrunners, or runs not progressing past Act 5 or Act 10.
Players can opt to use only Ballista Totems, only Manaforged Arrows, or both. The decision is mostly personal preference.
Supplemental Ballista Totems are a useful progression tool in Act 1 & Act 2. In Act 3 and onward, their damage output is roughly equal to Manaforged Setups.
Manaforged Setups offer the benefit of automated gameplay; which can be especially desirable as your character gets faster.
Either Returning Projectiles Support or Mirage Archer Support.
- Base Game: Deadeye
- Legacy of Phrecia: Wildspeaker or Daughter of Oshabi (Untested)
Summary
- Complete the PoE Campaign with a Lightning Arrow Ranger Leveling Build in under 3 Hours
- Step-by-Step Leveling Progression through the Acts including Gem Swaps
- Tips and Tricks to help gear up as you level
- SSF Fresh Start League Start Viable
Check out more related Build Guides to continue your character progression here!
Credits
Written by: havoc616
Reviewed by: Crouching_Tuna
Language Reviewed by: Tenkiei