Shade of Orobyss Boss Guide
Last Updated:February 15, 2024|Changelog
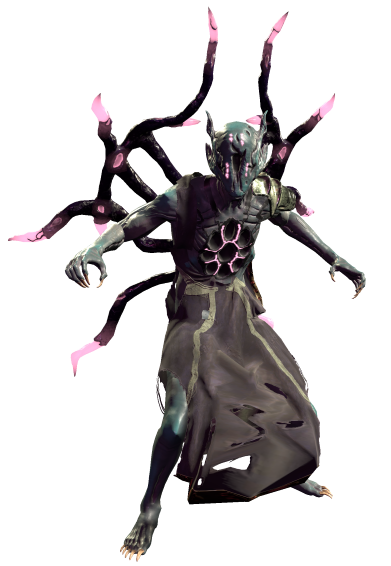
Shade of Orobyss is a unique fight in the Monolith of Fate. Instead of requiring stability to fight him, he can show up on any timeline as an Echo. Killing him either increases or decreases the amount of corruption for the timeline depending on how far he was from the center and how much corruption the Timeline already has.
He has the largest skill set of any boss in the game and selects a small number of them for each fight, providing a different challenge every time you face him.
In this guide we cover the rewards, boss mechanics, and provide a strategy for defeating this boss.
Rewards
Shade is unlike other Timeline bosses in his reward structure. While he does have his own pool of uniques he does not offer any blessings, instead providing the player with Corruption for the Timeline that increases difficulty but also rewards.
Corruption
The Corruption mechanic provides a way to 'juice' a Timeline by increasing health and damage of all enemies in the Timeline but also increasing Item Rarity and XP gained. The amount of corruption received is determined by three factors:
- How far away Shade spawns from the center of the Timeline.
- How many times you've killed the Timeline Boss since you last fought the Shade.
- How much Corruption you have in other Timelines.
Shades farthest from the center provide the most Corruption, while Shades closest give the least. Killing the timeless boss provides Gaze of Orobyss, a resource that increases the Corruption from the next Shade you fight (provided the Shade has positive Corruption). All Gaze is lost if you die to the Shade. He also provides a bonus if you have higher Corruption in other Timelines, allowing you to increase the Corruption of lower timelines faster.
Find out more how the Shade affects Corruption in our Monolith Beginners Guide, Empowered Monolith Guide and Advanced Monolith Strategies
Uniques
Shade can drop 5 different Boss exclusive Uniques:
- Siphon of Anguish is a common drop. It can drop from any Shade regardless of Corruption.
- Stymied Fate is an uncommon drop from level 60 or higher Shades. it can drop at any level or Corruption. Drop rates are improved by corruption.
- Apathy's Maw is an uncommon drop that requires a level 65 or higher Shade with at least 50 Corruption. Drop rates are improved with higher Corruption. We recommend farming this on Empowered.
- Shattered Chains is a rare drop that can only be found in Empowered with at least 120 Corruption. Drop rates are improved with higher Corruption.
- Omnis is a very rare drop that can only be found in Empowered with at least 200 Corruption. Drop rates are improved with higher Corruption.
See the Monolith Timeline Guide for more info on Corruption.
Boss Mechanics
Shade's mechanics are unusual. Instead of having a set list of skills he has a pool of skills to draw from and will use a select number during any fight. This makes each fight feel different from previous ones and also creates a challenge to learning the fight. However, his skillset is not completely random. For each fight Shade will drop skills following this structure:
- Both skills from one of five Damage Types (Fire, Lightning, Cold, Physical, Poison)
- Three Void Skills
- One Movement Skill
- Basic Melee Attack
Below we have broken up the skills into their corresponding types to clarify what combinations you may be dealing with.
Modifiers
When you go into a timeline boss fight, you carry any modifiers that are active from running echoes. Some of these modifiers can be especially dangerous, while some can actually bring value with little or no downside.
- Critical Strike Avoidance - If you're a Crit based build and have sufficient Crit to be noticeable.
- Enemies have +X Critical Strike Chance - avoid these if you don't have capped Critical Strike Avoidance.
- Enemies have a chance to Dodge - any builds that rely on Hitting the enemy (including DoT builds that apply Ailments on Hit) should avoid this modifier (except for Rogues with Focus Fire).
- Enemies heal if they have not been damaged recently - There are skill combinations that make it much harder to maintain damage on Shade for any builds that don't apply ailments.
- Frenzy and Haste + Enrage - Individually these are manageable (although you may still want to avoid them if you can). Together they can make a boss very difficult to deal with as they significantly speed up the mechanics of the fight. Don't take these unless you're comfortable with the mechanics and confident that the additional speed of the fight won't be a problem.
- Increased X Damage (i.e. Physical, Elemental, Void)- Since there's no way of knowing ahead of time what version of Shade you get it will always be risky to increase a particular damage type. Shade always has Void Damage so you can be sure it will scale some of his abilities.
- Anything that affects Rare enemies - Bosses are not considered Rare enemies, so those modifiers do not apply to the encounter. However, the rewards do. This is an easy way to boost the value of a fight for any build without increasing difficulty.
- Enemies have +X Critical Strike Chance when Crit capped - If you're Crit capped, then this modifier provides no extra difficulty.
- Critical Strike Avoidance on a DoT build - DoTs can't Crit, so this won't matter.
- Enemies have a X% chance to receive a Glancing Blow when hit on a DoT build - Similar to Crits, Glancing Blows only apply to Hits.
- Enemies have a chance to Dodge on a build that uses a DoT skill - Ailments generally need to Hit to be applied, so don't take this if you're relying on Hits to stack your DoTs. However, some skills have the DoT tag, meaning they don't Hit. DoTs can't be Dodged, so your damage is unaffected.
Boss Strategy
Due to the nature of how Shade chooses his skills it's impossible to come up with a general strategy for every encounter. He's a single phase fight and has all of his abilities available and at full strength from the start. The key to defeating Shade is knowing which of his abilities are the most dangerous and learning to avoid them. We cover the skills to watch out for along with some general strategies to deal with them, broken down by damage type.
Fire
Flame Thrower can be tanked, but Starburst is deadly. The circle telegraphs are hard to see and can overlap. As soon as you see the three balls of Fire on the ground identify where the circles are and move away from them until they explode.
Lightning
Lightning Bolt can be tanked. Spark can also be tanked at first, but becomes more powerful over its duration and it is possible to get hit by multiple Sparks in quick succession. When Shade first creates the Sparks start looking for a safe spot away from them quickly.
Cold
Both Orbiting Comet and Frozen Ice Storm can be deadly due to the increased damage they receive over their duration. Frozen Ice Storm is easy to avoid since it moves in a straight line. As soon as Shade uses it move away from the area. For Orbiting Comet you need to stand in melee range of Shade to avoid the projectiles. This can be difficult to maintain when dealing with his other attacks. Fortunately the comets aren't very dense so there are openings but if you do have to move out to avoid something make sure to get back in melee range quickly or else trying to dodge comets and Shade's other attacks together can quickly overwhelm you.
Physical
Both Blood Effigy and Blood Orbs are dangerous abilities that need to be accounted for whenever Shade uses them. Blood Effigy has unavoidable damage that ramps up quickly so it needs to be killed immediately. Blood Orbs seek out the player and can explode all at one or in quick succession. They can be dealt with either by avoiding them for long enough that they explode away from you or by taking out one at a time so that the damage is manageable.
Poison
Both Poison Puke and Toxic Spread are deadly and kill you quickly. The best strategy for dealing with a Poison Shade is to continuously strafe around him throughout the fight. Doing so will prevent either skill from being dropped directly on top of you.
Void
- Shade's most dangerous skill is Void Meteor which has a short telegraph and will one shot most builds. In order to reliably avoid the meteor, listen to what Shade says. If he shouts "The end comes!" be prepared to run or use a movement ability to get out of the telegraph. The direction of the meteor is random, so you need to really pay attention in order to determine which way to move and get out in time.
- Concentrated Burst is a dangerous skill but easy to avoid. The challenge is when he uses multiple abilities stacked on top of it. Concentrated Burst significantly decreases the size of the arena, so you need to keep track of his other abilities and make sure there's an area of the arena you can move to that will avoid Burst as well as his other abilities.
- Black Hole Decay is a quick killer for anyone who stands in it. Fortunately it's easy to avoid.
- The damage from Absorbing Meteors isn't especially high, but players who can't consistently avoid the meteors run the risk of being hit by multiple meteors in quick succession. The risk of being hit is higher the closer you are to Shade. When he uses this skill stop attacking him and give yourself some space to dance around the meteors.
- Mini Black Holes are similar to Blood Orbs, but there are a lot more of them and they have a short delay before they explode. The best way to deal with them is to set off a few at a time by running right through them without stopping. This will cause them to explode behind you. Rinse and repeat until all of the Black Holes are detonated.
- Falling Meteor is deadly to anyone who stands in it. Move out of the way until it expires.
- Exploding Black Hole has two components, but only one Black Hole is dangerous so don't stand in it. The projectiles do very little damage.
- Void Rift does a lot of damage for such a quick reaction skill. When he fires the projectile look for the rift in the arena and strafe around it and at a distance to avoid being hit by the projectile when it comes through the rift.
- Summon Tentacles and Summon Eyes aren't difficult on their own, but they can stack with other abilities and overwhelm. Kill them quickly to avoid having too much to worry about.
- All of Shade's movement abilities are not very threatening and only used when the player is out of melee range. Oblivion Leap, Void Reform, and Void Rush all have telegraphs that can be easily avoided.
Summary
- Shade of Orobyss must be killed in order to 'juice' a timeline by increasing its corruption.
- He has his own set of uniques, most of which have a corruption requirement to drop.
- Shade has 30 skills he can draw from, choosing only a few for each fight.
- He also chooses an additional damage type to go along with Void Damage, and two of his skills are drawn from that damage type.
- Given how many damage types Shade can pull from what resistances you need is directly tied to which version you get. You always need Void Resistance and you never need Necrotic Resistance. Everything else is luck of the draw.
Credits
Written by McFluffin.
Reviewed by Lizard_IRL, Aristotelian.