Easily Farm Spoils of Conquest in Destiny 2
Last Updated:February 14, 2025|Changelog
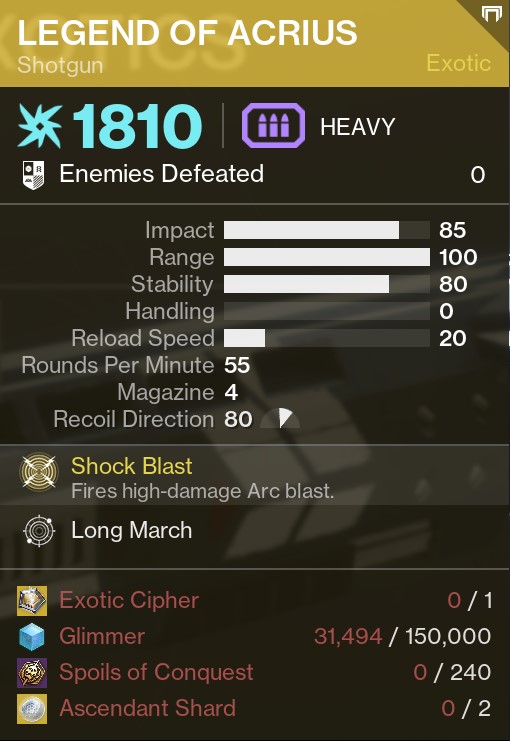
Guardian! Are you an aspiring collector? At some point, you need to get your hands on Legend of Acrius, Tarrabah, and Anarchy. If you didn't get them back in the day, you're going to need to farm a whole lot of Spoils of Conquest to get them.
You could go repeatedly farm whatever the current easiest encounter that drops Spoils is, but that takes several consecutive hours of concentrated effort. There is a better way to farm Spoils of Conquest if you're patient. By getting easily accessible Secret Chests from 4 different Raids across 3 characters (of differing Classes) every week, you would have only spent a few hours over the course of a few weeks to have gotten your beloved Raid Exotic without even forming a full Fireteam!
Some of the strategies in this Guide require the presence of at least one other player. The rest of them are made faster by including another player.
Note: If you opt to bring another Player along, it's best that both of you understand how to maintain an instance while character swapping!
- An instance is maintained as long as at least one player is in it, or is at least loading into it.
- Don't character swap at the same time! If you both leave at once, both of you lose the instance you've readied the Secret Chest in!
- WARNING: Secret Chests have a lifetime of around 10 minutes once opened by a player. It is no longer possible to obtain loot from a Chest After this time has elapsed, forcing a restart.
What Can You Do With Spoils of Conquest?
- Spoils of Conquest are used to purchase Vaulted Raid Exotics from the Monument to Lost Lights in the Tower, each costing 240!
- Using the methods shown in this Guide, It takes 3.2 weeks to obtain one of these with minimal effort.
- Use Spoils of Conquest at an end-of-Raid Vendor to purchase copies of Weapons and Armor.
- For raids other than the Vault of Glass, your first Weapon purchase each week is guaranteed to be a Deepsight Weapon and its pattern gets you closer to crafting it.
- For Master Raids, Spoils of Conquest are used to purchase copies of previously obtained Adept Weapons. These are some of the most prestigious Weapons in the entire game! They even (slightly) exceed the power of their crafted counterparts.
Reach Vow of the Disciple's 1st Secret Chest (15 Spoils)
This Secret Chest can be obtained easily and quickly while solo.
Having a friend along allows the instance to be held while characters are swapped, making it faster to acquire the Secret Chest on other characters.
Note: Vow of the Disciple requires ownership of The Witch Queen expansion to access.
Obtain 15 Spoils of Conquest every week, (5 per character) by pillaging the Secret Chest in Vow's opening encounter. You also get copies of Vow of the Disciple Legendary Armor or Weapons you've obtained before, and Raid Mods if there's any left to unlock.
3 Resonance Splinters reside within Vow of the Disciple's opening encounter. They are in the same place every time. Destroy them all to unlock a door hiding a Secret Chest.
- Destroy Savuthan's Projection to gain access to the Disciple's Bog.
- Drive your Sparrow or Skimmer past the "boat" and incoming Scorn combatants.
- You start getting stacks of Pervading Darkness, having 10 of these kills you, but you can just endlessly respawn nearby.
- Destroy the first Resonance Splinter, just past the "boat", to your left as you turn right.
- Destroy the second Resonance Splinter, at the end of the columned straightaway.
- Destroy the final Resonance Splinter, under the bridge.
- Approach the building complex ahead of the bridge. The Secret Chest is in the room to your right.
Reach the Abyss Chest in Crota's End (15 Spoils)
Accessing this Secret Chest requires a friend, but takes little effort and time.
With your friend, you can hold the instance while characters are swapped, making it significantly faster to acquire the Secret Chest on other characters.
Obtain 15 Spoils of Conquest every week, (5 per character) by pillaging the Secret Chest in Crota's End's Abyss encounter. You also get copies of Crota's End Legendary Armor or Weapons you've obtained before, and Raid Mods if there's any left to unlock.
In order to reach Crota's End's Abyss Secret Chest, you need a friend to pass a charged Chalice of Light to.
- After exchanging the charged Chalice of Light, Enlighten the plate you stand on to construct the bridge.
- Dive off the bridge and into the Abyss.
- Once in the Abyss, race along the left wall using an Eager Edge Sword, an Nadir Focus Sword, or Grapple
- After making a sharp left turn, continue straight ahead, and walk through the door housing the Secret Chest.
Backtrack at Nezarec in Root of Nightmares (15 Spoils)
This Secret Chest can be obtained easily and while solo, though it's a long trek.
Having a friend along allows the instance to be held while characters are swapped, making it significantly faster to acquire the Secret Chest on other characters.
Note: Accessing this Secret Chest requires a Nezarec Checkpoint, which you can obtain through a variety of (free) services.
Note: Root of Nightmares requires ownership of the Lightfall expansion to access.
Warning: If you intend to bring a friend, have them join on you only after you get close to the Secret Chest, not before!
Obtain 15 Spoils of Conquest every week, (5 per character) by pillaging the second Secret Chest inside Root of Nightmares, by backtracking from the final encounter. You also get copies of Root of Nightmares Legendary Armor or Weapons you've obtained before, and Raid Mods if there's any left to unlock.
- After joining your Checkpoint provider's instance of Nezarec, make sure that the team gets "wiped" by having everyone die. This gives you the Nezarec Checkpoint as the encounter resets.
- Place down a Raid Banner to get bonus Eager Edge Sword Ammo, as well as charging your movement-enhancing Super, like Silkstrike or Daybreak.
- Head back towards Encounter 3, Explicator of Planets. It's a fairly long jog. You need movement-enhancing Weapons and Abilities for some parkour, though none particularly difficult.
- From there, you're going to go out of bounds to get past Encounter 3 and reach the Jumping Puzzle section that precedes it.
- After exiting the the flowering root that leads to Encounter 3's exit, probe around the vegetation. There's a crack that you fall into which leads you out of bounds once you escape it through the other side. Grapple is handy here.
- Once out of bounds, get yourself on top of the flowering Root you just arrived in. Look for the "sidewalk" that surrounds Encounter 3's Arena's box.
- Walk in a straight path along this "sidewalk", until you can make a left turn that lets you enter a doorway.
- Go through this doorway. This loads the Cataclysm zone, which is where the Secret Chest is.
- When reached this way, Cataclysm is safe from Nezarec's deadly waves of energy that would normally be there, but all of the player-launchers are broken.
- As you approach the building down the hill, have your friend(s) join on you. Players that join at this point spawn at the start of the jumping puzzle. They need movement-enhancing Weapons and Abilities to make up for the lack of player-launchers.
- Find the Resonance-Button to the side of the building and shoot it to open the door to the room with the Secret Chest.
- Meet your allies by the door inside the building, as it only opens when all members of the Fireteam have reached it.
Construct the Spire in the Vault of Glass (30 Spoils)
Accessing these Secret Chests can be extremely difficult, especially for inexperienced players. Bringing along a friend, practice, strategy, and proper loadout configuration makes it easier, though it's still quite hard (and fun, in my opinion).
Having a friend allows the instance to be held while characters are swapped, making it significantly faster to acquire the Secret Chest on other characters.
Obtain 30 Spoils of Conquest every week, (10 per character) by pillaging the opening encounter Chest and the first Secret Chest inside the Vault of Glass. You also get copies of Vault of Glass Legendary Armor or Weapons you've obtained before, and Raid Mods if there's any left to unlock.
- Control all 3 Vex Plates to gradually construct the Spire.
- When fully constructed, the encounter ends and you're free to reap your rewards.
- One Orange-Bar Praetorian Minotaur Spawns per Vex Plate. If a Plate's Praetorian has died, a new one spawns near it in one of two locations.
- When a Praetorian steps on its assigned Vex Plate, it captures it, forcing you to recapture it back.
- Praetorians can only capture the Vex Plate it is assigned to.
- Like all Vex, shoot the Praetorian's head off to enrage it and change its combat AI.
- Headless Praetorians prioritize chasing players over capturing Vex Plates.
- By enraging and thus relieving two Praetorians of their Vex Plate duties and keeping them angry with you, you can control all 3 Vex Plates while only technically defending one.
Strategy & Mechanics
- Work on one Vex Plate at a time. Start from the highest Vex Plate and work your way down the hill, to the bottom.
- Kill Praetorians that have captured Vex Plates. You need them dead to easily recapture it.
- For the first two Vex Plates, shoot the head off of the next Praetorian that spawns after you capture a plate.
- Avoid killing headless Praetorians that you've successfully lured away from their home Vex Plate at ALL costs.
- For the third Vex Plate, kill its Praetorian as quickly as possible every time it spawns.
- Headless Praetorians actively pursue players they have sight of and can actually reach. If there's no player to pursue, the Praetorian returns to its home Vex Plate, sometimes even teleports to it.
- Avoid Invisibility and jumping to inaccessible places. Don't die!
- In the event that a lured Praetorian dies and thus respawns, or returns to its home Vex Plate, you need to start over the process of capturing Vex Plates and luring defending Praetorians away!
- Spire Construction progress is never lost, don't actually restart the encounter.
- Powerful Cyclopses spawn near each Vex Plate!
- They respawn very frequently, it's often not viable to try to keep them dead.
- Avoid death through evasive maneuvers or crowd control effects.
- Weak Goblins and Hobgoblins also spawn frequently, they're easy to kill and even work in your favor to proc healing effects like Devour, Heal Clip, and maintaining Restoration via Ember of Empyrean.
- If you've brought a friend along, you can have them defend one Vex Plate while you lure only one Praetorian to defend two Vex Plates at once, significantly reducing the amount of damage you take.
Loadout Recommendations
Survival and not accidentally killing lured Praetorians is key.
To have the easiest time with this encounter, build with the follow restrictions in mind:
- Get 10 Resilience, a Void Resistance and Concussive Dampener to mitigate the damage dealt from Praetorians pelting you with their Torch Hammers, and Solar Resistance to defend against everything else.
- Incorporate potent defensive tools into your build. Some options include:
- Disorienting Grenades from non-Void Grenade Launchers.
- Blocking with Infinite Guard Swords, like Worldline Zero or emulated by using Strongholds.
- Non-Void Glaives.
- Get powerful healing effects that work while taking damage. The more you have, the better. Some options include:
- Heal Clip Solar Weapons, pair it with Ember of Tempering, Ember of Mercy, and Ember of Empyrean to maintain perpetual Restoration from kills.
- Throw in a Healing Grenade for good measure.
- Warlock Healing Rifts, especially with The Stag.
- Devour, obtain it with Echo of Starvation and a Siphon Mod or Secant Filaments. If you opt to play on Void, also use Echo of Vigilance and Echo of Persistence.
- Recuperation and Better Already paired with Siphon Mod and Reaper.
- Heal Clip Solar Weapons, pair it with Ember of Tempering, Ember of Mercy, and Ember of Empyrean to maintain perpetual Restoration from kills.
- Avoid powerful explosive damage, over-penetrating weapons, and sources of Void damage at ALL costs.
- That means no offensive grenades and most melee abilities. Be wary of elemental effects that lead to Shattering, Solar Ignitions, Strand Unraveling Tangle generation, and Arc Jolt. Avoid weapons with Dragonfly and Chain Reaction, as well as ALL Special and Heavy ammo Fusion Rifles, Rocket Launchers, Heavy Grenade Launchers, or anything that is otherwise capable of dealing uncontrollable damage!
- Praetorian Minotaurs have flimsy Void-tuned Shields. Dealing Void damage to them breaks their Shield and cause it to detonate, dealing significant damage to the Praetorian's real health and also breaking nearby Praetorian Shields!
Summary
- Legend of Acrius, Tarrabah, and Anarchy are purchased from the Monument to Lost Lights for a LOT of Spoils of Conquest.
- Spoils of Conquest are also used to purchase Weapons from end-of-Raid vendors, and Adept Weapons within Master Raids.
- Why farm for several agonizing hours with a hastily put together fireteam, when you could commit a few hours over a few weeks while needing only one other person for the same result?
- Soloable and easy, Vow of the Disciple's first Secret Chest yields up to 15 Spoils of Conquest per week.
- Requiring a friend but easy, Crota's End's Abyss Secret Chest yields up to 15 Spoils of Conquest per week.
- Soloable and quite hard, solo or duo Vault of Glass's opening encounter to earn up to 30 Spoils of Conquest per week!
- Time consuming if solo'd, backtrack from Root of Nightmare's final encounter - Nezarec - and eventually go Out of Bounds to reach the Secret Chest in Cataclysm, earning up to 15 Spoils of Conquest per week.
Credits
Written by: Xtra37
Reviewed by: ShieldMaiden, Tenkiei