Pit Pushing Guide
Last Updated:April 19, 2025|Changelog
It is not easy to understand the mechanics of the Pit without a Pit Pushing Guide. So, we made one! This guide covers currently existing maps, mob type combinations, and strategies to complete the highest levels of the Pit. This guide assumes you have a basic knowledge of the Pit and the system, and you can find this basic information in our Pit Article.
Preparation
Pit Pushing is not for the faint of heart. Due to the wide variety of available builds, it is impossible to list everything required for each one to function effectively in a Pit Pushing environment. For information on specific builds, head over to our Pit Pushing Tier List and look for our Pit Pushing variants. However, there are some generic preparations you can do to optimize your character.
- Cap your Resistances and Armor.
- Optimize your damage using our In-Depth Damage Guide if you make a build yourself.
- Masterwork everything to Rank 12.
- Farm for Legendary Aspects that are as close to maxed out as possible.
- If you are using one of our Endgame Build Guides, read up on the tips given under the Pit Pushing variant.
Most builds also require certain mob types, specific maps, or even bosses to complete at the highest level. Because of this, you must farm a lot of Artificer Stones. You can find which activities provide the most Artificer Stones in our Optimal Farming Guide.
Not all builds are viable for Pit Pushing at the highest level. To compete with the best of the best, you must use the best builds available.
Enemies
The Pit has 10 different Monster Family combinations and 11 different bosses. This creates over 990 combinations of enemies that you face in the Pit. This section of the guide focuses on specific enemies, highlighting which ones are good for pushing and which should be avoided.
Monster Family Combinations
The following Monster Family combinations were observed, and importantly, it was observed that Monster Family combinations could not occur twice in a row. This means that every pair of Monster Families has 9 different pairings and cannot be repeated. Enemies marked in Green are preferred, Yellow are passable but not ideal, and Red means they should be avoided.
| Efficiency | Monster Family Combination |
|---|---|
| High | Bandits, Cultists Bandits, Werewolves Demons, Werewolves |
| Mid / Situational | Bandits, Nangari Spiders, Skeletons |
| Low | Fallen, Nangari Vampires, Goat Drowned, Zombies Drowned, Knights Vampires, Nangari |
Based on the experience of our Pit Pushers, the clear winner in terms of efficient enemies for pushing is the Bandits combined with Cultists or Werewolves. The reason why other Monster Families are less efficient is because of their inherited abilities. Vampires, Nangari, and Zombies teleport or charge a lot, causing them to get scattered. Drowned deals massive damage and pushes you back. Knights are durable thanks to their barriers and also deal massive damage.
Bosses
Currently, 11 bosses are available in the Pit, each with a 9.09% uniform spawn rate. Ideal bosses are build-dependent, but some outliers are universally optimal for most builds. The table below shows all available bosses ranked in order of efficiency.
| Efficiency | Bosses with adds: | Bosses without adds: |
|---|---|---|
| High | Spiritcaller Resurrected Malice | N/A |
| Mid / Situational | Seahag Hivemaster Den Mother Scourge | Chief Marauder |
| Low | N/A | Blood Bishop Bramble Mother's Judgment Slither |
Bosses with adds generally have fewer health points than bosses without adds, making them more efficient to kill. This causes the unfortunate side effect that most builds favour bosses with adds, as the builds utilized for Pit Pushing already have Area of Effect damage in their kits.
Echoes
In the Pit, bosses have a special mechanic referred to as Echoes. Echoes are abilities from old boss fights that deal a large amount of damage to the player. They start with a Tier 1 Echo, then gain a Tier 2 Echo when their health drops to 75%, and a Tier 3 Echo at 50%. Most of them have a uniform distribution, except for the Tier 2 Echo Collapsing Death, which only occurs after either Elias' Fireballs or the Succubus' Lightning Charge.
The Echoes below are coloured based on how much time you lose having these in your run. Green means it is safe and easy to play around. Yellow implies that they require more movement and awareness, while Red signifies how deadly the Echo is for most builds.
| Tier 1 | Tier 2 | Tier 3 |
|---|---|---|
| Succubus' Lightning Charge Tomb Lord's Bone Wall Elias' Homing Orbs Elias' Fireballs Tyrant King's Void Zones | Closing Circle Balrog's Hellfire Blood Lord's Shadow Wall | Wind of Hate (Triangle) Wind of Hate (Lines) Mother's Embrace Demonic Slam |
The only truly dangerous echoes among these are Mother's Embrace and Demonic Slam, both of which can be deadly for less durable builds.
Maps
Maps in the Pit are randomly generated based on 18 different environments and additional parameters. This section of the guide explains the system in depth so that the probability of finding your ideal maps can be more easily understood. The table below is the TLDR of the information gathered from 250 maps worth of testing.
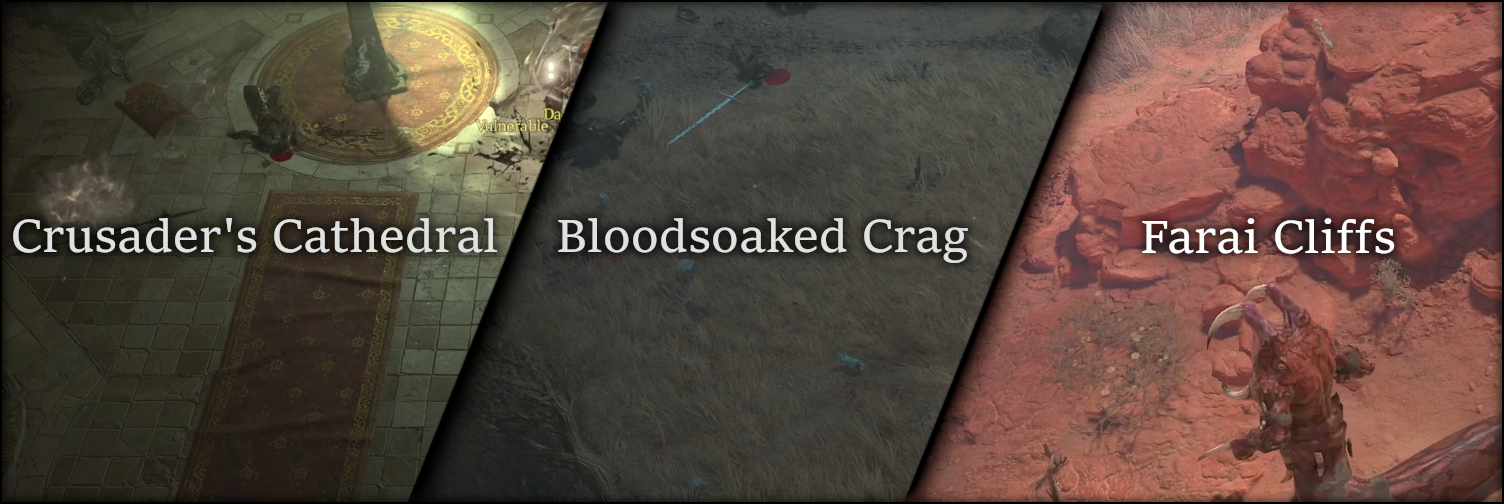
The Pit has two types of maps, linear and open. Open layouts offer more options for the player to do larger pulls and have minimal backtracking, while narrow, linear maps can sometimes force players to double back and do smaller pulls, leading to wasted time. The table below lists all available maps in order of efficiency.
| Efficiency | First Map | Second Map |
|---|---|---|
| High | Farai Cliffs Bloodsoaked Crag Crusader's Cathedral Buried Halls | Raethwind Wilds Bloodsoaked Crag Crusader's Cathedral Buried Halls Abandoned Mineworks |
| Mid / Situational | Raethwind Wilds Ularian Sepulcher Immortal Emanation Hoarfrost Demise Guulrahn Slums Putrescent Larder Vile Hive | Sleepless Hollow Demon's Wake Kor Dragan Barracks |
| Low | Lost Archives Hallowed Ossuary Shivta Ruins Kor Dragan Barracks | Guulrahn Slum Lost Archives Hallowed Ossuary Shivta Ruins |
| For reference images for the maps, see the end of the In-Depth Information section. | ||
In-Depth Information
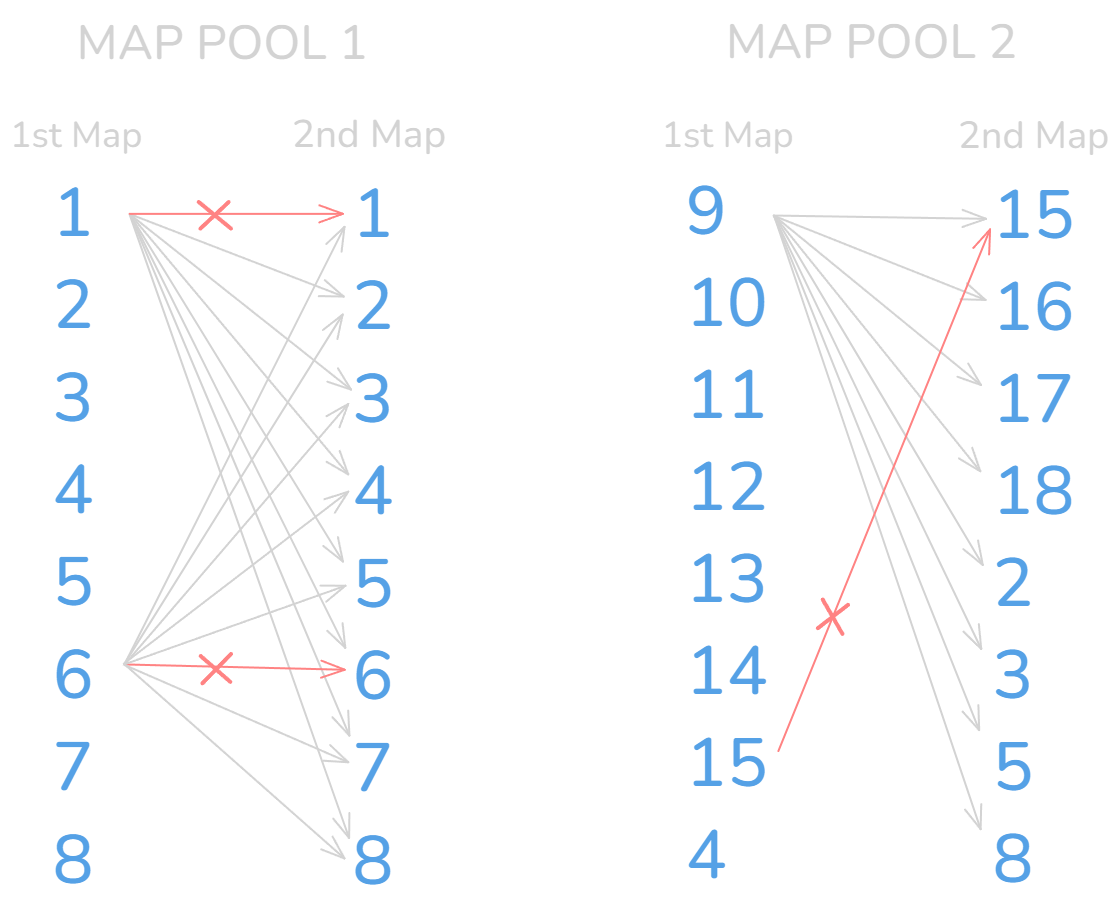
The Pit has 18 distinctly different maps shared by two separate pools of maps. Pool 1 has 8 of these maps, while Pool 2 has 15. Since 15 plus 8 does not equal 18, this implies that some maps are shared between the two pools. See the infographic below to see the map pools. In 250 recorded Pit runs, the first map did not share the environment type with the second map a single time. The expected probability of getting a repeated map is 9 / 128 = 7.03%, meaning we should have expected to see it 17 times in 250 attempts, making the outcome unlikely.
Using Map Pool 1 as an example, if your first map is Bloodsoaked Crag, you cannot end that pit run with Bloodsoaked Crag as your second map. This means that Grasslands can only pair up with the other 7 maps in the Pool, which you can see in the Total Maps list below. This means that Pool 1 has 8 x 7 = 56 map combinations.
On the other hand, Map Pool 2 has 15 unique maps, with 1 map that can be both the starting and the ending map. This means we have 7 starting options with 8 end maps, and 1 starting option with 7 end maps. That gives us 7 x 8 + 7 = 63 combinations in Map Pool 2. In total, this gives us 119 different map combinations in the Pit.
Total Maps
1. Bloodsoaked Crag (Grasslands)
2. Hallowed Ossuary (Catacombs)
3. Raethwind Wilds
4. Crusader's Cathedral
5. Lost Archives
6. Buried Halls (Cultists)
7. Guulrahn Slum (Fallen City)
8. Shivta Ruins
9. Immortal Emanation
10. Ularian Sepulcher (Temple #1)
11. Putrescent Larder (Temple #2)
12. Farai Cliffs (Desert)
13. Hoarfrost Demise
14. Vile Hive (Plague Tunnels)
15. Kor Dragan Barracks
16. Demon's Wake (Cellar)
17. Abandoned Mineworks
18. Sleepless Hollow (Desert Tunnel)
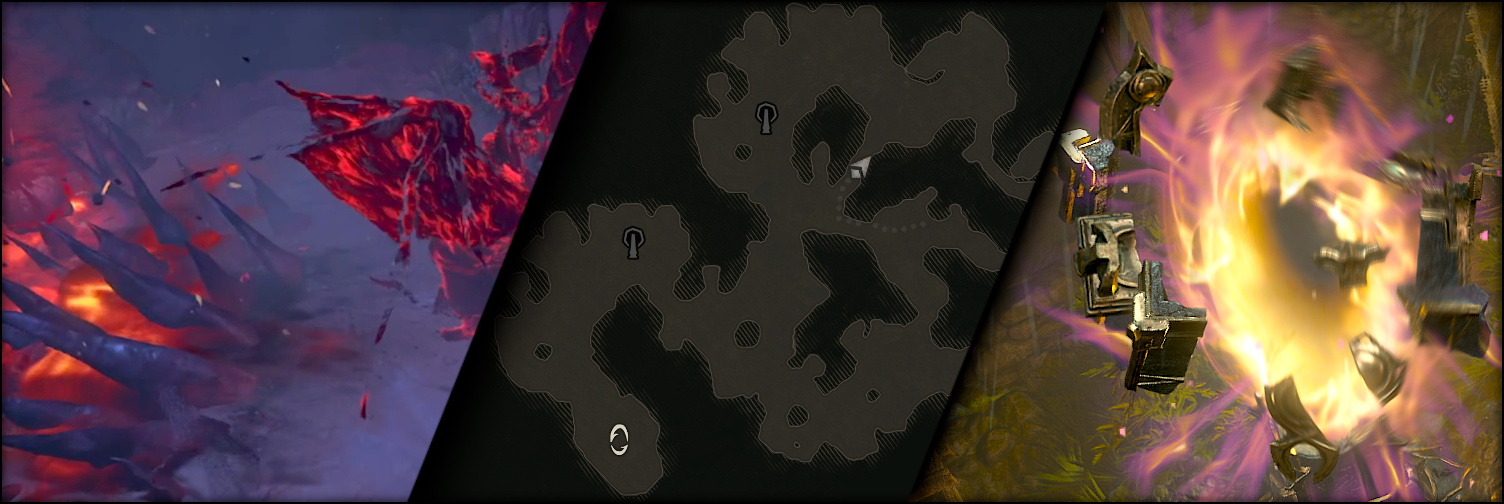
The accordions below have screenshots of each environment and layout examples associated with that map. It is important to note that these maps are randomly generated, meaning the layout shown is just one of a few possible configurations.
1. Bloodsoaked Crag
Map Environment
Map Layout Example
2. Hallowed Ossuary
Map Environment
Map Layout Example
3. Raethwind Wilds
Map Environment
Map Layout Example
4. Crusader's Cathedral
Map Environment
Map Layout Example
5. Lost Archives
Map Environment
Map Layout Example
6. Buried Halls
Map Environment
Map Layout Example
7. Guulrahn Slums
Map Environment
Map Layout Example
8. Shivta Ruins
Map Environment
Map Layout Example
4. Crusader's Cathedral
Map Environment
Map Layout Example
9. Immortal Emanation
Map Environment
Map Layout Example
10. Ularian Sepulcher
Map Environment
Map Layout Example
11. Putrescent Larder
Map Environment
Map Layout Example
12. Farai Cliffs
Map Environment
Map Layout Example
13. Hoarfrost Demise
Map Environment
Map Layout Example
14. Vile Hive
Map Environment
Map Layout Example
15. Kor Dragan Barracks
Map Environment
Map Layout Example
2. Hallowed Ossuary
Map Environment
Map Layout Example
3. Raethwind Wilds
Map Environment
Map Layout Example
5. Lost Archives
Map Environment
Map Layout Example
8. Shivta Ruins
Map Environment
Map Layout Example
15. Kor Dragan Barracks
Map Environment
Map Layout Example
16. Demon's Wake
Map Environment
Map Layout Example
17. Abandoned Mineworks
Map Environment
Map Layout Example
18. Sleepless Hollow
Map Environment
Map Layout Example
Combat Strategies
This section dives deep into strategies used by Pit Pushers to save valuable seconds when clearing the Pit at the highest level. There are strategies utilized by most builds, while some depend entirely on the strengths and weaknesses of the build you are playing. Some strategies focus on efficiently killing enemies to fill the Pit progression bar, while others involve proper boss positioning to maximize damage uptime.
Importantly, not all builds use each of these strategies, and it is up to the Pit Pusher to find out what is most optimal for their setup and playstyle. These strategies are ways to optimize combat efficiency and save time, and must be used strategically.
Trash Clear
Chain Pulling
- Killing while moving is often referred to as Chain Pulling. This strategy involves dragging your enemies with you while killing to optimize your movement and continuously getting fresh enemies into an elite that is slow to kill. This is especially important when you find Champion Elites that are often slower to kill.
AoE Setup / Stacking
- AoE Setups and Stacking enemies is a strategy that involves pulling all enemies from surrounding parts of the map before unleashing your damage.
- When utilizing this strategy, make sure to pull the enemies close to a wall so that the enemies cannot run around you. This makes abilities with narrow width more likely to hit all the enemies.
Elite Chasing
- This strategy revolves around hunting for Elite packs and quickly bursting them down as fast as possible. This strategy often results in the infamous Instant Progress Finish. This method can only be utilized if your build is bad at massive AoE pulls or if your clear speed is not capped based on damage dealt.
Instant Progress Finish
- The Instant Progress Finish is a feature where the enemy combination, combined with certain maps, results in too few enemies available to finish the Pit progression bar. When this occurs, the progression jumps to 100%, and the boss portal immediately appears. Short maps with a lack of enemies frequently trigger this phenomenon. This was likely implemented to prevent the need for backtracking.
Progress from Elites
- Both Elite types, Champions with minions and Triple Elites, grant roughly the same total Pit progress.
- Champions, however, have significantly more health, making them less efficient for progress unless Pit Pushing strategies like Chain Pulling or AoE Setup / Stacking are utilized.
Bossing
Boss Position
- Pulling the boss to the side prevents Tier 3 Echoes like Wind of Hatred (Triangle) and Mother's Embrace from being as deadly.
- Moving into the boss's hitbox repeatedly forces the boss to reposition. Use this to move the boss faster.
- Bone Walls from the Tier 1 Echo cannot spawn in terrain.
- Slither and Blood Bishop keep backpeddling unless their backs are against a wall.
- Pull the boss next to objects to stay out of the line of sight for dangerous abilities.
Notable Boss Abilities
- Scourge has a melee combo that creates a pool underneath you when the hit successfully strikes you.
- To save space, you can stack certain mechanics like the Seahag pools. Just make sure to avoid standing on them when they erupt.
- Hivemaster's void zones cannot spawn in terrain. If the center of a void zone is behind a pillar, you cannot trigger it as you must be in line of sight of its center. The Spit shotgun is also deadly, so sidestep it.
- Ressurected Malice plays dodgeball with you with homing ghosts, you can avoid them with line-of-sight. He also knocks you back with a large Area of Effect around him, so position yourself with your back against a wall to have higher damage uptime.
- Spiritcaller can be deceptively deadly, as the adds you kill during the fight explode after a certain time. The projectiles fired from Spiritcaller bounce off the effigy once per initial salvo.
Echoes
- Echoes spawn in a set pattern based on when they were triggered. New Echoes (when the boss hits 75% and 50%) are forced as soon as possible.
- The frequently observed pattern is Tier 1 - Tier 1 - Tier 2 - Tier 1 - Tier 1 - Tier 2 - Tier 3
Fishing & Probabilities
Fishing for the most favourable combinations of maps, enemies, and bosses is nothing new for the diehard fans of the Pit. Fishing means you begin a Pit run to see which environment and enemy type you get, and if it is not ideal, you teleport out and try again.
Enemy Probabilities
All the Monster Family combinations appear to be converging towards a 10% observed rate, meaning that the chances of each combination appearing are likely uniformly set to 10%. Knowing this, we can calculate the probability of certain Monster Families appearing. For instance, our preferred pairing appearing on either the first map, the second, or both, has a 28% probability of occurring (20% + 10% - (20% x 10%) = 28%). However, if you need them on both Maps for pushing, this only has a 2% chance of occurring (20% x 10% = 2%).
Including the 9.09% probability for bosses, if there are 3 ideal bosses for your build, you now have a 2% x 27.27% = 0.55% probability to get the optimal enemy combination each time you open the Pit. We could also include the odds of avoiding the two more difficult echoes, removing 50% of the possible boss fights. We would then be down to 0.275% probability of a favourable outcome.
Map Probabilities
The following table shows the probability of getting the specific maps based on the patterns observed from the data. Remember to check if the map pairing you desire is possible.
| Map Name | Probability First Map | Probability Second Map |
|---|---|---|
| 1. Bloodsoaked Crag | 5.88% | 5.88% |
| 2. Hallowed Ossuary | 5.88% | 12.6% |
| 3. Raethwind Wilds | 5.88% | 12.6% |
| 4. Crusader's Cathedral | 12.6% | 5.88% |
| 5. Lost Archives | 5.88% | 12.6% |
| 6. Buried Halls | 5.88% | 5.88% |
| 7. Guulrahn Slum | 5.88% | 5.88% |
| 8. Shivta Ruins | 5.88% | 12.6% |
| 9. Immortal Emanation | 6.72% | 0% |
| 10. Ularian Sepulcher | 6.72% | 0% |
| 11. Putrescent Larder | 6.72% | 0% |
| 12. Farai Cliffs | 6.72% | 0% |
| 13. Hoarfrost Demise | 6.72% | 0% |
| 14. Vile Hive | 6.72% | 0% |
| 15. Kor Dragan Barracks | 5.88% | 5.88% |
| 16. Demon's Wake | 0% | 6.72% |
| 17. Abandoned Mineworks | 0% | 6.72% |
| 18. Sleepless Hollow | 0% | 6.72% |
If you only want Farai Cliffs, Ularian Sepulcher, and Putrescent Larder for pushing, you have a 6.72% + 6.72% + 6.72% = 20.16% chance of getting an ideal First Map. Remember that not all of the First Maps lead to all Second Maps, which makes calculating the full probability a little bit difficult. The maps mentioned in this example are all in Pool 2, making it easier to calculate and visualize. Using Raethwind Wilds as our Second Map, the total probability would be:
- First Map being Farai Cliffs, Ularian Sepulcher, or Putrescent Larder
- 6.72% + 6.72% + 6.72% = 20.16%
- Second Map being Raethwind Wilds
- 6.72%
- The probability from Pool 1 does not apply since all First maps in this example are from Pool 2.
- 6.72%
- Total Probability: 20.16% x 6.72% = 1.35% chance to hit Farai Cliffs, Ularian Sepulcher, or Putrescent Larder, followed by Raethwind Wilds
Total Probability
Using the examples above, we would have a 0.275% chance of getting the right enemy combination and a 1.35% chance of getting the correct maps. This combined is a 0.275% x 1.35% = 0.0037125% chance of occurring whenever you open a Pit map. The probability calculated in this example is for a specific scenario in mind, and depending on the build, you could have more favourable outcomes.
Summary
Our Pit Pushing Guide is your one-stop place for all the information you need to clear the Pit at the highest level.
- Look for Bandits combined with Werewolves or Cultists for the easiest enemy types.
- The Farai Cliffs is the optimal map for most builds, followed by Bloodsoaked Crag, Crusader's Cathedral, and Buried Halls.
- Ressurected Malice and Spiritcaller are both efficient bosses for most builds out there.
- Make sure to utilize the strategies listed based on the strengths of your build. If it has strong AoE, consider doing AoE Setups, or Chain Pulling if you can attack on the move.
- Getting the correct enemies, bosses, and maps through fishing is rare. Make those rare occurrences count!
Credits
Written by Avarilyn
Reviewed by Icytroll, IBoilerUp & Beatdropper