Cortex
Last Updated:June 13, 2025|Changelog
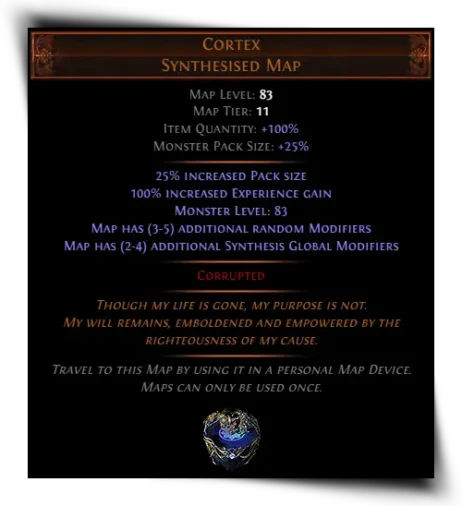
The Cortex is - next to the Altered, Augmented, Rewritten and Twisted Distant Memory - one of the five Synthesised Maps. He is the final and hardest encounter of them, introduced during the War of the Atlas Expansion in Patch 3.6 Synthesis League. The Cortex can also be witnessed by the Maven and is part of the Maven's Invitation: The Feared.
Synthesised Maps
- Altered Distant Memory
- Augmented Distant Memory
- Rewritten Distant Memory
- Twisted Distant Memory
- Cortex
- Replica Cortex
The Cortex Synthesised Map drops as a Tier 10 Map but is overwritten by a special Map modifier, making it Monster Level: 83 to prevent monster level modification. Synthesised Maps are not on the Atlas, but can still be modified by the Atlas Passive Tree that affects Synthesised Maps. Note that Atlas Passive Skills cannot modify Maps from Kirac's Atlas missions. The Keystone Memento Mori unlocks the Uber version of the Cortex, described further down below.
Acquisition
The Cortex Synthesised Map has drop restrictions and cannot be chanced. While allocating Vivid Memories on the Atlas Passive Tree, there is a small chance to drop a random Synthesised Map upon killing a Map Boss on Tier 11+. The Cortex can also be accessed as a Kirac Map mission or sometimes sold by Tujen.
The Cortex can also be created by the following Divination Cards:
- A Fate Worse Than Death
- Justified Ambition
- The Void
The Replica Cortex can be obtained in Heist or from the following Divination Cards:
- Eternal Bonds
- The Void
Loot Table
In addition to regular loot, the Cortex has the following boss-specific drops:
- Offering to the Serpent
- Perepiteia
- Garb of the Ephemeral
- Bottled Faith
Additional Drops:
- Imperfect Memories
- Dementophobia
- The Hook
Skills Breakdown
The Cortex - Synthesised Map
The Cortex is a Laboratory Map tile set with a 5 Phase Boss Encounter. The Map itself comes with randomized modifiers that can only be seen once entering the Map. It is highly recommended to fully clear the Map due to its valuable loot and high level Synthesised Items.
Once you enter the Boss Arena at the end of the Map, you see Venarius' spirit hovering above a central map device. After a short dialogue, the first boss spawns and Phase 1 begins.
- (40–50)% increased number of Rare Monsters
- (20–30)% more Magic Monsters
- Monsters' skills Chain (1-3) additional times
- Monsters are Hexproof
- Monsters Poison on Hit
- Slaying Enemies close together can attract monsters from Beyond this realm
- Monsters cannot be Stunned
- Monsters fire 2 additional Projectiles
- Monsters have (30-100)% increased Area of Effect
- Monsters have (100–400)% increased Critical Strike Chance
- +(20-40)% Monster Physical Damage Reduction
- (20–70)% more Monster Life
- (10–30)% increased Monster Damage
- Monsters deal (10–110)% extra Physical Damage as Fire
- Monsters deal (10–110)% extra Physical Damage as Cold
- Monsters deal (10–110)% extra Physical Damage as Lightning
- (10–35)% increased Monster Movement Speed
(10–35)% increased Monster Attack Speed - Area has patches of Burning Ground
- Area has patches of Chilled Ground
- Area has patches of Shocked Ground which increase Damage taken by (20-50)%
- Area has patches of desecrated ground
- Monsters have (20-40)% chance to Avoid Elemental Ailments
- Monsters take (15–40)% reduced Extra Damage from Critical Strikes
- (20-40)% less effect of Curses on Monsters
- Monsters cannot be Taunted
- All Monster Damage from Hits always Ignites
- +(15-25)% Monster Chaos Resistance
+(20-40)% Monster Elemental Resistances - Monsters have a (20-40)% chance to avoid Poison, Impale, and Bleeding
- Monsters have (20–50)% increased Accuracy Rating
- Monsters have (30–100)% chance to gain a Frenzy Charge on Hit
- Monsters have (30–100)% chance to gain an Endurance Charge on Hit
- Monsters have (30–100)% chance to gain a Power Charge on Hit
- Monsters have Onslaught
- Monsters have a (10–35)% chance to cause Elemental Ailments on Hit
- Monster Damage Penetrates (6-12)% Elemental Resistances
- Monsters have (10-30)% chance to steal Power, Frenzy and Endurance charges on Hit
- Synthesised Rare Monsters drop 2 additional Currency Items
- Synthesised Magic Monsters have 25% chance to drop a Currency Item
- Synthesised Monsters have 5% chance to drop a Currency Item
- Synthesised Rare Monsters drop 2 additional Quality Currency Items
- Synthesised Magic Monsters have 25% chance to drop a Quality Currency Item
- Synthesised Monsters have 5% chance to drop a Quality Currency Item
- Items dropped by Synthesised Rare Monsters have 50% chance to be Corrupted
- Items dropped by Synthesised Magic Monsters have 15% chance to be Corrupted
- Items dropped by Synthesised Monsters have 5% chance to be Corrupted
- Synthesised Rare Monsters have 150% increased chance to drop a Map
- Synthesised Magic Monsters have 100% increased chance to drop a Map
- Synthesised Monsters have 50% increased chance to drop a Map
- Synthesised Rare Monsters have 50% chance to drop a Divination Card
- Synthesised Magic Monsters have 7% chance to drop a Divination Card
- Synthesised Rare Monsters have 150% increased chance to drop a Unique Item
- Synthesised Magic Monsters have 100% increased chance to drop a Unique Item
- Synthesised Monsters have 50% increased chance to drop a Unique Item
- 500% increased Quantity of Items Dropped by Synthesised Rare Monsters
- 200% increased Quantity of Items Dropped by Synthesised Magic Monsters
- 50% increased Quantity of Items Dropped by Synthesised Monsters
- 500% increased Rarity of Items Dropped by Synthesised Rare Monsters
- 200% increased Rarity of Items Dropped by Synthesised Magic Monsters
- 50% increased Rarity of Items Dropped by Synthesised Monsters
- Synthesised Rare Monsters grant 500% increased Experience
- Synthesised Magic Monsters grant 200% increased Experience
- Synthesised Monsters grant 100% increased Experience
- Synthesised Rare Monsters drop 2 additional Currency Shards
- Synthesised Magic Monsters have 25% chance to drop a Currency Shard
- Synthesised Monsters have 5% chance to drop a Currency Shard
- Synthesised Rare Monsters have 10% chance to drop a Shaper Item
- Synthesised Magic Monsters have 2% chance to drop a Shaper Item
- Synthesised Rare Monsters have 10% chance to drop an Elder Item
- Synthesised Magic Monsters have 2% chance to drop an Elder Item
- Synthesised Rare Monsters drop an additional Breach Splinter
- Synthesised Magic Monsters have 10% chance to drop a Breach Splinter
- Synthesised Monsters have 2% chance to drop a Breach Splinter
- Synthesised Rare Monsters have 20% chance to drop a Fossil
- Synthesised Magic Monsters have 3% chance to drop a Fossil
- Synthesised Rare Monsters have 20% chance to drop a Jewel
- Synthesised Rare Monsters have 20% chance to drop an Abyss Jewel
- Synthesised Rare Monsters have 20% chance to drop a Map
- Synthesised Rare Monsters have 20% chance to drop a Talisman
- Synthesised Rare Monsters have 20% chance to drop an Essence
- Synthesised Rare Monsters are resurrected as an Ally when slain
- When a Player Kills a Synthesised Rare Monster, they gain its Modifiers for 20 seconds
- Synthesised Rare Monsters have 20% chance to drop a Vaal Fragment
- Synthesised Rare Monsters have 30% chance to drop a Veiled Item
- Duplicate up to 3 Synthesised Rare Monsters
- Duplicate up to 6 Synthesised Rare Monsters
- Duplicate up to 10 Synthesised Rare Monsters
- 20% chance for Synthesised Packs to be upgraded to Magic
- 20% chance for Synthesised Packs to be upgraded to Rare
- 50% chance for Synthesised Rare Packs to have an additional Rare Monster
- 15% increased Size of Synthesised Monster Packs
- 30% increased Size of Synthesised Monster Packs
- Area contains 5 additional Synthesised Chests which contain Normal Monsters
- Area contains 4 additional Synthesised Chests which contain Magic MonstersArea contains 3 additional Synthesised Chests which contain Rare Monsters
Phases
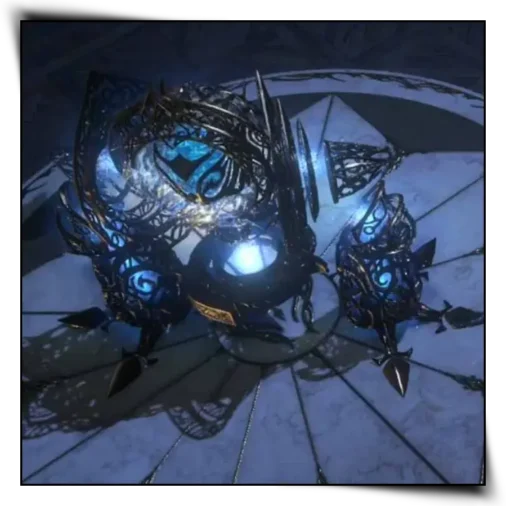
- Phase 1 - The Fractal Gargantuan
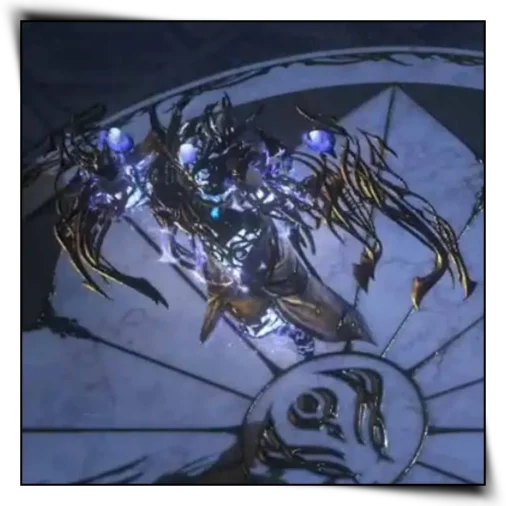
- Phase 2 - Synthete Masterpiece
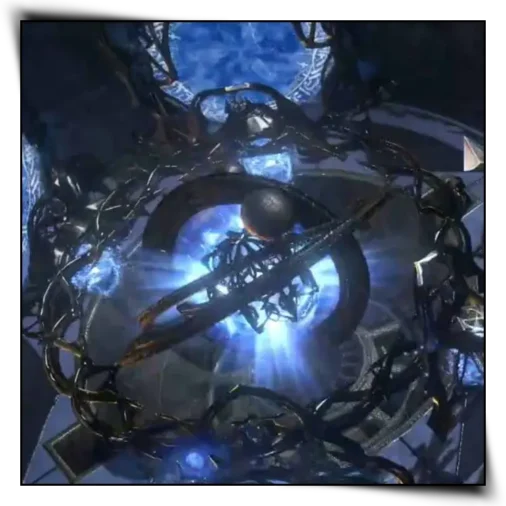
- Phase 3 - Intermission (Minion Phase)
- Phase 4 - Fractal Titan
- Phase 5 - Synthete Nightmare
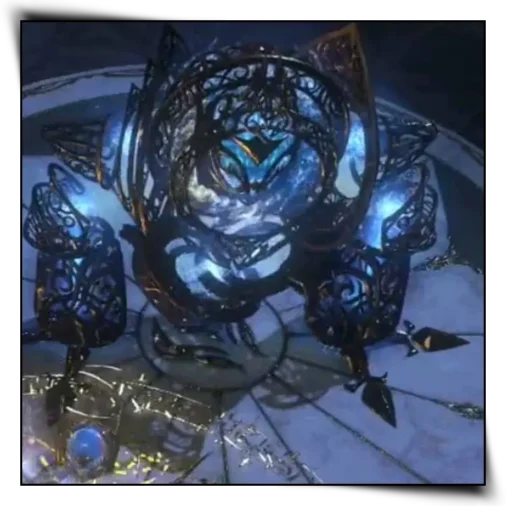
Once entering the boss arena, Venarius spirit hovers above a Decaying Map device. After a short dialogue he then proceeds to summon a Fractal Gargantuan which indicates the start of the Cortex encounter.
The Fractal Gargantuan is similar to the Rewritten Synthete of the Rewritten Distant Memory Map. While fighting the Gargantuan, Void zones spawn and last until this phase is over.
If you want to learn more about his abilities, make sure to check out the skills breakdown section.
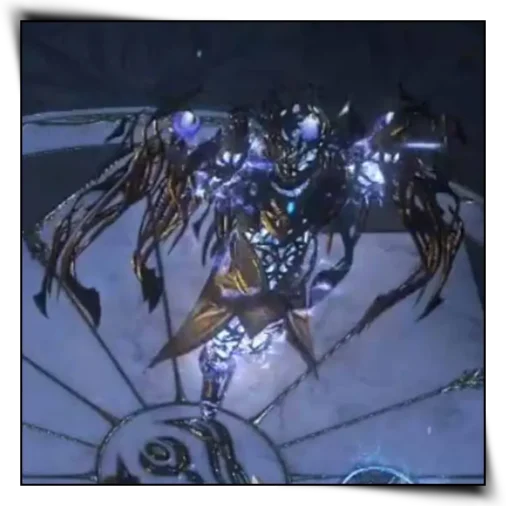
Once you have defeated the Fractal Gargantuan, Venarius spawns a Synthete Masterpiece which indicates the start of Phase 2.
The Synthete Masterpiece is similar to the Altered Synthete of the Altered Distant Memory Map. While fighting the Synthete, Energy Pylons spawn which charge up on impact and explode after another collision. These Pylons de-spawn when the Phase 2 ends.
If you want to learn more about its abilities, make sure to check out the skills breakdown section.
Once you have defeated the Synthete Masterpice, a Decaying Map Device appears at the center of the boss arena which indicates the start of Phase 3.
In this intermission, four Portals appear around the Decaying Map Device which spawn synthesis Monsters for about 30 seconds before Phase 4 begins.
Once you defeated all synthesis monsters spawning out of the Decaying Map Device Portals, Venarius spirit summons a Fractal Titan which indicates the start of Phase 4.
The Fractal Titan is an empowered version of the Fractal Gargantuan and has extra abilities alongside all Phase 1 abilities.
If you want to learn more about his abilities, make sure to check out the skills breakdown section.
Once you have defeated the Fractal Titan, Venarius spawns a Synthete Nightmare which indicates the start of Phase 5.
The Synthete Nightmare is an empowered version of the Synthete Masterpiece and has extra abilities alongside all Phase 2 abilities.
If you want to learn more about its abilities, make sure to check out the skills breakdown section.
Once you defeat the Synthete Nightmare, the Cortex encounter ends and your loot spawns after a short delay.
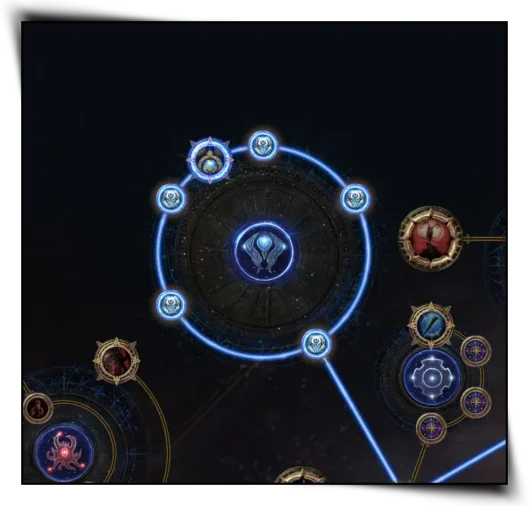
Atlas Passive Tree
The newly revamped Atlas Passive Tree provides us with additional ways to enhance the Pack Size and drop chances of synthesized Maps:
Notables
- Vivid Memories
Nodes
- Synthesis Monster Pack Size
Uber Cortex
In addition to the regular Cortex encounter, there is also an Uber version available by opening 5 Synthesising Fragments in your Map Device. This makes the fight much harder in several ways:
In addition to massively increased life and damage, the Uber version also has the following new mechanics:
- Each unique Phase spawns an additional unique Synthete
- Fractal Gargantuan - Altered Synthete
- Synthete Masterpiece - Augmented Synthete
- Fractal Titan - Twisted Synthete
- Synthete Nightmare - Rewritten Synthete
- Energy Pylons spawn in all four unique phases
In addition to the regular Cortex loot, the Uber Cortex has the following boss-specific drops:
- Mask of the Tribunal
- Nebulis
- Rational Doctrine
- Circle of Ambition
- The Apostate
- Forgotten Reliquary Key
Additional Drops:
- Imperfect Memories
- Dementophobia
- The Hook
Summary
- The Cortex encounter is the final and hardest of the 5 Synthesised Maps.
- It is part of the Maven's Invitation: The Feared and can be witnessed by the Maven.
- The Map has a Laboratory tile set and comes random with different Map and Synthesis Modifiers.
- It is highly recommended to clear the entire Map due to its valuable loot and high level synthesis item bases.
- The Cortex Encounter is split into 5 Phases:
- Phase 1 - The Fractal Gargantuan
- Phase 2 - The Synthete Masterpiece
- Phase 3 - Decaying Map Device Portals (intermission)
- Phase 4 - The Fractal Titan
- Phase 5 - The Synthete Nightmare
- Upon defeating the specific Phase Boss, the next Phase starts and the encounter continues.
- Once you have defeated the Synthete Nightmare, the Cortex encounter ends and the Loot spawns shortly after.
Credits
Written by mbXtreme
Reviewed by TriPolarBear, Facefoot