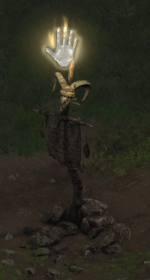
Shrines and Wells
As soon as you leave the Rogue Encampment for the first time, you encounter different types of Shrines and Wells scattered throughout Sanctuary. Shrines are generally beneficial during your conquest of Sanctuary, but beware of the one "black sheep" in the mix - the Fire Shrine!
Diablo 2's game files place Shrines into 3 categories:
- "Recharge" Shrines have an instant recovery effect for Life, Mana or both.
- "Magic" Shrines create their effect instantly on activation.
- "Booster" Shrines provide your Character with a temporary buff. The duration and effect are determined by the Shrine used (see list below).
Mechanics
- All Recharge and Booster Shrines (with the exception of the Experience Shrine) have a Cooldown after which they can be activated again.
- The symbol indicating the Shrine type transfers to the player. Once it recharges, the symbol returns to the Shrine.
- Booster Shrines are removed when your Character becomes cursed. You can get rid of a curse affecting you, by activating a Booster Shrine.
- You can only have one Booster Shrine active at any time. Activating a new one overwrites an already active Shrine.
- The duration of Booster Shrines is not additive. If you activate a Stamina Shrine while you have this Shrine active, the duration timer is reset to the maximum value. Any remaining time from the previous Shrine is lost.
- Singleplayer only: While Wells, Health and Mana Shrines always stay the same, every other Shrine is randomized after Save & Exit and reentering the game. This means that a Mana Shrine will always be a Mana Shrine, while a Skill Shrine on the first encounter, can be a Stamina Shrine after restarting the game.
- Not every Shrine is available starting in the Blood Moor. When looking into the game files, you can find out that certain Shrines are not supposed to spawn in earlier areas. However the code’s logic can cause Shrines to appear earlier than they should. It simply uses the most recently rolled Shrine from the process of determining the Shrine result. A result such as a Poison Resist Shrine in Blood Moor is an example of this extremely rare occurrence.
When to use Shrines and Wells
Depending on the Shrine, there are multiple ways to use them as efficiently as possible. Here are some uses, that may not be obvious right away:
- All Recharge Shrines should be used when you are low on the respective resource. This can save you a Potion here and there. Wells are especially great, since they also replenish your Stamina.
- You can use Wells to remove Curse and Poison effects.
- The Experience Shrine should always be used when you are going to kill a lot of monsters. This increases your Experience gained by 50%. Be careful to avoid getting cursed while it is active.
- The Skill Shrine should always be used to improve the speed of your progress. But don't use it while you have an Experience Shrine already active. If it is close to a Waypoint, you can also pick it up later for an Act boss fight.
- Stamina Shrines are mainly useful in the early stages. You'll get to a point where your native Stamina Regeneration is enough to not require this Shrine.
- All the Resistance Shrines are really nice when you are not Resistance capped and have to fight monsters with the respective damage type. The Resist Fire Shrine is especially useful as Fire is a very frequent damage type.
- Gem Shrines should always be used to upgrade Flawless Gems to Perfect Gems. Prioritize Flawless Amethysts and Flawless Rubys since they’re the most used Gems for Crafting.
Recharge Shrines
Health
"You feel healthy..."
Effect: Fills up your Life globe.
Regeneration: 120 seconds
Earliest spawn location: Blood Moor
Mana
"You feel recharged..."
Effect: Fills up your Mana globe.
Regeneration: 120 seconds
Earliest spawn location: Act 1 Caves (not outside areas!)
Refilling
"You feel refreshed..."
Effect: Fills up your Life and Mana globes.
This Shrine does not regenerate.
Earliest spawn location: Blood Moor
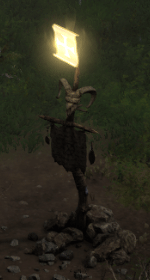
Booster Shrines

Armor
"Your skin hardens..."
Effect: +100% Defense
Mechanic: Total Defense = Summed Flat Defense * (100% + Summed xx% Defense)
Duration: 96 seconds
Regeneration: 300 seconds
Earliest spawn location: Dark Wood
Combat
"You feel ready for combat.."
Effect: +200% to Attack Rating and +200% min and max damage
Duration: 96 seconds
Regeneration: 300 seconds
Earliest spawn location: Act 1 Caves (not outside areas!)
Experience
"Your experience teaches you well..."
Effect: 50% more Experience per kill
Duration: 144 seconds
This Shrine does not regenerate.
Earliest spawn location: Blood Moor
Mana Recharge
"Your spiritual forces recover more quickly"
Effect: +400% Mana recharge rate
Duration: 96 seconds
Regeneration: 300 seconds
Earliest spawn location: Blood Moor

Resist Cold
"You no longer fear the cold..."
Effect: Cold Resist +75%
Duration: 144 seconds
Regeneration: 300 seconds
Earliest spawn location: Monastery Gate
Resist Fire
"You no longer fear fire..."
Effect: Resist Fire +75%
Duration: 144 seconds
Regeneration: 300 seconds
Earliest spawn location: Dark Wood
Resist Lightning
"You no longer fear lightning..."
Effect: Resist Lightning +75%
Duration: 144 seconds
Regeneration: 300 seconds
Earliest spawn location: Inner Cloister

Resist Poison
"You no longer fear poison..."
Effect: Poison Resist +75%
Duration: 144 seconds
Regeneration: 300 seconds
Earliest spawn location: Monastery Gate
Skill
"You feel more skillful"
Effect: +2 to all Skill Levels
Duration: 144 seconds
Regeneration: 300 seconds
Earliest spawn location: Blood Moor

Stamina
"The weight of the world feels lighter on your shoulders..."
Effect: Unlimited Stamina
Duration: 192 seconds
Regeneration: 300 seconds
Earliest spawn location: Blood Moor
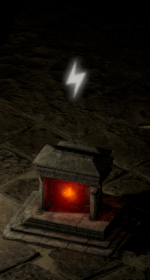
Magic Shrines

Explosive
"A circle of flame..."
Effect: Drops 5-10 Exploding Potions and throws out Exploding Potions in random directions, dealing Fire Damage to monsters.
This Shrine does not regenerate.
Earliest spawn location: Blood Moor
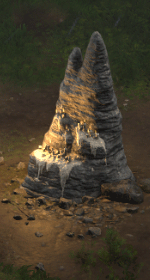
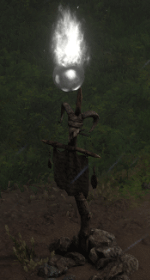
Fire
"A fiery death..."
Effect: Shoots a circle of Fireballs which reduces the current Life of monsters and Players hit by 50%.
Note: Early on, this Shrine can actually kill monsters.
This Shrine does not regenerate.
Earliest spawn location: Blood Moor
Gem
"A marvelous gem..."
Effect: Upgrades a random Gem in your inventory or drops a random Chipped Gem if none is available. Note: Gems in the Horadric Cube are ignored. This shrine cannot drop a Chipped Skull, but can upgrade a Skull in your inventory.
This Shrine does not regenerate.
Earliest spawn location: Stony Field
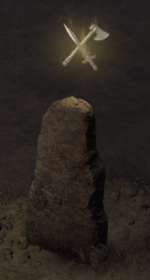
Monster
"Death's advocate approaches..."
Effect: The nearest monster is turned into an Elite monster.
This Shrine does not regenerate.
Earliest spawn location: Blood Moor
Poison
"A circle of death..."
Effect: Drops 5-10 Choking Gas Potions and releases a cloud of gas, dealing Poison Damage to monsters.
This Shrine does not regenerate.
Earliest spawn location: Blood Moor
Portal
"The freedom to go home..."
Effect: Creates a permanent Town Portal in this game instance.
This Shrine does not regenerate.
Earliest spawn location: Cold Plains
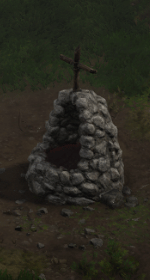
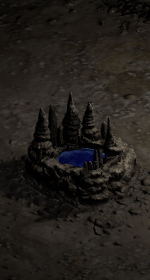
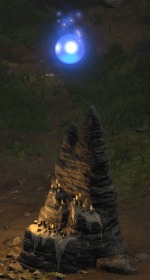
Wells
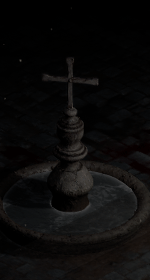
You and your minions instantly replenish 50% Life, Mana and Stamina upon using a Well. Poison and Curse effects are also removed. They have 2 Charges with individual regeneration timers of 30 seconds each, which start when the charge is used.
Example:
- Charge 1 is used. The 30 second timer for this charge begins.
- Charge 2 is used 15 seconds later. The 30 second timer for this charge begins.
- Charge 1 is regenerated 15 seconds later, as the timer reaches 30 seconds.
- Charge 2 is regenerated 15 seconds after that, as the timer reaches 30 seconds.
Summary
- Shrines are very valuable boosts to your overall gameplay. Use them as efficiently as possible.
- Stay away from Fire Shrines, they hurt. In Multiplayer, activating a Fire Shrine is considered as a form of griefing, when done intentionally.
- Use Gem Shrines to upgrade Flawless Gems to Perfect Gems.
Knowing about Shrines and using them efficiently can help you in your battle against the Demons of hell. This article helps you use them as efficiently as possible.
Credits
Written by Teo1904
Reviewed by MacroBioBoi